
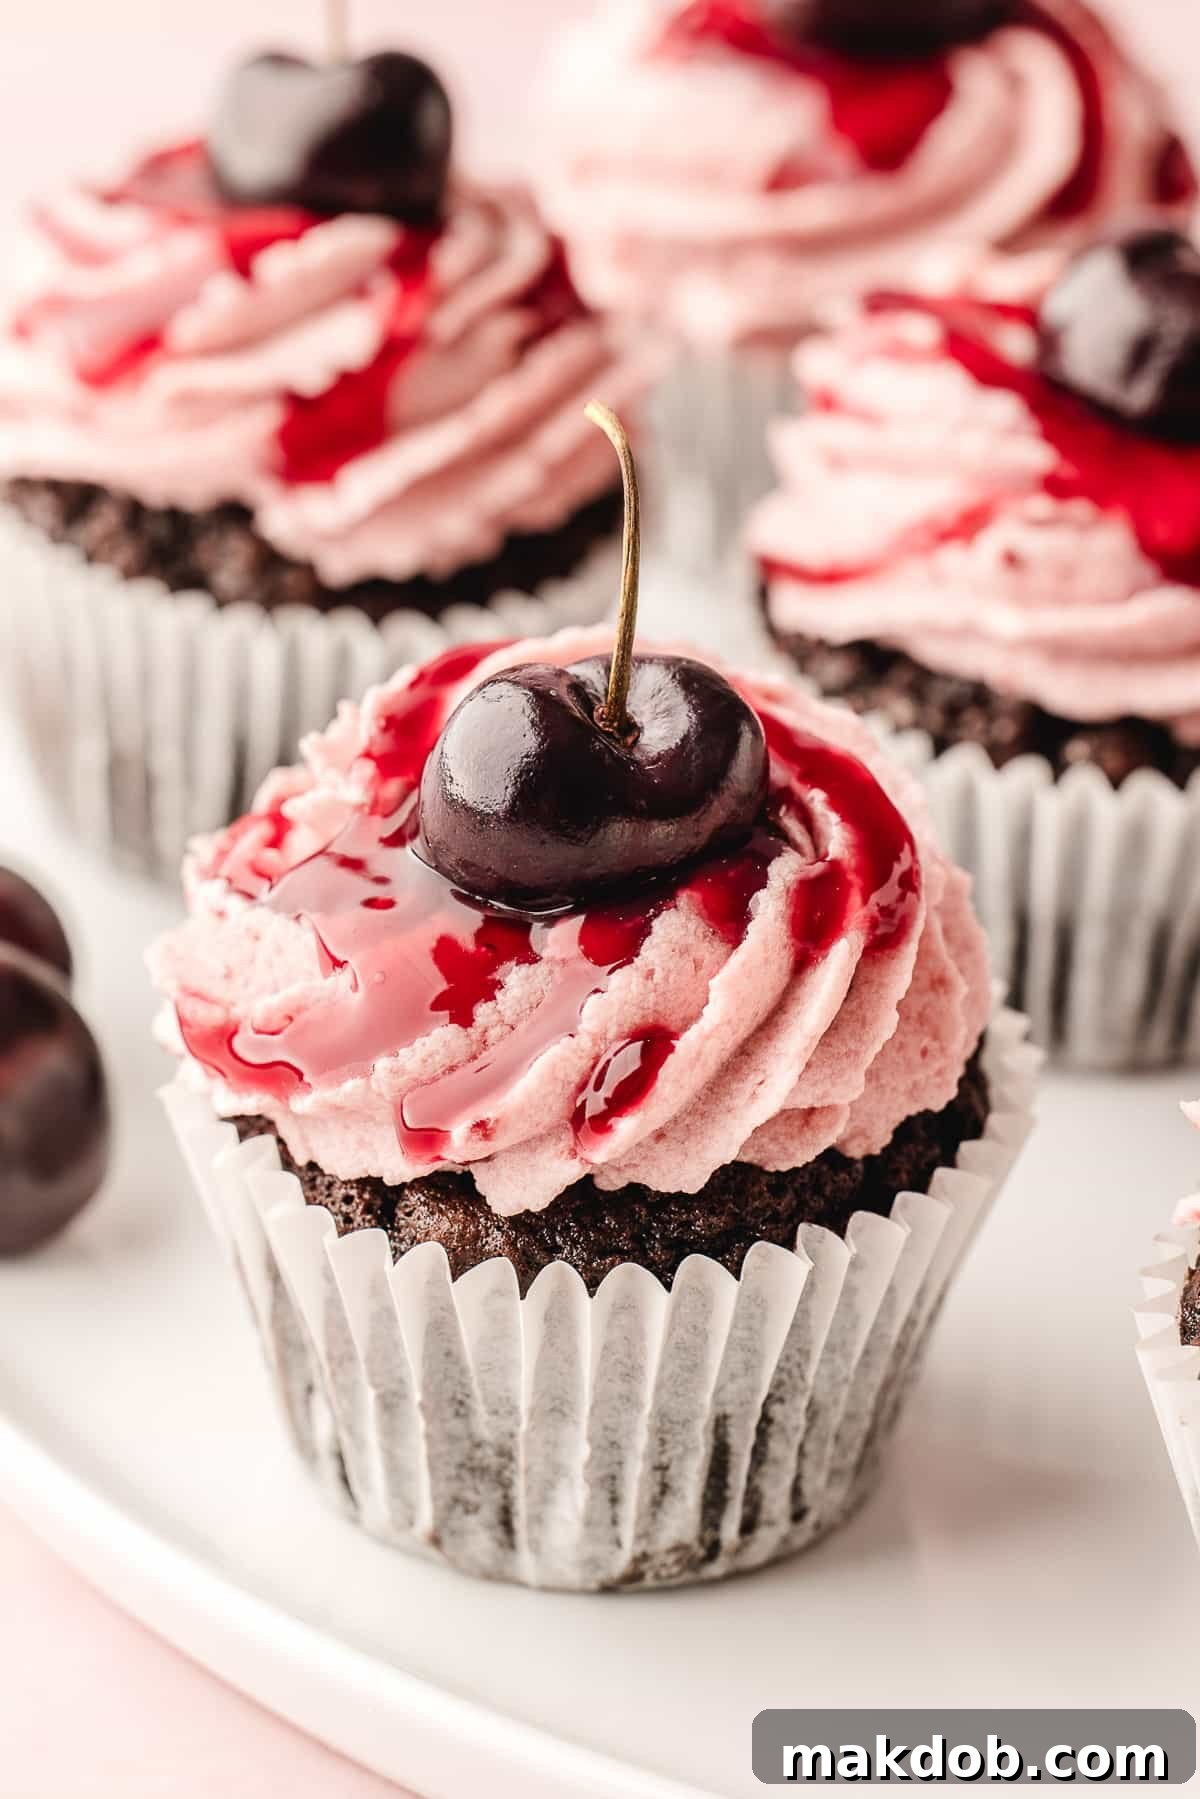
Indulge in the rich, classic flavors of a Black Forest cake, reimagined into these irresistibly charming and easy-to-make Black Forest Cupcakes. These delightful treats feature a moist, homemade chocolate cake base, generously filled with a luscious cherry compote, and crowned with a swirl of airy cherry buttercream frosting. Each bite is a symphony of dark chocolate and sweet-tart cherries, creating an impressive yet approachable dessert perfect for any special occasion or a delightful everyday indulgence.
While a grand Black Forest layer cake is undoubtedly magnificent, the intricate preparation can often be time-consuming. That’s precisely where these cupcakes shine! They deliver all the decadent taste and elegant presentation of the traditional German dessert but in a convenient, individual serving size that’s surprisingly simple to assemble. Say goodbye to daunting multi-layered cakes and embrace the joy of these perfectly portioned chocolate cherry delights.
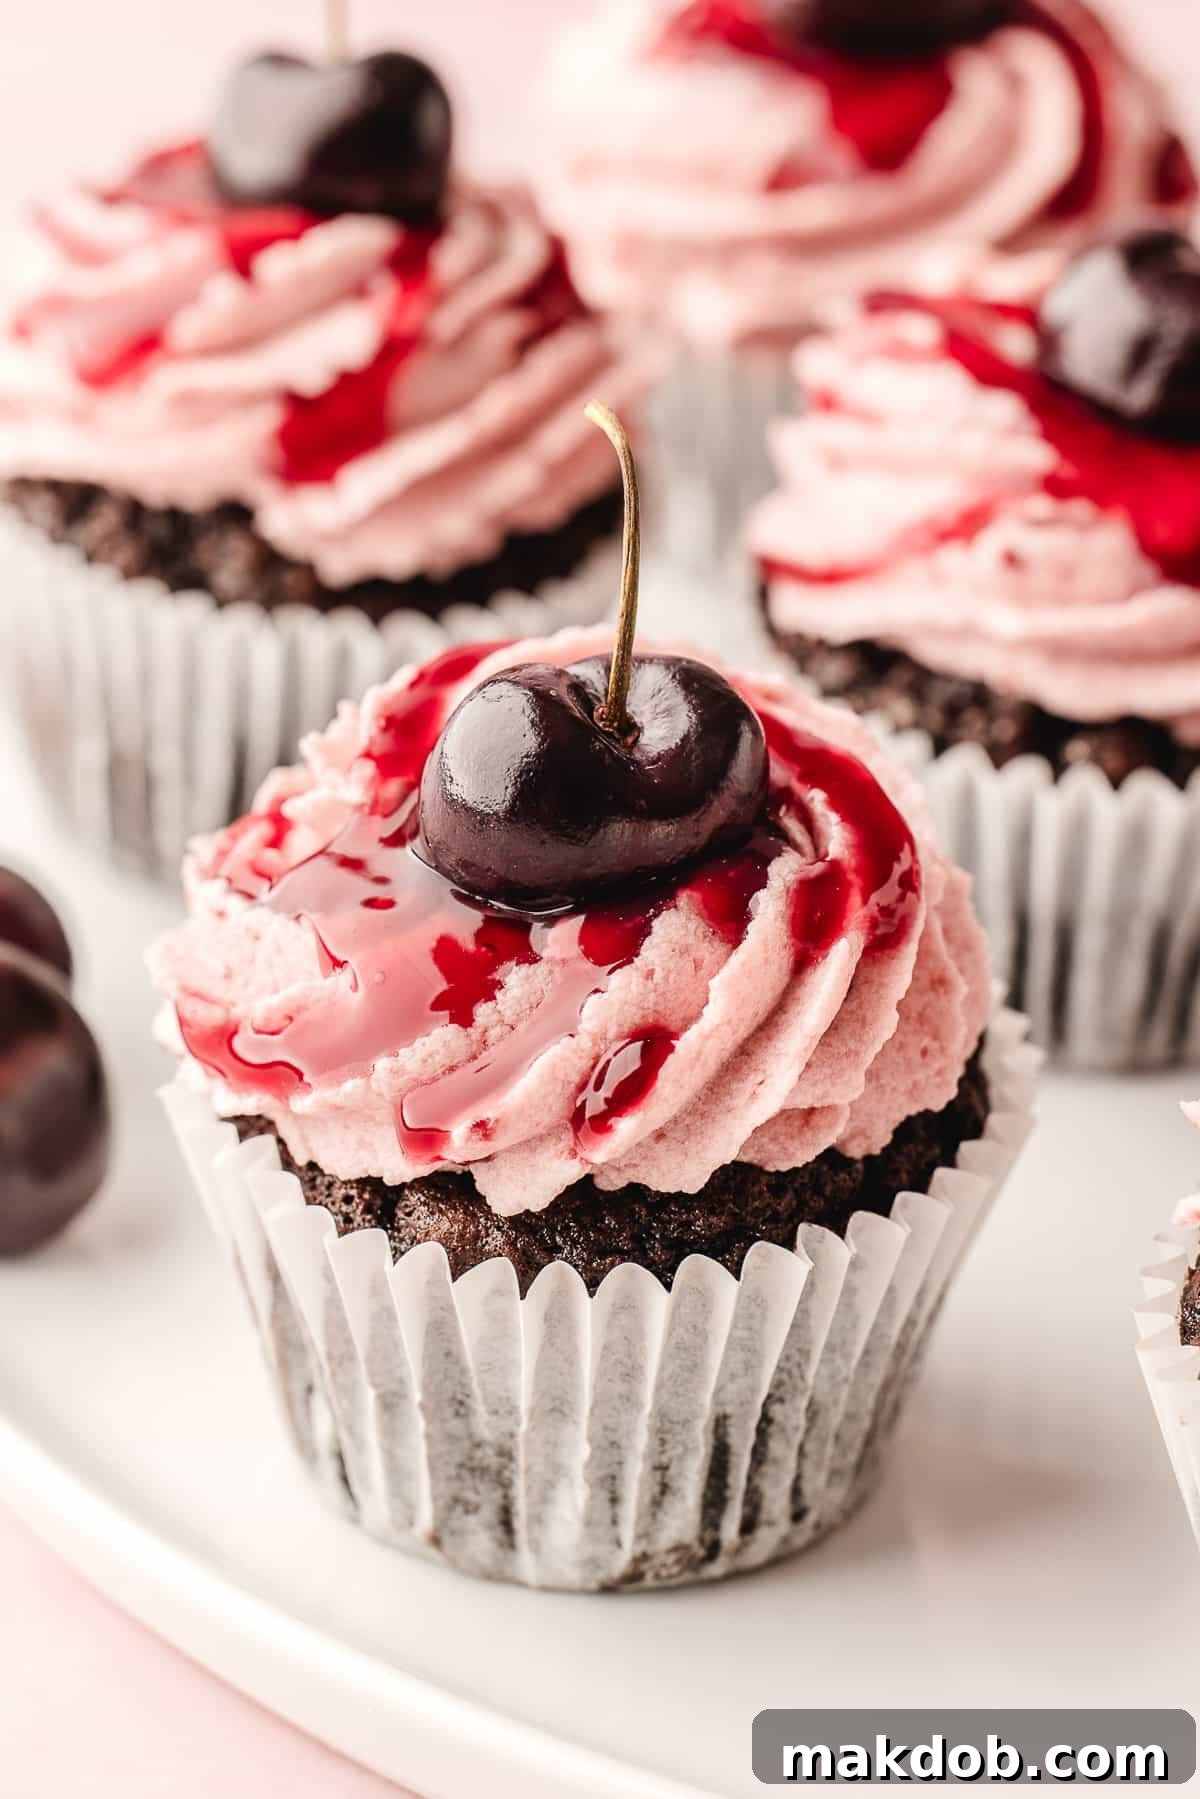
For those who appreciate beautiful and delicious dessert recipes, you’ll find these chocolate cherry cupcakes right up there with favorites like a strawberry lemon cake, a vibrant pink cake, a rich Nutella cake, a whimsical heart cake, the beloved berry chantilly cake, and delightful red velvet brownies. These Black Forest Cupcakes are not just a dessert; they are an experience, combining the deep flavors of chocolate and cherry in a harmonious, easy-to-enjoy format.
Table of Contents
- Black Forest Cupcakes Ingredients
- How to Make Black Forest Cupcakes
- Tips For The Perfect Cupcakes
- Quick Tip: Dutch Process Cocoa
- Recipe FAQs
- Flavor Variations
- More Great Dessert Recipes
- Black Forest Cupcakes Recipe Card
Black Forest Cupcakes Ingredients
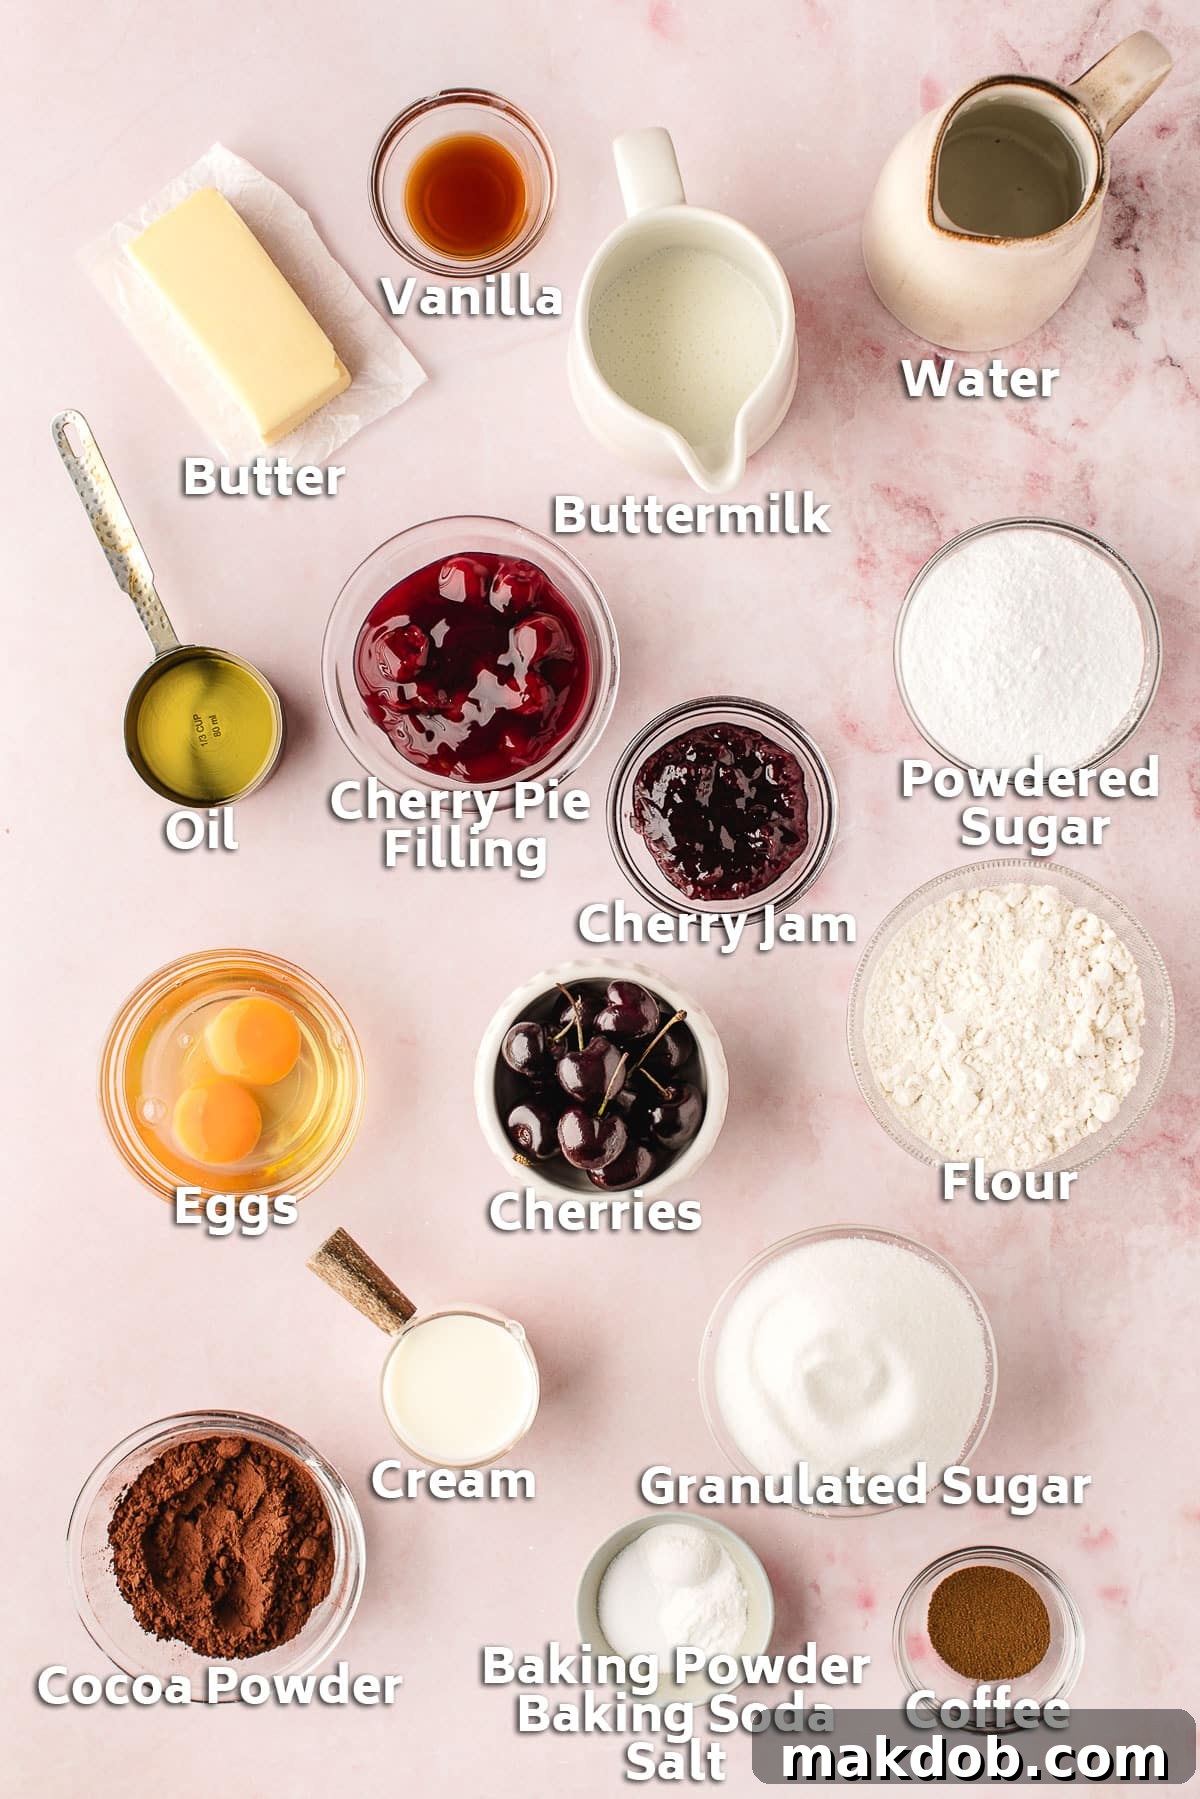
Crafting these delectable Black Forest Cupcakes requires a careful selection of high-quality ingredients for both the rich chocolate cake and the vibrant cherry buttercream. For the cake base, you’ll need: boiling water to bloom the cocoa, instant coffee granules to enhance chocolate flavor, vegetable oil for moisture, creamy buttermilk for tenderness, aromatic vanilla extract, large room temperature eggs for better emulsification, granulated sugar for sweetness, all-purpose flour for structure, baking powder and baking soda for lift, and a pinch of salt to balance the flavors. Most importantly, Dutch process cocoa powder is essential for its deep, less bitter chocolate flavor and darker color, which is characteristic of Black Forest desserts.
For the sumptuous cherry buttercream frosting, gather unsalted butter (softened to perfection), a generous amount of powdered sugar (sifted for ultimate smoothness), delicious cherry jam or preserves (providing both flavor and color), a splash of heavy cream or milk for consistency, and a hint of almond extract to complement the cherry notes beautifully. Finally, the iconic cherry filling is achieved with cherry pie filling, and fresh cherries serve as the elegant garnish, adding a burst of freshness and visual appeal.
How to Make Black Forest Cupcakes: A Step-by-Step Guide
Creating these exquisite Black Forest Cupcakes is a rewarding process that breaks down into three main stages: preparing the chocolate cake, crafting the cherry buttercream, and finally, assembling and garnishing your masterpieces. Follow these steps for a perfect batch every time.
Step 1: Preparing the Chocolate Cupcake Base
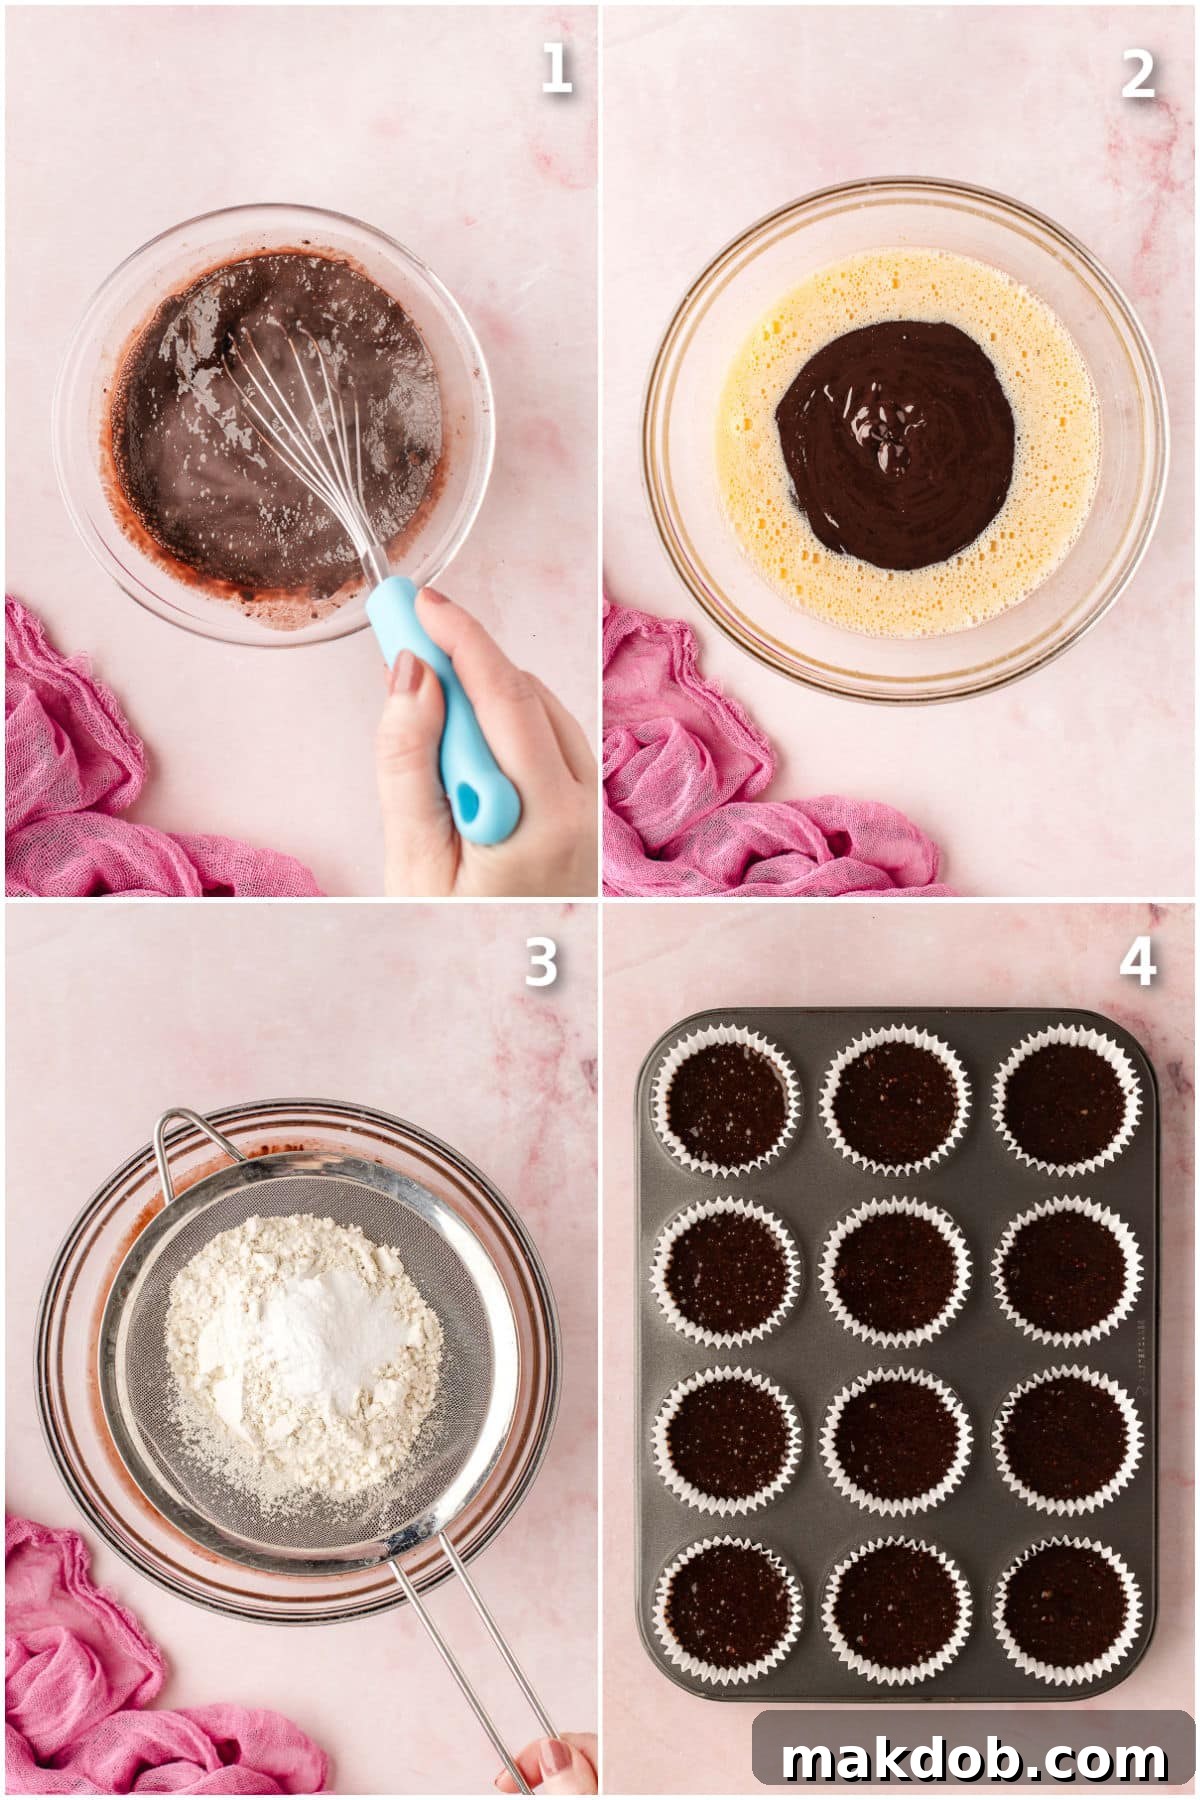
Begin by preheating your oven to 350 degrees Fahrenheit (175°C) and lining a 12-cup muffin pan with paper cupcake liners. In a small bowl, whisk together the boiling water, Dutch process cocoa powder, and instant coffee granules until a smooth, rich chocolate mixture forms; set this aside to cool slightly. In a separate, larger mixing bowl, combine the wet ingredients: vegetable oil, room temperature large eggs, creamy buttermilk, granulated sugar, and vanilla extract. Whisk these together for about 2-3 minutes until they are well combined and slightly lightened. Once the cocoa mixture has cooled, gradually add it to the bowl of wet ingredients, whisking again until thoroughly incorporated.
Next, place a fine-mesh sieve over your large mixing bowl. Sift in the dry ingredients: all-purpose flour, baking powder, baking soda, and salt. Sifting helps prevent lumps and ensures a lighter crumb. Using a spatula, gently fold the ingredients together until they are *just* combined. It’s crucial not to overmix the batter, as this can develop the gluten too much, resulting in tough, dense cupcakes. A few small lumps are perfectly fine. Divide the silky batter evenly among the 12 prepared muffin cups, filling each approximately three-quarters full. Bake in the preheated oven for 18 minutes, or until a wooden toothpick inserted into the center of a cupcake comes out clean. The cupcakes should feel springy to the the touch and have risen beautifully over the edges of the liners. Once baked, remove the muffin pan from the oven and let the cupcakes cool completely on a wire rack before frosting.
Step 2: Crafting the Cherry Buttercream Frosting
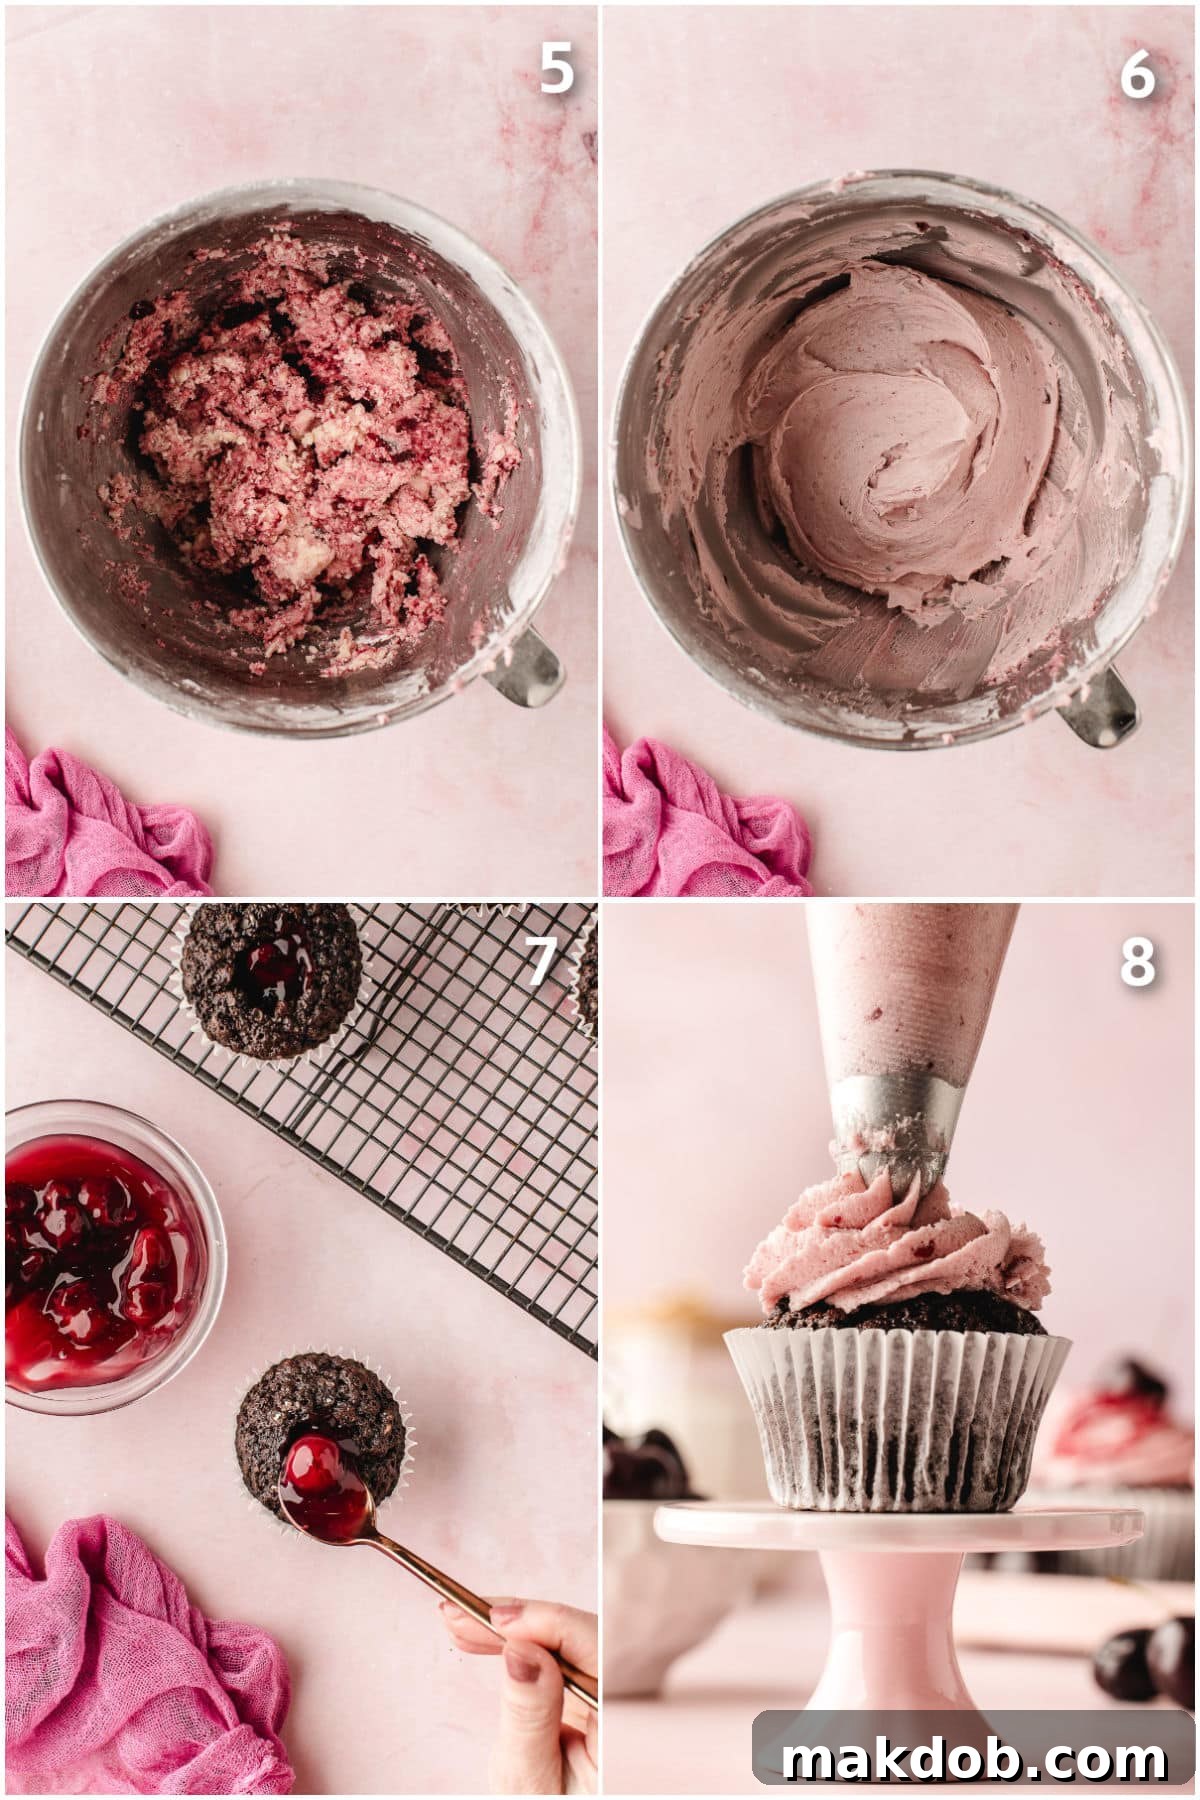
While your chocolate cupcakes are cooling, it’s time to prepare the star of the show: the cherry buttercream frosting. In the bowl of a stand mixer fitted with a paddle attachment, place the softened unsalted butter. Beat the butter on medium-high speed for 2-3 minutes until it becomes light, pale, and fluffy. Gradually add the sifted powdered sugar, one cup at a time, beating on low speed until each addition is incorporated and you have a smooth, thick base. This slow addition prevents a cloud of sugar from engulfing your kitchen.
Next, gently mix in the cherry jam or preserves on low speed until it’s evenly distributed. The jam will infuse the buttercream with a wonderful fruity flavor and a beautiful pink hue. Finally, slowly pour in the heavy cream (or milk) and almond extract. Increase the mixer speed to high and beat for another 2-3 minutes, allowing the frosting to become incredibly light, airy, and fluffy. This final whip is crucial for that perfect, pipeable consistency. Transfer the prepared frosting to a piping bag fitted with a large open star tip, ready for decorating.
Step 3: Assembling and Garnishing Your Black Forest Cupcakes
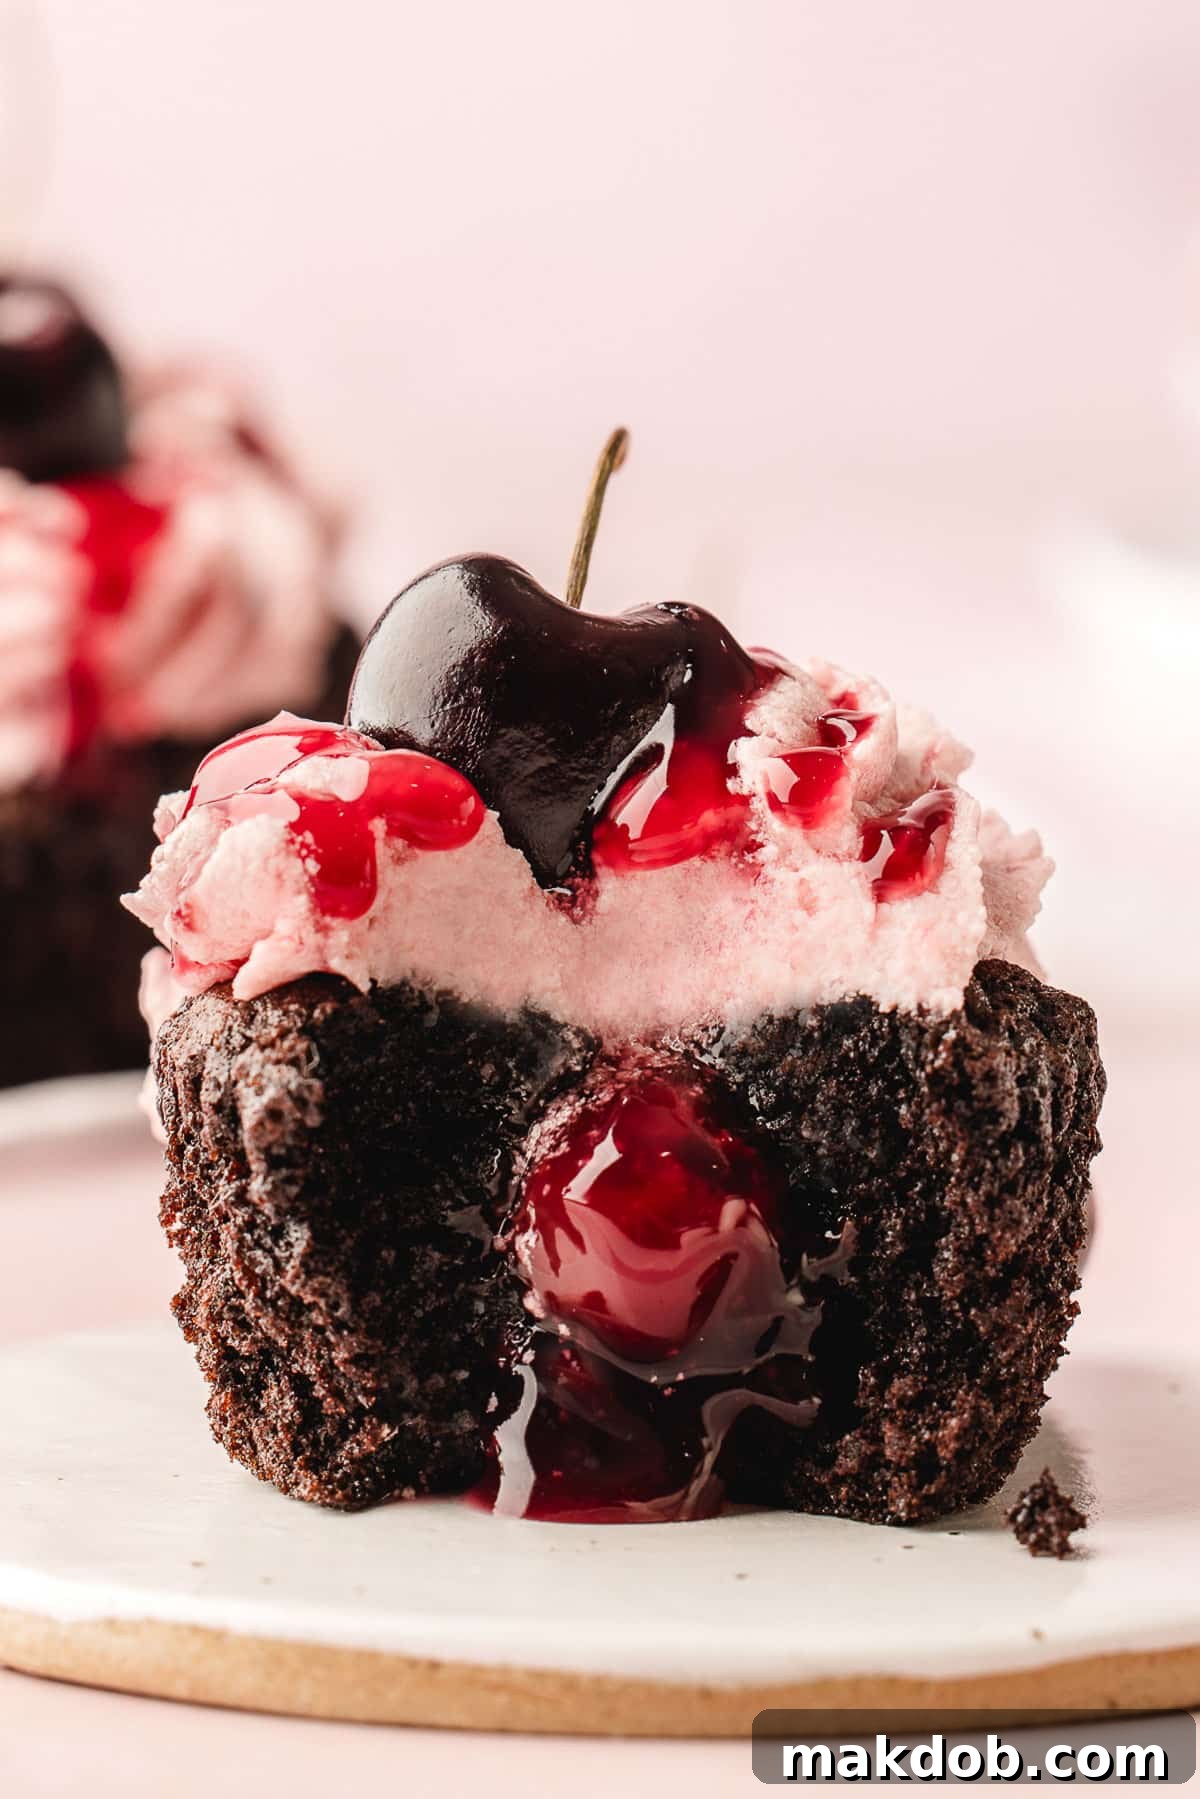
With the cupcakes fully cooled and the frosting prepared, it’s time for the exciting assembly! Take the larger, round end of a piping tip and gently press it into the center of each cupcake to cut out a cylindrical core. Be careful not to go all the way through to the bottom. Carefully remove these cake cores. Fill each newly created hole generously with cherry pie filling – you should be able to fit 2-3 whole cherries along with some of their luscious syrup into each cupcake. This hidden burst of fruit is what truly defines a Black Forest treat.
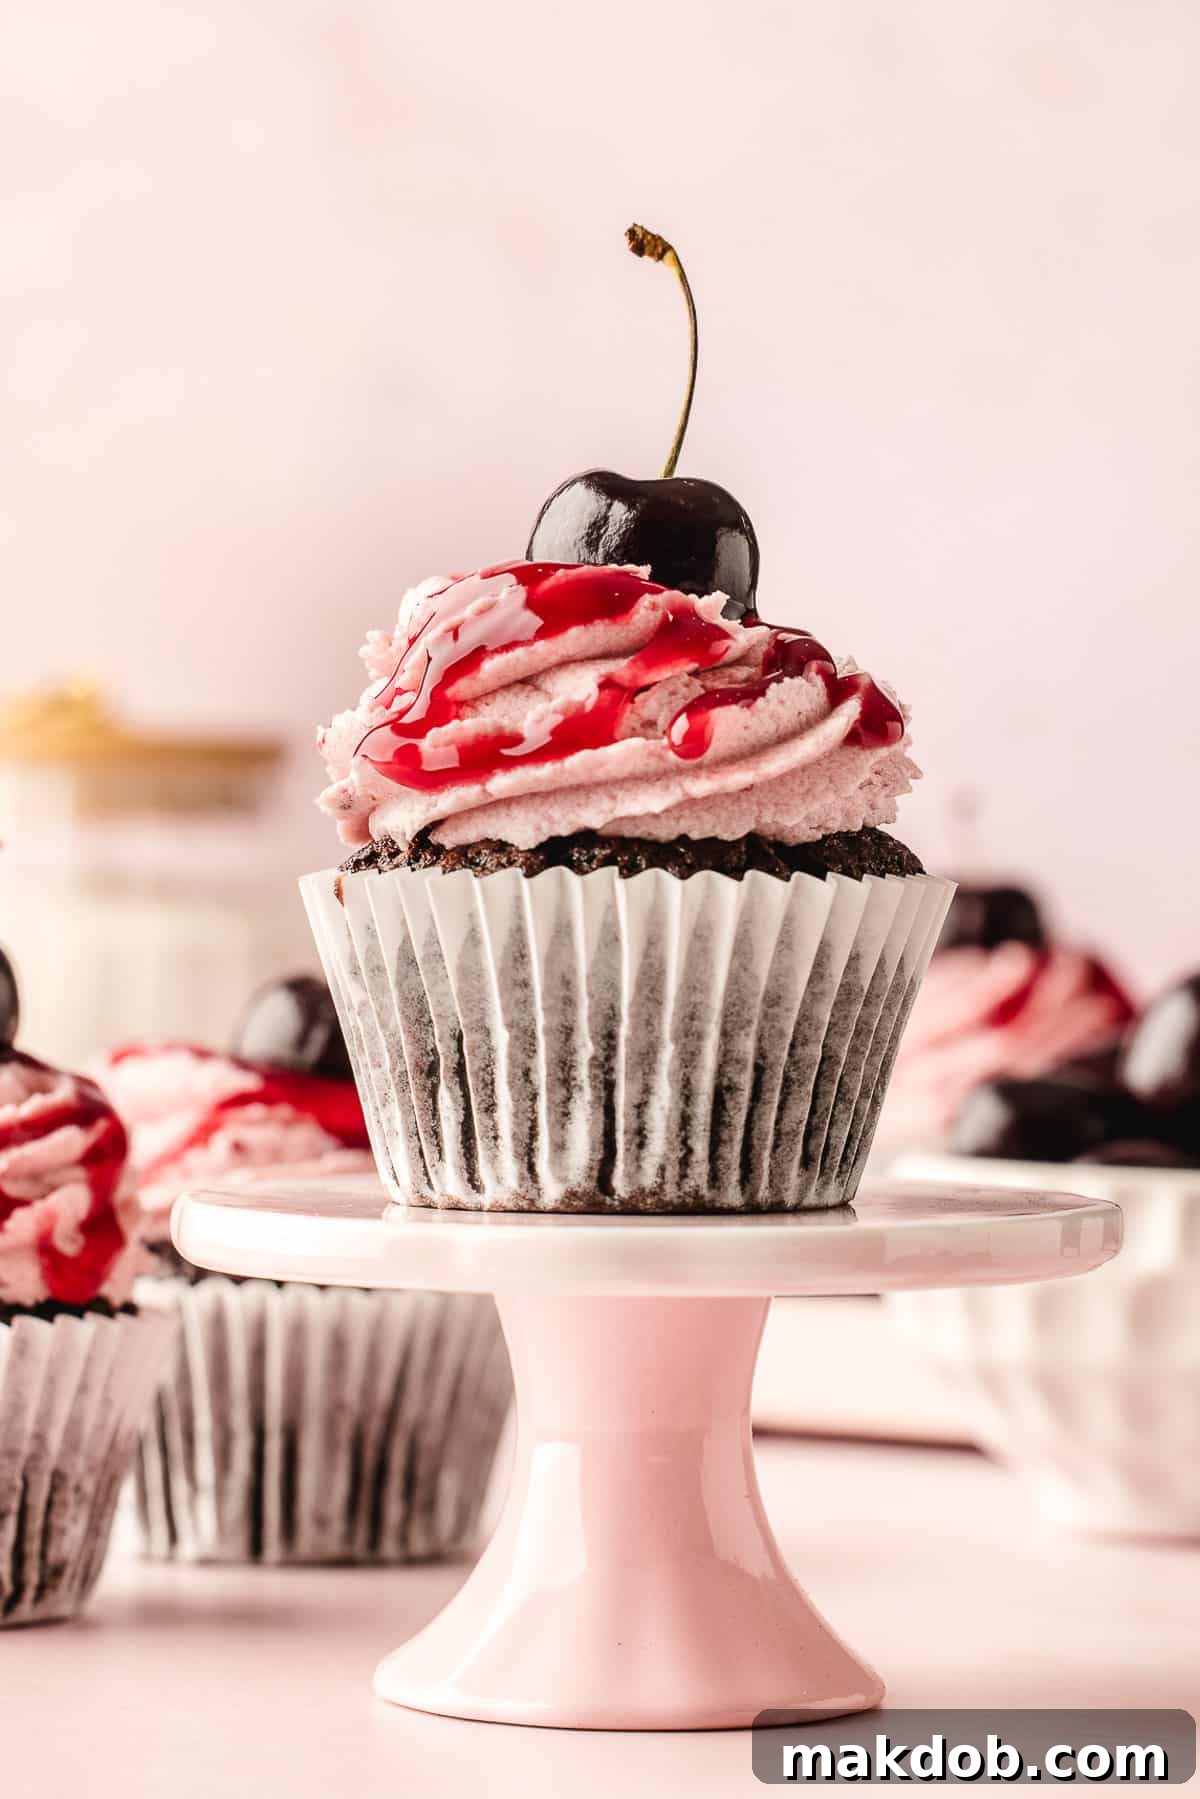
To seal the filling, slice approximately a half-inch off the top of each cake core you removed. Use these trimmed cake pieces to plug the opening in the top of each cupcake. This creates a neat base for your frosting. Now, using your piping bag, pipe beautiful swirls of the cherry buttercream onto each filled cupcake. For an extra touch of cherry goodness and shine, drizzle a small amount of the leftover cherry syrup from the pie filling can over the frosting. As a final, elegant garnish, top each cupcake with a fresh, bright cherry. Your stunning Black Forest Cupcakes are now ready to be served and enjoyed!
Expert Tips for Perfect Black Forest Cupcakes
Achieving bakery-quality Black Forest Cupcakes is easier than you think with these helpful tips:
- Storage Perfection: To maintain their freshness, store your Black Forest Cupcakes in an airtight container in the refrigerator for up to 3 days. For the best flavor and texture, allow them to come to room temperature for about 20 minutes before serving. This softens the cake and frosting, enhancing their delicate qualities.
- Frosting Texture: Most varieties of cherry jam and preserves contain delightful small pieces of fruit, which will give your buttercream a lovely, rustic texture. If you prefer an ultra-smooth, silky frosting, simply strain the jam through a fine-mesh sieve to remove any fruit pieces before incorporating it into the butter and powdered sugar mixture.
- Cherry Garnishes Beyond Fresh: While fresh cherries offer unmatched visual appeal and taste, they might not always be in season or readily available. Don’t fret! You can easily garnish your cupcakes with a cherry from the cherry pie filling can (if it contains whole fruit), a classic maraschino cherry for a pop of color, or for a more gourmet touch, exquisite jarred Italian amarena cherries or luxardo cherries. Each offers a unique flavor profile that complements the chocolate and cherry theme.
- Cherry Pie Filling Options: You have the flexibility to use either a homemade cherry pie filling for an extra personal touch or a high-quality store-bought can of cherry pie filling for convenience. Both options work beautifully to create that signature cherry center.
- Effortless Coring: The simplest method for creating the perfect cavity for your cherry filling is to use the large, round end of a piping tip. This creates a clean, uniform hole. Alternatively, you can invest in a dedicated cupcake corer kitchen tool, which makes the job even quicker. For a basic approach, a small paring knife can also be used to carefully cut out a circular section from the center of each cupcake.
Quick Tip: Dutch Process Cocoa
This recipe specifically calls for Dutch process cocoa powder. Unlike natural cocoa powder, Dutch process cocoa is treated with an alkali to neutralize its acidity. This process gives it a darker color and a smoother, milder, and less bitter chocolate flavor. It also reacts differently with leavening agents, making it ideal for recipes using baking soda and baking powder in specific ratios, as found in these cupcakes, to ensure the perfect rise and texture. You’ll find it in most grocery stores alongside regular cocoa powder.
Black Forest Cupcakes FAQs
A traditional Black Forest cake, known in German as Schwarzwälder Kirschtorte, is a classic German dessert typically consisting of several layers of chocolate sponge cake, rich cherry filling (often made with sour cherries), and generous amounts of whipped cream or buttercream frosting. It is commonly flavored with Kirschwasser (a clear cherry brandy) and decorated with chocolate shavings and fresh cherries. The combination of deep chocolate, sweet-tart cherries, and luscious cream is its defining characteristic.
While both chocolate cake and Black Forest cake share basic ingredients like flour, sugar, fat (oil or butter), eggs, and cocoa powder, their distinguishing features lie in their flavor profiles and presentation. A standard chocolate cake is generally defined by its prominent chocolate flavor and is often finished with various chocolate frostings (like chocolate ganache or chocolate buttercream). A Black Forest cake, on the other hand, specifically incorporates a distinct cherry element (cherry filling or preserves) and is traditionally frosted with whipped cream or a lighter buttercream, with a common addition of cherry liqueur and garnishes of chocolate shavings and fresh cherries. The interplay of chocolate and cherry is key to the Black Forest experience, whereas plain chocolate cake focuses solely on the cocoa flavor.
Absolutely! These cupcakes are fantastic for making in advance. You can bake the chocolate cupcakes a day or two ahead and store them in an airtight container at room temperature. The cherry pie filling can also be prepared ahead if you’re making it from scratch. The buttercream frosting can be made 1-2 days ahead and stored in the refrigerator; just be sure to let it come to room temperature and re-whip it slightly before piping. For best results, assemble and garnish the cupcakes within a day of serving.
The instant coffee granules in this recipe are a secret ingredient to enhance the chocolate flavor, not to make the cupcakes taste like coffee. Coffee is a natural flavor enhancer for chocolate, deepening its richness and complexity without imparting a noticeable coffee flavor to the final product. It simply makes the chocolate taste “more chocolatey.”
FOLLOW ME
Delightful Flavor Variations for Your Cupcakes
These Black Forest Cupcakes are absolutely delicious as written, embodying the perfect balance of chocolate and cherry. However, if you’re feeling creative or want to tailor them to specific preferences, the recipe is wonderfully versatile. Here are some fantastic ways to customize your batch:
- Frosting Alternatives: While our recipe features a rich cherry buttercream, traditional Black Forest cakes often utilize sweetened whipped cream. If you prefer a lighter, more classic touch, you can easily swap it out. To make whipped cream frosting: Combine 2 cups of very cold heavy whipping cream, 1/2 cup of powdered sugar, and 1/2 teaspoon of vanilla extract in the bowl of a mixer fitted with a whisk attachment. Whip on high speed until stiff peaks form. For an added cherry twist, you can gently fold in a few tablespoons of cherry jam or preserves (strained, if you prefer a smooth texture) into the whipped cream before piping onto the cupcakes.
- Creative Garnishes: Beyond the fresh cherry, you can elevate the visual appeal and add extra texture with a variety of garnishes. Consider sprinkling your frosted cupcakes with delicate chocolate shavings or mini chocolate chips for an extra cocoa kick. For a more sophisticated look, a drizzle of rich fudge sauce or a glossy chocolate ganache can replace or accompany the cherry syrup. Edible glitter or a dusting of cocoa powder can also add a touch of elegance.
- Boozy Filling Twist: For an authentic Black Forest experience, infuse your cherry filling with a hint of liqueur. Stir 1 tablespoon of Kirschwasser (cherry brandy), or another cherry-flavored liqueur, directly into your cherry pie filling before using it to fill the cupcakes. This adds a subtle warmth and depth of flavor that is characteristic of the traditional German dessert.
- Other Fruit Fillings: While cherry is classic, you can experiment with other fruit fillings for a unique twist. Raspberry or blackberry pie filling could create a similarly delightful tart-sweet contrast with the chocolate cake.
This Black Forest Cupcake recipe truly stands out as one of my all-time favorite desserts. The timeless combination of luscious cherry and deep chocolate flavors is a classic for a reason – it’s simply irresistible!
More Irresistible Dessert Recipes
Chocolate Chip Cupcakes
35 mins
Chocolate Covered Cherries
22 mins
Cherry Cheesecake Dip
6 mins
Chocolate Pudding Cake
45 mins
Chocolate Fruit Dip
6 mins
Love This Recipe?
Please leave a 5-star 🌟🌟🌟🌟🌟rating in the recipe card below & a review in the comments section further down the page!
Black Forest Cupcakes
Pin
Time
Ingredients
For the cake
- ½ cup boiling water
- ½ cup Dutch process cocoa powder
- 1 teaspoon instant coffee granules
- ⅓ cup vegetable oil
- 2 large eggs room temperature
- ½ cup buttermilk
- 1¼ cups granulated sugar
- 1 teaspoon vanilla extract
- 1 cup all purpose flour
- ½ teaspoon baking powder
- ½ teaspoon baking soda
- ½ teaspoon salt
For the filling
- ¾ cup cherry pie filling
For the frosting
- ¾ cup unsalted butter softened
- 3½ cups powdered sugar sifted
- ⅓ cup cherry jam or preserves
- 3 tablespoons heavy cream or milk
- ¼ teaspoon almond extract
For garnish
- ¼ cup cherry syrup from can of cherry pie filling
- 12 fresh cherries
Instructions
For the cake
-
Preheat the oven to 350 degrees F. Line a muffin pan with 12 paper liners.
-
Place the boiling water, cocoa powder and instant coffee in a small bowl. Whisk thoroughly to combine until smooth, then set aside to cool.
-
In a large mixing bowl, add the vegetable oil, eggs, buttermilk, granulated sugar and vanilla extract. Whisk for 2-3 minutes until the mixture is well combined.
-
Add the cooled chocolate mixture to the large bowl, and whisk again until fully incorporated.
-
Set a sieve over the mixing bowl, and sift in the flour, baking powder, baking soda and salt. Use a spatula to gently fold the ingredients together, being careful not to overmix. The batter will be runny with a few lumps.
-
Divide the cake batter between the 12 muffin cups, each cup should be about ¾ full.
-
Bake in the middle of the preheated oven for 18 minutes or until a toothpick inserted into the center comes out clean.
-
The cupcakes will have risen slightly over the edges of the liners and should feel springy to the touch. Set aside to completely cool.
For the frosting
-
Place the butter in the bowl of a stand mixer that has a paddle attachment on it. Beat the butter for 2-3 minutes until light and fluffy.
-
Gradually add the powdered sugar, 1 cup at a time, until you have a smooth, thick mixture.
-
Add the cherry jam, then mix on low speed to combine.
-
Slowly add the cream and almond extract. Turn the mixer to high speed and beat for 2-3 minutes or until the buttercream is light and fluffy.
-
Transfer the frosting to a piping bag fitted with an open star tip.
For the filling
-
Use the large side of a piping tip to cut a core out of the center of each cupcake.
-
Fill each cupcake hole with cherry pie filling. You should be able to fit 2-3 cherries in each along with some syrup.
-
Slice a ½ inch off the top of each piece of cake core, and use the cut cores to plug the opening of each cupcake.
-
Pipe swirls of cherry buttercream on top of each cupcake and drizzle over some leftover syrup from the can of cherry pie filling. For a final garnish, top each cupcake with a fresh cherry.
Notes
- Black Forest cupcakes will stay fresh in an airtight container in the refrigerator for up to 3 days. For best taste and texture, allow them to come to room temperature for 20 minutes before serving.
- Most varieties of cherry jam and cherry preserves contain pieces of fruit, which means your frosting will not be completely smooth. If you prefer an ultra-smooth frosting, you can strain the pieces of fruit out of the jam before you add it to the sugar and butter.
- If fresh cherries are not in season near you, feel free to garnish the cupcakes with a cherry from the cherry pie filling can, a maraschino cherry, a jarred Italian amarena cherry, or a luxardo cherry for an equally delicious and attractive finish.
- I find it easiest to cut a core out of the center of each cake with the large round end of a piping tip. This creates a clean, uniform hole. You can also purchase a dedicated cupcake corer kitchen tool, or simply use a small paring knife for this task.