
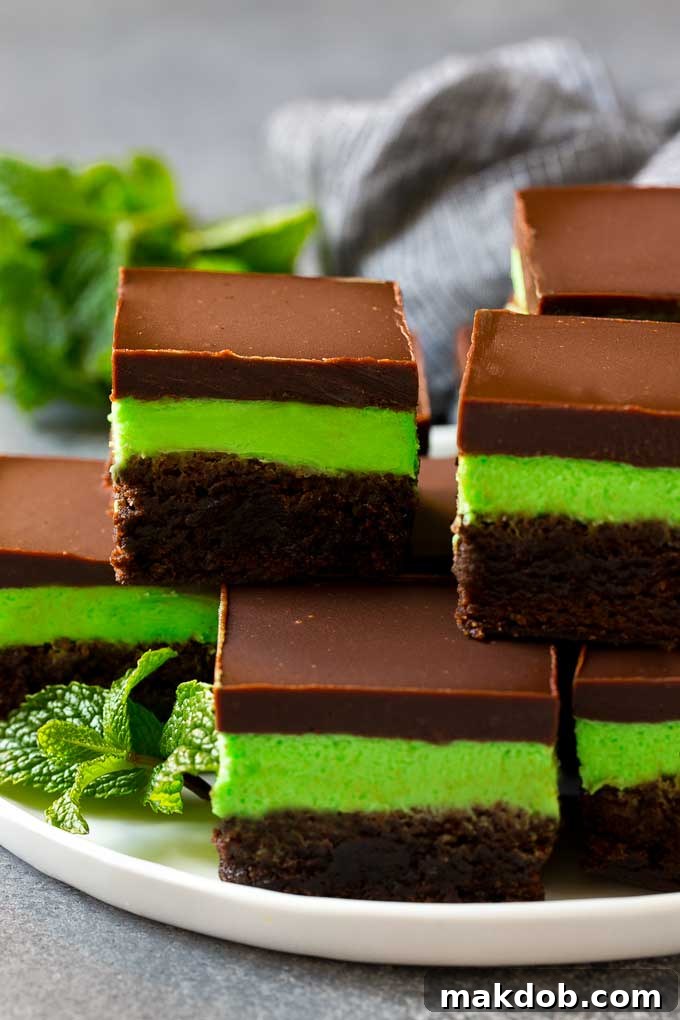
These mint brownies are the epitome of indulgent desserts: rich, fudgy chocolate brownies crowned with a refreshing layer of vibrant mint frosting, and finished with a smooth chocolate topping. This easy-to-follow yet incredibly impressive dessert recipe is perfectly suited for gatherings, parties, or simply treating yourself to an unforgettable sweet experience.
The timeless pairing of chocolate and mint creates an irresistible flavor symphony that captivates taste buds. It’s a duo celebrated in many beloved treats, from classic peppermint patties to festive peppermint bark. But for those who crave a truly decadent, multi-layered dessert, these mint brownies offer an elevated experience that combines the best of both worlds in a single, heavenly bite.
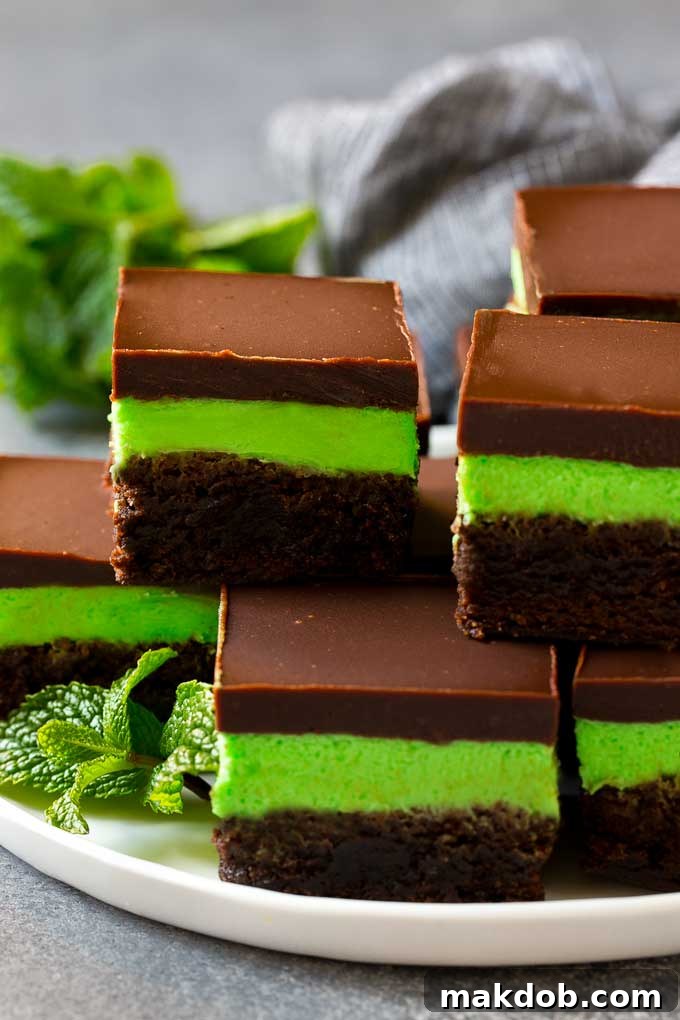
The Ultimate Fudgy Mint Brownies: A Recipe for Sweet Indulgence
When the craving for a quick, satisfying dessert strikes without demanding excessive effort, brownies or blondies often come to mind. They are inherently simple to prepare and consistently delight everyone who tries them. Our exquisite mint brownies take this beloved simplicity to the next level. Starting with a convenient boxed mix for the base (or your cherished homemade recipe), these brownies are transformed into a gourmet masterpiece with layers of creamy mint frosting and a decadent chocolate ganache. Their sophisticated appearance belies their straightforward preparation, ensuring that no one will suspect their humble beginnings!
Why These Layered Mint Brownies Are a Must-Try
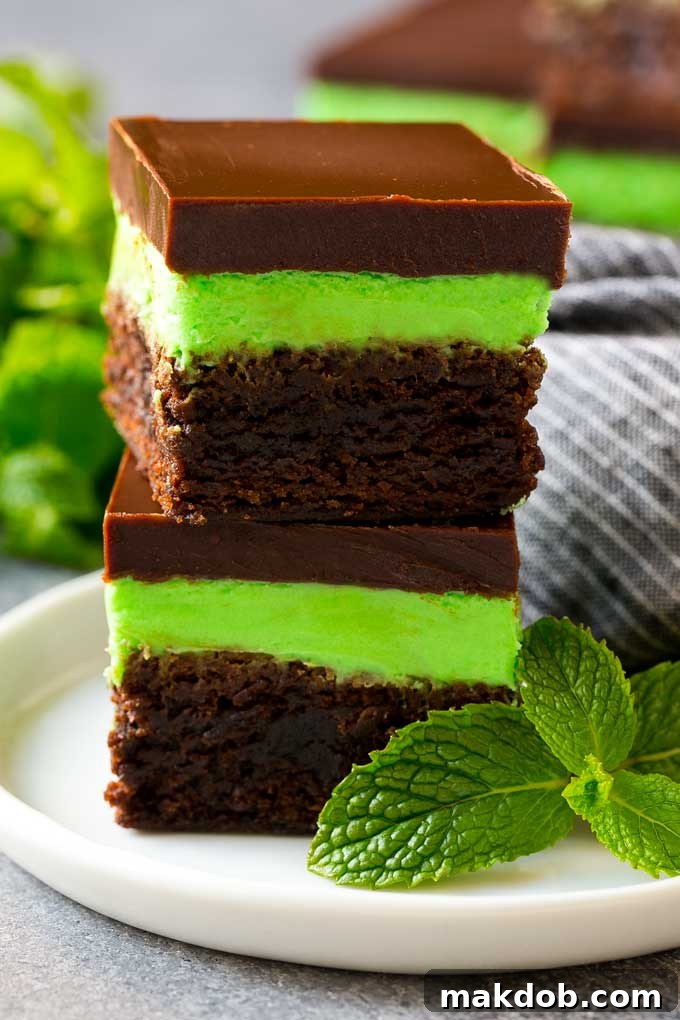
These aren’t just any brownies; they are a celebration of flavor and texture, meticulously designed to impress. The deep, rich notes of chocolate perfectly complement the cool, refreshing essence of mint, creating a harmonious balance that is both invigorating and deeply comforting. The fudgy base provides a satisfying chew, while the creamy mint layer adds a smooth, melt-in-your-mouth quality, all sealed with a glossy, rich chocolate topping. This three-tiered delight makes them an ideal choice for any occasion, from casual family desserts to elegant holiday spreads like St. Patrick’s Day or Christmas.
What sets this recipe apart is its brilliant combination of convenience and gourmet appeal. Whether you opt for a high-quality store-bought brownie mix or embark on a homemade journey from scratch, the result is a dessert that looks and tastes like it came from a professional patisserie. The vivid green mint layer adds a cheerful and festive touch, making these brownies not only delicious but also visually stunning. They are easy to transport, store well, and are always a crowd-pleaser, ensuring that you’ll be asked for the recipe every time.
Crafting Your Mint Brownies: A Simple Step-by-Step Guide
Making these layered mint brownies is a fun and rewarding process. The magic happens in three distinct stages, each building upon the last to create a harmonious blend of flavors and textures.
Step 1: The Fudgy Brownie Base
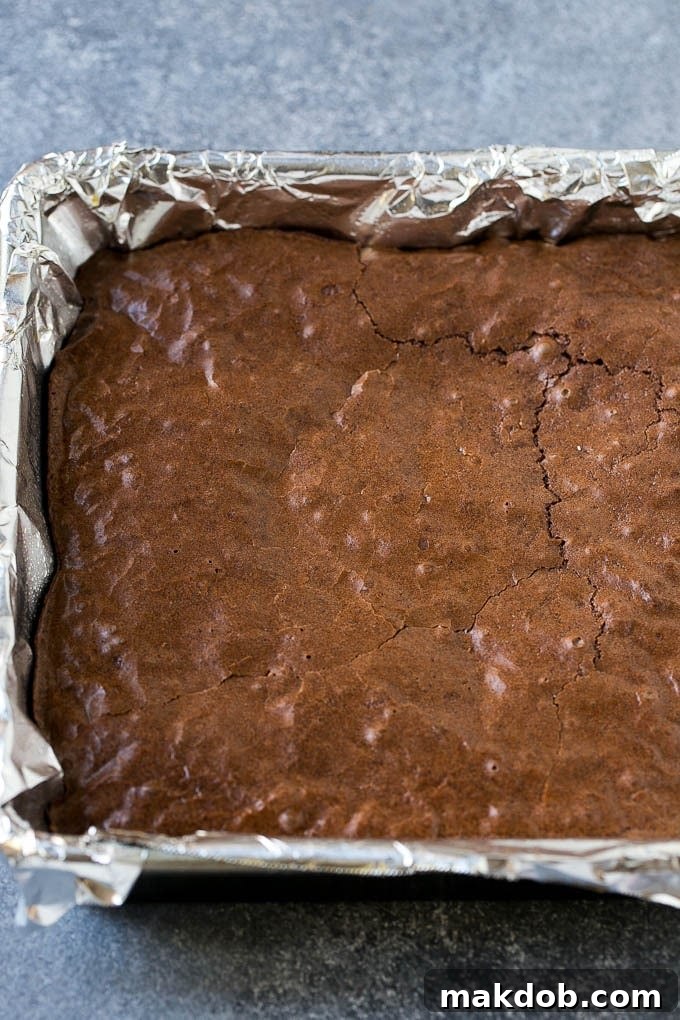
The foundation of our mint brownies is a perfectly fudgy, deeply chocolatey base. While you can certainly use your favorite homemade brownie recipe, a high-quality family-size boxed brownie mix (around 18-20 ounces) offers exceptional convenience without compromising on flavor or texture. Prepare the brownie mix according to the package directions, incorporating eggs, oil, and water as specified. For an extra hint of mint throughout the entire brownie, stir in 1/4 teaspoon of mint extract directly into the batter. This infuses the base with a subtle coolness that perfectly sets the stage for the layers to come.
Before baking, line your chosen pan (a 9″x9″ square or 9″x13″ rectangular pan, depending on desired thickness and yield) with foil, leaving a generous overhang on the sides. This simple trick will make removing the cooled brownies incredibly easy. Coat the foil with cooking spray to prevent sticking. Bake the brownies according to the package instructions, then allow them to cool completely on a wire rack. Patience is key here; a fully cooled brownie provides a stable canvas for the frosting layers.
Step 2: The Creamy Mint Frosting Layer
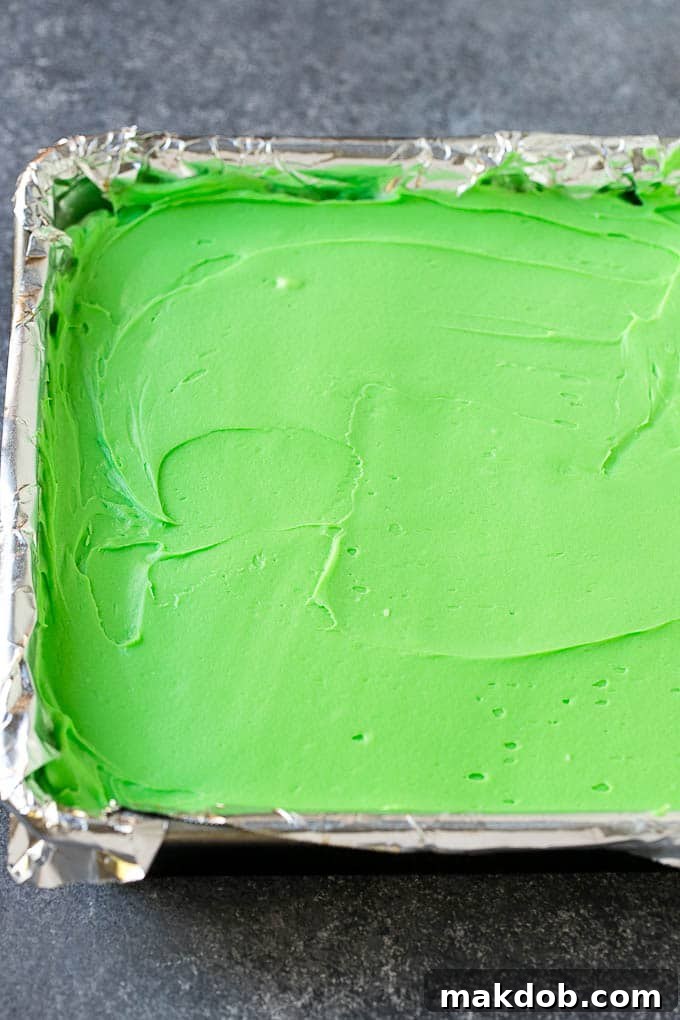
Once your brownie base is cool, it’s time to create the refreshing mint layer. In a mixing bowl, combine softened butter and cream cheese. Beat them together until the mixture is smooth and free of lumps. Gradually add 1/4 cup of heavy cream, continuing to beat until everything is well blended and creamy. Next, slowly incorporate 3 1/2 cups of powdered sugar, beating until the frosting becomes wonderfully smooth, light, and fluffy.
To achieve that signature mint flavor and eye-catching color, add another 1/4 teaspoon of mint extract and about 5 drops of green food coloring. Beat for an additional 30 seconds to ensure the color is evenly distributed and the flavor is fully integrated. If you prefer a more intense mint flavor, feel free to add another 1/4 to 1/2 teaspoon of extract. Spread this luscious mint layer evenly over the cooled brownies. This vibrant green layer not only adds flavor but also a striking visual appeal. Place the brownies in the refrigerator and chill them for 45-60 minutes, or until the mint layer is firm enough to support the next topping.
Step 3: The Decadent Chocolate Topping
The final touch is a glossy, rich chocolate ganache that perfectly complements the mint. In a saucepan over medium-low heat, combine 1/2 cup of heavy cream, 2 cups of semisweet chocolate chips, and 1/2 cup of butter. Stir constantly for 3-4 minutes, allowing the ingredients to melt together until the mixture is completely smooth and luxurious. Be careful not to scorch the chocolate.
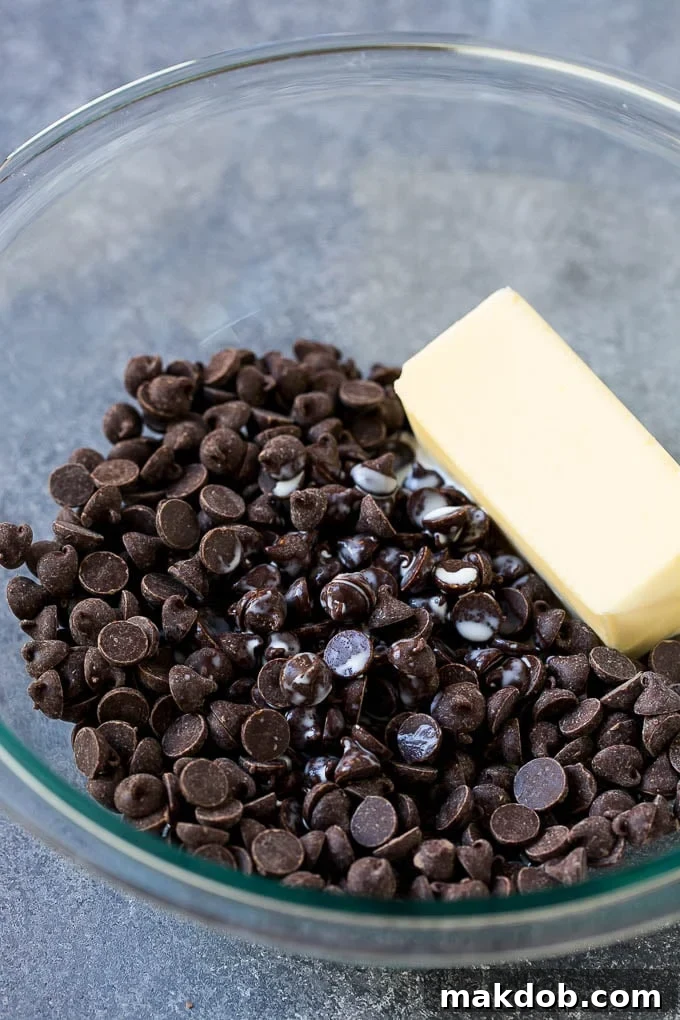
Remove the chocolate topping from the heat and let it sit at room temperature for approximately 8-10 minutes, or until it has cooled to lukewarm. This step is crucial; pouring hot ganache directly over the chilled mint layer will cause it to melt and mar your perfectly layered creation. Once cooled to the right temperature, carefully pour the chocolate topping evenly over the firm mint layer. Return the brownies to the refrigerator and chill again until the chocolate layer is completely set, which typically takes another 45-60 minutes.
Once thoroughly chilled and firm, use the foil overhang to gently lift the entire brownie slab out of the pan. Place it on a cutting board, and with a sharp knife (wiping the blade clean between cuts for perfectly neat edges), slice the brownies into squares. Garnish with fresh mint leaves or additional toppings if desired, then serve and enjoy these spectacular layered mint brownies!
Expert Tips for Flawless Mint Brownies
Achieving bakery-worthy mint brownies is easier than you think with these expert tips:
- Choose Your Pan Wisely: This recipe works well in both a 9″ square pan and a 9″x13″ rectangular pan. The brownies pictured were baked in a 9″ square pan, resulting in thicker, more substantial bars. If you’re feeding a larger crowd or prefer a slightly thinner brownie, the 9″x13″ pan is the way to go.
- The Importance of Chilling: For distinct, beautiful layers, it is absolutely essential to let the brownies chill thoroughly between the application of each layer. Rushing this step will result in messy, mixed layers. Allow ample time for firming.
- Tinting for Cheer: A bright green mint buttercream is undeniably festive and appealing! While entirely optional, a few drops of green food coloring create that classic mint brownie look. You can adjust the amount to your preference or omit it for a natural, off-white hue.
- Lukewarm Chocolate Topping is Key: Ensure your chocolate topping has cooled to at least room temperature, or even slightly lukewarm, before pouring it over the mint buttercream. If the chocolate is too hot, it will melt the mint layer, compromising your beautiful design.
- Storage for Freshness: These delightful brownies are best stored covered in the refrigerator. When properly stored, they will maintain their deliciousness for up to 5 days, making them an excellent make-ahead dessert.
- Customize Mint Flavor Intensity: The recipe suggests 1/4 teaspoon of mint extract for a mild, pleasant mint flavor. If you’re a true mint enthusiast and desire a bolder taste, feel free to increase the amount of mint extract by an additional 1/4 to 1/2 teaspoon, adjusting to your personal preference.
- Clean Cuts Every Time: For perfectly neat squares, use a warm, sharp knife. Running your knife under hot water and wiping it dry before each cut will help slice through the layers cleanly, preventing sticking and smudging.
Creative Variations to Elevate Your Mint Brownies
While these mint brownies are undeniably delicious on their own, they also serve as a fantastic base for creative customization. Elevate them even further for a party or special occasion with these delightful additions:
- Chocolate Sprinkles: For a simple yet festive touch, scatter about 1/2 cup of your favorite chocolate sprinkles over the chocolate layer immediately after it’s poured onto the brownies, before it sets.
- Chopped Andes Mints: Amp up the mint-chocolate experience by sprinkling finely chopped Andes mints over the chocolate layer once it has partially set. The warmth of the chocolate will slightly melt them, creating a delightful finish.
- Mini Chocolate Chips: Add another dimension of chocolate texture by adding 1/2 cup of mini chocolate chips on top of the chocolate layer once it has started to firm up.
- White Chocolate Drizzle: For an elegant presentation and an extra layer of sweetness, melt white chocolate chips and drizzle them in a decorative pattern over the set chocolate topping.
- Crushed Peppermint Candies: Especially festive during the holidays, a sprinkle of crushed peppermint candies (like candy canes) adds a beautiful color contrast and a satisfying crunch.
Indulge in the Perfect Minty Treat
If you’re a devoted fan of the chocolate-mint combination, these fudgy, layered mint brownies are an absolute must-try. Their perfect balance of rich chocolate, cool mint, and creamy textures makes them incredibly addictive. Prepare to fall in love with every bite – you won’t be able to stop at just one!
More Irresistible Chocolate Dessert Ideas
- Chocolate Covered Pretzels
- Oreo Balls
- Earthquake Cake
- Peanut Butter Brownies
- Rocky Road Fudge
Mint Brownies
Pin
Save
Sara Welch
20 minutes
30 minutes
1 hour 20 minutes
50 minutes
Dessert
American
20
Ingredients
For the brownies
- 1 box brownie mix family size, around 18-20 ounces
- eggs, oil and water as called for on brownie mix box
- 1/4 teaspoon mint extract
- cooking spray
For the mint layer
- 1/4 cup butter softened
- 4 ounces cream cheese softened
- 1/4 cup heavy cream
- 3 1/2 cups powdered sugar
- 1/4 teaspoon mint extract
- 5 drops green food coloring
For the chocolate topping
- 1/2 cup heavy cream
- 2 cups semisweet chocolate chips
- 1/2 cup butter
Instructions
- Preheat the oven to the temperature specified on the box.
- Line a 9″ x 9″ or 9″ x 13″ pan with foil, leaving an overhang on the sides. Coat with cooking spray.
- Prepare the brownie mix with the eggs, oil and water as called for on the package. Stir in the mint extract.
- Bake according to package directions. Let the brownies cool completely.
- For the mint layer. Place the 1/4 cup butter and cream cheese in a bowl, then beat until smooth with a mixer. Add the 1/4 cup of heavy cream and beat until well blended.
- Gradually add the powdered sugar, beating until smooth and fluffy. Add the mint extract and green food coloring and beat for 30 seconds more.
- Spread the mint layer evenly over the brownies. Place the brownies in the fridge and chill until the mint layer is firm, 45-60 minutes.
- For the chocolate topping. Place the 1/2 cup heavy cream, chocolate chips and 1/2 cup butter in a pan over medium low heat. Cook for 3-4 minutes, stirring constantly, until melted and smooth.
- Remove the chocolate topping from the heat. Let sit at room temperature for about 8-10 minutes or until lukewarm.
- Pour the chocolate topping over the mint layer. Refrigerate until set, about 45-60 minutes.
- Use the foil overhang to lift the brownies out of the pan. Cut into squares and serve.
Notes
Nutrition
Did you make this recipe?
Tag @dinneratthezoo on Instagram and hashtag it #dinneratthezoo
Tweet
Pin
This article was originally published on August 19, 2016, and updated on March 14, 2019, with new content to enhance your baking experience. Portions were originally sponsored by The J.M. Smucker Company, and we appreciate your support for the brands that help make Dinner at the Zoo possible.