
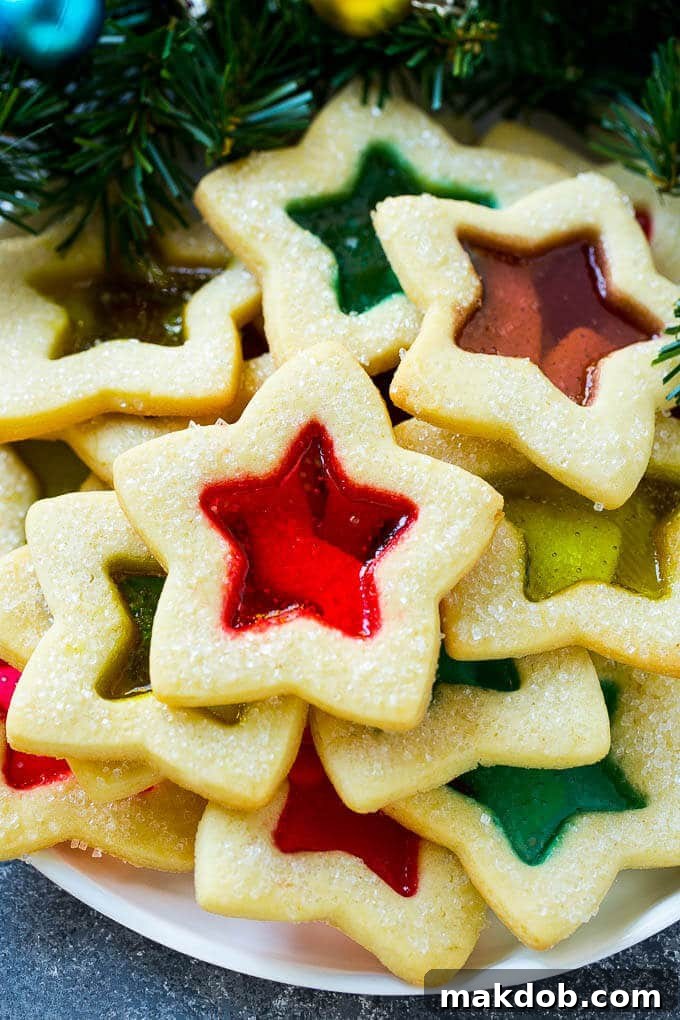
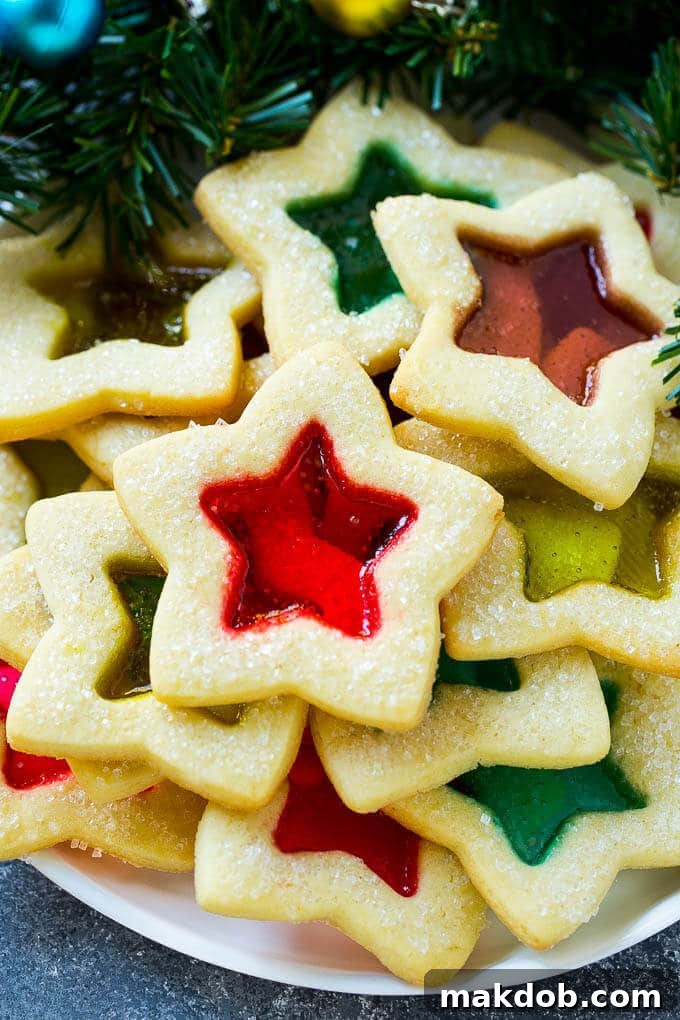
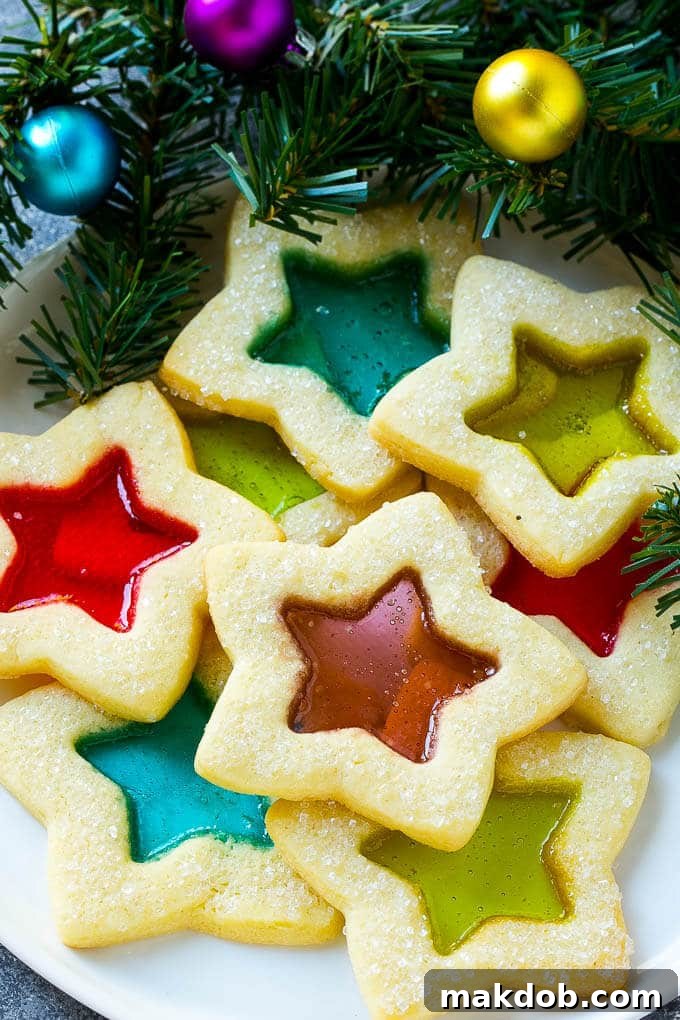
Step into a world of culinary magic this holiday season with these enchanting Stained Glass Cookies. More than just a treat, these buttery sugar cookies with their vibrant, translucent candy centers are miniature edible masterpieces. A true holiday classic, they not only taste incredibly delicious but also dazzle with their stained glass window effect, making them as visually stunning as they are delightful to eat.
If you’ve ever admired the intricate beauty of stained glass window cookies but felt intimidated by the process, this is your year to try! They are truly unique, undeniably pretty, and exude an unparalleled festive charm. Imagine serving these sparkling gems alongside other beloved Christmas recipes such as traditional Christmas sugar cookies, cheerful M&M cookies, delightful microwave caramels, or whimsical Christmas tree brownies. These cookies are guaranteed to be the star of any festive gathering or cookie exchange.
Why You’ll Love Making These Stained Glass Window Cookies
Initially, the idea of creating such visually perfect cookies might seem daunting. The first time these cookies went into the oven, there was a moment of suspense – would they emerge as the elegant, picture-perfect confections seen in magazines, or would they turn into a sticky, melted Pinterest fail? The relief and joy upon pulling out these exquisite, sparkling gems were immense! If such beautiful results are achievable by anyone, they are certainly within your reach. This recipe is designed to guide you to success, creating stunning stained glass window cookies that will impress everyone. It’s also a wonderfully engaging activity to share with children, as the process of crushing candies and watching them melt into colorful windows is pure magic for little ones.
Table of Contents
- Essential Ingredients for Stained Glass Cookies
- Step-by-Step Guide: How to Make Stained Glass Cookies
- Expert Tips for Perfect Stained Glass Cookies
- Quick Storage Tip
- Stained Glass Cookies: Your Questions Answered
- Flavor & Decoration Variations
- More Delightful Holiday Cookie Recipes
- Stained Glass Cookies Video Tutorial
- Love This Recipe? Leave a Review!
- Stained Glass Cookies Recipe Card
Essential Ingredients for Stained Glass Cookies
Crafting these beautiful cookies requires a few simple, readily available ingredients. You’ll need:
- Unsalted butter: Softened to room temperature for optimal creaming with sugar.
- Granulated sugar: Provides the classic sweetness and helps create a tender crumb.
- Eggs: Act as a binder and add richness to the cookie dough.
- Vanilla extract: A crucial flavoring agent that enhances the overall sweetness.
- Salt: Balances the sweetness and brings out the other flavors.
- All-purpose flour: The structural base of your sugar cookies.
- Coarse sparkling sugar: For a dazzling, festive finish on the cookie edges.
- Crushed hard candies: The star ingredient for the “stained glass” centers. Choose a variety of bright colors for the most vibrant effect. Jolly Ranchers or Lifesavers are excellent choices due to their clear, vibrant colors and consistent melting properties.
Step-by-Step Guide: How to Make Stained Glass Cookies
Creating these festive Stained Glass Cookies is a rewarding process. Follow these detailed steps for perfect results:
- Cream Butter and Sugar: In the bowl of a stand mixer fitted with the paddle attachment, or using a hand mixer, combine the softened unsalted butter and granulated sugar. Beat them together on medium speed until the mixture is light, fluffy, and significantly paler in color. This typically takes about 2 to 3 minutes, ensuring air is incorporated for tender cookies.
- Add Eggs: Incorporate the eggs one at a time, beating well after each addition until thoroughly combined. Scrape down the sides of the bowl as needed to ensure all ingredients are evenly mixed.
- Add Flavoring and Dry Ingredients: Stir in the vanilla extract and salt. Then, gradually add the all-purpose flour, mixing on low speed until the ingredients are just combined and a soft, cohesive dough forms. Avoid overmixing, as this can develop too much gluten and result in tough cookies.
- Chill the Dough: Remove the dough from the bowl and shape it into a flat disc. Wrap the disc tightly in plastic wrap and refrigerate it for at least 1 hour. Chilling is essential as it firms up the butter, preventing the cookies from spreading excessively during baking and making the dough much easier to roll and cut. You can chill the dough for up to 1 day.
- Prepare for Baking: Preheat your oven to 350°F (175°C). Line several baking sheets with parchment paper or nonstick silicone baking mats.
- Roll the Dough: Divide the chilled dough in half. Return one half to the refrigerator to keep it cool while you work with the first. On a lightly floured surface, roll out the dough to an even thickness of approximately 1/2 inch. This specific thickness is vital for creating sturdy cookie walls that can effectively contain the melted candy.
- Cut Cookie Shapes: Use a large cookie cutter (a 4-inch star is festive, but any holiday shape works) to cut out as many shapes as possible from the rolled dough. Carefully transfer these cut-out shapes to your prepared baking sheets, ensuring they are spaced about 1 inch apart.
- Create the “Windows”: Take a smaller cookie cutter of the same shape (e.g., a 2-inch star) and use it to cut out the centers of each large cookie. This creates the “windows” for your stained glass effect. Gently remove the smaller dough cutouts; these can be re-rolled with any dough scraps.
- Re-roll Scraps: Gather any dough scraps, gently combine them, and re-roll to cut out more shapes until your first baking sheet is full.
- Add Sparkling Sugar: Gently press coarse sparkling sugar onto the top edges or borders of the cookies. This adds a beautiful shimmer and a delicate crunch.
- Second Chill: Place the baking sheets with the sugar-coated, cut-out cookies back into the refrigerator to chill for another 20 minutes. This second chilling step further helps the cookies maintain their intricate shapes during the baking process.
- Fill with Candy: Remove the chilled cookies from the refrigerator. Carefully fill each cookie window approximately two-thirds full with your crushed hard candies. For intricate shapes, use a toothpick or the tip of a small spoon to gently nudge the candy pieces into any points or crevices, ensuring an even layer.
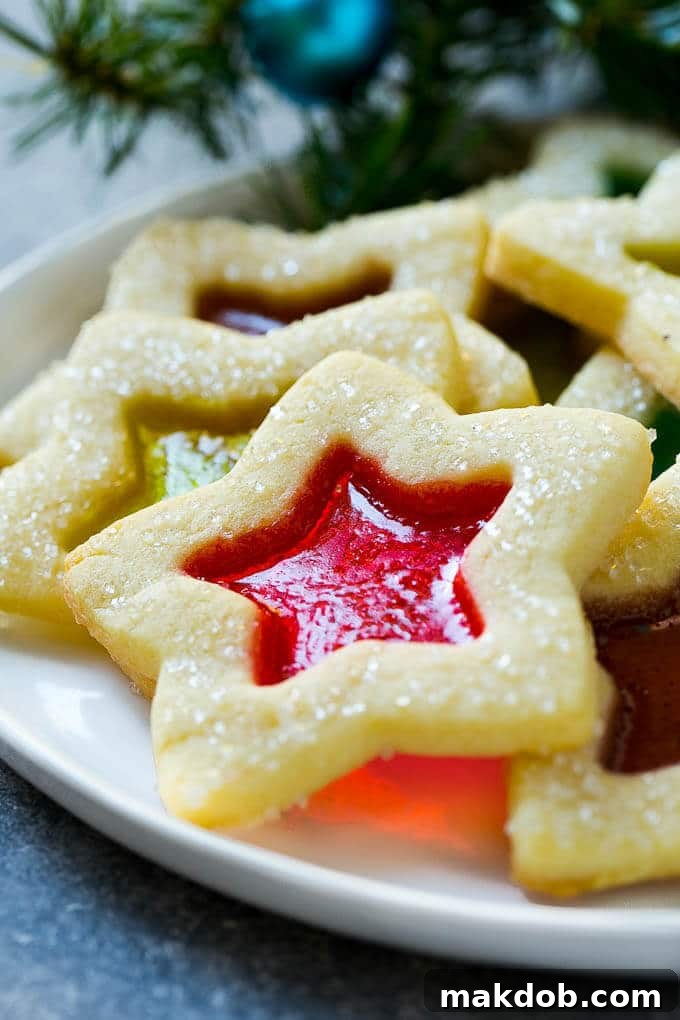
- Bake to Perfection: Bake the cookies for 10-12 minutes, or until the edges of the cookies are lightly golden brown and the candy centers are completely melted, smooth, and glossy. Keep a close eye on them to prevent the candy from over-caramelizing or burning.
- Cool Completely: Allow the cookies to cool completely on the baking sheets without moving them. The melted candy will be extremely hot and sticky, but it will harden into its beautiful, translucent “stained glass” form as it cools.
- Repeat: Repeat the entire cutting, chilling, filling, and baking process with the remaining half of the dough that you had previously stored in the refrigerator.
- Storage: Once fully cooled, store the Stained Glass Cookies in an airtight container at room temperature. To prevent the delicate candy centers from sticking together, arrange them in a single layer or place parchment paper between layers. They will remain fresh and beautiful for up to 2 days.
Expert Tips for Flawless Stained Glass Cookies
Achieving perfectly beautiful Stained Glass Cookies is easier with these helpful tips:
- Choosing Cookie Cutters: While star-shaped cookie cutters were used here, any festive holiday shapes will work beautifully. The key is to have two different sizes of the same shape – one larger for the cookie outline and a smaller one to cut out the inner “window.” This allows for versatility and creativity in your designs.
- Crushing Hard Candies: For the most vibrant and even melting, it’s best to separate the candies by color before crushing. Place a single color of candy in a resealable plastic bag and use the flat end of a meat mallet or a rolling pin to crush them. The goal is to achieve a coarse, pebble-like consistency, similar to coarse sand or small gravel. Avoid grinding them into a super fine powder, as this can cause them to over-caramelize and darken too much in the oven. Conversely, large chunks won’t melt smoothly, leaving gaps in your “stained glass.”
- Filling the Candy Centers: Do not overfill the cookie windows with crushed candy. You only need to fill the centers approximately two-thirds of the way full. Overfilling can lead to the melted candy overflowing onto the cookie edges, marring the clean “stained glass” effect. For intricate shapes like star points or small corners, use a toothpick to gently nudge the candy pieces into place, ensuring complete coverage without excess.
- Dough Temperature is Key: Ensure your dough is consistently cold throughout the process. Working with chilled dough prevents it from becoming sticky and helps the cookies hold their shape better during baking. If the dough gets too warm while you’re working, place it back in the refrigerator for 10-15 minutes to firm up.
- Parchment Paper is Your Friend: Always use parchment paper or silicone baking mats on your baking sheets. This prevents the cookies (and especially the melted candy) from sticking, making transfer much easier once cooled.
- Cooling Patience: It’s crucial to let the cookies cool completely on the baking sheet before attempting to move them. The candy is molten and extremely hot immediately after baking. As it cools, it will set into a firm, glass-like texture. Trying to move them too soon will result in broken cookies and messy, unset candy.
Quick Tip: Storing Your Stained Glass Cookies
These beautiful cookies maintain their freshness and delicate structure best when stored at room temperature for about 2-3 days. To prevent the vibrant candy centers from sticking together, always store them in a single layer in an airtight container, or place a sheet of parchment paper between stacked layers.
Stained Glass Cookies: Your Questions Answered
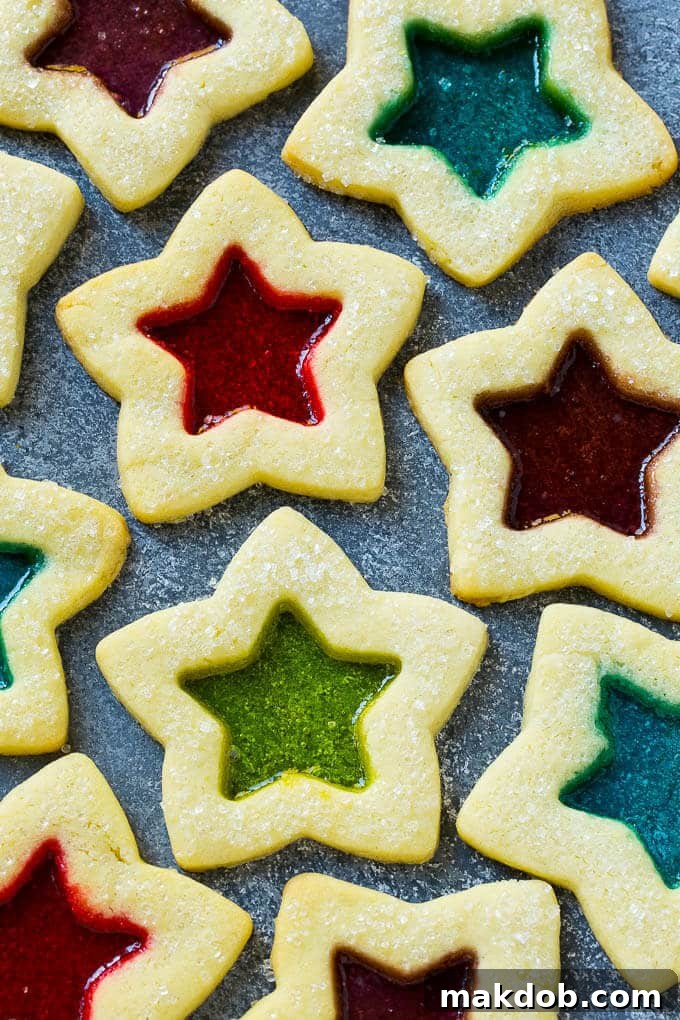
The candy melts directly in the oven as the cookies bake. There’s no need for pre-melting. The key is to crush the hard candies into coarse, pebble-like pieces and to avoid overfilling the cookie window. The heat from the oven will naturally transform the crushed candy into a smooth, translucent glass-like center.
For most cut-out cookies, a thickness of 1/4 inch or 1/2 inch is recommended. For these Stained Glass Cookies, a thickness of 1/2 inch is ideal. This ensures that the cookie walls are sturdy enough to contain the melted candy without breaking or becoming too flimsy. A thicker cookie also provides a satisfying bite and complements the candy center.
Absolutely! While Jolly Ranchers and Lifesavers are popular choices for their vibrant colors and smooth melting, almost any hard candy can work. Consider peppermints for a festive red and white swirl, butterscotch for a warm amber tone, or even clear fruit drops for a variety of hues. Just ensure the candies are hard and can be crushed to the right consistency.
Yes, you can! You can prepare the dough, wrap it tightly in plastic wrap, and then in foil, and freeze it for up to 3 months. Thaw the dough in the refrigerator overnight before rolling and cutting. This is a great way to get a head start on your holiday baking!
FOLLOW ME
Flavor & Decoration Variations
While these Stained Glass Cookies are absolutely delicious in their classic form, there are plenty of ways to customize them to suit your taste preferences and add even more festive flair:
- Dough Enhancements: Elevate the flavor of your sugar cookie dough by incorporating additional seasonings. A pinch of cinnamon or nutmeg can add a warm, cozy touch. For a brighter profile, consider adding lemon zest or orange zest. Extracts beyond vanilla, such as almond extract or a hint of orange extract, can also introduce delightful new dimensions to the cookie base.
- Candy Choices: Don’t limit yourself to just Jolly Ranchers. This recipe is incredibly versatile and works with a wide array of hard candies. Experiment with Lifesavers, classic butterscotch candies for a rich, caramel-like window, or vibrant cinnamon discs for a spicy kick and festive red glow. Clear hard candies with fruit flavors often produce the most jewel-like effects.
- Sprinkle Alternatives: Instead of, or in addition to, coarse sparkling sugar on the outside of your cookies, get creative with other decorative sprinkles. Use colored sanding sugars to match your holiday theme, or add a playful touch with nonpareil sprinkles for a fun and celebratory look. You can also drizzle cooled cookies with a simple glaze or white chocolate for an extra layer of decoration.
- Cookie Cutout Shapes: Beyond stars, consider using other holiday-themed cookie cutters like angels, Christmas trees, gingerbread men, bells, or ornaments. The key is just having a smaller cutter of the same shape to create the inner “window.”
If you’re aiming to bring an impressive, conversation-starting treat to a cookie exchange or want to surprise your loved ones with a truly special homemade dessert this year, these Stained Glass Cookies are an unbeatable choice!
More Delightful Holiday Cookie Recipes
Christmas Wreath Cookies
15 mins
Peppermint Bark Cookies
35 mins
Avalanche Cookies (No Bake)
6 mins
Almond Roca Cookies
30 mins
Chocolate Fudge Cookies
1 hr 30 mins
Stained Glass Cookies Video Tutorial
For a visual guide on how to create these stunning Stained Glass Cookies, watch the comprehensive video tutorial below. It walks you through each step of the process, from preparing the dough to achieving the perfect melted candy centers, ensuring your baking experience is smooth and successful.
(Video coming soon!)
Love This Recipe? Leave a Review!
If you enjoyed making and tasting these beautiful Stained Glass Cookies, please consider leaving a 5-star 🌟🌟🌟🌟🌟 rating in the recipe card below and a comment in the comments section further down the page. Your feedback is greatly appreciated!
Stained Glass Cookies
These beautiful stained glass cookies are buttery sugar cookies with a candy center. A holiday classic that tastes as good as it looks!
Author: Sara Welch
Prep Time: 40 minutes
Cook Time: 12 minutes
Chilling Time: 1 hour
Total Time: 1 hour 52 minutes
Course: Dessert
Cuisine: American
Servings: 20 cookies
Ingredients
- 1 cup unsalted butter, softened
- 1 cup granulated sugar
- 2 large eggs
- 1 1/4 teaspoon vanilla extract
- 1/2 teaspoon salt
- 3 cups all-purpose flour
- 2/3 cup coarse sparkling sugar
- 1/2 cup crushed hard candies (Jolly Ranchers or Lifesavers work great for vibrant colors)
Instructions
- In the bowl of a mixer, beat the softened butter and granulated sugar until light and fluffy, about 2-3 minutes.
- Add the eggs one at a time, beating well after each addition until fully incorporated.
- Stir in the vanilla extract and salt. Gradually add the all-purpose flour, mixing on low speed until a soft dough forms. Do not overmix.
- Remove the dough from the bowl, shape it into a flat disc, wrap it tightly in plastic wrap, and chill in the refrigerator for at least 1 hour (or up to 1 day). This chilling step is crucial for easy handling and preventing spread.
- Preheat your oven to 350°F (175°C). Line several baking sheets with parchment paper or a nonstick baking mat.
- Divide the chilled dough in half. Return one half to the fridge. On a lightly floured surface, roll the remaining dough to an even thickness of approximately 1/2 inch.
- Using a 4-inch star-shaped cookie cutter (or any large holiday shape), cut out shapes from the dough. Place these shapes 1 inch apart on the prepared baking sheets.
- Next, use a smaller 2-inch star cookie cutter (or a smaller version of your chosen shape) to cut out the centers of each large cookie, creating the “windows.” Gently remove the small inner dough cutouts.
- Re-roll any dough scraps and repeat the cutting process until your first baking sheet is filled.
- Gently press coarse sparkling sugar onto the top edges of each cookie for added sparkle and texture.
- Place the baking sheets with the cut-out cookies back into the refrigerator to chill for an additional 20 minutes.
- Remove the cookies from the refrigerator. Fill each cookie’s window about two-thirds full with the crushed hard candies. Use a toothpick to gently nudge the candy into any small crevices or points of the shape.
- Bake for 10-12 minutes, or until the cookie edges are lightly golden brown and the candy centers are completely melted and glossy.
- Allow the cookies to cool completely on the baking sheets. The melted candy will be extremely hot and sticky, so let it set and harden before moving.
- Repeat the entire process with the remaining chilled dough.
- Store the cooled stained glass cookies in an airtight container at room temperature for up to 2 days, placing parchment paper between layers to prevent sticking.
Notes
- For best results, separate your hard candies by color before crushing them. Place a single color in a resealable bag and crush with a meat mallet or rolling pin. Aim for a coarse, pebble-like consistency, avoiding both fine powder and large chunks, for optimal melting.
- Filling the cookie windows approximately two-thirds full with crushed candy is crucial to prevent overflowing during baking. A toothpick can help gently guide the candy into intricate points.
Nutrition Information
Calories: 195kcal | Carbohydrates: 24g | Protein: 2g | Fat: 9g | Saturated Fat: 5g | Cholesterol: 40mg | Sodium: 66mg | Potassium: 28mg | Sugar: 10g | Vitamin A: 305IU | Calcium: 8mg | Iron: 1mg
Did you make this recipe?
Tag @dinneratthezoo on Instagram and hashtag it #dinneratthezoo – we’d love to see your creations!