
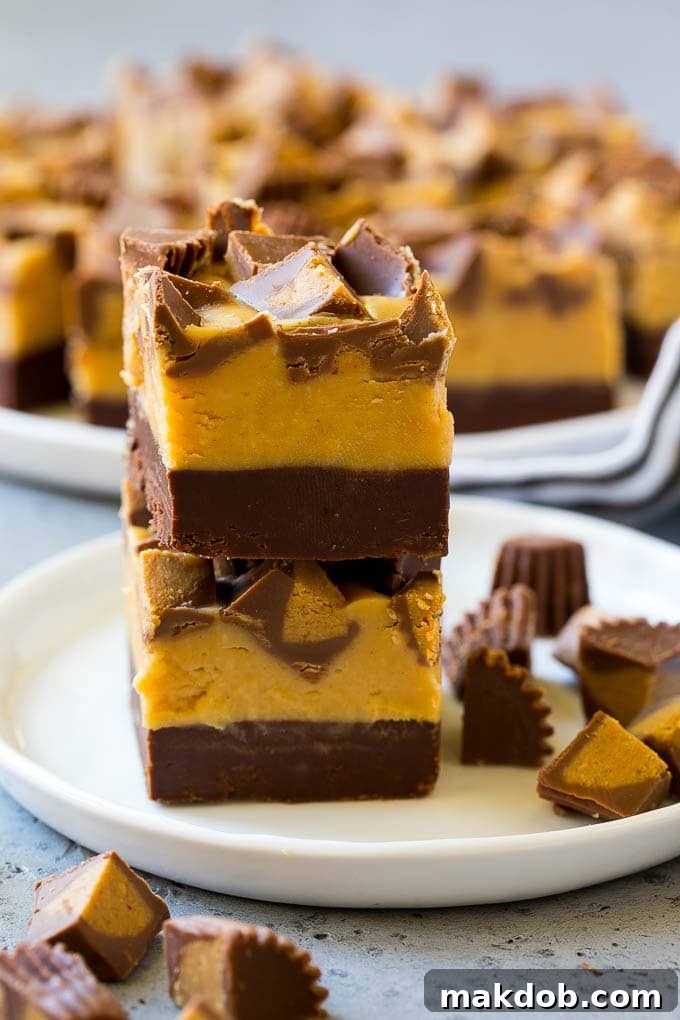
Prepare to delight your taste buds with this incredible **chocolate peanut butter fudge** recipe! This is no ordinary sweet treat; it’s a beautifully layered confection featuring two distinct fudge flavors, elegantly crowned with irresistible mini peanut butter cups. Designed to be an effortless yet impressive dessert, it’s absolutely perfect for any gathering, holiday celebration, or as a thoughtful homemade gift.
If you’re among the countless fans of the classic peanut butter cup, then this **peanut butter chocolate fudge** is about to become your new obsession. Its stunning layered appearance suggests hours of intricate work, but in reality, it’s remarkably simple to prepare. I often include this decadent fudge in my Christmas dessert spread, alongside other festive favorites such as Oreo brownies, red velvet cookies, snowball cookies, and peanut butter blossoms. It’s a guaranteed crowd-pleaser that brings joy to every bite.
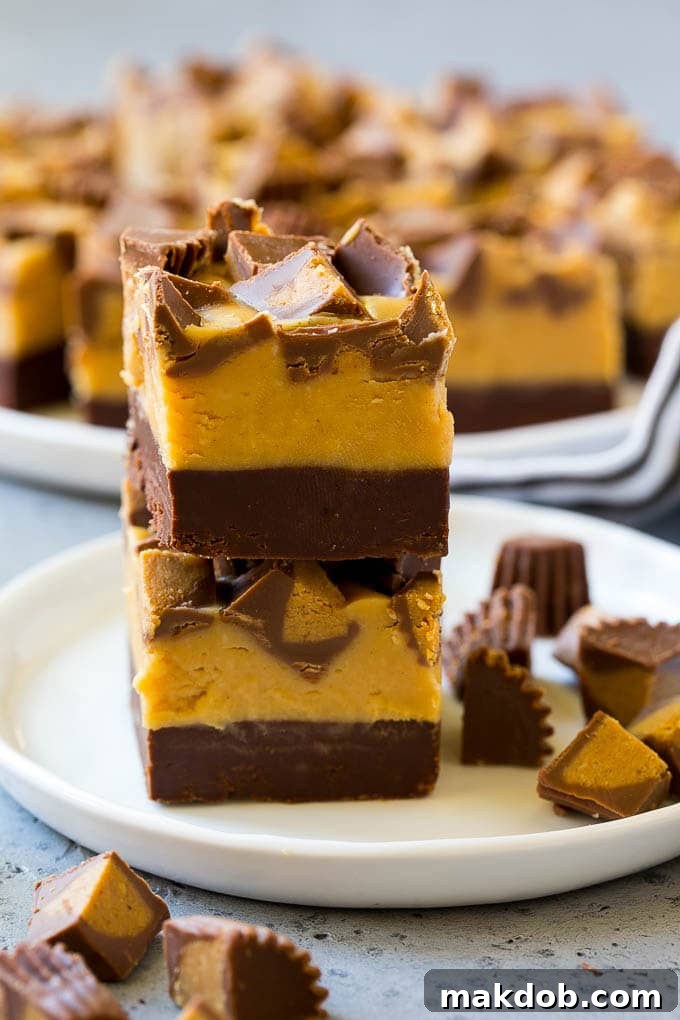
The timeless combination of chocolate and peanut butter is truly a match made in culinary heaven, a duo that simply cannot be surpassed. When these beloved flavors are transformed into creamy, melt-in-your-mouth fudge, the result is even more spectacularly delicious! This **homemade chocolate peanut butter fudge** recipe is straightforward to make, requiring minimal effort for maximum reward, and is guaranteed to satisfy even the most intense chocolate cravings.
Table of Contents
- Why You’ll Love This Chocolate Peanut Butter Fudge
- Essential Chocolate Peanut Butter Fudge Ingredients
- How to Make Layered Chocolate Peanut Butter Fudge
- Expert Tips for Flawless Fudge
- Frequently Asked Questions About Fudge
- Creative Flavor Variations
- Chocolate Peanut Butter Fudge Recipe Card
- More Irresistible Sweet Treats
Why You’ll Love This Chocolate Peanut Butter Fudge
There are countless reasons why this layered chocolate peanut butter fudge will become a staple in your dessert repertoire. Beyond its undeniably delicious taste, this recipe offers simplicity, versatility, and that irresistible nostalgic charm. It’s an ideal choice for busy bakers who want to create something truly special without spending hours in the kitchen. The striking two-tone layers make it a show-stopping centerpiece, perfect for impressing guests at potlucks, birthday parties, or holiday gatherings. Moreover, its rich, decadent flavor profile ensures that a small piece is incredibly satisfying, making it an excellent candidate for edible gifts during the festive season. It’s more than just a dessert; it’s a delightful experience waiting to happen, combining the best of both worlds in every bite.
Essential Chocolate Peanut Butter Fudge Ingredients
Crafting this luscious, layered fudge requires a selection of readily available ingredients, ensuring that anyone can whip up this delightful treat in their own kitchen. For the rich, smooth chocolate base, you’ll need high-quality **semisweet chocolate chips**, a can of **sweetened condensed milk** for that essential creamy texture and underlying sweetness, and a touch of **butter** to give it a luxurious mouthfeel. The vibrant **peanut butter layer** calls for smooth, **creamy peanut butter** – ensure it’s not the natural, oil-separated kind for best results – more butter for richness, a hint of **vanilla extract** to enhance the overall flavors, and a generous amount of **powdered sugar** to achieve its perfect, firm-yet-creamy consistency. Finally, to top it all off and add that classic, unmistakable touch, you’ll need **miniature peanut butter cups**, quartered for easy pressing and enjoyment. Remember, using fresh, good-quality ingredients makes a significant difference in the final taste and texture of your homemade fudge!
How to Make Layered Chocolate Peanut Butter Fudge
Creating this stunning layered chocolate peanut butter fudge is surprisingly simple, primarily using your microwave for ease and speed. This method makes homemade fudge accessible to everyone, ensuring a perfect batch every time. Here’s a detailed, step-by-step overview of the process:
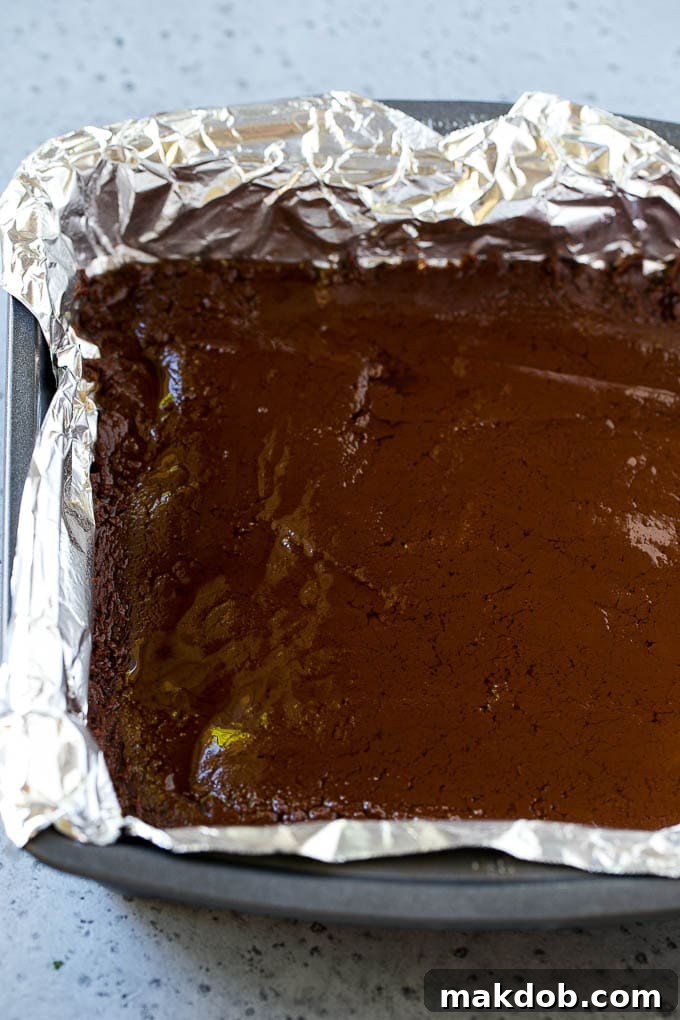
- Prepare Your Pan: Begin by lining a 9-inch square baking dish with aluminum foil or parchment paper. Ensure you leave a generous 2-inch overhang on all sides; this will act as convenient handles for lifting the set fudge later. Lightly coat the entire surface of the foil or paper with cooking spray to prevent any sticking, making removal effortless.
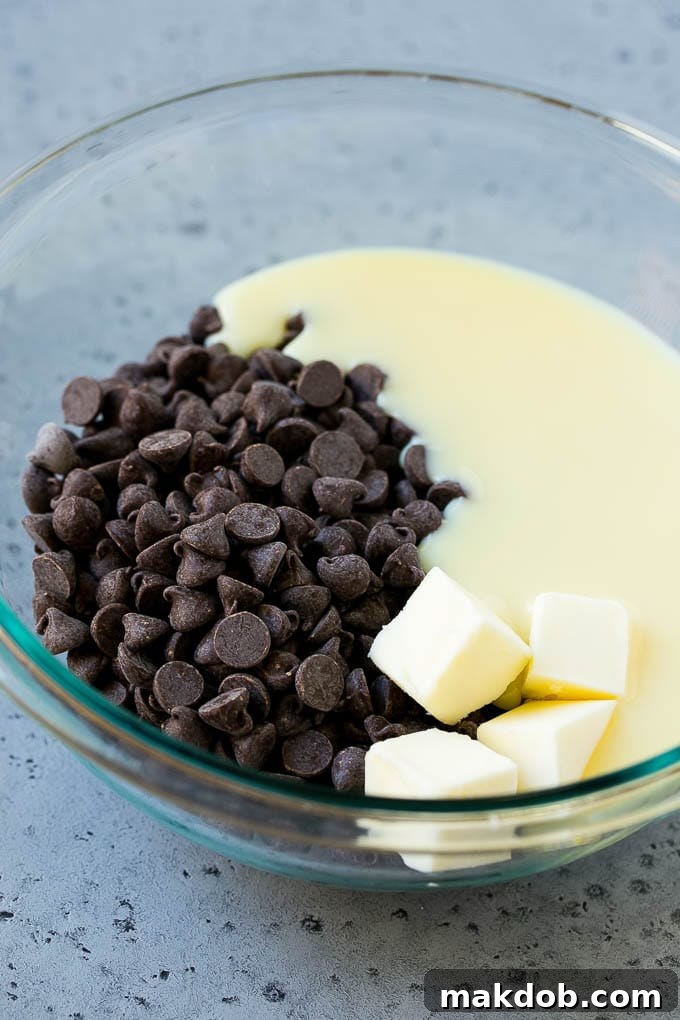
- Craft the Chocolate Layer: In a large microwave-safe bowl, combine the semisweet chocolate chips, the entire can of sweetened condensed milk, and one tablespoon of butter. Microwave the mixture on high power in short, controlled intervals. Start with 60 seconds, then remove and stir vigorously. Return it to the microwave for an additional 30 seconds if needed. Continue stirring until the chocolate is fully melted and the mixture transforms into a smooth, glossy, uniform consistency.
- Pour the Chocolate Base: Immediately pour the warm chocolate mixture into your meticulously prepared pan. Working quickly, use an offset spatula or the back of a sturdy spoon to spread it evenly and firmly across the bottom of the pan, forming a solid, smooth layer. It’s crucial for this layer to still be warm when you add the next one.
- Prepare the Peanut Butter Layer: In a separate large microwave-safe bowl, combine the creamy peanut butter, the remaining butter (cut into slices for quicker melting), and the vanilla extract. Heat this mixture in 45-second increments in the microwave, stirring after each until all ingredients are melted and smoothly combined.
- Incorporate Powdered Sugar: Once the peanut butter mixture is smooth and warm, gradually begin adding the powdered sugar. Whisk constantly as you add the sugar, incorporating it fully until the mixture thickens into a rich, spreadable fudge consistency. This step requires a bit of muscle but is key to the peanut butter layer’s texture.
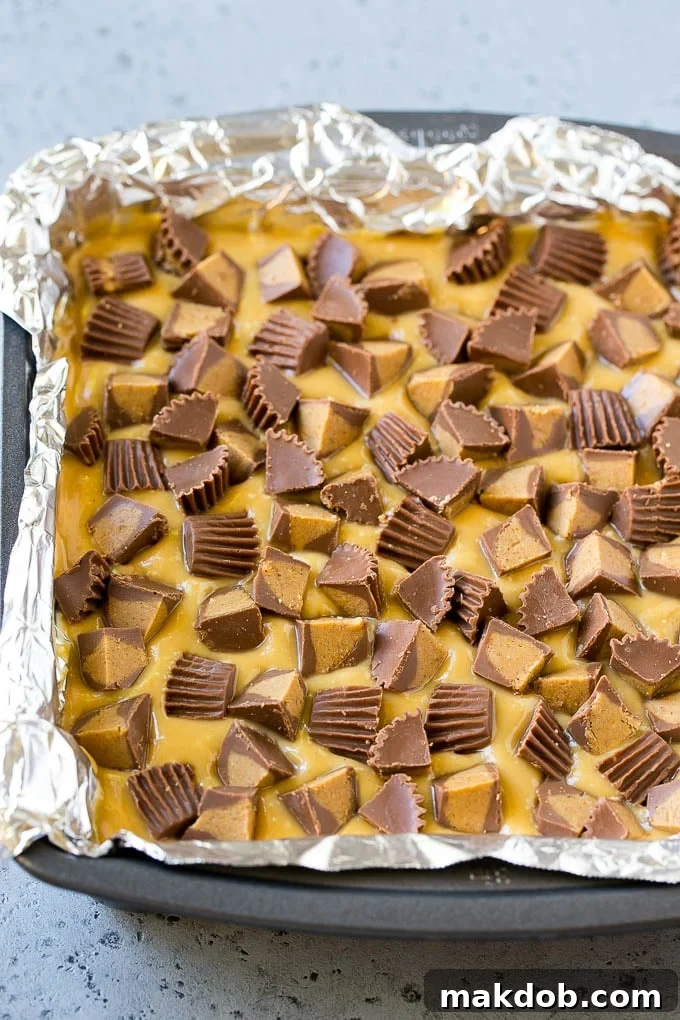
- Layer and Top: Without delay, pour the peanut butter mixture directly over the still-warm chocolate layer in the pan. Gently spread it evenly to create the second beautiful layer. While the peanut butter layer is still soft and pliable, quickly arrange and lightly press the quartered mini peanut butter cups onto its surface.
- Chill and Serve: Place the entire pan in the refrigerator for a minimum of 1 hour, or until the fudge is completely firm and set. Once chilled, use the foil overhangs to carefully lift the entire block of fudge out of the pan. Transfer it to a clean cutting board and, using a sharp knife, slice it into 36 perfect, bite-sized squares. Serve immediately and enjoy!
Expert Tips for Flawless Fudge
- It is absolutely crucial to make sure you **layer the fudge while everything is still warm**. The warmth helps the two distinct layers adhere beautifully, ensuring your fudge holds together perfectly when cut. If you attempt to layer warm peanut butter fudge onto a cool chocolate base, the layers may separate, spoiling the pristine presentation. To facilitate this, have all your ingredients precisely measured and ready before you begin, allowing you to work quickly and efficiently. Time is of the essence for perfect adhesion!
- For the best consistency and taste in your peanut butter layer, this recipe performs optimally with **creamy peanut butter**. Avoid using natural peanut butter, as its oil separation can lead to a greasy or crumbly fudge texture that won’t set properly. Stick to the classic, processed creamy varieties for reliable results that will integrate smoothly with the other ingredients.
- The quality of your chocolate chips directly impacts the flavor of your fudge. Invest in a **good quality brand of semisweet chocolate chips** for the most decadent and rich chocolate flavor. I personally recommend premium brands like Guittard or Ghirardelli, as they melt smoothly and offer a superior taste experience compared to generic alternatives. Using a lower quality chocolate can result in a grainy texture or a less intense chocolate flavor.
- This particular fudge is exceptionally rich and incredibly satisfying, meaning a little goes a long way! Don’t feel obliged to cut massive portions. Its intense flavor means that even small squares pack a punch. You can cut the squares into smaller, more manageable sizes (e.g., 1-inch squares), and still provide a wonderfully **satisfying treat** that everyone can enjoy without feeling overwhelmed by its richness. This also makes it ideal for sharing or as part of a larger dessert platter.
- **Proper Storage is Key:** To maintain its freshness and delightful texture, always store your homemade chocolate peanut butter fudge in an airtight container. When refrigerated, it will remain wonderfully fresh for up to one week. For extended enjoyment, fudge can also be frozen for up to two months. When ready to serve from frozen, simply thaw it in the refrigerator overnight or at room temperature for a few hours until it reaches your desired texture.
Quick Tip: Storage Solutions
Fudge will stay wonderfully fresh in an airtight container when stored in the refrigerator for up to one week. For extended enjoyment, you can also freeze fudge for up to two months, ensuring you always have a delightful treat on hand.
Frequently Asked Questions About Fudge
While both chocolate bars and chocolate fudge share a delicious chocolate flavor, their textures and fundamental ingredient lists set them apart significantly. Chocolate bars are typically firm, crisp, or snappy, and are primarily made from cocoa solids, cocoa butter, and sugar, sometimes with milk solids and emulsifiers. Fudge, on the other hand, is distinctly softer, creamier, and much sweeter, with a melt-in-your-mouth consistency that is achieved through a different process. Its unique texture comes from key ingredients like butter and sweetened condensed milk (or other forms of milk and sugar cooked to a specific temperature), which are not present in standard chocolate bars. This recipe, in particular, uses sweetened condensed milk to achieve its perfect, velvety smooth consistency, resulting in a richer, denser treat than a typical chocolate bar.
Fudge is a type of confectionery that is traditionally made by boiling sugar, butter, and milk (or cream) to the soft-ball stage (around 238-240°F or 114-116°C), then beating the mixture vigorously while it cools to create a smooth, crystalline texture. Many modern and “quick” recipes, like this one, simplify the process by relying on the combination of melted chocolate chips and sweetened condensed milk, along with butter, effectively eliminating the need for a candy thermometer and tedious beating. Beyond these core components, fudge recipes can incorporate a wide array of additional ingredients for flavor and texture, such as marshmallow fluff for extra softness, various nuts (like walnuts or pecans) for crunch, different types of milk, or flavorings like vanilla extract, coffee, or peppermint. This versatility allows for endless creative variations, making fudge a beloved treat for many occasions.
FOLLOW ME
Creative Flavor Variations
While this classic chocolate peanut butter fudge is undeniably delicious and perfect as-is, one of its greatest appeals is how easily you can customize the ingredients to perfectly suit your personal tastes, dietary preferences, or adapt it for different occasions. Get creative with these exciting ideas to make it uniquely yours:
- **Peanut Butter Alternatives:** If you or your guests have peanut allergies, or you simply want to try something different, consider making this recipe with delicious cookie butter (like Biscoff spread) or creamy almond butter. Should you choose these nut-free or alternative butter options, remember to omit the peanut butter cups from the topping. Instead, try using chopped almonds or slivered almonds for an almond butter fudge, or crushed Biscoff cookies for a cookie butter version to complement the flavor profile beautifully and add a delightful crunch.
- **Chocolate Choices:** The base layer of fudge, originally made with rich semisweet chocolate, is wonderfully versatile. Feel free to experiment with other types of chocolate to alter the flavor intensity and sweetness. White chocolate will yield a sweeter, milder fudge with a creamy, almost vanilla-like flavor, while milk chocolate will provide a classic, creamy candy bar taste that many adore. For those who prefer a deeper cocoa flavor and less sweetness, dark chocolate chips can be used, offering a more sophisticated and intense chocolate experience.
- **Exciting Toppings:** The mini peanut butter cups are a fantastic topping, adding both flavor and visual appeal, but don’t stop there! Elevate your fudge with other exciting textures and flavors. Consider adding colorful **chocolate sprinkles** for a festive look, especially for celebrations. A generous sprinkle of **chopped peanuts** (or any nut of choice) can add an extra crunch and a more intense nutty flavor. For an added layer of texture and a burst of candy flavor, try **crushed peanut butter candy** such as Butterfinger or Reese’s Pieces. A decorative drizzle of caramel sauce or melted white chocolate could also add an elegant touch to the finished squares.
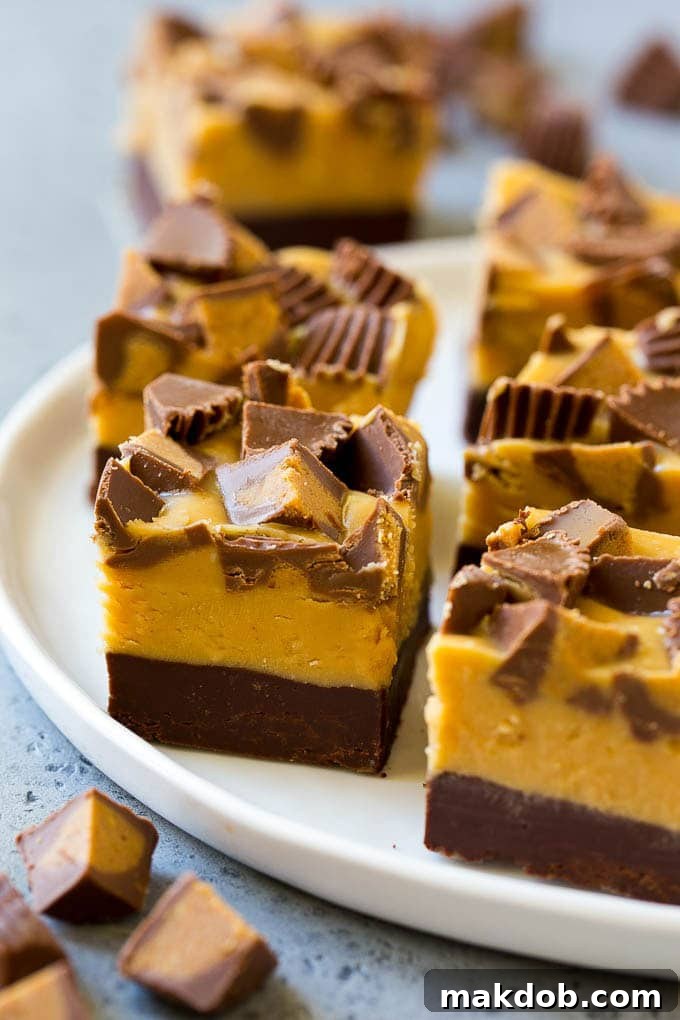
I find myself making this delectable **chocolate peanut butter fudge** every single year for the holidays, and it has truly become a cherished family tradition. Without fail, it garners rave reviews and requests for the recipe from all our friends and family, making it an indispensable part of our festive celebrations. It’s more than just a dessert; it’s a taste of home and happiness, a simple pleasure that brings smiles to everyone’s faces. This easy recipe ensures that you too can share in this delightful tradition, creating lasting memories with every sweet piece.
Chocolate Peanut Butter Fudge Recipe Card
Chocolate Peanut Butter Fudge
📌Pin Recipe
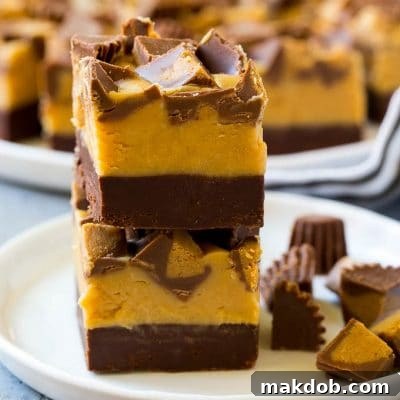
This recipe for chocolate peanut butter fudge is a layered treat made with two types of fudge and topped with peanut butter cups. It’s an easy treat that’s perfect for parties and gift giving!
Ingredients
For the chocolate layer
- 2 cups semisweet chocolate chips (do not use Nestle Toll House, they do not melt well)
- 14 ounce can sweetened condensed milk
- 1 tablespoon butter
- Cooking spray
For the peanut butter layer
- 1 cup butter (cut into slices)
- 1 cup creamy peanut butter
- 1/2 teaspoon vanilla extract
- 3 1/2 cups powdered sugar
- 1 cup miniature peanut butter cups (quartered)
Instructions
- Coat an 9 inch square pan with cooking spray and line the pan with foil, leaving a 2 inch overhang on the sides. Coat the foil with cooking spray.
For the chocolate layer
- Place the chocolate chips, butter and sweetened condensed milk in a microwave safe bowl.
- Heat for 60 seconds, then stir and heat for an additional 30 seconds or until melted. Stir until smooth.
- Use an offset spatula to firmly press the chocolate fudge into an even layer in the bottom of the pan. Immediately prepare the peanut butter layer to put over the warm chocolate layer.
For the peanut butter layer
- Place the peanut butter, butter and vanilla in a large microwave safe bowl. Heat in 45 second increments until melted.
- Stir until smooth, then gradually add the powdered sugar to the peanut butter mixture while whisking constantly.
- Immediately pour the peanut butter mixture over the chocolate layer. Quickly press the peanut butter cups into the top of the peanut butter layer.
- Chill until firm, then use the foil to lift the fudge out of the pan and cut into 36 squares.
Notes
- It’s important to put the two layers together when both types of fudge are warm so that they will stick together and come out as one piece when you cut the fudge. If you put warm peanut butter fudge onto cool chocolate fudge the layers may not stick together when you go to cut them.
Nutrition
Calories: 240kcal
|
Carbohydrates: 24g
|
Protein: 3g
|
Fat: 15g
|
Saturated Fat: 7g
|
Cholesterol: 18mg
|
Sodium: 119mg
|
Potassium: 137mg
|
Fiber: 1g
|
Sugar: 21g
|
Vitamin A: 200IU
|
Vitamin C: 0.2mg
|
Calcium: 31mg
|
Iron: 0.7mg
Did you make this recipe?
Tag @dinneratthezoo on Instagram and hashtag it #dinneratthezoo
More Irresistible Sweet Treats
Peanut Butter Chocolate Gooey Butter Cake
Total Time: 55 mins
Microwave Caramels with Sea Salt
Total Time: 9 mins
Chocolate Peanut Butter Pie (No Bake)
Total Time: 21 mins
Peanut Butter Brownies
Total Time: 50 mins
Rocky Road Fudge
Total Time: 12 mins
Quick Tip: Share Your Feedback!
We’d love to hear from you! Please consider leaving a 5-star ⭐⭐⭐⭐⭐ rating in the recipe card above & a review in the comments section further down the page.