
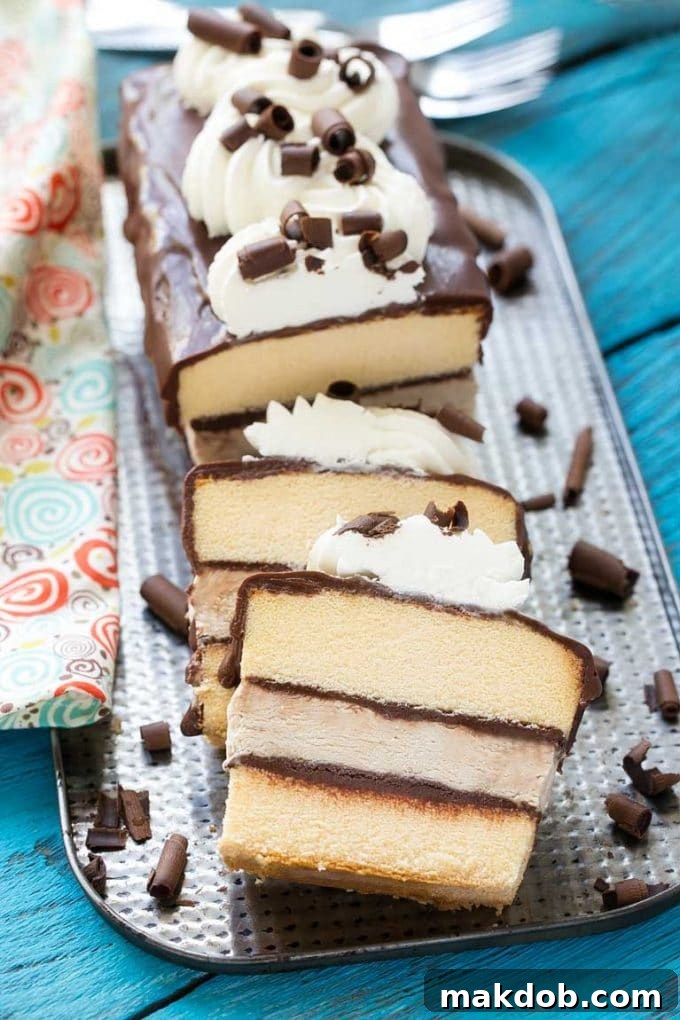
Welcome to a dessert experience that promises to elevate your entertaining game: the Tiramisu Ice Cream Cake. Imagine the classic Italian delight, tiramisu, transformed into a refreshing, frozen masterpiece. This isn’t just any ice cream cake; it’s a meticulously layered creation featuring rich, no-churn coffee ice cream, fluffy pound cake, and a luxurious chocolate ganache. Designed for those who appreciate both convenience and gourmet flavor, this cake is an absolute showstopper, perfect for gatherings, celebrations, or simply treating yourself to an extraordinary sweet escape. If you’re a devoted fan of tiramisu, prepare to be captivated by this innovative, chilled rendition of your favorite dessert.
Why This Tiramisu Ice Cream Cake Will Be Your New Favorite Dessert
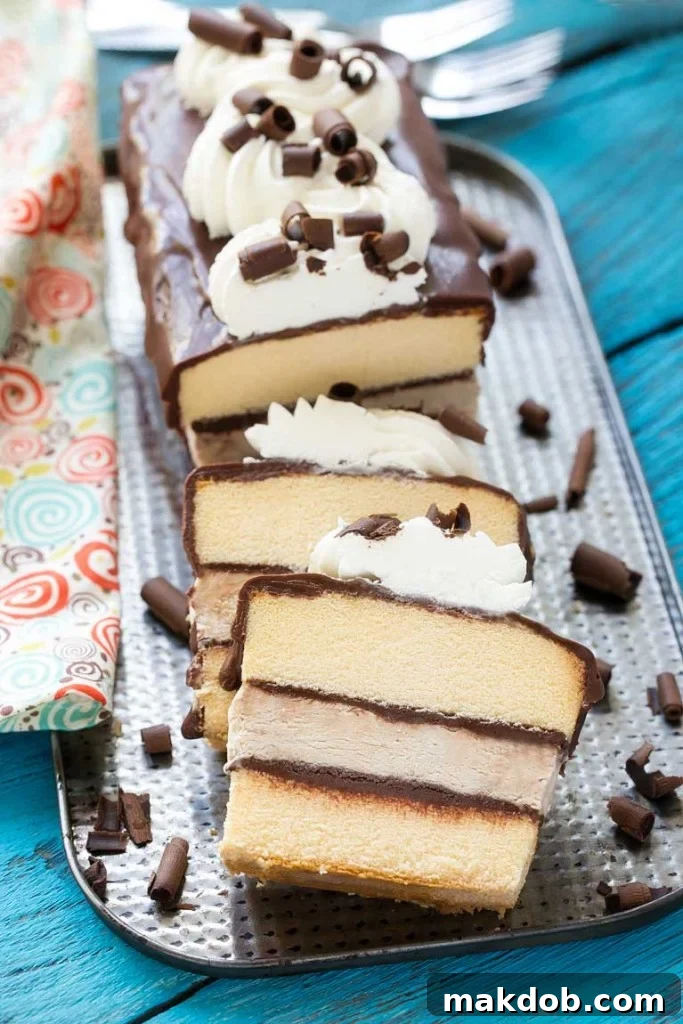
There’s something inherently delightful about an ice cream cake, especially when it effortlessly combines ease of preparation with sophisticated flavors. This Tiramisu Ice Cream Cake stands out as a culinary marvel, blending the beloved taste profile of classic tiramisu – rich coffee, creamy sweetness, and deep chocolate – into a cool, refreshing dessert. Its no-churn ice cream base simplifies the process dramatically, eliminating the need for an ice cream maker without compromising on creaminess or flavor. Plus, as a make-ahead dessert, it frees you up to enjoy your guests when entertaining, making it an ideal choice for busy hosts.
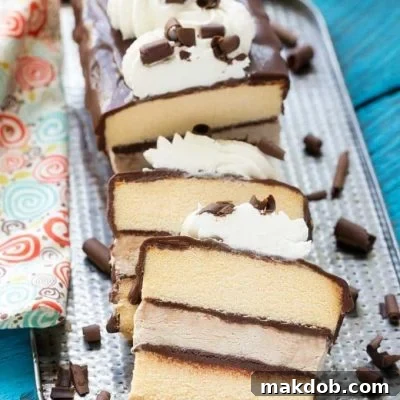
The beauty of this recipe lies in its elegant simplicity. Each layer contributes to a harmonious symphony of textures and tastes: the delicate sponge of pound cake, the smooth, vibrant coffee ice cream, and the luxurious, melt-in-your-mouth chocolate ganache. It’s a dessert that not only tastes incredible but also looks incredibly impressive with its distinct, beautifully defined layers. Prepare to receive endless compliments as your guests savor each spoonful, wondering how you managed to create such a seemingly complex yet utterly delicious treat with such apparent ease.
Deconstructing the Deliciousness: Key Components of Your Tiramisu Ice Cream Cake
Crafting this exceptional Tiramisu Ice Cream Cake involves three primary components, each playing a crucial role in achieving the perfect balance of flavor and texture. Understanding these elements and how they come together will empower you to create a dessert that’s both authentic to tiramisu’s spirit and uniquely refreshing.
The No-Churn Coffee Ice Cream: Effortless Elegance
The heart of this ice cream cake is its no-churn coffee ice cream. What makes it “no-churn”? It means you don’t need a specialized ice cream machine! This ingenious method relies on just a few simple ingredients to create a wonderfully creamy and smooth ice cream: heavy cream, sweetened condensed milk, and mocha-flavored iced coffee. The heavy cream is whipped to stiff peaks, then gently folded with the coffee and condensed milk mixture. This process incorporates air, giving the ice cream its light, airy texture without any churning. The mocha iced coffee infuses a rich, aromatic coffee flavor characteristic of tiramisu, with a subtle hint of chocolate. For best results, ensure your heavy cream is very cold before whipping. This ice cream can be made up to a week in advance, providing ultimate flexibility for your planning.
The Pound Cake Base: A Foundation of Flavor
For the cake layer, a pound cake is used, offering a sturdy yet tender foundation that absorbs just enough of the surrounding flavors without becoming soggy. While you could certainly bake a homemade pound cake for an extra personal touch, a good quality store-bought pound cake is a fantastic time-saver and works perfectly in this recipe. Its dense crumb provides an excellent contrast to the creamy ice cream and rich ganache. Consider choosing a vanilla or plain pound cake to allow the coffee and chocolate flavors to truly shine. If you prefer a more traditional tiramisu experience, you could also experiment with ladyfingers soaked in a little espresso, though a pound cake provides a more robust structure for a frozen cake.
The Rich Chocolate Ganache: A Decadent Embrace
No tiramisu-inspired dessert would be complete without chocolate, and this cake features a luscious chocolate ganache. This simple yet sophisticated topping is incredibly easy to make, typically requiring just two ingredients: semisweet chocolate chips and heavy cream. Heating the cream until scalding hot and then pouring it over the chocolate chips, followed by a gentle stir, yields a smooth, glossy, and intensely chocolatey ganache in mere minutes. This ganache serves a dual purpose: it forms delicious layers within the cake and provides a beautiful, pourable finish for the top. For a slightly different texture, you could also explore using a homemade magic shell recipe, which hardens when it comes into contact with the cold ice cream, offering a satisfying snap.
Step-by-Step Guide to Crafting Your Tiramisu Ice Cream Cake
While this recipe is straightforward, it does require some chilling time between layers, so planning ahead is key. Let’s walk through the process, ensuring each step brings you closer to a stunning and delicious dessert.
Phase 1: Preparing the No-Churn Coffee Ice Cream
- **Whip the Cream:** In a large mixing bowl, using a whisk attachment (or a hand mixer), beat 1 cup of cold heavy cream until stiff peaks form. This usually takes about 3-4 minutes. Stiff peaks mean the cream holds its shape when the whisk is lifted.
- **Combine Coffee and Condensed Milk:** In a separate bowl, gently stir together 3/4 cup of mocha flavored iced coffee and 3/4 cup of sweetened condensed milk until well combined.
- **Fold Gently:** Gradually pour the coffee mixture into the whipped cream, a little at a time. Using a spatula, gently fold the mixture until it’s fully incorporated. Be careful not to deflate the whipped cream.
- **Freeze:** Transfer the ice cream base into a freezer-safe container, cover it, and freeze for at least 3 hours. For optimal texture and firmness, it’s best to freeze it for 4 hours or even overnight. You can make this ice cream up to a week in advance.
Phase 2: Crafting the Chocolate Ganache
- **Heat the Cream:** In a small saucepan or microwave-safe bowl, heat 1/4 cup plus 2 tablespoons of heavy cream until it’s scalding hot. You’ll see small bubbles around the edges, indicating it’s just about to boil.
- **Melt the Chocolate:** Pour the hot cream over 1 1/2 cups of semisweet chocolate chips. Let it sit for a minute, then stir until the chocolate is completely melted and the mixture is smooth and glossy. If any lumps remain, microwave for 5-second intervals, stirring in between, until smooth.
- **Cool:** Allow the ganache to cool for about 5 minutes, or until it’s slightly thickened but still pourable.
Phase 3: Assembling Your Tiramisu Ice Cream Cake
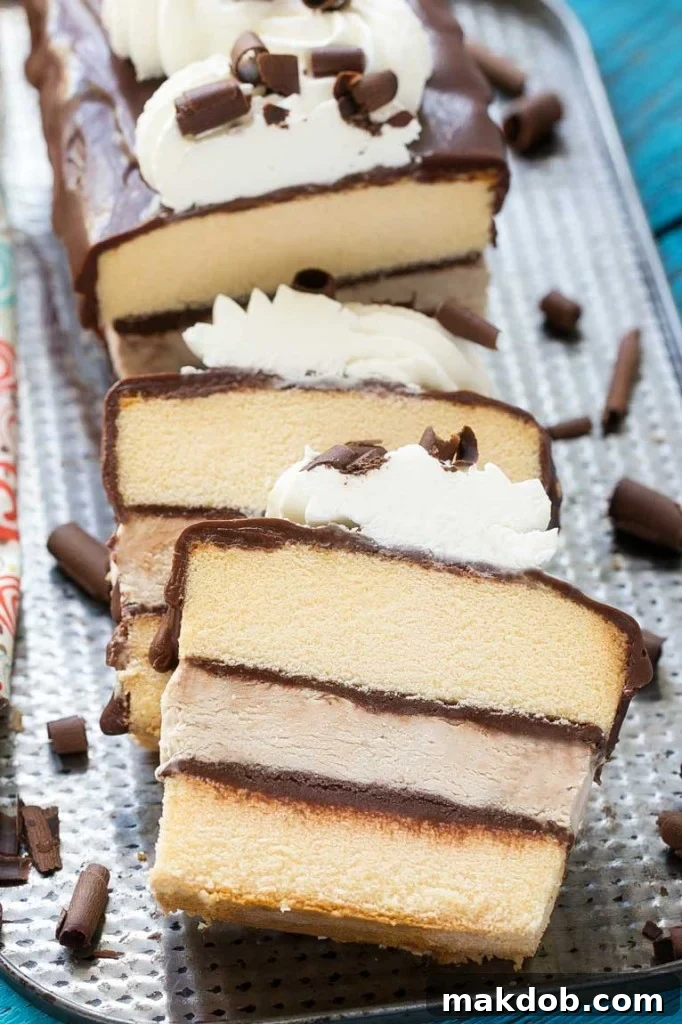
- **Prepare the Cake:** Slice the 16-ounce pound cake lengthwise into two equal layers. This is often easier if the pound cake is cold.
- **First Layer:** Place one slice of pound cake on your serving platter or in your cake pan (if using a springform pan, line it first). Spread 1/3 of the prepared chocolate ganache evenly over this bottom layer of cake.
- **Ice Cream Layer:** Spread the coffee ice cream over the ganache. For easier spreading, you may need to let your frozen ice cream sit at room temperature for a few minutes to soften slightly. Create a smooth, even layer.
- **Freeze & Repeat:** Place the cake and ice cream layer back into the freezer until it’s frozen solid, which usually takes about an hour. Once firm, remove from the freezer and spread another 1/3 of the ganache over the ice cream layer. Carefully place the second pound cake layer on top.
- **Final Freeze:** Return the assembled cake to the freezer for at least 30 minutes to firm up.
Phase 4: Finishing Touches and Decoration
- **Final Ganache Pour:** Microwave the remaining 1/3 of the ganache for about 10 seconds, or just until it reaches a pourable consistency. Remove the cake from the freezer and pour this ganache over the top, spreading it evenly to coat.
- **Set the Ganache:** Place the cake back into the freezer until the final ganache layer sets, approximately 15-20 minutes.
- **Optional Garnishes:** While the cake is delicious as is, garnishing takes it to the next level.
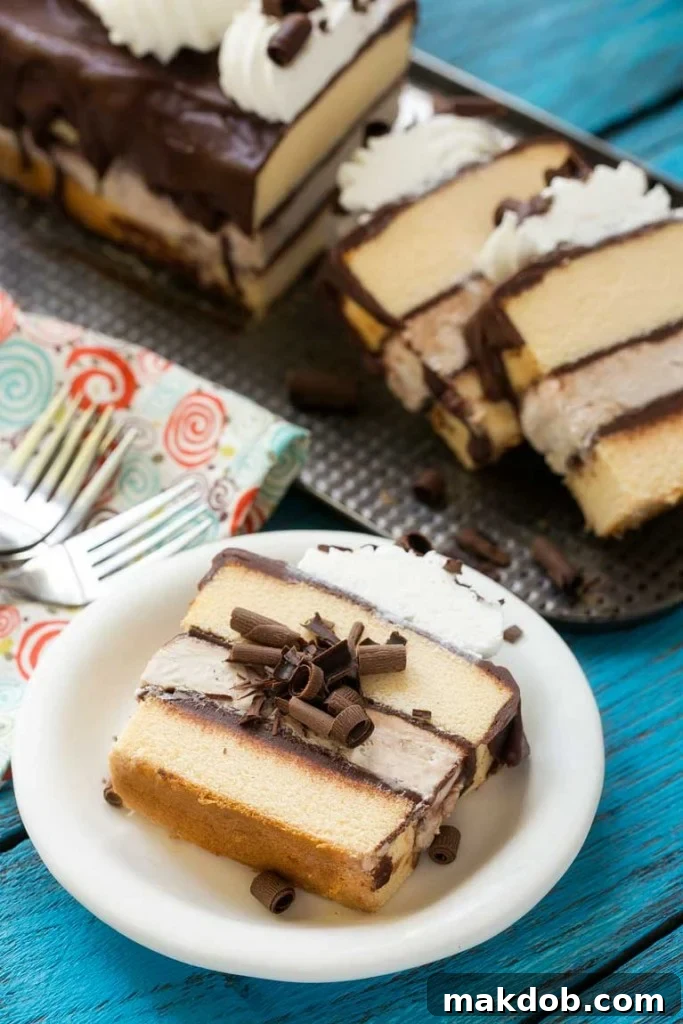
Crafting Your Garnishes (Optional, but Highly Recommended!)
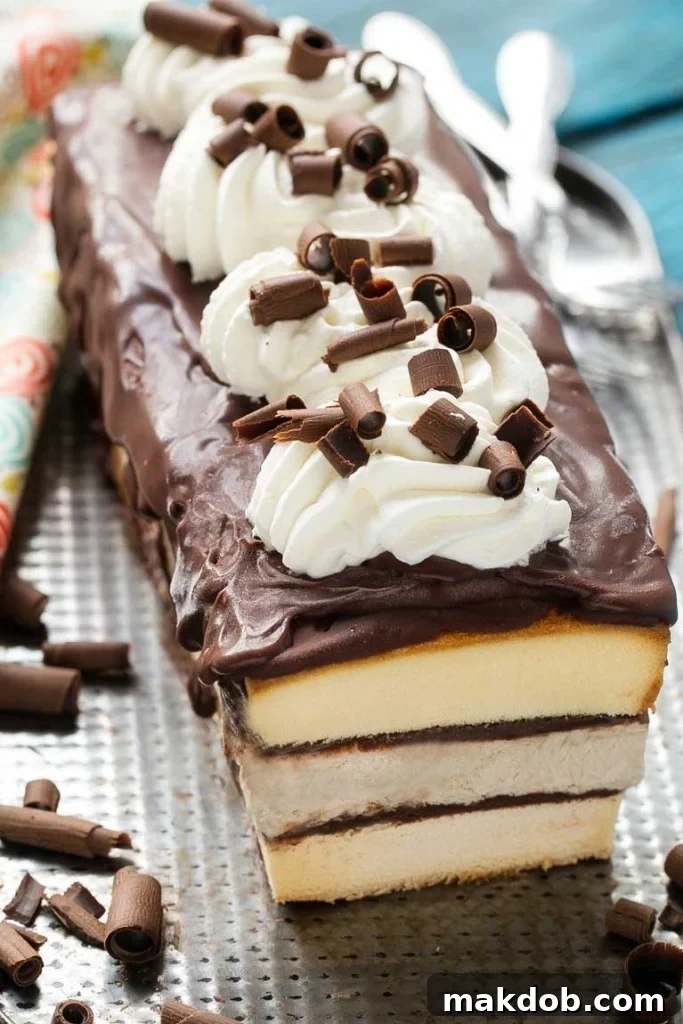
- **Whipped Cream:** In a mixer, beat 1/2 cup of cold heavy cream until stiff peaks form (3-4 minutes). Add 1 tablespoon of sugar and beat for another 30 seconds. Transfer to a piping bag fitted with a star tip and pipe a decorative design on top of your cake.
- **Chocolate Curls:** This elegant touch is surprisingly simple! Take one semisweet chocolate bar and warm it slightly in your hands or a warm spot. To test if it’s ready, gently press your finger on the surface; if it leaves a fingerprint, it’s warm enough. Use a vegetable peeler to shave off delicate chocolate curls directly onto the whipped cream.
Pro Tips for the Perfect Tiramisu Ice Cream Cake
Achieving a picture-perfect and delicious Tiramisu Ice Cream Cake is easy with a few insider tips:
- **Chill is Your Friend:** The success of this cake heavily relies on freezing time. Ensure each layer is sufficiently frozen before adding the next to prevent melting and messy layers.
- **Pound Cake Temperature:** While the recipe suggests slicing cold pound cake for easier handling, ensure it’s not too frozen or it will crumble.
- **Ice Cream Softness:** When spreading the ice cream, let it sit out for a few minutes until it’s just soft enough to spread easily, but not so soft that it starts to melt.
- **Ganache Consistency:** For pouring, your ganache should be fluid but not watery. If it’s too thick, microwave in very short bursts (5 seconds) until it reaches the desired consistency. If it’s too thin, let it cool a bit more.
- **Clean Slices:** To get those beautiful, clean layers when slicing, dip a sharp knife in hot water and wipe it clean between each cut.
- **Make Ahead Magic:** This cake is incredibly forgiving and truly shines as a make-ahead dessert. The flavors meld beautifully as it rests in the freezer.
Creative Variations & Customizations
Once you’ve mastered the classic Tiramisu Ice Cream Cake, feel free to experiment with these delightful variations:
- **Espresso Boost:** For a more intense coffee flavor, brush the pound cake layers with a little cooled espresso before adding the ganache.
- **Liqueur Infusion:** For an adult version, add a splash of Kahlua, rum, or coffee liqueur to your coffee mixture for the ice cream base.
- **Hazelnut Dream:** Incorporate a layer of chopped toasted hazelnuts between the ganache and ice cream, or mix hazelnut spread into your ganache.
- **White Chocolate Delight:** Replace semisweet chocolate with white chocolate for a creamier, milder ganache.
- **Fruit Fusion:** While not traditional tiramisu, a thin layer of raspberry or strawberry compote could add a lovely tart contrast.
- **Mascarpone Swirl:** For an even richer ice cream, you could swirl a few dollops of mascarpone cheese into your coffee ice cream base.
Tiramisu Ice Cream Cake
Pin
Sara Welch
1 hour 30 minutes
5 minutes
1 hour 35 minutes
Dessert
Italian
10 servings
Ingredients
For the ice cream
- 1 cup cold heavy cream
- 3/4 cup sweetened condensed milk
- 3/4 cup mocha flavored iced coffee
For the cake
- 16 ounce pound cake homemade or store bought
- 1 1/2 cups semisweet chocolate chips
- 1/4 cup + 2 tablespoons heavy cream
- 1/2 cup cold heavy cream
- 1 tablespoon sugar
- 1 semisweet chocolate bar
Instructions
- For the ice cream:
- In the bowl of a mixer fitted with a whisk attachment, beat the heavy cream until stiff peaks form, about 3-4 minutes. In another bowl, stir together the iced coffee and condensed milk. Pour the coffee mixture into the whipped cream a little at a time, gently folding it into the whipped cream until all of the coffee mixture has been added.
- Pour the ice cream base into a container and freeze for at least 3 hours, or up to a week.
- Heat the 1/4 cup + 2 tablespoons of heavy cream on the stove or in the microwave until it’s scalding hot – there will be little bubbles and it will be about to boil. Pour the heavy cream over the chocolate chips and stir until the chocolate is completely melted. If the chocolate doesn’t melt all the way in the hot cream you can microwave it for 5 seconds at a time until the mixture is smooth; let the ganache cool for 5 minutes.
- Slice the pound cake in half lengthwise (this is easier to do if it’s cold). Spread 1/3 of the ganache over the bottom layer of cake. Spread the ice cream over the ganache, creating a smooth even layer. You may need to let you ice cream sit at room temperature for a few minutes to reach a spreadable consistency. Place the cake and ice cream layer in the freezer until it’s frozen solid, about an hour. Remove from the freezer and spread with another 1/3 of ganache. Place the second cake layer on top. Freeze for 30 minutes.
- Microwave the remaining ganache for about 10 seconds until it reaches a pourable consistency. Remove the cake from the freezer and pour the remaining ganache over the top, spreading to coat the top evenly. Place the cake back into the freezer until the ganache sets up, about 15-20 minutes. You can serve the cake as is or add the optional garnishes (see below).
- For the garnishes:
- Beat the heavy cream with a mixer until stiff peaks form, about 3-4 minutes. Add the sugar and beat for 30 more seconds. Place the whipped cream into a large piping bag fitted with a star tip and pipe a design on top of the cake.
- Warm the chocolate bar in your hands or in a warm spot until your finger leaves a print when you touch the surface of the chocolate. Using a vegetable peeler, shave off chocolate curls. Place the curls on top of the whipped cream.
- The finished cake can be stored, loosely covered in the freezer, for up to 5 days.
Notes
Nutrition
Did you make this recipe?
Tag @dinneratthezoo on Instagram and hashtag it #dinneratthezoo
Serving and Storage Suggestions
To ensure your Tiramisu Ice Cream Cake is served at its best, remove it from the freezer about 10-15 minutes before slicing. This allows the ice cream to soften slightly, making it easier to cut and enjoy. For impeccably clean slices that showcase the beautiful layers, dip a long, sharp knife in hot water and wipe it dry before each cut. This simple trick prevents the ice cream from sticking and creates a smooth finish.
Once sliced, serve immediately to prevent excessive melting. This cake is a true indulgence on its own, but a sprinkle of cocoa powder, an extra drizzle of chocolate sauce, or a side of fresh berries could complement its rich flavors. Leftovers, if any, can be stored in the freezer for up to 5 days. Ensure it’s loosely covered with plastic wrap or aluminum foil to prevent freezer burn and to keep it tasting fresh. This make-ahead capability truly makes it a fantastic option for planned events, allowing you to prepare it well in advance and simply pull it out when dessert time arrives.
More Sweet Treats to Delight Your Palate
If you’re looking for more ways to cool off or expand your repertoire of delectable desserts, explore these other fantastic recipes:
- Brownie Pizza
- Chocolate Peanut Butter Pie
- Haystack Cookies
- Ice Cream Sandwich Cake
- Earthquake Cake
Enjoy the sweet journey!