
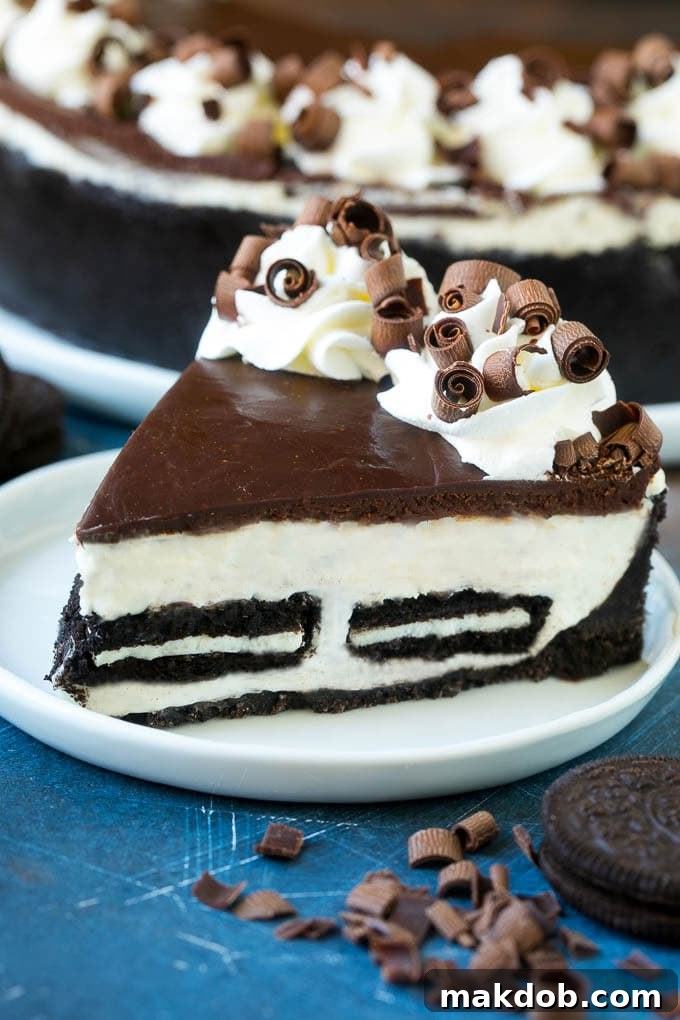
This no bake Oreo cheesecake is a dreamy dessert masterpiece, featuring a perfectly crisp Oreo cookie crust, a rich and creamy cheesecake filling generously studded with crushed Oreos, and often crowned with a luxurious chocolate ganache. It’s an effortlessly elegant treat, ideal for satisfying any chocolate lover’s craving without the need for an oven.
Indulge in the Ultimate No-Bake Oreo Cheesecake Experience
If you consider yourself a true aficionado of all things Oreo, prepare to be captivated by this truly decadent no-bake Oreo cheesecake. It’s more than just a dessert; it’s an experience that delivers a harmonious blend of textures and intensely satisfying chocolate-cream flavors. The best part? Its ‘no-bake’ nature means you can whip up this delightful creation all summer long, keeping your kitchen cool and your sweet tooth happy. For those constantly seeking more delightful Oreo-inspired treats, don’t forget to explore other favorites like my Oreo cookies and cream bars and classic chocolate-covered Oreos!
Why This Easy Oreo Cheesecake Will Become Your Go-To Dessert
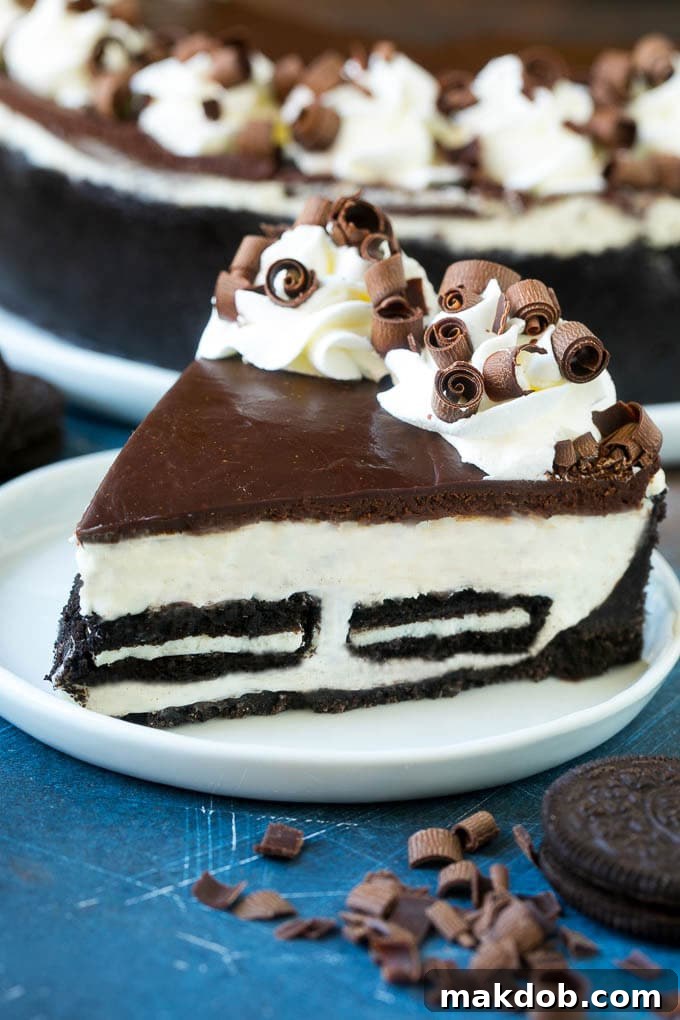
Have you ever encountered a dessert so exquisitely delicious, so perfectly balanced, that you find yourself unable to stop thinking about it until you secure another slice? For me, this no-bake Oreo cheesecake holds that coveted spot. Each bite offers the ideal amount of rich chocolate, luxurious creaminess, and satisfying richness, ensuring you’ll be eager for more. It transforms simple ingredients into an extraordinary treat that’s both impressive to look at and a joy to devour.
Crafting Your No-Bake Oreo Cheesecake: A Simple Guide
Creating this magnificent no-bake Oreo cheesecake is surprisingly straightforward, relying on distinct layers that build upon each other to form a cohesive and mouthwatering whole. The process begins with an incredible Oreo cookie crust, serving as a sturdy and flavorful foundation. This crisp base is then generously filled with a velvety, smooth no-bake cheesecake mixture, which is beautifully studded with even more crushed Oreo pieces. To elevate it further, a luscious chocolate fudge topping is poured over, creating a truly show-stopping dessert. Honestly, the most challenging part of this entire recipe is the patience required while the cheesecake chills in the refrigerator, firming up to perfection.
The Irresistible Oreo Cookie Crust
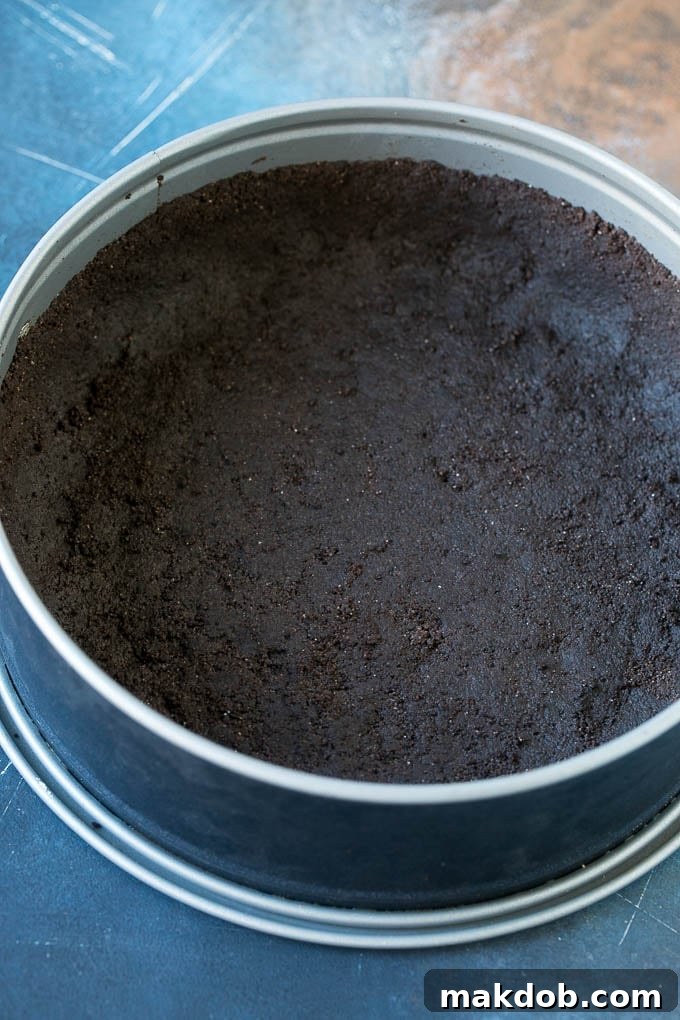
Every great cheesecake starts with a solid foundation, and for an Oreo cheesecake, nothing less than an Oreo cookie crust will do. This crust is incredibly simple to prepare, requiring just three ingredients: Oreo cookies, granulated sugar, and melted butter. The key is to finely crush the cookies, including their creamy filling, to create a consistent crumb. A food processor makes this task effortless, transforming the cookies into a fine, dark powder. Once combined with melted butter and a touch of sugar, this mixture is firmly pressed into the base and slightly up the sides of a springform pan. Chilling the crust for at least 30 minutes before adding the filling is crucial; it helps it set firmly, preventing crumbling when sliced and providing a wonderful textural contrast to the soft filling.
The Velvety Smooth Cheesecake Filling
The heart of this no-bake wonder is its creamy, dreamy cheesecake filling. It combines softened cream cheese with vanilla extract, granulated sugar, and heavy whipping cream. The secret to achieving that signature light yet rich texture lies in how these ingredients are combined. First, the cream cheese is beaten until perfectly smooth, ensuring no lumps remain. Then, vanilla and sugar are incorporated. Finally, the heavy whipping cream is added and beaten until stiff peaks form. This aeration is what gives the no-bake cheesecake its luscious, airy, and stable consistency, eliminating the need for baking. The filling is then generously mixed with more chopped or crushed Oreos, ensuring an explosion of cookie goodness in every bite.
Layering for Ultimate Oreo Indulgence
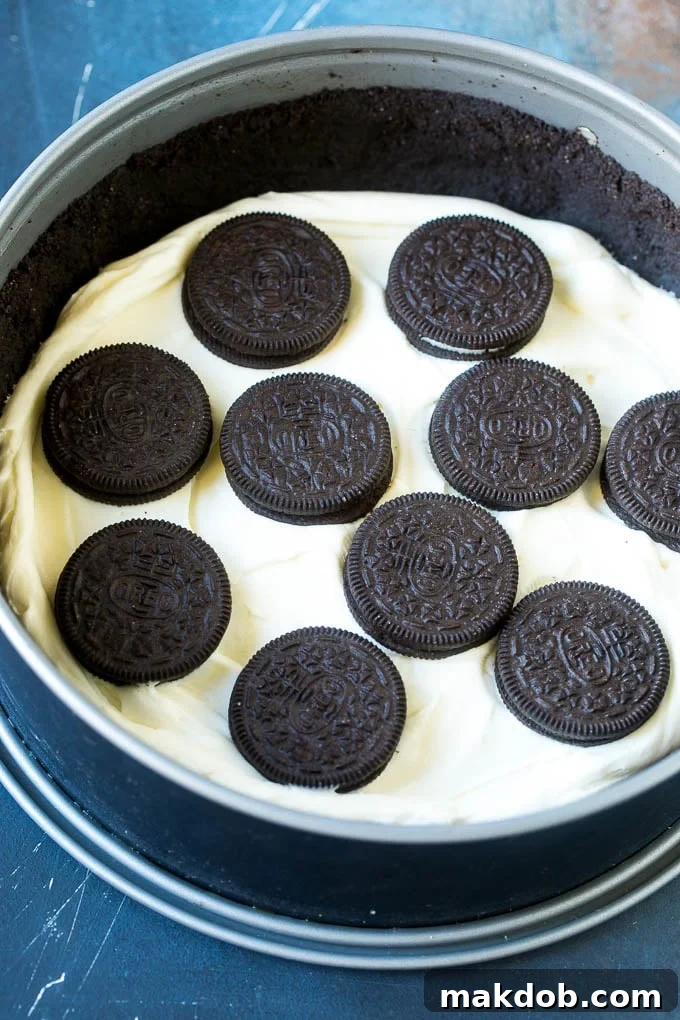
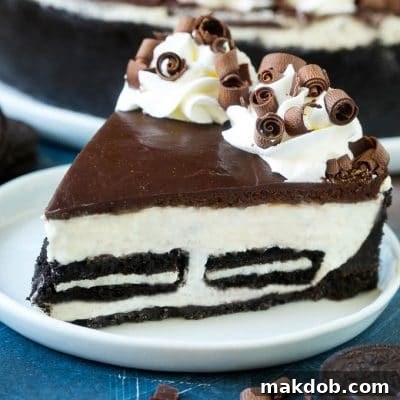
What sets this particular Oreo cheesecake apart is its delightful layering. Instead of simply mixing all the Oreos into the filling, this recipe suggests creating layers. After spreading a third of the cheesecake mixture into the chilled crust, a layer of whole Oreo cookies is carefully arranged on top. This process is repeated, alternating cheesecake filling with whole Oreos, culminating in a final layer of the creamy cheesecake mixture. This method ensures that each slice reveals visually appealing layers and provides pockets of intense Oreo crunch and flavor throughout the dessert. After assembling, the cheesecake takes another brief chill in the fridge before the final topping is added.
The Decadent Chocolate Ganache Topping
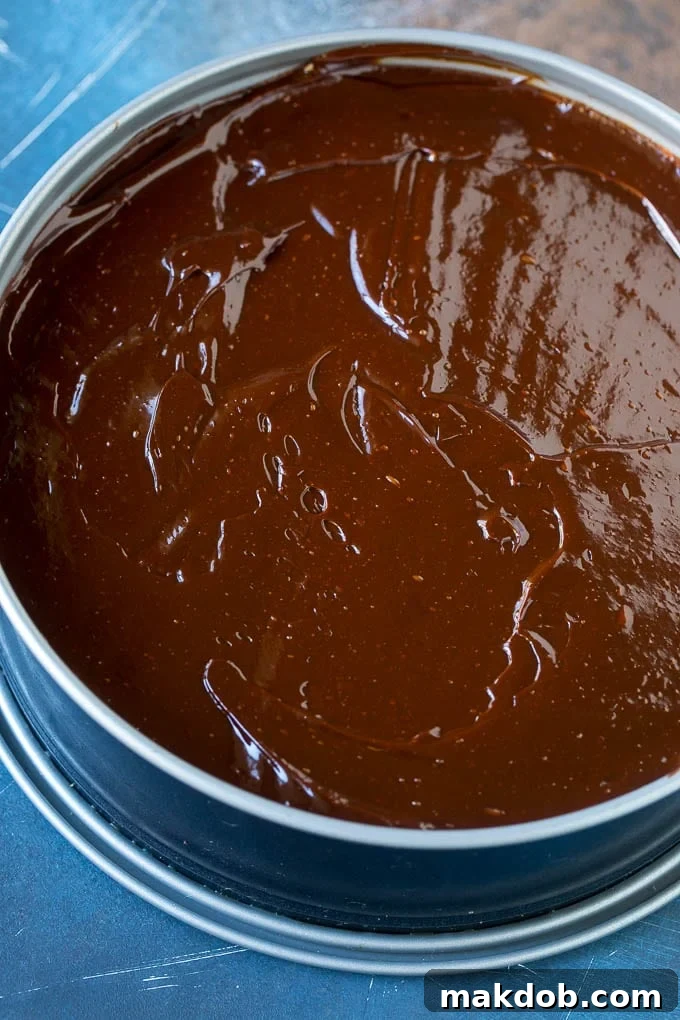
No Oreo cheesecake would be complete without a touch of rich chocolate on top. This recipe features a simple yet luxurious chocolate ganache. Made by heating heavy cream and then melting chopped semisweet chocolate and a pat of butter into it, the ganache creates a glossy, smooth, and deeply flavorful finish. The warm cream gently melts the chocolate, creating a velvety consistency that can be effortlessly spread over the chilled cheesecake. The butter adds an extra sheen and richness. This topping not only adds another layer of chocolatey goodness but also provides a beautiful contrast to the white cheesecake filling, making it even more visually appealing.
Essential Tips for No-Bake Oreo Cheesecake Perfection
-
Chilling for Success
The success of any no-bake cheesecake hinges significantly on adequate chilling time. This specific no-bake Oreo cheesecake requires a minimum of 6 hours in the refrigerator to properly firm up and achieve its optimal texture. For best results and the cleanest slices, preparing it a day in advance is highly recommended, allowing it to chill for up to 2 days. Always keep this cheesecake refrigerated until just before you plan to serve it, especially during warmer weather, to maintain its structural integrity and refreshing coolness.
-
Garnishing Your Masterpiece
While the cheesecake is delightful on its own, thoughtful garnishes can elevate its presentation and flavor profile. Consider a variety of options:
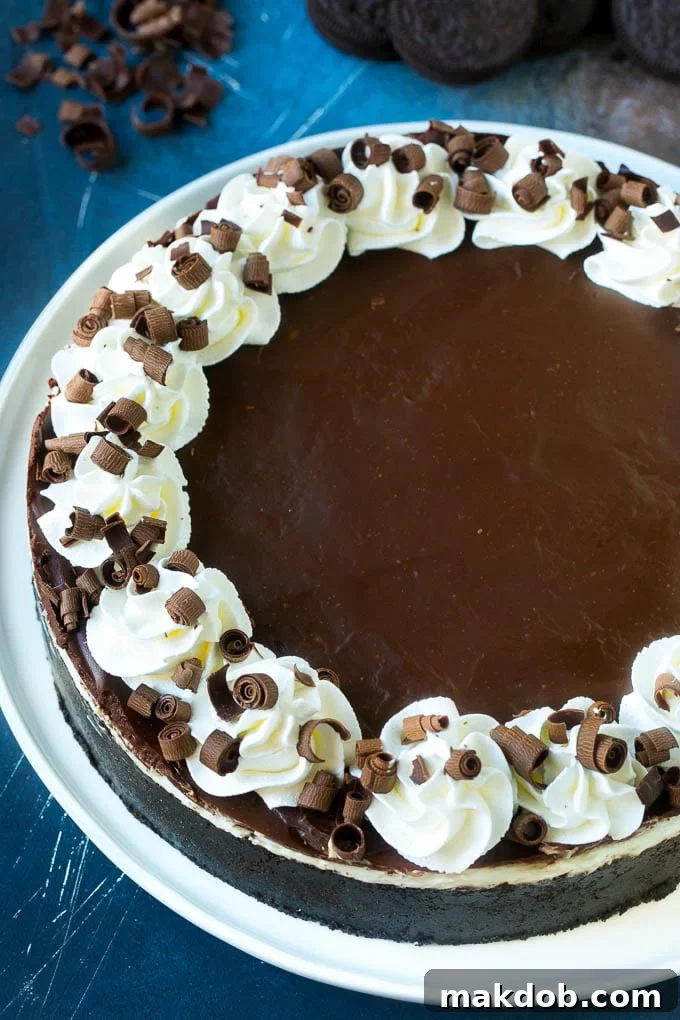
- Chocolate Curls: As demonstrated in the pictures, elegant chocolate curls add a sophisticated touch.
- Chopped Oreo Cookies: A sprinkle of roughly chopped Oreos on top reinforces the star ingredient and adds extra crunch.
- Whipped Cream Dollops: Piped swirls or simple dollops of fresh whipped cream provide a light, airy contrast.
- Chocolate Syrup Drizzle: A delicate drizzle of chocolate syrup can add a final flourish.
- Fresh Berries: For a pop of color and a hint of tartness, a few fresh raspberries or strawberries can be a beautiful addition.
-
Mastering Chocolate Curls
Creating professional-looking chocolate curls is simpler than you might think. Start with a wrapped chocolate bar, and gently warm it in your hands until it becomes just slightly pliable, but not melted. You want it to be firm enough to hold its shape but soft enough to yield. Use a vegetable peeler to shave thin curls directly from the side of the chocolate bar. If the chocolate becomes too soft and the curls start to break, simply chill the bar for a few minutes. If it becomes too hard, warm it again slightly in your hands before resuming. These curls instantly add an elegant touch to your dessert.
-
Piping Whipped Cream Like a Pro
For those beautiful whipped cream decorations on top of your cheesecake, a piping bag fitted with a star tip works wonders. If you don’t have specialized piping equipment, don’t worry! A gallon-sized resealable freezer bag makes an excellent substitute. Simply fill the bag with whipped cream, snip a small corner off the tip, and you can pipe attractive dollops or swirls with ease.
Storage and Longevity: Keeping Your Cheesecake Fresh
Understanding how to properly store your no-bake Oreo cheesecake is key to enjoying it for as long as possible while maintaining its delicious taste and texture.
Refrigeration Guidelines
A no-bake cheesecake can be safely stored in the refrigerator for 3 to 5 days. To ensure its freshness and prevent it from absorbing other odors in your fridge, always keep your cheesecake tightly covered. Using plastic wrap pressed directly onto the surface of the cheesecake, or placing it in an airtight container, will help maintain its creamy texture and prevent it from drying out. If your cheesecake includes more perishable garnishes, such as fresh fruit, its shelf life might be slightly shorter, so it’s best to consume it within 2-3 days.
Freezing for Future Enjoyment
Absolutely, you can freeze your no-bake Oreo cheesecake! This is an excellent option if you’ve made a large batch or wish to save some for a later occasion. To prevent freezer burn, which can degrade both taste and texture, ensure the cheesecake is effectively covered. Wrap it tightly in several layers of plastic wrap, followed by a layer of aluminum foil. You can freeze it as a whole or in individual slices. When you’re ready to enjoy it, remove it from the freezer and allow it plenty of time to thaw in the refrigerator, typically overnight. Be aware that the Oreo cookies within the filling and crust might soften slightly after being frozen and defrosted, but the overall flavor and creaminess will still be delightful.
More Delicious No-Bake Recipes You’ll Love
Beyond this spectacular Oreo cheesecake, the world of no-bake desserts is vast and exciting. They offer a fantastic way to enjoy delicious treats without the fuss of an oven, making them perfect for busy schedules or warm days. Here are a few more no-bake recipes that are sure to become family favorites:
- Chocolate Peanut Butter Pie
- Avalanche Cookies
- No Bake Pumpkin Cheesecake
- Oreo Balls
- No Bake Peanut Butter Cookies
Recipe: No Bake Oreo Cheesecake
Oreo Cheesecake (No Bake)
Pin
Ingredients
For the crust
- 25 Oreo cookies
- 2 tablespoons granulated sugar
- 6 tablespoons butter, melted
- cooking spray
For the filling
- 16 ounces cream cheese, softened
- 1 teaspoon vanilla extract
- 3/4 cup granulated sugar
- 1 1/2 cups heavy whipping cream
- 20 Oreo cookies, coarsely chopped
For the topping
- 1/2 cup heavy whipping cream
- 8 ounces semisweet chocolate, chopped
- 1 tablespoon butter, cut into small pieces
- Additional whipped cream and chocolate shavings for garnish (optional)
Instructions
- Place 25 Oreo cookies and 2 tablespoons of sugar in a food processor. Process until fine crumbs form.
- Pour the cookie mixture into a bowl and add the melted butter. Stir until thoroughly combined.
- Coat a 9-inch springform pan with cooking spray. Press the cookie crust firmly into the bottom and slightly up the sides of the pan.
- Chill the crust in the refrigerator for at least 30 minutes.
- Place the softened cream cheese in the bowl of a stand mixer. Beat until smooth and creamy.
- Add the vanilla extract and 3/4 cup granulated sugar to the cream cheese mixture and beat until well combined.
- Pour the 1 1/2 cups heavy whipping cream into the cream cheese mixture. Using a mixer fitted with the whisk attachment, beat the mixture on medium-high speed until stiff peaks form (this usually takes 3-5 minutes).
- Gently fold in the 20 coarsely chopped Oreo cookies into the cheesecake filling.
- Spread 1/3 of the cheesecake mixture evenly into the chilled springform pan. Arrange a layer of 10 whole Oreo cookies over this cheesecake layer. Repeat this process with the remaining cheesecake mixture and cookies, ensuring the final layer is cheesecake filling.
- Place the cheesecake back into the fridge to chill for another 30 minutes.
- For the chocolate topping, place 1/2 cup heavy cream in a medium microwave-safe bowl. Microwave in 20-second increments until the cream is very hot but not boiling.
- Add the chopped semisweet chocolate to the hot cream. Let it sit undisturbed for 1 minute to soften, then stir until a smooth, glossy chocolate mixture (ganache) forms. Stir in the 1 tablespoon of butter until completely melted and incorporated.
- Pour the chocolate ganache over the top of the chilled cheesecake and gently spread it into an even layer using an offset spatula or the back of a spoon.
- Cover the cheesecake loosely with plastic wrap and chill in the refrigerator for at least 6 hours, or ideally overnight (up to 2 days) for the best results.
- To serve, carefully remove the side of the springform pan. Garnish with additional whipped cream and chocolate shavings or curls if desired. Slice with a sharp knife and enjoy!
Notes
Nutrition
Calories: 424kcal | Carbohydrates: 34g | Protein: 5g | Fat: 28g | Saturated Fat: 20g | Cholesterol: 97mg | Sodium: 389mg | Potassium: 171mg | Fiber: 1g | Sugar: 19g | Vitamin A: 1120IU | Vitamin C: 0.2mg | Calcium: 68mg | Iron: 4.1mg
Did you make this recipe?
Tag @dinneratthezoo on Instagram and hashtag it #dinneratthezoo
This post was originally published on August 15, 2018, and was updated on April 30, 2019, with new content and enhanced recipe details.