
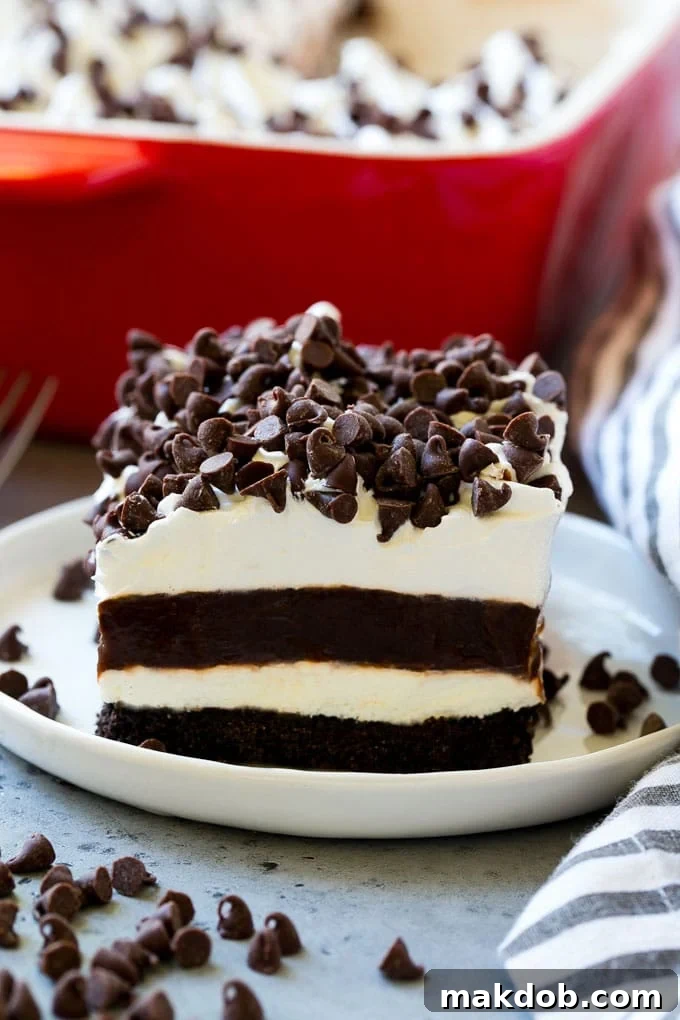
The Ultimate No-Bake Chocolate Lasagna: Your New Favorite Dessert!
Prepare to be amazed by this incredible Chocolate Lasagna recipe! It’s a show-stopping, no-bake dessert that features a decadent cookie crust, layers of rich cheesecake filling, creamy chocolate pudding, a fluffy whipped topping, and a generous sprinkle of chocolate chips. This impressive treat is surprisingly easy to make and perfect for feeding a crowd at any gathering. If you love chocolate and crave a dessert that combines rich flavors with delightful textures, you’ve just found your new go-to.
This Chocolate Lasagna truly is a dream come true for all chocolate enthusiasts. Who could resist a dessert boasting multiple layers of chocolate goodness, complemented by a tangy cheesecake and light whipped cream? I frequently bring this irresistible dessert to potlucks and parties, and without fail, I’m always asked for the recipe. Its ease of preparation combined with its unforgettable taste makes it a guaranteed crowd-pleaser that will have everyone reaching for a second slice.
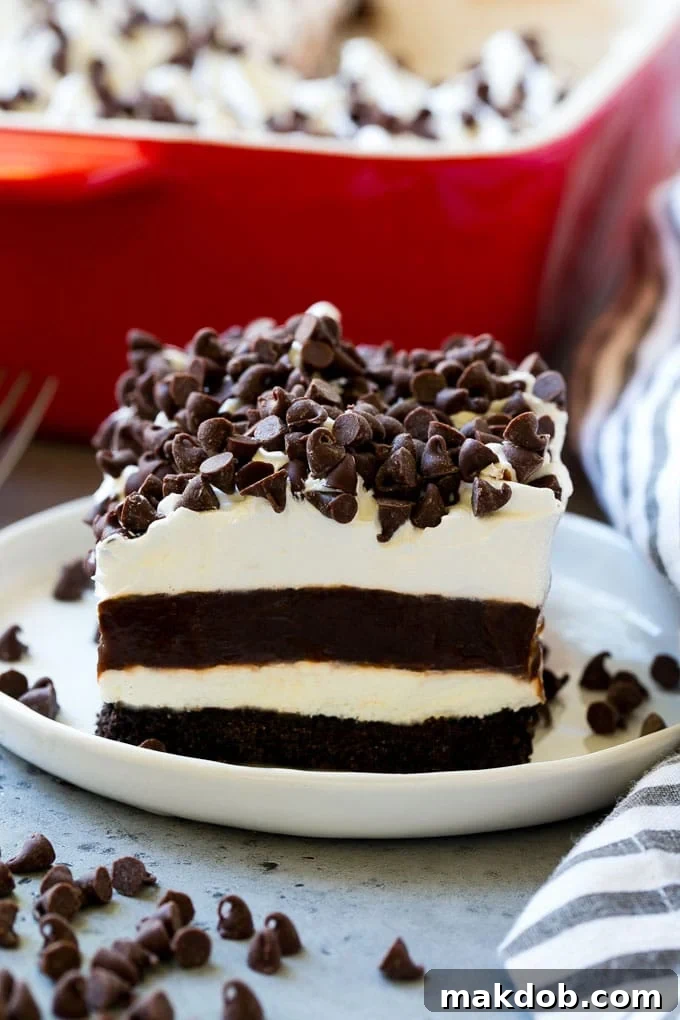
This delectable Chocolate Lasagna has graced my refrigerator all week, and each time I pass by, I find myself sneaking just one more bite. It’s truly that addictive! The best part? This delightful dessert requires absolutely no baking, making it incredibly simple to assemble. It has become my absolute favorite dessert to prepare for any celebration or casual get-together, and it consistently garners rave reviews and compliments from everyone who tries it.
Why You’ll Adore This No-Bake Chocolate Lasagna
This Chocolate Lasagna isn’t just another dessert; it’s a culinary experience designed for maximum enjoyment with minimal effort. Here’s why it’s destined to become a beloved staple in your recipe collection:
- Effortlessly Easy: No oven required! This makes it ideal for beginners or anyone looking for a stress-free dessert solution. The simplicity of layering ingredients means you can create a spectacular treat without any complicated baking techniques.
- A Crowd-Pleaser: Its rich chocolate flavor, creamy textures, and appealing presentation make it universally loved. Whether it’s a family dinner, a potluck, a holiday celebration, or a backyard barbecue, this dessert disappears fast.
- Perfect for Make-Ahead: One of its greatest advantages is that it tastes even better when made in advance, allowing the flavors to meld beautifully. You can prepare it up to three days before serving, freeing up your time on the day of your event.
- Irresistible Layers of Flavor: Each bite delivers a delightful combination of crunchy, creamy, and smooth textures, featuring intense chocolate, tangy cheesecake, and light whipped cream.
- Cool and Refreshing: As a chilled dessert, it’s particularly perfect for warm weather months when you want something sweet but don’t want to turn on your oven.
Understanding the Layers: A Delectable Journey to Chocolate Bliss
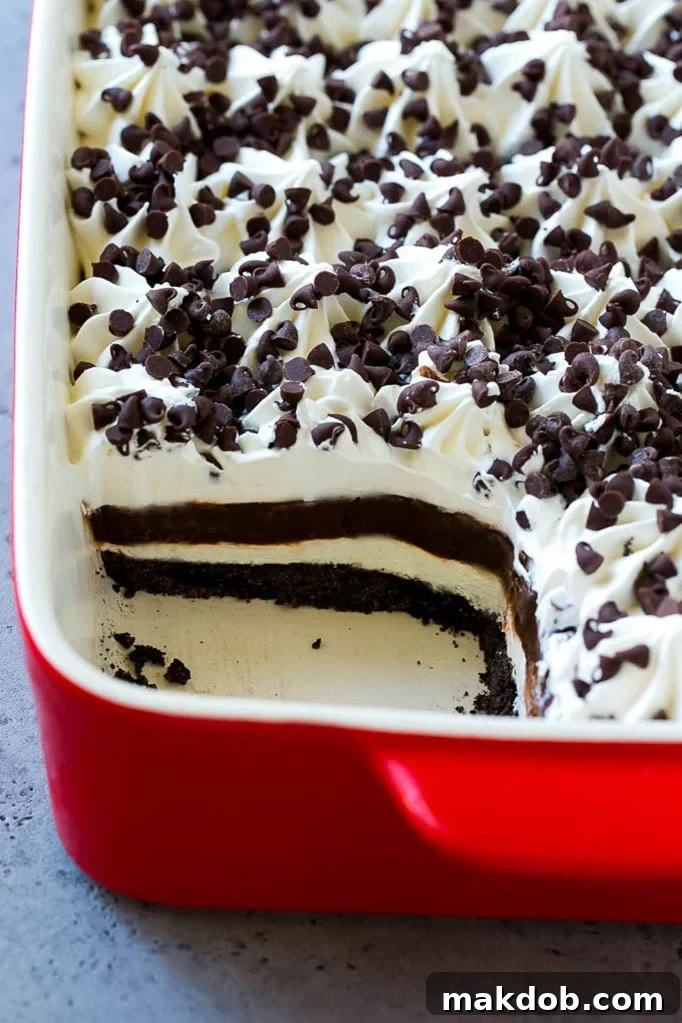
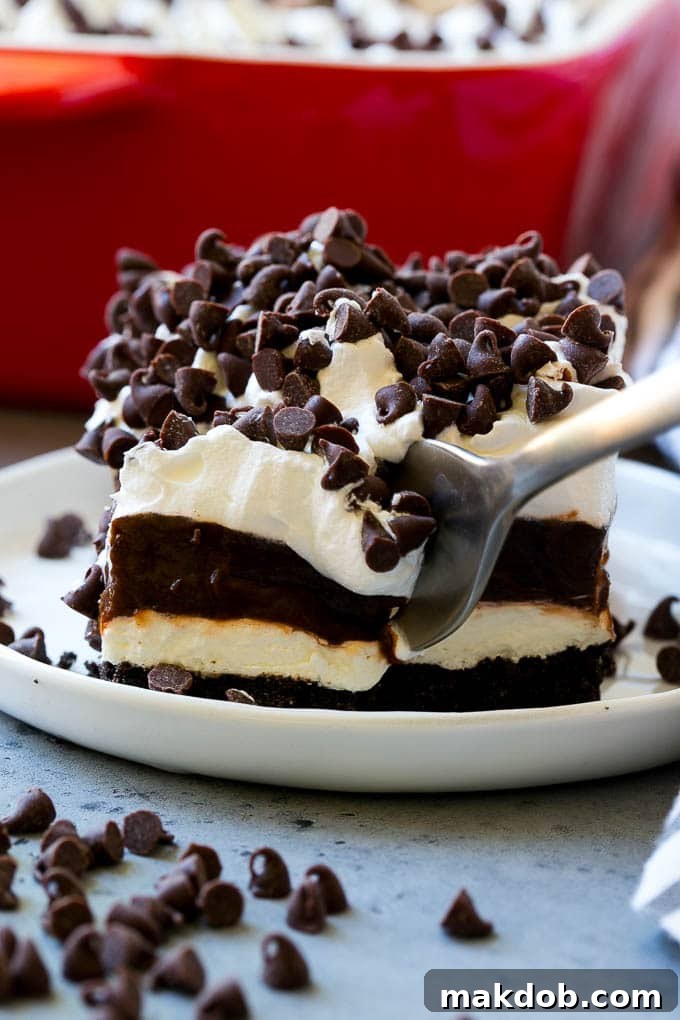
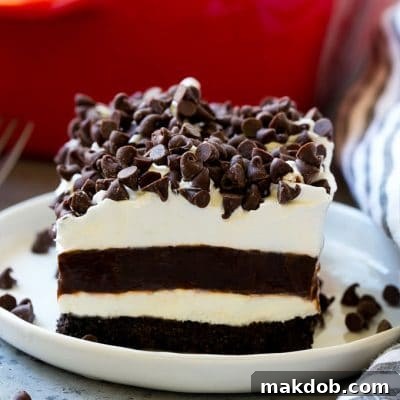
This exquisite Chocolate Lasagna is composed of five distinct, yet harmoniously blended, layers, each contributing its unique flavor and texture to the overall experience. While none of the individual steps are overly challenging, it’s important to account for chilling time between layers to ensure everything sets perfectly. Planning to make this dessert in advance is key to success, as it allows the layers to firm up and the flavors to deepen.
The Irresistible Oreo Cookie Crust
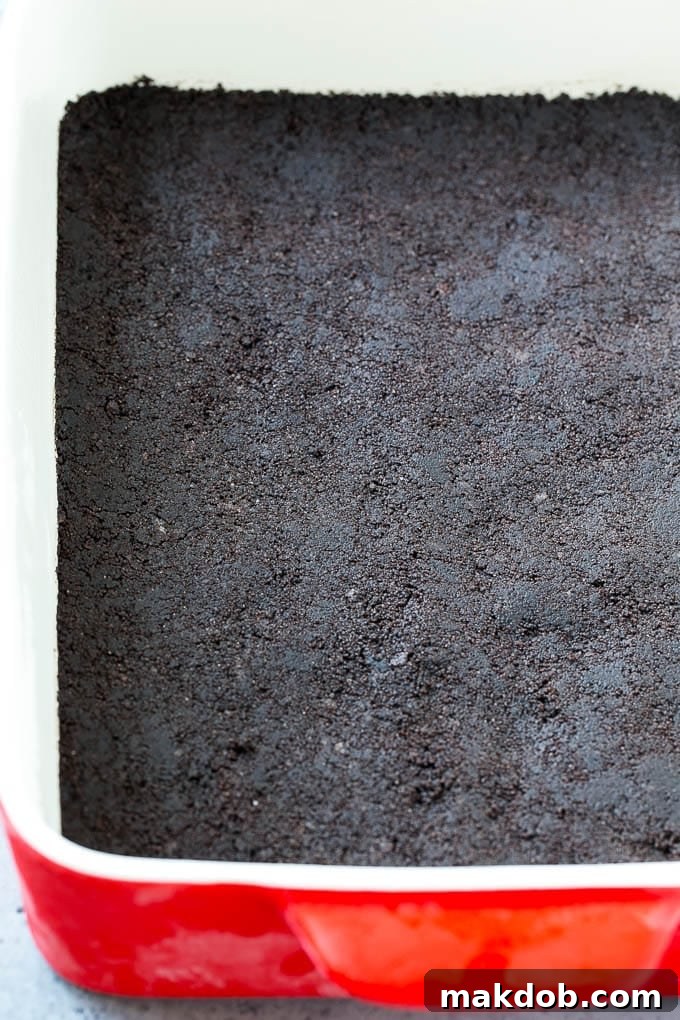
Every great dessert needs a solid foundation, and our Chocolate Lasagna starts with a phenomenal Oreo cookie crust. This simple yet satisfying layer is created by combining finely crushed Oreo sandwich cookies with melted butter. The chocolatey crunch of the Oreos forms the perfect contrast to the creamy layers above. To achieve the best texture, ensure your Oreos are processed into fine crumbs – a food processor works wonders for this. Once combined with butter, this mixture is firmly pressed into the bottom of a rectangular pan. This crucial step helps prevent the crust from crumbling when sliced. A quick chill in the freezer for about 10 minutes will set the crust, preparing it for the layers to come.
Creamy, Dreamy Cheesecake Filling
Following the crunchy crust is a light and fluffy cheesecake layer that adds a delightful tang and creamy texture. This layer is a simple yet indulgent blend of softened cream cheese, granulated sugar, a touch of milk or cream, a hint of vanilla extract, and a generous amount of whipped topping. Beating the cream cheese until it’s smooth and airy is essential for that signature fluffy consistency. Once the sugar, milk, and vanilla are incorporated, the whipped topping is gently folded in, creating a cloud-like filling. Spreading this over the chilled Oreo crust requires a careful touch to maintain an even layer. I always recommend chilling each layer for about 10-15 minutes in the freezer before adding the next. This brief cooling period is vital; it gives each layer a chance to firm up, preventing them from mixing and ensuring beautifully distinct lines when you slice the final dessert.
Rich Chocolate Pudding Perfection
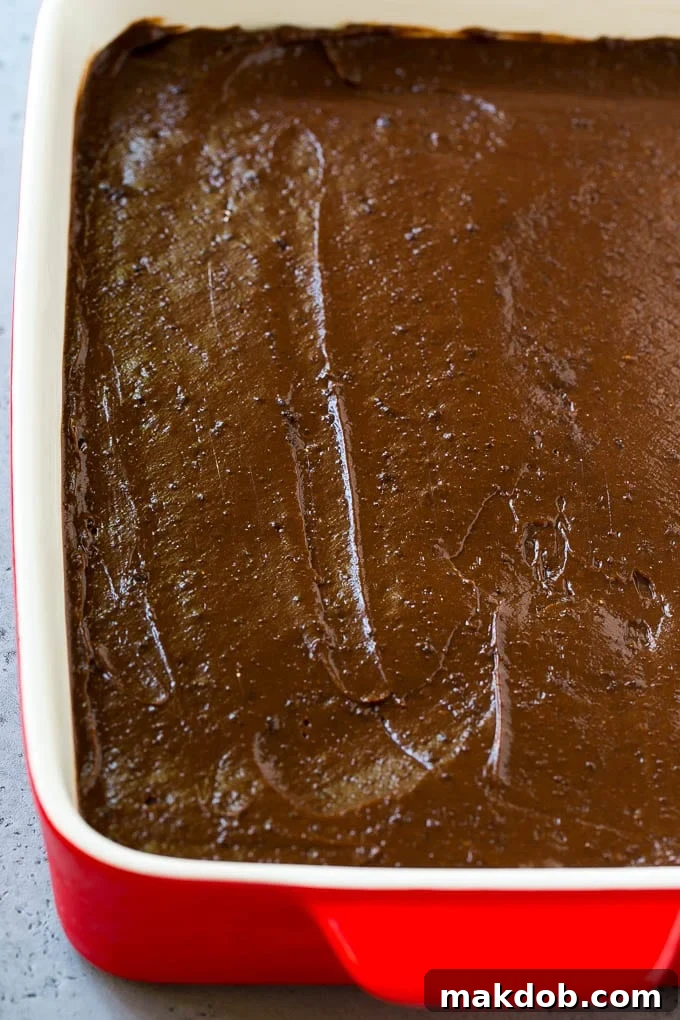
The third layer introduces an intense burst of chocolate flavor with a smooth, creamy chocolate pudding. For convenience and consistent results, this recipe utilizes instant chocolate pudding mix, whisked together with milk until it thickens into a luxurious, creamy consistency. The key here is to whisk thoroughly for 2-3 minutes until the pudding is smooth and begins to set, but is still spreadable. This layer adds a deep chocolate element that perfectly complements the tang of the cheesecake and the crunch of the crust. Once spread evenly over the chilled cheesecake layer, another brief visit to the freezer for 10-15 minutes helps this pudding layer firm up and prevents it from spreading into the final whipped topping.
Light and Airy Whipped Topping with Chocolate Chips
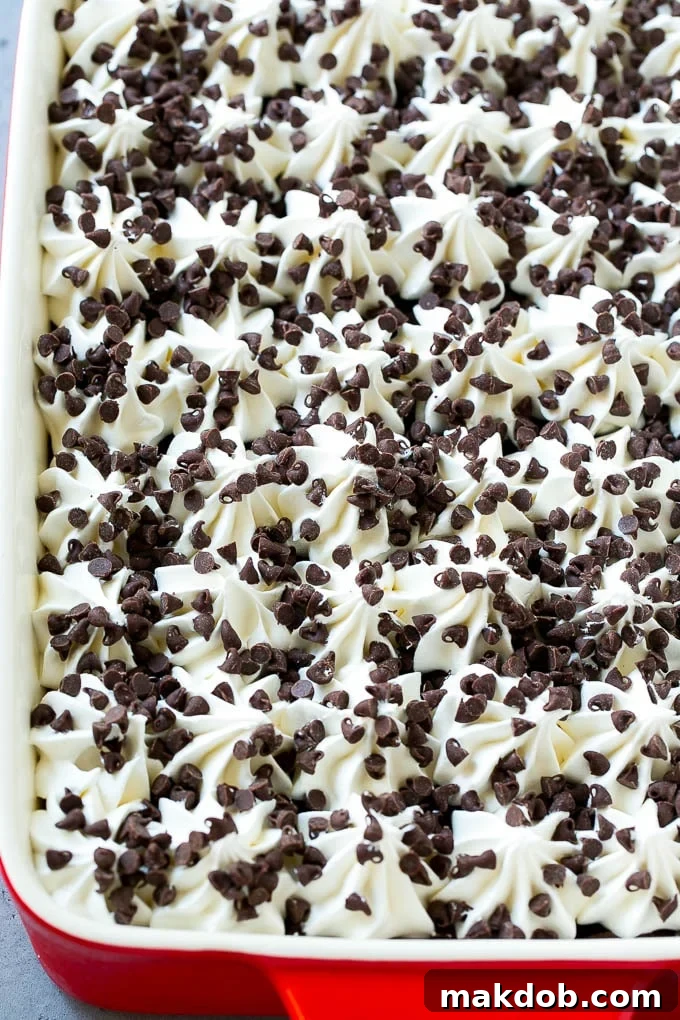
The grand finale of our Chocolate Lasagna is a generous layer of light and airy whipped topping, crowned with miniature chocolate chips. This top layer not only adds a delicate sweetness but also a beautiful aesthetic. You can simply spread the whipped topping smoothly across the pudding layer with a spatula for a clean, classic look. However, for a more elegant and festive presentation, I love to pipe the whipped topping using a large open star tip. This creates charming swirls and peaks that instantly elevate the dessert. After applying the whipped topping, sprinkle a generous amount of miniature chocolate chips over the entire surface. These tiny chips provide an extra burst of chocolate and a satisfying textural contrast.
Expert Tips for Perfect Chocolate Lasagna Slices
While assembling the Chocolate Lasagna is quite straightforward, the most common challenge lies in achieving neat, picture-perfect slices. Fortunately, with a few simple tricks, you can master the art of slicing this layered dessert like a professional.
- Pre-Slice Freeze: To ensure your layers remain perfectly intact and create clean edges, place your entire pan of Chocolate Lasagna in the freezer for about 20-30 minutes just before you plan to slice it. This brief freezing period will firm up all the layers even further, making them less prone to smudging or collapsing when cut.
- Clean Knife, Clean Cuts: This is arguably the most important tip. After each cut, wipe your knife blade thoroughly with a clean, damp paper towel. Residual cream or pudding on the knife can drag through the subsequent slices, smudging the distinct layers. A clean wipe ensures sharp, defined lines every time. For an even better result, you can briefly warm your knife under hot water, dry it, and then make your cut.
- Use a Sharp Knife: A long, sharp knife (like a chef’s knife or a large carving knife) is crucial. A dull knife will tear and drag rather than slice cleanly through the soft layers and crunchy crust.
- Offset Spatula for Perfection: If you’re aiming for truly pristine, bakery-quality slices, use an offset spatula. After making your cut, gently run the offset spatula around the sides of each slice to gently push and even out the layers, tidying up any minor imperfections. This technique helps to achieve those striking, defined layer visuals.
- Gentle Removal: Once sliced, use a sturdy spatula to carefully lift each piece out of the pan. Support the bottom layer to prevent it from breaking or bending.
The symphony of flavors and textures in this dessert is truly remarkable. From the satisfying crunch of the cookie crust to the fluffy tang of the cheesecake and the silky smoothness of the creamy pudding, every forkful is a delight. This is a treat you’ll undoubtedly find yourself making time and time again, especially during the warmer months when the thought of turning on the oven is simply unbearable.
Common Questions & Ingredient Swaps
What can I use instead of store-bought whipped topping?
This is a question I get asked frequently, and it’s completely understandable! Not everyone is a fan of store-bought whipped toppings like Cool Whip, despite their incredible convenience. While Cool Whip offers stability and ease, some prefer alternatives. The good news is, you absolutely can substitute it with an equal amount of homemade whipped cream in this recipe.
- Homemade Whipped Cream: To make your own, you’ll need heavy cream (or heavy whipping cream), powdered sugar (also known as confectioners’ sugar), and a touch of vanilla extract. Simply beat very cold heavy cream with a hand mixer or stand mixer on medium-high speed until soft peaks form. Gradually add powdered sugar and vanilla, then continue beating until stiff peaks are achieved. This ensures a stable whipped cream that won’t deflate in your lasagna. Ensure it’s sweetened to taste. Homemade whipped cream offers a richer, more natural dairy flavor.
- Avoid Canned Whipped Cream: It’s crucial to avoid using whipped cream from a can for this recipe. Canned whipped cream is aerated and unstable; it will quickly deflate and become watery when incorporated into the cheesecake layer or used as the final topping, ruining the structure and texture of your lasagna.
Make-Ahead and Storage Tips
One of the many benefits of this no-bake Chocolate Lasagna is its excellent make-ahead potential, making it ideal for entertaining or busy schedules.
- Advance Preparation: You can completely assemble your Chocolate Lasagna up to 3 days before you plan to serve it. In fact, allowing it to chill for a longer period (overnight or even 2-3 days) lets the flavors meld and deepen, resulting in an even more delicious dessert. Just be sure to cover the pan loosely with plastic wrap to prevent it from absorbing any refrigerator odors.
- Storage: Any leftover Chocolate Lasagna should be stored in an airtight container in the refrigerator for up to 3-4 days. While it might last a bit longer, the crust can soften over time, so it’s best enjoyed within this timeframe for optimal texture.
- Freezing: For longer storage, you can freeze individual slices or the entire pan (well-wrapped in plastic wrap and then aluminum foil) for up to 1-2 months. Thaw in the refrigerator overnight before serving. The texture of the whipped topping might change slightly upon thawing, but it will still be delicious.
A Dessert That Delivers Every Time
You absolutely will not be disappointed by this Chocolate Lasagna. Its generous serving size makes it the quintessential dessert for any gathering, from casual potlucks to elegant dinner parties. The sheer joy of knowing it can be prepared days in advance is an added bonus, especially for hosts who want to minimize last-minute stress. On the day of your party, all that’s left to do is pull it from the fridge, slice into perfectly layered squares, serve, and bask in the compliments. Get ready to impress everyone with this delightfully easy, intensely chocolatey, and utterly irresistible no-bake dessert!
More No-Bake Desserts You’ll Love
- 9 No Bake Cookie Recipes
- Ice Cream Sandwich Cake
- S’mores Dip
- Earthquake Cake
- Peanut Butter Chocolate Gooey Butter Cake
Chocolate Lasagna Recipe
This chocolate lasagna is a cookie crust topped with layers of cheesecake filling, pudding, whipped cream and chocolate chips. An impressive no bake dessert that’s perfect for feeding a crowd!
Ingredients
For the crust
- 1 package Oreo cookies
- 6 tablespoons butter, melted
- Cooking spray
For the cream cheese layer
- 8 ounces cream cheese, softened
- 1/4 cup sugar
- 2 tablespoons milk or cream
- 1/2 teaspoon vanilla extract
- 1 1/2 cups whipped topping (such as Cool Whip)
For the pudding layer
- 2 (3.9 ounce) packages of instant chocolate pudding mix
- 3 1/4 cups milk
For the topping
- 1 bag miniature chocolate chips
- 3 cups whipped topping (such as Cool Whip, thawed)
Instructions
For the crust
- Coat a 9″x13″ pan with cooking spray.
- Place the Oreo cookies in a food processor and process until fine crumbs form.
- Transfer the Oreo crumbs to a bowl and pour in the melted butter. Stir until thoroughly combined.
- Firmly press the Oreo mixture into the bottom of the prepared pan with your fingers or the bottom of a measuring cup.
- Freeze the pan for 10 minutes to set the crust.
For the cream cheese layer
- Place the softened cream cheese in the bowl of a mixer. Beat until smooth and fluffy.
- Add the sugar, milk, and vanilla extract and beat until smooth.
- Gently fold 1 1/2 cups of the whipped topping into the cream cheese mixture until just combined.
- Evenly spread the cream cheese mixture over the chilled Oreo crust.
- Place the pan in the freezer for 10-15 minutes to chill and firm up the layer.
For the pudding layer
- Place the instant chocolate pudding mixes in a bowl and add 3 1/4 cups milk. Whisk until smooth and starting to thicken, about 2-3 minutes.
- Spread the pudding in an even layer over the chilled cream cheese layer.
- Place the pan in the freezer for 10-15 minutes to chill and set the pudding.
For the topping
- Pipe or gently spread the remaining 3 cups of whipped topping over the pudding layer.
- Generously sprinkle with miniature chocolate chips.
- Cover the pan loosely with plastic wrap and chill in the refrigerator for a minimum of 3 hours, or preferably overnight, and up to 3 days.
- Cut into squares and serve. For the cleanest slices, place the pan in the freezer for 30 minutes prior to slicing, then wipe your knife clean between each cut.
Nutrition
Carbohydrates: 47g |
Protein: 5g |
Fat: 25g |
Saturated Fat: 14g |
Cholesterol: 35mg |
Sodium: 269mg |
Potassium: 174mg |
Fiber: 1g |
Sugar: 37g |
Vitamin A: 470IU |
Vitamin C: 0.2mg |
Calcium: 122mg |
Iron: 2.8mg
Did you make this recipe?
Tag @dinneratthezoo on Instagram and hashtag it #dinneratthezoo to share your creation with us!