
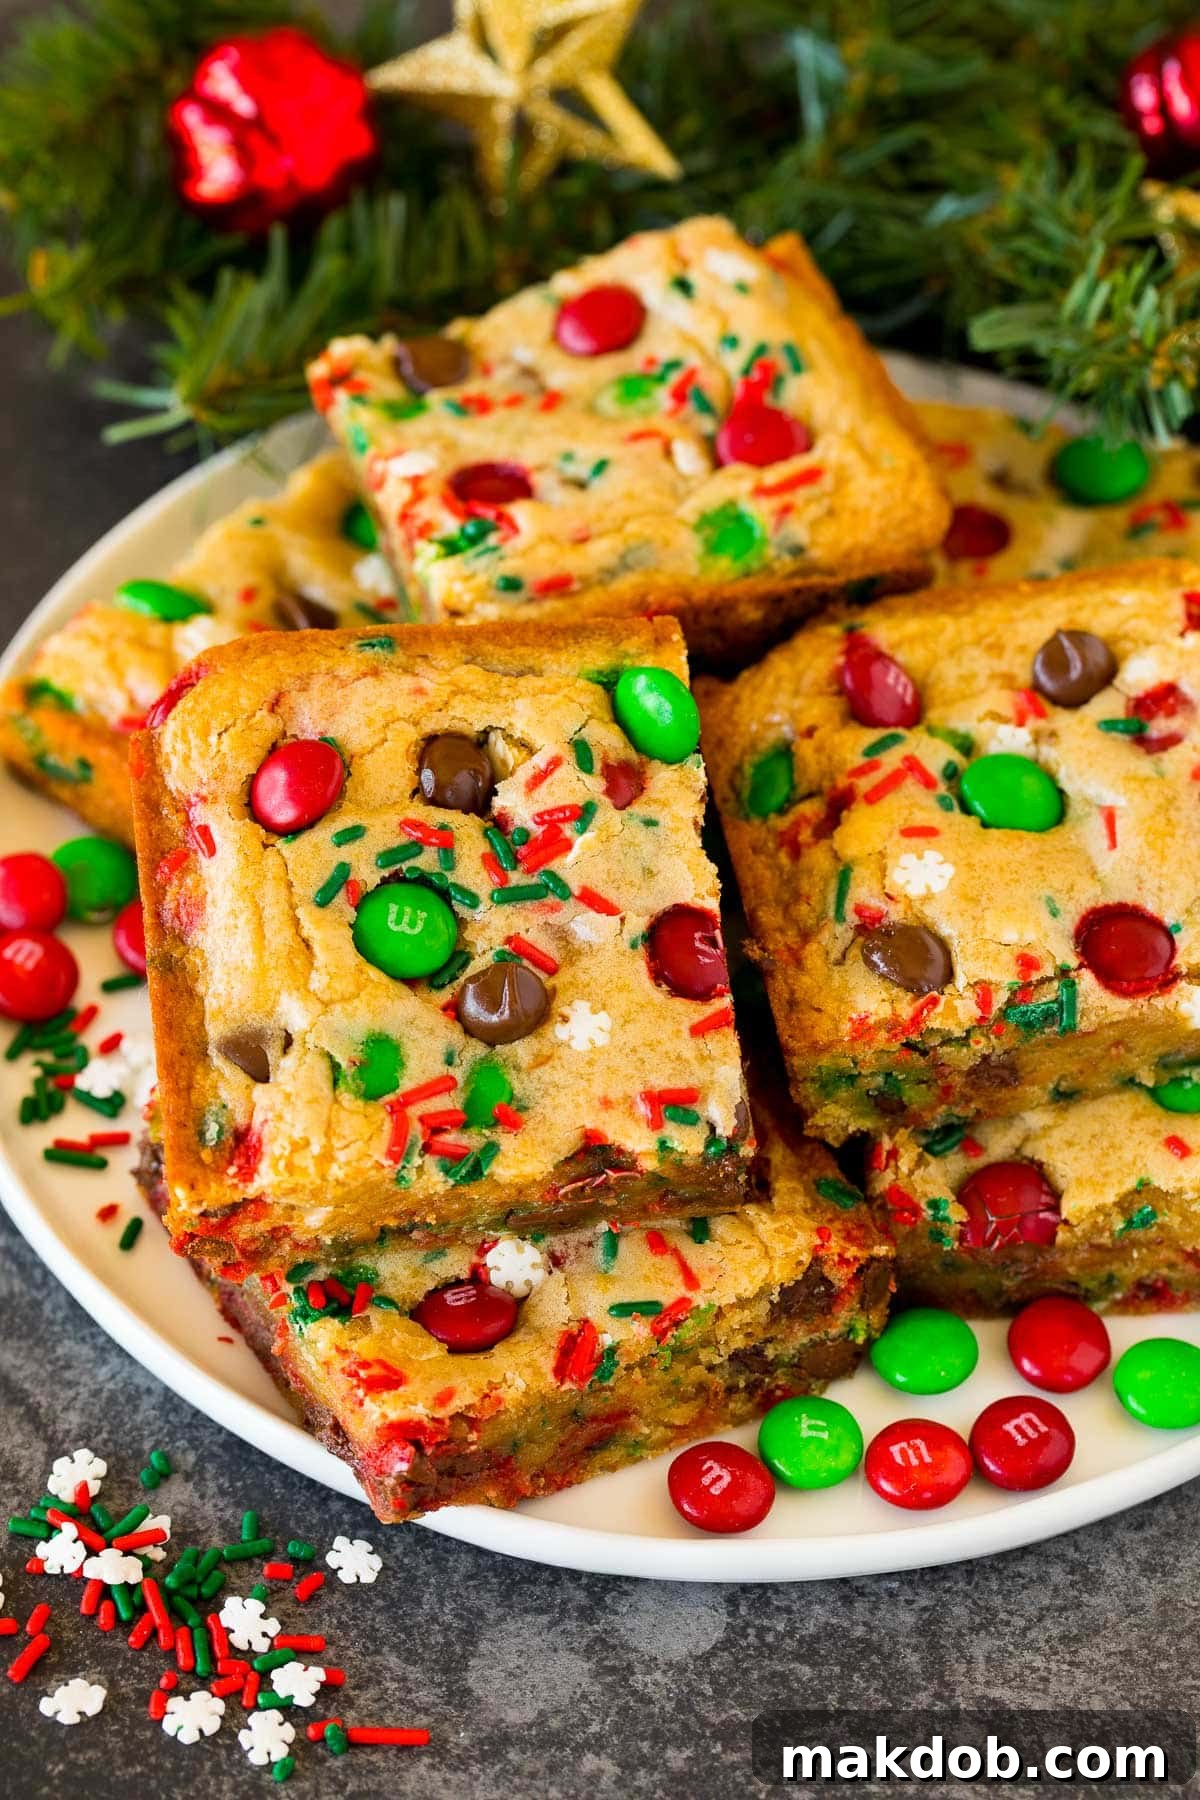
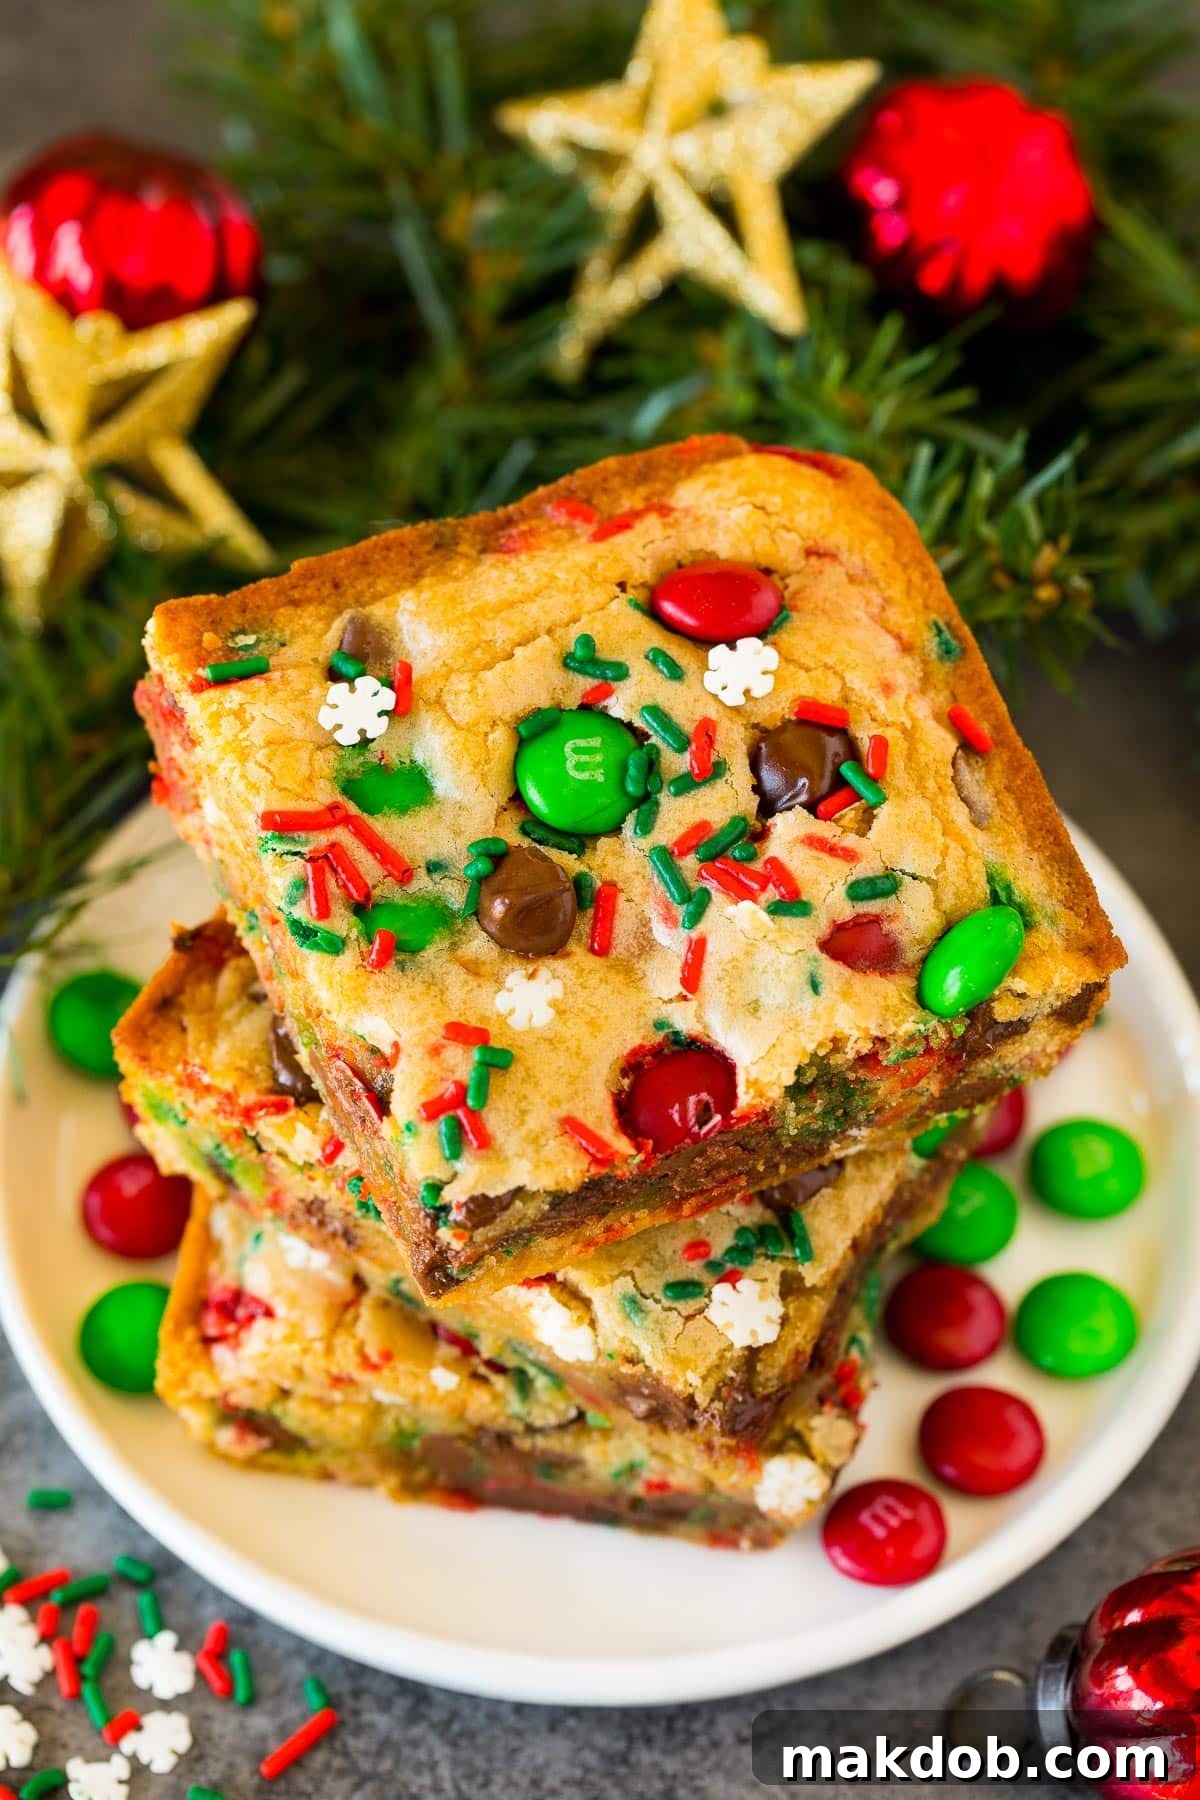
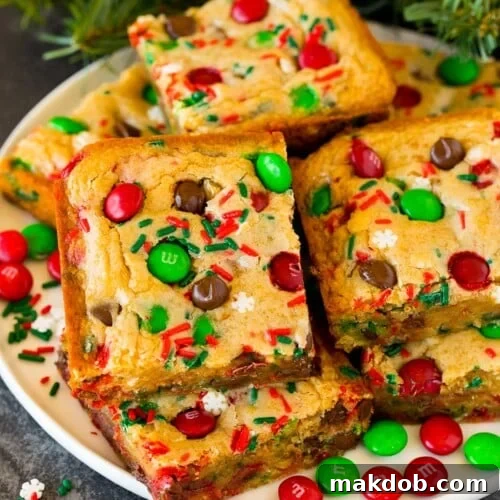
Get ready to infuse your holiday season with warmth, joy, and incredible flavor with these delightful Christmas cookie bars! Imagine a perfectly chewy, golden-brown sugar cookie base, generously studded with vibrant holiday M&M candies and festive sprinkles. These bars aren’t just easy to make; they are an utterly delicious treat designed for sharing, making them perfect for feeding a crowd at any festive gathering.
The holiday season calls for simple yet spectacular desserts, and while classic cookies hold a special place, cookie bars offer unparalleled convenience and a unique texture. Their straightforward preparation means less time shaping individual cookies and more time enjoying the festive spirit. Whether you’re a seasoned baker or new to holiday treats, these bars promise a fuss-free, crowd-pleasing experience.
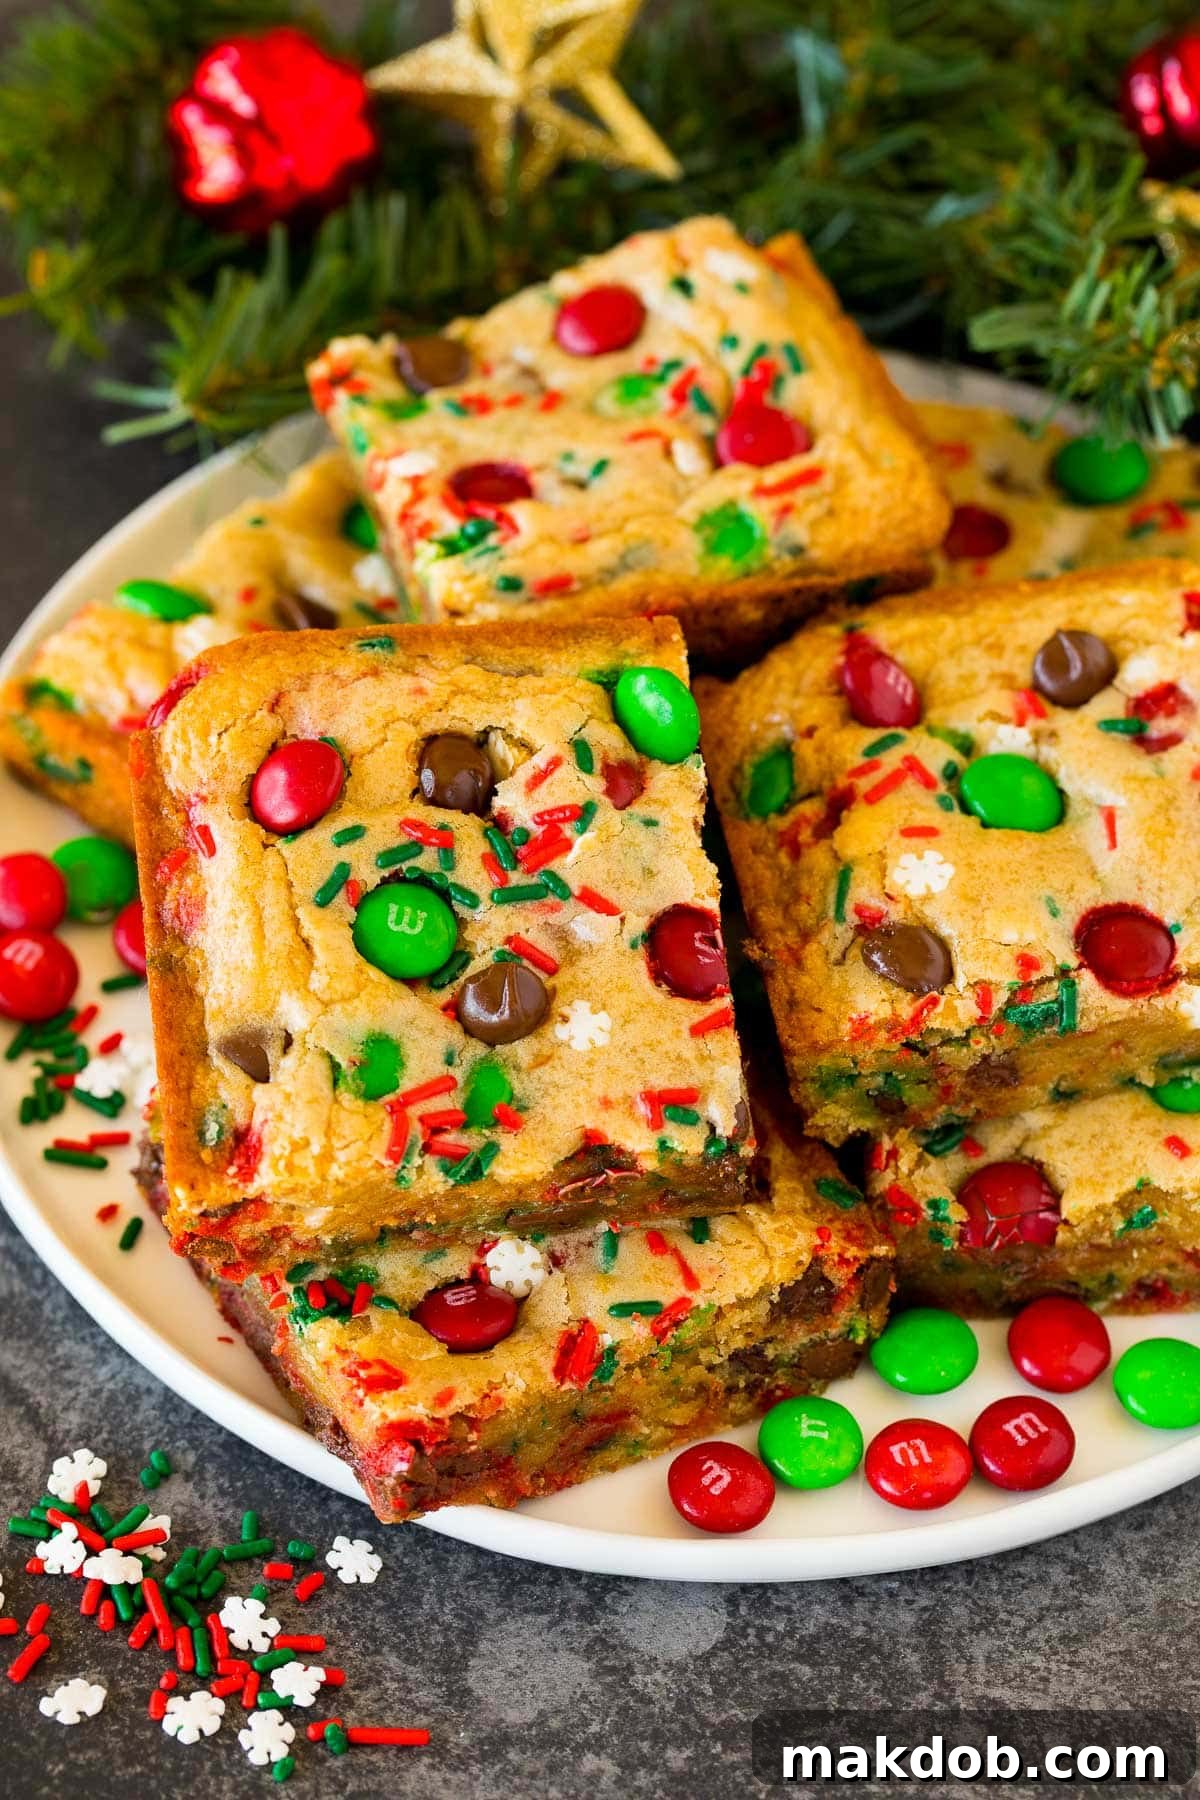
When the holidays roll around, my kitchen transforms into a dessert wonderland, and Christmas cookie bars are always at the top of my baking list. They offer the comforting nostalgia of homemade cookies with the added benefit of being incredibly quick to prepare. Plus, their versatility allows for endless customization, ensuring they perfectly suit any taste or holiday theme. Forget tedious individual cookie baking; these bars deliver maximum festive impact with minimal effort.
Table of Contents
- Why You’ll Love These Christmas Cookie Bars
- Christmas Cookie Bars Ingredients List
- Step-by-Step Guide to Making Christmas Cookie Bars
- Expert Tips for Perfectly Chewy Cookie Bars
- Recipe FAQs: Holiday Baking Questions Answered
- Creative Flavor Variations and Add-Ins
- More Irresistible Holiday Desserts
- Love This Recipe? Rate it!
- Christmas Cookie Bars Recipe Card
Why You’ll Love These Christmas Cookie Bars
These Christmas cookie bars are more than just a dessert; they’re a celebration in every bite. Here’s why they’ll become your new favorite holiday tradition:
- Effortless Elegance: Forget the individual scooping and shaping of traditional cookies. These bars bake in a single pan, making cleanup a breeze and saving you precious time during the busy holiday season. They present beautifully with minimal effort, offering a stunning centerpiece for any dessert table.
- Crowd-Pleaser: Designed to serve a generous crowd, these chewy brown sugar cookie bars are perfect for holiday parties, school events, office potlucks, or large family gatherings. Easily cut into uniform squares, everyone gets a perfectly sized, festive treat.
- Irresistible Texture: The base is a rich, buttery brown sugar cookie dough that bakes up incredibly moist and chewy. It’s the perfect contrast to the slight crunch of M&M’s and the delicate crispness of sprinkles.
- Festive & Fun: Loaded with vibrant Christmas M&M’s and sprinkles, these bars instantly evoke holiday cheer. The bright colors and playful toppings make them particularly appealing to both children and adults.
- Customizable: While designed for Christmas, these versatile cookie bars can be adapted for any celebration throughout the year. Simply swap out the holiday-themed candies and sprinkles for colors and flavors suitable for birthdays, Halloween, Valentine’s Day, or even patriotic events.
- Perfect for Gifting: Baked goods make wonderful holiday gifts. These bars can be neatly packaged in festive tins or boxes, making thoughtful homemade presents for neighbors, teachers, or friends.
- Make-Ahead Friendly: You can prepare the dough in advance or bake the bars ahead of time and store them, allowing you to get a head start on your holiday preparations. They maintain their deliciousness for days, and can even be frozen for longer storage.
Christmas Cookie Bars Ingredients List
Crafting these delectable holiday cookie bars requires a few simple, high-quality ingredients that come together to create an unforgettable treat. Here’s a detailed look at what you’ll need to make these festive brown sugar cookie bars truly shine:
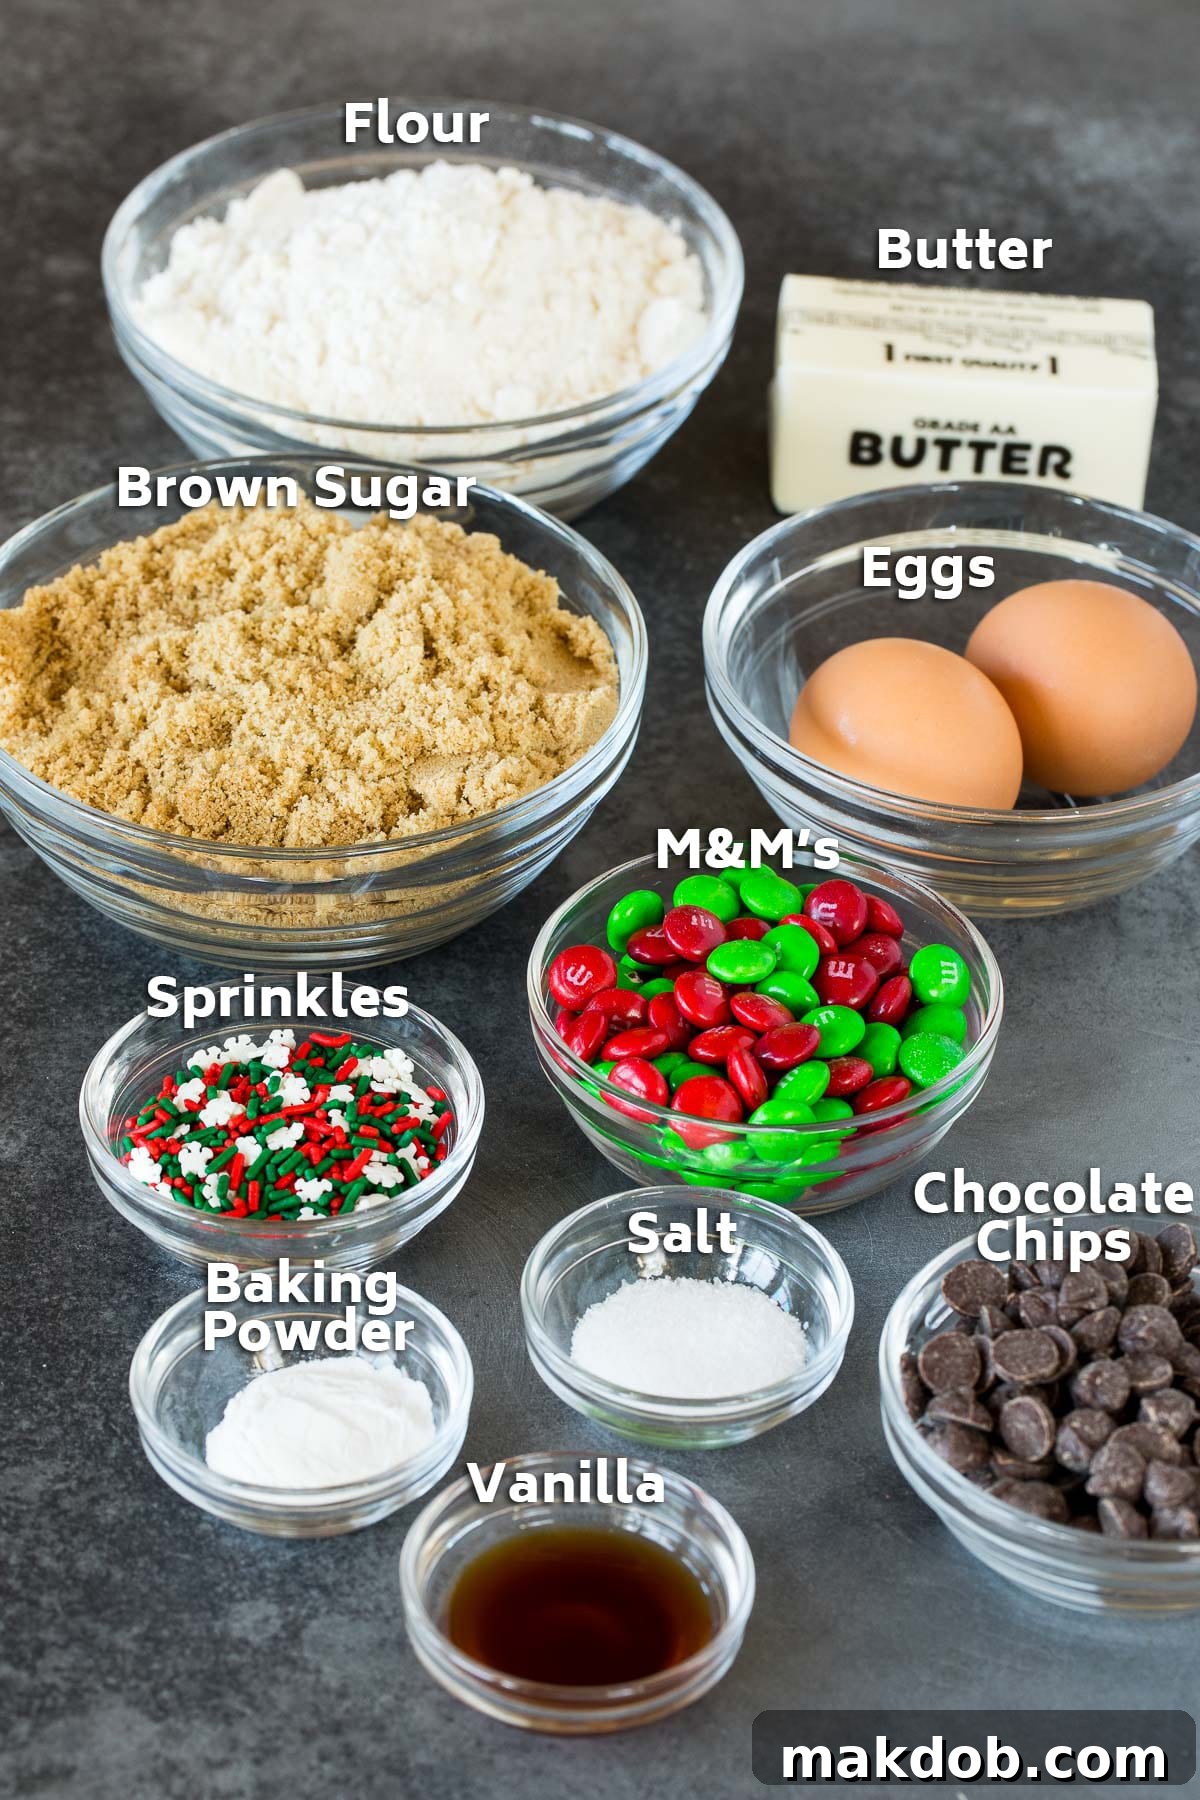
- Unsalted Butter (melted): The foundation of our chewy cookie base. Melting the butter first ensures a denser, chewier texture compared to using softened butter, which typically yields a cakier result. Unsalted butter allows you to control the overall saltiness of the recipe.
- Light Brown Sugar (packed): This is the secret to the deep, caramel-like flavor and incredibly moist, chewy texture of these bars. Packing it ensures you get the correct measurement.
- Vanilla Extract: A crucial flavor enhancer that complements the brown sugar and chocolate. Opt for pure vanilla extract for the best flavor profile, avoiding artificial versions.
- Eggs: Act as a binder, adding structure, richness, and helping to achieve that perfect chewy consistency. Ensure they are at room temperature for better incorporation into the wet ingredients.
- All-Purpose Flour: The primary structural component of the cookie bars. Measure it correctly by spooning it into a measuring cup and then leveling it off to avoid overly dense or dry bars.
- Baking Powder: Provides the necessary lift, giving the bars a soft, slightly risen crumb without making them too cake-like.
- Salt: Essential for balancing the sweetness and enhancing all the other flavors in the cookie bars. Don’t skip it!
- Christmas M&M’s (divided use): These festive candies bring color, crunch, and a delightful chocolate burst. Dividing them allows some to be mixed into the dough and others to be pressed onto the top for a beautiful finish.
- Semisweet Chocolate Chips: While M&M’s provide plenty of chocolate, a handful of semisweet chocolate chips adds another layer of rich, melty chocolate flavor, enhancing the overall indulgence.
- Holiday Sprinkles (jimmies, divided use): A mix of festive sprinkles, especially jimmies, adds visual appeal and a fun textural element. Use a combination in the dough and on top for maximum holiday cheer.
- Cooking Spray: For preparing your baking pan, ensuring the parchment paper stays in place and the bars release easily.
Using quality ingredients makes a noticeable difference in the final taste and texture of your Christmas cookie bars. Fresh eggs, good vanilla, and your favorite chocolate will elevate this simple recipe to a holiday masterpiece.
Step-by-Step Guide to Making Christmas Cookie Bars
Creating these festive and incredibly easy Christmas cookie bars is a straightforward process that yields impressive results. Follow these simple steps for a perfect batch every time:
- Step 1: Prepare Your Baking Pan and Preheat Oven. Begin by preheating your oven to 350 degrees Fahrenheit (175 degrees Celsius). This ensures the oven is at the correct temperature when your dough is ready. Next, take a 9×9 inch square baking pan and line it with parchment paper. It’s crucial to leave an overhang of parchment paper on two opposite sides; this will act as “handles” later, making it incredibly easy to lift the entire slab of baked cookies out of the pan. Once lined, lightly coat the parchment paper with cooking spray to prevent any sticking.
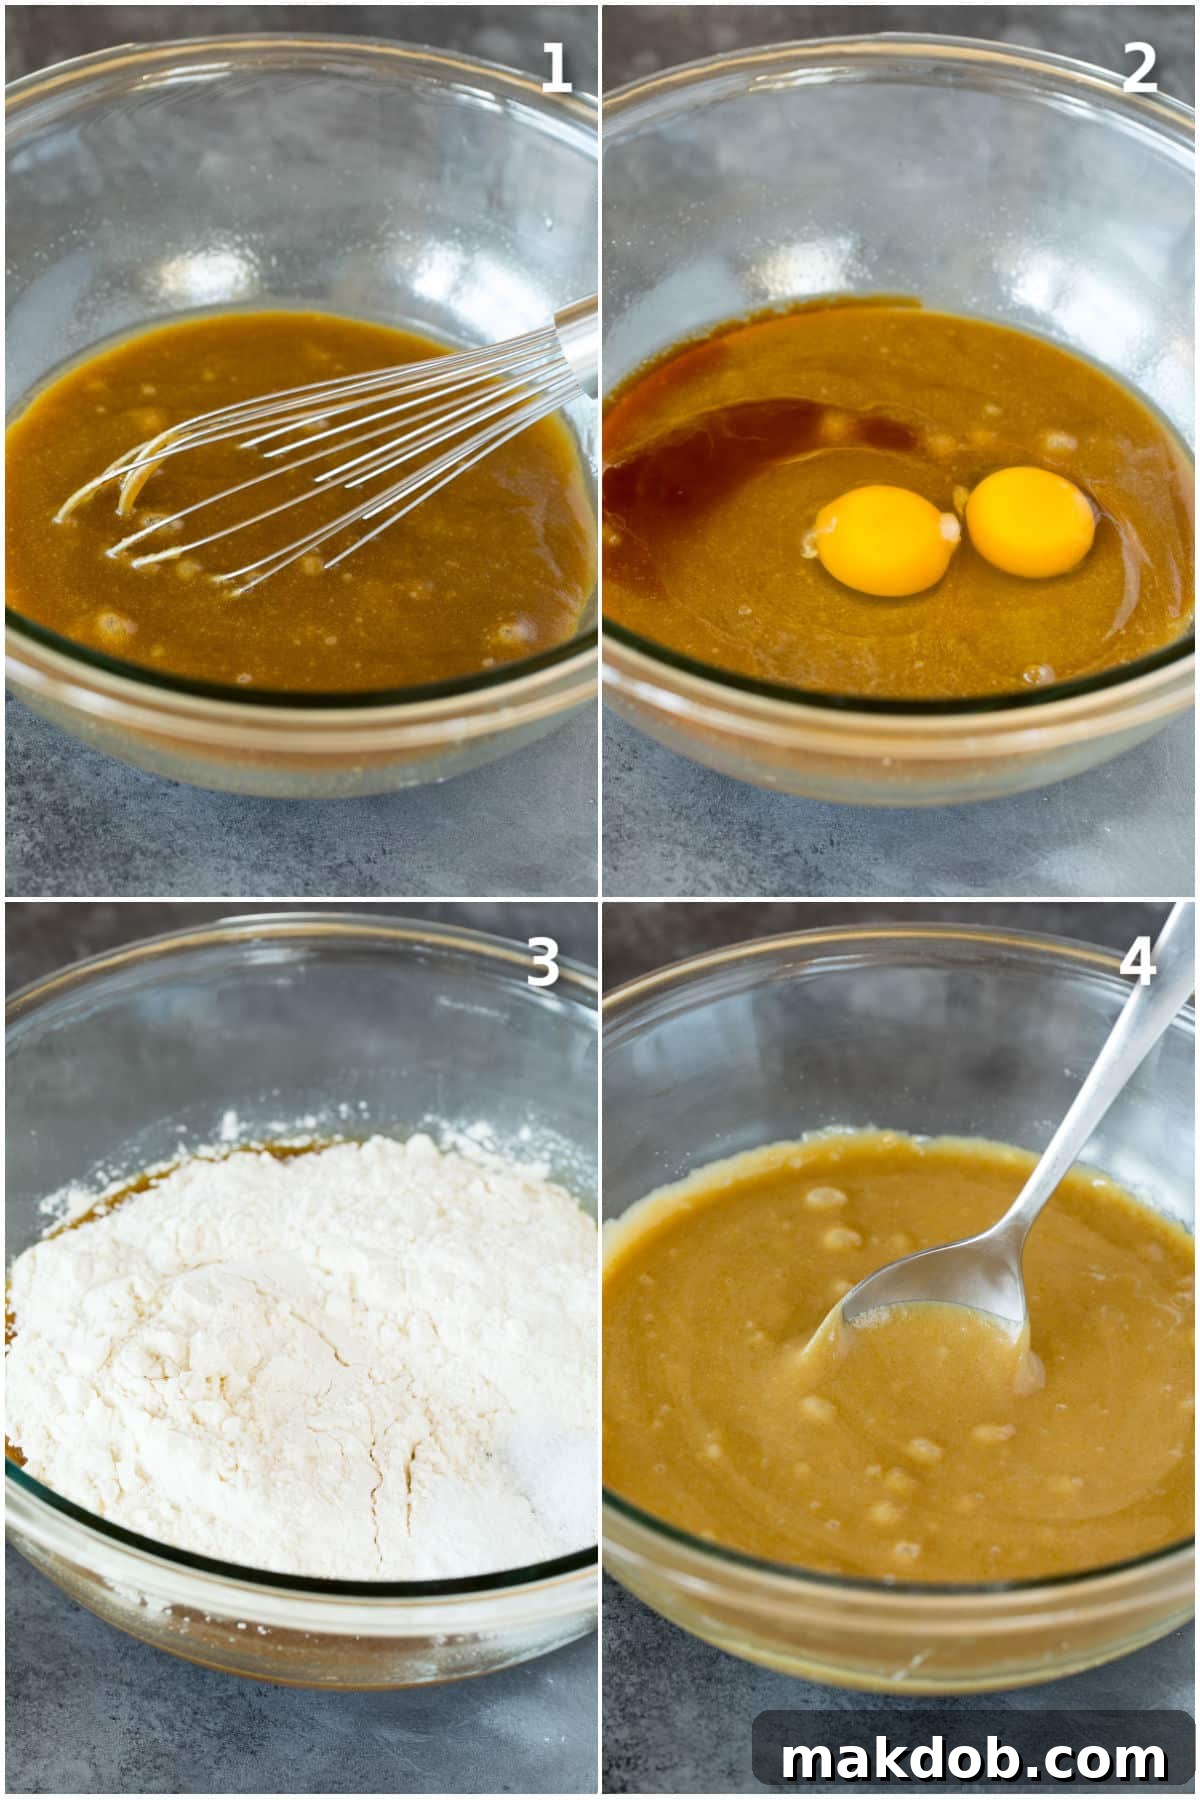
- Step 2: Combine Wet Ingredients. In a large mixing bowl, pour in your melted unsalted butter and packed light brown sugar. Whisk these two ingredients together until they are thoroughly combined and smooth. The brown sugar should dissolve somewhat into the warm butter, creating a rich, fragrant base. Then, add the eggs one at a time, whisking well after each addition until fully incorporated. Finish by whisking in the vanilla extract until the mixture is beautifully smooth and evenly textured.
- Step 3: Incorporate Dry Ingredients. To the wet mixture, add the all-purpose flour, baking powder, and salt. Using a sturdy spoon or a spatula, stir these dry ingredients into the wet mixture. Be careful not to overmix; stir only until the flour streaks have just disappeared and a cohesive batter forms. Overmixing can lead to tough cookie bars, so a gentle hand is key for that perfect chewy texture.
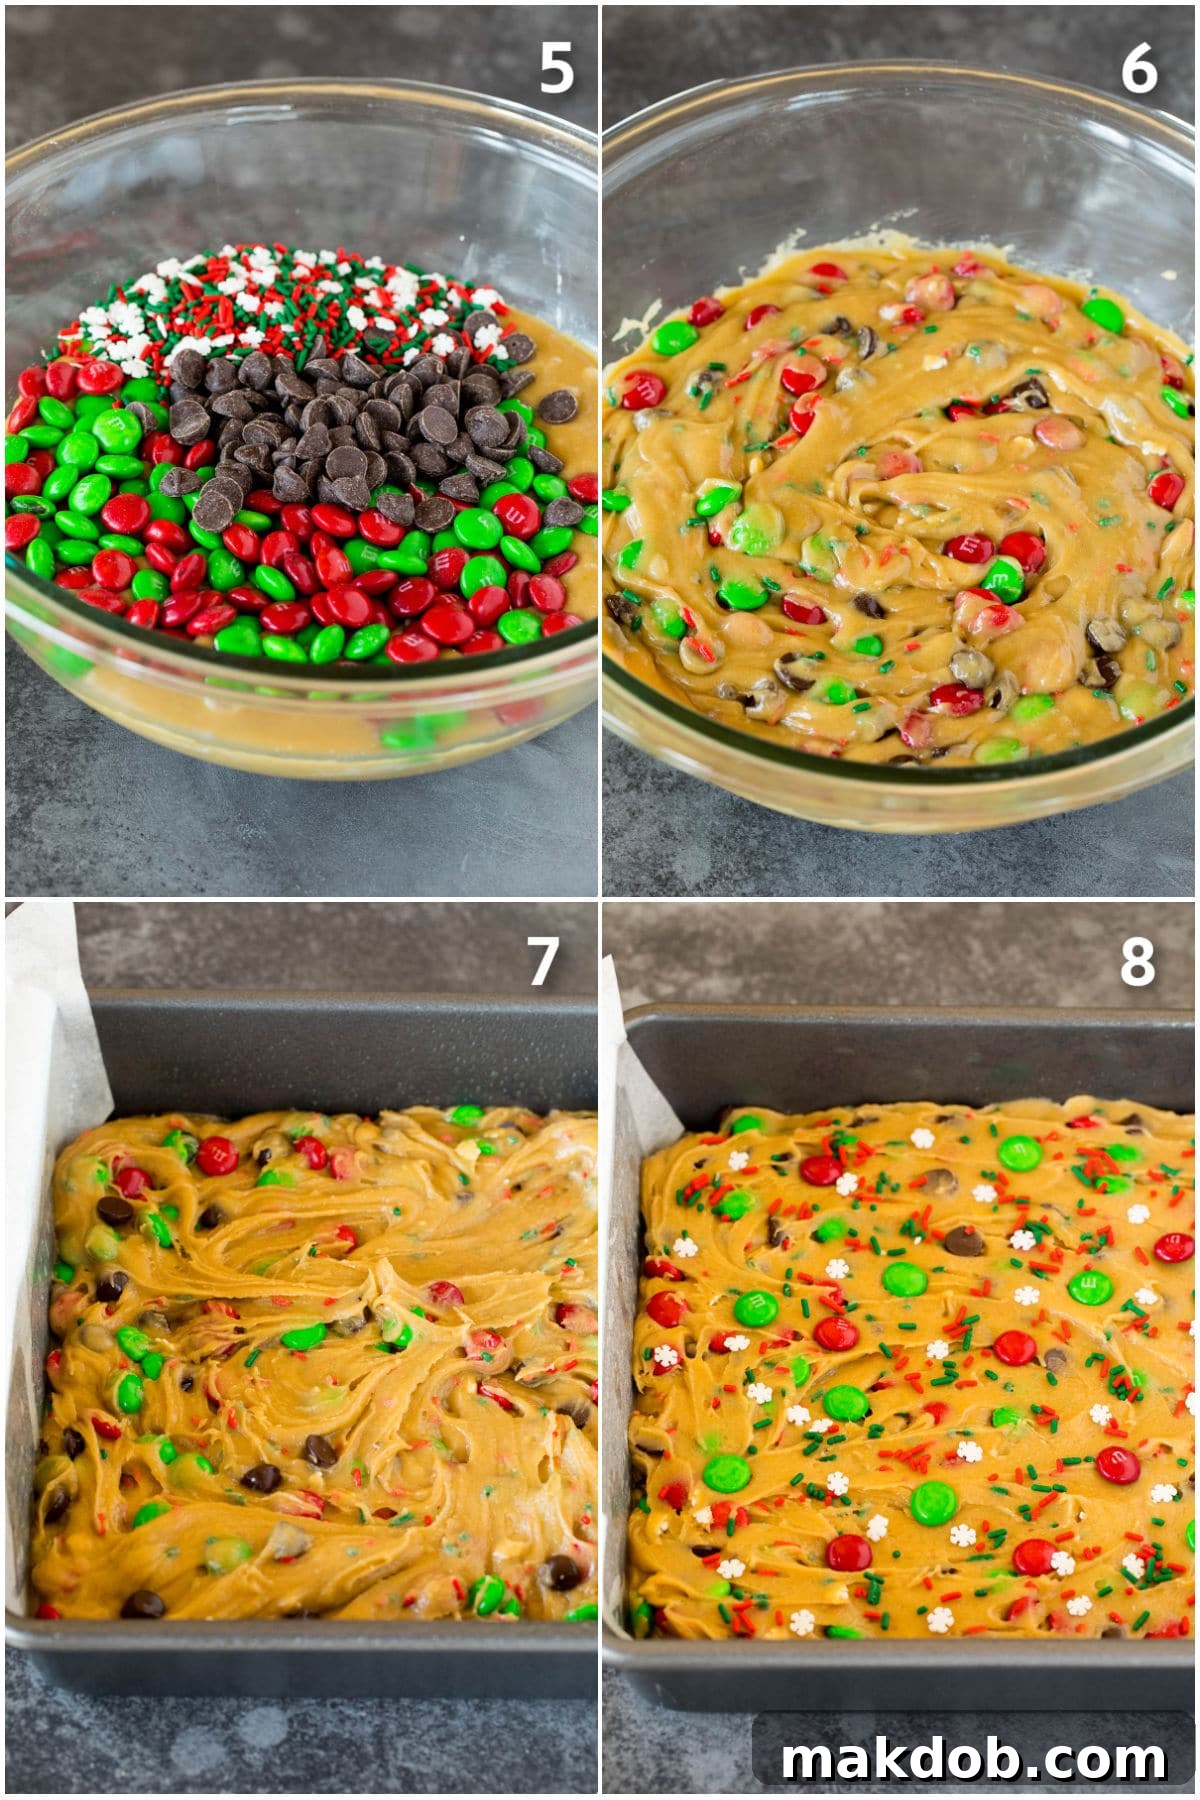
- Step 4: Fold in the Festive Add-Ins. Now for the fun part! Gently fold 1 cup of your Christmas M&M candies, all of the semisweet chocolate chips, and 4 tablespoons of your holiday sprinkles into the cookie dough. Distribute them evenly throughout the dough. The goal is to get a burst of color and chocolate in every bite.
- Step 5: Spread and Decorate. Transfer the prepared cookie dough into your parchment-lined and greased baking pan. Using an offset spatula or the back of a spoon, spread the dough evenly across the bottom of the pan, making sure it reaches all the corners. Don’t press too hard, just an even layer. For an extra festive touch, take the remaining 1/2 cup of M&M’s and 2 tablespoons of sprinkles and press them gently into the top surface of the dough. This ensures a beautiful, colorful display once baked.
- Step 6: Bake to Perfection. Place the pan in your preheated oven and bake for 20-25 minutes. The baking time can vary slightly depending on your oven, so keep an eye on them. The bars are ready when the edges are lightly golden brown, and a toothpick inserted into the center comes out with just a few moist crumbs attached, but not wet batter. Avoid overbaking, as this will result in dry, crumbly bars rather than the desired chewy texture.
- Step 7: Cool, Cut, and Serve. Once baked, remove the pan from the oven and let the bars cool completely in the pan on a wire rack. Cooling is crucial; warm bars are too soft to cut neatly. Once fully cooled, use the parchment paper overhang as handles to lift the entire slab of cookie bars out of the pan. Transfer it to a cutting board and use a sharp knife (and perhaps a ruler for precision) to cut them into perfectly even squares. Serve your delicious Christmas cookie bars and watch them disappear!
Expert Tips for Perfectly Chewy Cookie Bars
Achieving the perfect chewy texture and beautiful presentation for your Christmas cookie bars is easier with a few expert tips. Follow these guidelines to ensure your holiday treats are always a hit:
- Precision Cutting for Presentation: For bakery-worthy cookie bars, use a ruler and a sharp, non-serrated knife to cut your cooled bars into perfectly even-sized pieces. Clean the knife with a warm, damp cloth between cuts to prevent sticking and ensure crisp edges. This small step makes a big difference in presentation, especially when serving a crowd or gifting.
- Festive Shapes with Cookie Cutters: While squares are classic, you can elevate the festive appeal by using holiday cookie cutters! Once your baked cookie slab has cooled completely, use star, tree, or bell-shaped cutters to create individual festive shapes. Any leftover edges can be enjoyed as baker’s treats or crumbled over ice cream.
- Invest in Quality Chocolate: The quality of your chocolate truly impacts the flavor. I highly recommend using a high-quality brand of chocolate chips, such as Ghirardelli, Guittard, or even a good quality European chocolate. Better chocolate melts more smoothly and offers a richer, more indulgent flavor profile that shines through in every bite.
- Optimal Storage for Freshness: To keep your Christmas cookie bars at their peak freshness, store them in an airtight container at room temperature. They will remain wonderfully fresh and chewy for up to 5 days. For longer storage, you can also freeze your cooled cookie bars in a single layer in an airtight container or freezer bag for up to 2 months. Thaw at room temperature before serving.
- Avoid the Dreaded Overbake: This is perhaps the most crucial tip for chewy bars! Be careful not to overbake your cookies. The bars are ready when the edges appear golden brown and a toothpick inserted into the center comes out clean or with only a few moist crumbs attached. If the toothpick comes out completely clean and dry, they are likely overbaked and will be dry rather than chewy. Slightly underbaked is always better for chewiness.
- Room Temperature Ingredients: Ensure your eggs are at room temperature. Room temperature eggs emulsify better with the butter and sugar, creating a smoother, more uniform dough, which contributes to a better texture in the final baked product.
- Don’t Overmix the Flour: Once you add the flour, mix only until just combined. Overmixing develops the gluten in the flour, leading to tough and less chewy cookie bars. A few streaks of flour are better than an overmixed dough.
Seasonal Versatility: A Quick Customization Tip
Unlock the year-round potential of these versatile bars! You can easily adapt this recipe to suit any holiday or special occasion by simply swapping out the Christmas-themed sprinkles and M&M colors. Imagine vibrant pastels for Easter, spooky oranges and blacks for Halloween, or patriotic red, white, and blue for the Fourth of July!
Recipe FAQs: Holiday Baking Questions Answered
Planning dessert for a Christmas party can be tricky, but a good rule of thumb is to estimate 2-3 cookies per guest if other food items like appetizers or a main course are also being served. If your Christmas cookie bars are the primary dessert, or if you know your guests have a sweet tooth, it’s safer to plan for 3-4 pieces per person. For a cookie exchange, where guests swap and take home a variety, it’s best to plan on at least a dozen (12) cookies per person, allowing them to both share and leave with a good selection.
While bar cookies and drop cookies often share similar ingredients, their key difference lies in the baking method and resulting presentation. Drop cookies are individual portions of dough dropped onto a baking sheet, spreading into distinct, round shapes during baking. Bar cookies, on the other hand, are baked in a single slab in a square or rectangular pan. After baking and cooling, this slab is then cut into individual portions, usually squares or rectangles. This method makes bar cookies incredibly efficient for feeding larger groups, as there’s no need to scoop and space each cookie individually.
Absolutely! These Christmas cookie bars are perfect for making ahead. You can bake the entire batch, let them cool completely, and then store them in an airtight container at room temperature for up to 5 days. For longer storage, you can freeze the cooled, uncut slab or individual cut bars for up to 2 months. Thaw them at room temperature for a few hours before serving. This makes them an excellent choice for busy holiday preparations.
A 9×9 inch square baking pan is ideal for this recipe, yielding perfectly thick and chewy bars. You can also use an 8×8 inch pan for slightly thicker bars, though baking time may need to be adjusted by a few extra minutes. If you need to double the recipe for a larger crowd, a 9×13 inch rectangular pan would be the perfect choice. Always line your pan with parchment paper, leaving an overhang, for easy removal and cleanup.
FOLLOW ME FOR MORE DELICIOUS RECIPES
Creative Flavor Variations and Add-Ins
While these holiday cookie bars are undeniably delicious in their classic form, they are also incredibly adaptable! Feel free to unleash your creativity and customize them with a variety of exciting flavor combinations to suit your preference or a specific holiday theme. Here are some fantastic ideas to get you started:
- Exciting Add-Ins: Beyond M&M’s, the possibilities are endless for mixing into your cookie dough! Consider swapping out or adding ½ cup of the M&M’s for any of these delightful options:
- Crushed Pretzels: For a fantastic sweet and salty crunch.
- Chopped Nuts: Almonds, pecans, walnuts, or peanuts add a lovely earthy flavor and texture. Lightly toast them beforehand for intensified flavor.
- Toffee Bits: For a buttery, caramelized chewiness that melts deliciously into the cookie.
- Peanut Butter Cups: Chopped into small pieces, these add a rich peanut butter and chocolate swirl.
- Caramel Bits: These soft, chewy pieces create pockets of gooey caramel throughout the bars.
- White Chocolate Chips: A sweet and creamy contrast to the brown sugar base.
- Dried Cranberries or Cherries: For a tart, fruity burst that complements the holiday flavors.
- Mini Marshmallows: Folded in during the last few minutes of baking, they will create gooey, toasted pockets.
- Chocolate Choices: If semisweet chocolate isn’t your preferred type, don’t hesitate to experiment with other varieties.
- Milk Chocolate Chips: For a sweeter, creamier chocolate experience.
- White Chocolate Chips: Offer a milder, vanilla-infused chocolate flavor that pairs beautifully with many add-ins.
- Dark Chocolate Chunks: If you prefer a richer, less sweet chocolate experience, dark chocolate adds a sophisticated depth.
- Peppermint Chips: During the holiday season, peppermint chips are a festive and refreshing addition.
- Finishing Toppings: Elevate the visual appeal and taste with creative toppings once the bars have cooled slightly.
- White Chocolate Drizzle: Melted white chocolate drizzled over the top adds an elegant touch and extra sweetness.
- Flaky Sea Salt: A sprinkle of flaky sea salt enhances the flavors and provides a sophisticated sweet-and-salty balance.
- Powdered Sugar Dusting: A light dusting of powdered sugar after cooling gives a “snow-kissed” effect, perfect for Christmas.
- Chocolate Ganache: A rich, decadent chocolate ganache spread over the top would make these bars truly irresistible.
These Christmas cookie bars are more than just a recipe; they are a blank canvas for your holiday baking imagination. Whether served at a lively holiday gathering, packaged as thoughtful homemade gifts, or brought to a class party, their customizable nature ensures they are always a joyous and delicious hit!
More Irresistible Holiday Desserts
Creamy Eggnog Cake
1 hr
Classic Peppermint Bark
15 mins
Sparkling Christmas Popcorn
15 mins
Festive Christmas Tree Brownies
1 hr
Whimsical Christmas Puppy Chow
16 mins
Love This Recipe? Rate it!
Your feedback means the world to us! Please leave a 5-star 🌟🌟🌟🌟🌟 rating in the recipe card below and share your thoughts with a review in the comments section further down the page. Happy baking!
★
★
★
★
Christmas Cookie Bars
Pin
Save
10
20
30
Ingredients
- 12 tablespoons unsalted butter melted
- 1 ½ cups light brown sugar packed
- 2 teaspoons vanilla extract
- 2 eggs
- 1 ½ cups all purpose flour
- 1 teaspoon baking powder
- ½ teaspoon salt
- 1½ cups Christmas M&M’s divided use
- ½ cup semisweet chocolate chips
- 6 tablespoons Christmas sprinkles divided use
- cooking spray
Instructions
-
Preheat the oven to 350 degrees F (175 C). Line a 9-inch square pan with parchment paper, ensuring there’s an overhang on each of two opposing sides to act as “handles.”
-
Lightly coat the parchment-lined baking pan with cooking spray to prevent any sticking.
-
In a large bowl, combine the melted butter and packed light brown sugar. Whisk thoroughly until smooth. Then, whisk in the eggs one at a time, followed by the vanilla extract, until the mixture is well-combined and velvety.
-
Add the all-purpose flour, baking powder, and salt to the wet ingredients. Stir gently with a spatula or wooden spoon until the dry ingredients are just incorporated and no streaks of flour remain. Be careful not to overmix.
-
Gently fold 1 cup of the Christmas M&M candies, all of the semisweet chocolate chips, and 4 tablespoons of the Christmas sprinkles into the cookie dough until evenly distributed.
-
Spread the cookie dough into an even layer in the prepared pan. Press the remaining 1/2 cup of M&M’s and 2 tablespoons of sprinkles onto the top surface of the dough for an attractive finish.
-
Bake for 20-25 minutes, or until the cookie bars are lightly golden brown around the edges and a toothpick inserted into the center comes out with only a few moist crumbs attached. Avoid overbaking to keep them chewy.
-
Allow the bars to cool completely in the pan on a wire rack. Once fully cooled, use the parchment paper overhang to lift the entire slab of cookie from the pan. Transfer to a cutting board and cut into squares before serving.
Notes
- These bars are incredibly versatile! You can easily use any color M&M’s and sprinkles to customize them for different holidays or themed events throughout the year.
- Store any leftover cookie bars in an airtight container at room temperature for up to 5 days to maintain their freshness and chewy texture.
Nutrition
Carbohydrates: 29g |
Protein: 2g |
Fat: 9g |
Saturated Fat: 5g |
Cholesterol: 43mg |
Sodium: 87mg |
Potassium: 75mg |
Sugar: 20g |
Vitamin A: 290IU |
Calcium: 35mg |
Iron: 0.8mg