
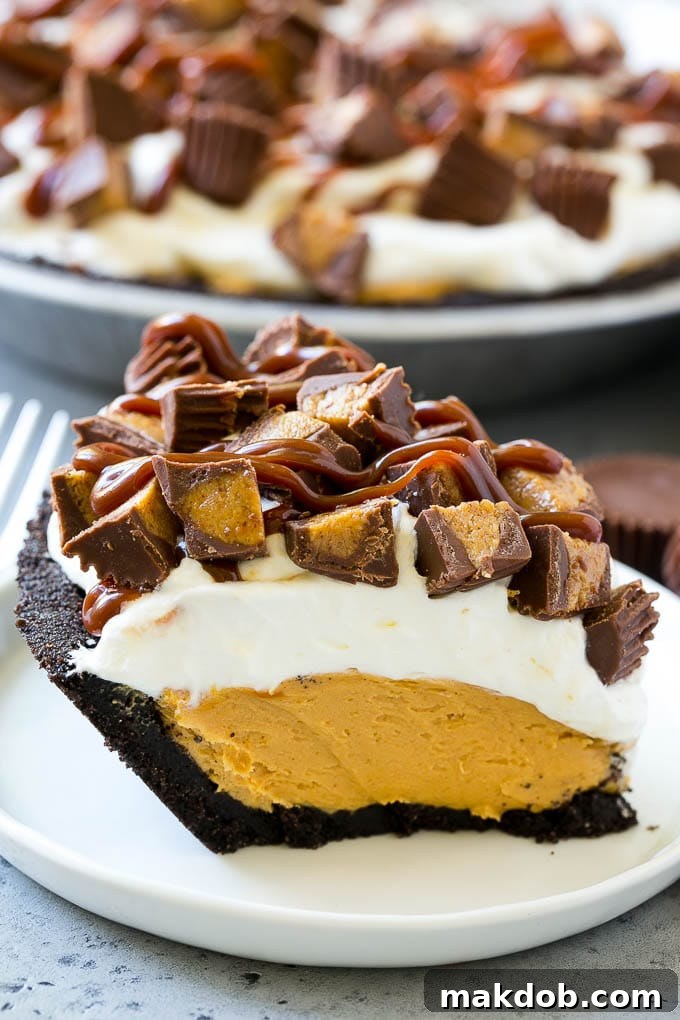
Prepare to be swept away by the sheer delight of this Chocolate Peanut Butter Pie – a truly irresistible, no-bake dessert that effortlessly combines two universally loved flavors. With its perfectly crumbly cookie crust, sumptuously creamy peanut butter filling, and a cloud of fluffy whipped cream, all crowned with delightful chopped peanut butter cups, this pie is a masterpiece of simplicity and indulgence. It’s the ideal make-ahead treat, promising stress-free entertaining and rave reviews from everyone who tastes it!
The harmonious marriage of chocolate and peanut butter is a classic for a reason, and this easy no-bake pie offers the most divine way to satisfy your sweet cravings. If you’re a devoted peanut butter enthusiast, you’ll also adore our other creations like peanut butter blossoms and peanut butter brownies, or explore our extensive list of 10 mouth-watering peanut butter recipes.
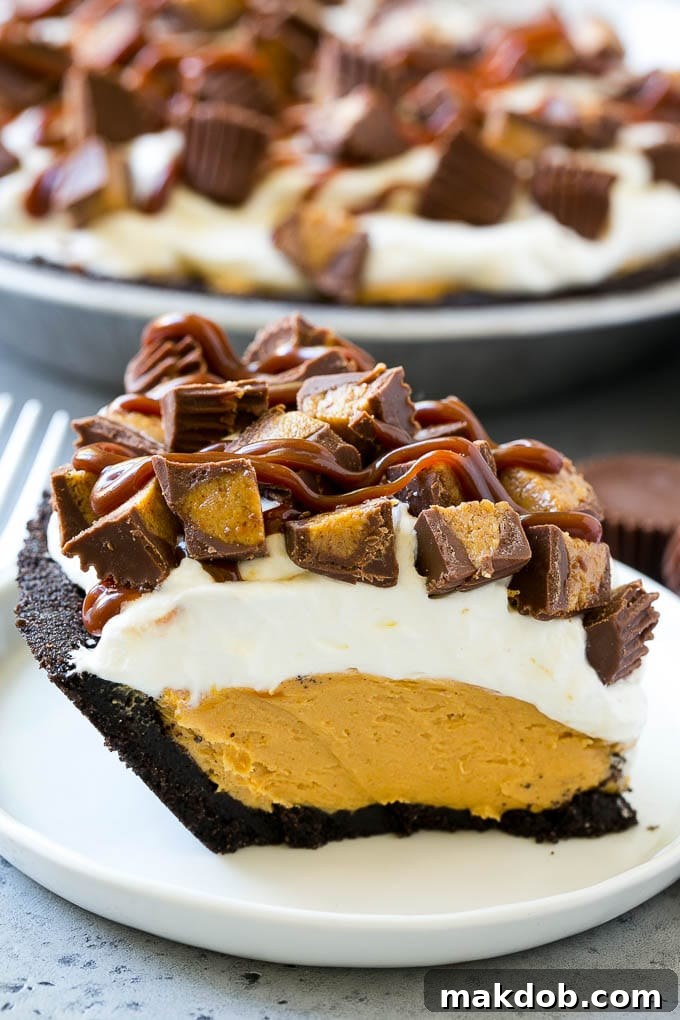
Why You’ll Adore This No-Bake Chocolate Peanut Butter Pie
There’s an undeniable charm to no-bake desserts, and this chocolate peanut butter pie is a prime example. Its effortless preparation means you can whip up a spectacular dessert without ever turning on your oven, perfect for warm weather or busy schedules. I confess, I’m utterly obsessed with no-bake pies right now! The day after creating this incredibly decadent chocolate peanut butter pie, I found myself making another no-bake delight (avalanche cookies). However, everyone was already longing for more of this peanut butter cup pie – it was truly that delicious and vanished in record time!
Beyond its incredible flavor, this pie’s convenience makes it a true culinary gem. It’s a fantastic make-ahead option, allowing you to prepare it hours, or even a day, in advance, freeing up your time when entertaining. Plus, the combination of rich chocolate and creamy peanut butter appeals to almost everyone, making it a guaranteed crowd-pleaser for any gathering, from casual family dinners to festive celebrations.
For those who appreciate magnificent desserts, be sure to explore more of our beloved dessert and pie recipes, including our comforting Dutch apple pie, classic pumpkin meringue pie, and the unique pear custard pie!
Essential Ingredients for Your Decadent Pie
Creating this spectacular chocolate peanut butter pie requires a straightforward list of readily available ingredients. You’ll need:
- Chocolate Sandwich Cookies (like Oreos): These form the base of our rich, dark, and perfectly crisp crust.
- Granulated Sugar: A small amount is added to the crust for extra sweetness and to help bind the crumbs.
- Melted Butter: The key to transforming cookie crumbs into a cohesive and flavorful pie crust.
- Softened Butter: The foundation for our creamy peanut butter filling, ensuring a smooth, luxurious texture.
- Creamy Peanut Butter: The star of the show! We recommend a standard, processed creamy peanut butter for the best texture and stability.
- Powdered Sugar: Essential for sweetening the peanut butter filling and giving it a melt-in-your-mouth consistency.
- Sweetened Whipped Cream: A light, airy topping that balances the richness of the peanut butter and chocolate. You can make it fresh or use a quality thawed whipped topping.
- Mini Peanut Butter Cups: Chopped for a delightful crunch and extra burst of peanut butter chocolate flavor on top.
- Fudge Sauce: For an additional layer of chocolatey goodness and an elegant drizzle.
- Cooking Spray: To ensure your crust doesn’t stick to the pie pan.
Step-by-Step Guide: Crafting Your Decadent No-Bake Pie
Creating this luscious chocolate peanut butter pie is surprisingly simple, requiring minimal effort for maximum flavor. Here’s how you’ll assemble this dreamy dessert:
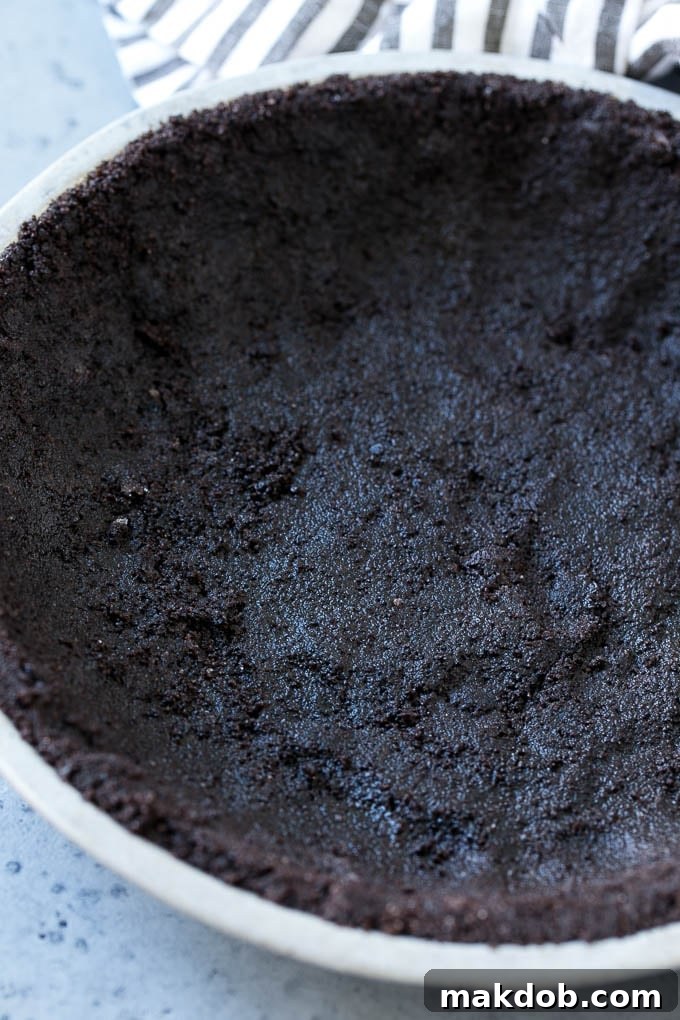
- Prepare the Cookie Crust: Begin by making your delightfully crunchy chocolate cookie crust. In a food processor, combine the chocolate sandwich cookies and granulated sugar. Pulse until a mixture of fine, uniform crumbs is achieved.
- Form the Crust Base: Lightly coat a 9-inch pie pan with cooking spray to prevent sticking. Pour the melted butter into the cookie crumbs and stir thoroughly until all crumbs are moistened and resemble wet sand.
- Press and Chill: Firmly press this buttery cookie mixture into the bottom and up the sides of your prepared pie tin. For a sturdy crust, use the back of a large spoon or the flat bottom of a measuring cup to compact it tightly. Once formed, transfer the crust to the refrigerator to chill for at least 30 minutes. This chilling time is crucial for the crust to set properly.
- Whip the Peanut Butter Filling: While the crust chills, prepare the creamy peanut butter filling. In the bowl of a stand mixer fitted with a paddle attachment (or using an electric hand mixer), beat together the softened butter and creamy peanut butter until the mixture is light and smooth.
- Sweeten the Filling: Gradually add the powdered sugar to the peanut butter mixture, beating on low speed until fully incorporated, then increase speed and beat until the filling is light and fluffy. Scrape down the sides of the bowl as needed to ensure everything is well combined.
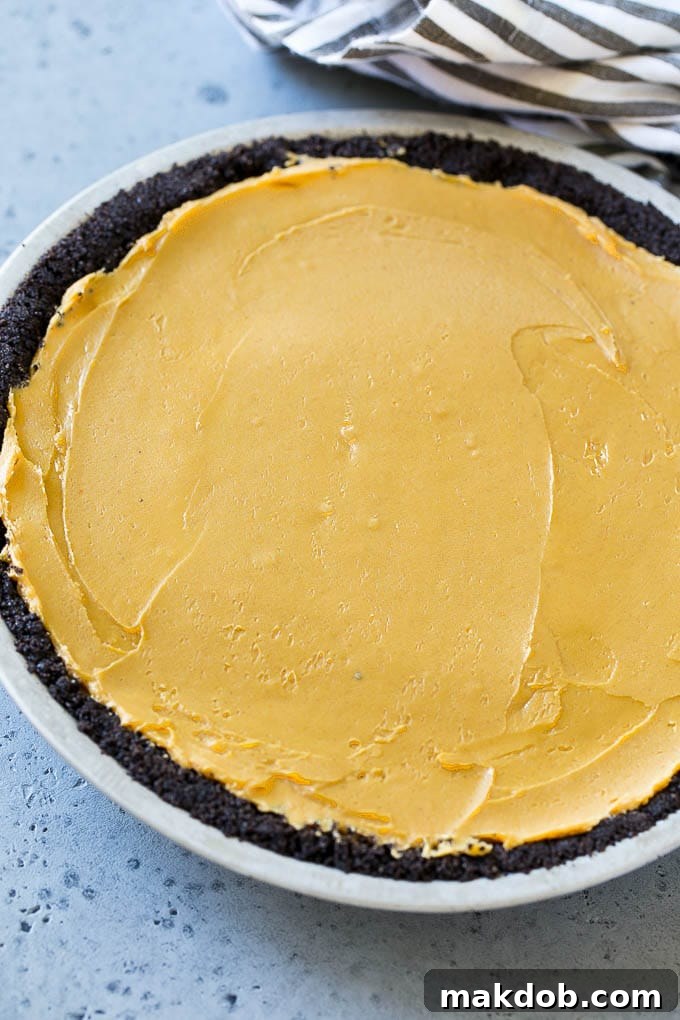
- Assemble the Pie Layers: Remove the chilled crust from the refrigerator. Evenly spread the peanut butter filling over the bottom of the cookie crust, creating a smooth, thick layer.
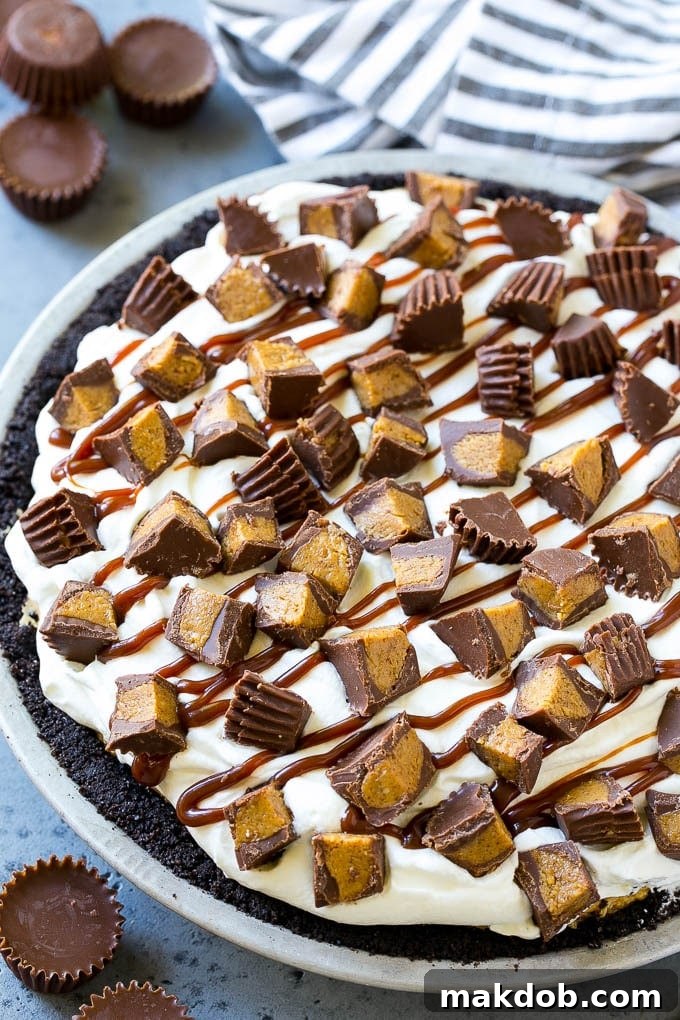
- Add Toppings: Gently spread the sweetened whipped cream over the peanut butter filling. Drizzle generously with fudge sauce, creating inviting swirls. Finally, scatter the chopped mini peanut butter cups over the whipped cream for an extra burst of flavor and texture.
- Final Chill and Serve: Place the assembled pie back into the refrigerator to chill for a minimum of 4 hours, or preferably overnight. This allows all the layers to set completely, ensuring clean slices. Once firm, cut into generous slices and savor one of the most delicious, oven-free pies you’ll ever experience!
Pro Tips for a Flawless No-Bake Peanut Butter Pie
- Choosing Your Crust: While I absolutely adore using Oreo cookies for my no-bake peanut butter pie crust, feel free to experiment! Chocolate graham crackers or chocolate wafer cookies also work exceptionally well, providing a similar rich base. The key is to use a dry, crisp cookie that will process into fine crumbs.
- Mixing Equipment: For achieving the smoothest, creamiest peanut butter mousse filling and perfectly fluffy whipped cream, I highly recommend using a stand mixer. Alternatively, an electric hand mixer in a large mixing bowl will also do the trick beautifully.
- Peanut Butter Preference: For optimal results and a filling that holds its shape, I suggest using standard store-bought creamy peanut butter brands like Skippy or Jif. Natural peanut butter, while delicious, tends to separate after resting, which can affect the pie’s texture and consistency.
- Whipped Cream Excellence: For an elevated taste and texture, I prefer to use freshly whipped cream on top of my chocolate peanut butter pie. However, if time is of the essence, you can certainly substitute with a quality whipped topping, such as Cool Whip, for a convenient alternative.
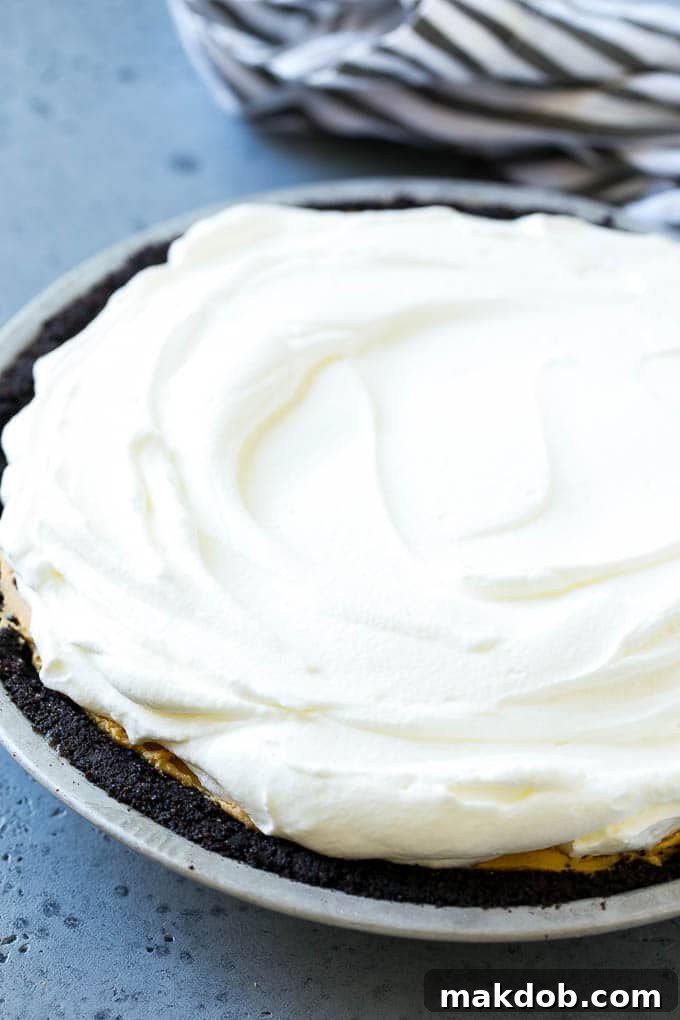
- Avoid Aerosol Whipped Cream: A crucial tip for presentation: do not use aerosol-style whipped cream. It will quickly deflate, leaving you without the beautiful mound of fluffy whipped cream goodness as pictured. Stick to fresh or thawed whipped topping for best results.
- Firm Crust is Key: It’s incredibly important to firmly press your crust into the pie pan. This compacting helps it set and prevents it from crumbling when sliced. Using the back of a large spoon or the bottom of a measuring cup helps tremendously with this task, ensuring an even and sturdy base.
- Patience with Chilling: While 4 hours is the minimum chilling time for the pie, chilling it overnight yields the best results. It allows the filling to fully firm up and the flavors to meld, making for cleaner slices and a more enjoyable eating experience.
Serving Suggestions to Elevate Your Pie
While this chocolate peanut butter pie is undeniably delicious on its own, a few simple additions can elevate its presentation and taste even further:
- Extra Drizzle: Beyond the fudge sauce, consider a drizzle of caramel sauce or a sprinkle of flaky sea salt for a sophisticated touch that enhances the chocolate and peanut butter flavors.
- Fresh Berries: A scattering of fresh raspberries or sliced strawberries can add a pop of color and a refreshing tartness that cuts through the richness of the pie.
- Chopped Nuts: Toasted peanuts or pecans can provide an additional layer of crunch and nutty flavor, complementing the peanut butter filling.
- Coffee or Milk: Serve slices with a steaming cup of coffee, a cold glass of milk, or even a shot of espresso for a delightful after-dinner treat.
- Ice Cream: A small scoop of vanilla or chocolate ice cream alongside a slice creates an ultimate dessert experience.
Storage and Make-Ahead Tips
This no-bake pie is fantastic for making in advance, which is perfect for entertaining or enjoying throughout the week. Here’s how to store it properly:
- Refrigeration: The pie must be stored in the refrigerator due to its dairy-based filling and topping. Cover it loosely with plastic wrap or aluminum foil. It will stay fresh and delicious for 3-4 days.
- Freezing: For longer storage, this pie freezes beautifully! Once completely chilled and set, you can wrap the entire pie (or individual slices) tightly in plastic wrap, then an additional layer of aluminum foil. Freeze for up to 1-2 months. Thaw in the refrigerator overnight before serving. The crust might soften slightly when thawed, but the flavor will still be incredible.
- Make-Ahead Prep: You can prepare the crust and the peanut butter filling up to 1-2 days in advance. Store the chilled crust covered in the fridge, and the peanut butter filling in an airtight container in the fridge. Assemble the pie with whipped cream and toppings a few hours before serving for the freshest taste and best presentation.
Frequently Asked Questions
Frozen whipped topping, often found in tubs, typically has little to no dairy content and contains artificial ingredients and stabilizers, making it sweeter and more stable. Real whipped cream, on the other hand, is made from heavy cream (dairy), offering a richer, fresher taste that is less sweet and free from artificial additives. Many prefer the taste and texture of fresh whipped cream for its natural flavor.
Making a graham cracker crust is very similar to making a cookie crust. Simply substitute graham cracker crumbs for the chocolate cookie crumbs. You’ll still blend them with a little sugar and melted butter. Be mindful that graham cracker crumbs can sometimes absorb less butter than cookie crumbs, so add the melted butter a little at a time until the mixture resembles wet sand and holds together when pressed.
Absolutely! To make this pie gluten-free, simply substitute the chocolate sandwich cookies for your favorite gluten-free chocolate sandwich cookies or gluten-free graham crackers. The rest of the ingredients are typically gluten-free, but always check labels to be certain.
While creamy peanut butter is recommended for a silky-smooth filling, you can certainly use crunchy peanut butter if you prefer a textural contrast. It will add small bits of peanut to the filling, which can be a delightful surprise!
Follow Us for More Delicious Recipes!
Customizing Your Chocolate Peanut Butter Pie
This chocolate peanut butter pie is incredibly smooth, delightfully creamy, and utterly delicious as is. However, one of its best features is how easily you can customize the flavors and textures to perfectly suit your personal taste or the occasion:
- Add More Candy: Feel free to infuse your pie with more of your favorite candies! Mix in mini M&Ms, Reese’s Pieces, or other chopped candy bars into the peanut butter filling for an extra layer of sweetness and texture. Sprinkle them on top for a festive look.
- Boost the Chocolate: If you’re a true chocoholic, consider adding mini chocolate chips directly into your peanut butter filling. Alternatively, sprinkle them generously over the whipped cream topping, or even incorporate some melted dark chocolate into the filling for an even richer chocolate flavor.
- Experiment with Crusts: The possibilities for the crust are endless! Instead of an Oreo cookie crust, you could create a delicious base using other crushed cookies like vanilla wafers for a lighter contrast, chocolate chip cookies for a chewy element, or classic graham crackers for a traditional flavor. Oatmeal cookies could also provide a unique, wholesome twist. The key is to choose a drier cookie that easily processes into crumbs and can form a stable crust when mixed with butter.
- Nut Butter Alternatives: While it’s a peanut butter pie, if you have allergies or want to try something different, consider a nut-free butter alternative or even an almond butter for a unique twist. Note that flavors and textures will vary.
My kids have already been relentlessly begging for more of this no-bake peanut butter cup pie. I have a strong feeling this will become a frequent request in our household – and I’m certainly not complaining! I enjoyed every single bite just as much as they did, if not more!
More Irresistible Peanut Butter Recipes You’ll Love
Peanut Butter Eggs
Prep & Chill: 12 mins
Peanut Butter Chocolate Gooey Butter Cake
Total Time: 55 mins
Buckeye Balls (Peanut Butter Balls)
Total Time: 1 hr 2 mins
No Bake Peanut Butter Cookies
Total Time: 10 mins
Chocolate Peanut Butter Fudge
Total Time: 10 mins
Love This Recipe?
We would be absolutely thrilled if you’d leave a 5-star 🌟🌟🌟🌟🌟 rating in the recipe card below & share your feedback with a review in the comments section further down the page. Your support helps us create more delicious recipes!
Chocolate Peanut Butter Pie
Pin Recipe
Sara Welch
20 minutes
1 minute
4 hours
21 minutes (plus chilling)
Dessert
American
12
Ingredients
- 20 chocolate sandwich cookies such as Oreos
- 2 tablespoons granulated sugar
- 5 tablespoons melted butter
- 8 tablespoons butter softened
- 1 1/2 cups creamy peanut butter
- 1 1/2 cups powdered sugar
- 2 cups sweetened whipped cream can also use thawed whipped topping
- 1 1/2 cups mini peanut butter cups chopped
- 1/4 cup fudge sauce
- cooking spray
Instructions
-
Place the cookies and granulated sugar in a food processor. Process until fine crumbs form.
-
Coat a 9-inch pie pan with cooking spray.
-
Pour the melted butter into the cookie mixture and stir until combined.
-
Firmly press the cookie mixture into the bottom and sides of the pie pan.
-
Chill the crust for at least 30 minutes.
-
To make the peanut butter filling, place the softened butter and peanut butter in the bowl of a mixer. Beat until smooth.
-
Add the powdered sugar to the peanut butter mixture and beat until thoroughly combined.
-
Spread the peanut butter filling into an even layer in the crust.
-
Spread the whipped cream over the layer of peanut butter filling. Drizzle with fudge sauce and arrange peanut butter cups on top.
-
Chill for at least 4 hours. Cut into slices and serve.
Notes
- It’s important to firmly press your crust into the pan. Using the back of a large spoon or the bottom of a measuring cup helps tremendously with this task.
- I recommend standard store-bought creamy peanut butter (like Skippy or Jif) for the best results in terms of texture and stability.
- I like to use fresh whipped cream on top of my chocolate peanut butter pie for the best flavor. However, you can substitute a whipped topping, like Cool Whip, if you don’t have time to whip up your own cream. Avoid aerosol whipped cream as it will deflate quickly.
Nutrition
Carbohydrates: 68g |
Protein: 14g |
Fat: 29g |
Saturated Fat: 19g |
Cholesterol: 43mg |
Sodium: 539mg |
Potassium: 446mg |
Fiber: 4g |
Sugar: 53g |
Vitamin A: 475IU |
Vitamin C: 0.2mg |
Calcium: 72mg |
Iron: 3mg
Did you make this recipe?
Tag @dinneratthezoo on Instagram and hashtag it #dinneratthezoo