

Welcome to the ultimate guide for creating irresistible Oreo Balls, a decadent no-bake dessert that captures the hearts of everyone who tastes them! These delightful treats, often known as Oreo Truffles, are a heavenly combination of crushed Oreo cookies and creamy cheese, expertly rolled into bite-sized balls and then generously dipped in rich chocolate. The final flourish? A vibrant array of sprinkles, making them as visually appealing as they are delicious.
Whether you’re seeking the perfect homemade gift for the holidays, a standout dessert for a party, or simply a fun baking project with the kids, Oreo balls are an absolute winner. They are incredibly easy to make, require just a few simple ingredients, and offer endless possibilities for customization. Forget complicated baking; these truffles are designed for effortless enjoyment and guaranteed rave reviews. Just like beloved dessert recipes such as Christmas Crack, Chocolate Covered Cherries, Crock Pot Candy, and Peppermint Patties, these festive Oreo truffles are a staple in our household, bringing smiles to friends and family alike.

The beauty of this recipe lies in its simplicity and versatility. With only four core ingredients, you can whip up a batch of these delectable treats in no time, making them a fantastic addition to your holiday baking rotation or any special occasion. Let’s dive into how to create these delightful chocolate-dipped wonders!
Table of Contents
- What Are Oreo Balls?
- Why You’ll Love These Oreo Truffles
- Oreo Balls Ingredients
- Essential Kitchen Tools
- How Do You Make Oreo Balls? A Step-by-Step Guide
- Tips For The Perfect Dessert
- Quick Tip: Cream Cheese
- Recipe FAQs
- Unleash Your Creativity: Flavor Variations
- Serving and Storing Oreo Balls
- More Recipes For Chocolate Lovers
- Oreo Balls Video
- Love This Recipe?
- Oreo Balls Recipe Card
What Are Oreo Balls?
Oreo balls, also famously known as Oreo truffles, are a delightful no-bake dessert crafted from a simple yet ingenious combination of crushed Oreo cookies and softened cream cheese. This rich, fudgy mixture is then rolled into uniform spheres, chilled until firm, and finally coated in melted chocolate or candy melts. The result is a bite-sized confection that boasts a perfect balance of creamy and crunchy textures, enveloped in a sweet chocolate shell. These easy-to-make treats offer all the classic flavor of your favorite sandwich cookie, elevated into an elegant dessert that’s perfect for sharing, gifting, or simply indulging in yourself.
Why You’ll Love These Oreo Truffles
- Effortlessly Easy: With a minimal ingredient list and no baking required, this recipe is perfect for beginner cooks and seasoned bakers alike. It’s a fantastic project to involve children in the kitchen!
- A Guaranteed Crowd-Pleaser: The classic combination of Oreos and chocolate is universally loved. These truffles are always a hit at parties, potlucks, and family gatherings, appealing to all ages.
- Incredibly Versatile: From different Oreo flavors to various chocolate coatings and an endless array of toppings, you can easily customize these treats to match any theme, holiday, or personal preference.
- Perfect for Gifting: Elegantly present these homemade truffles in decorative boxes or bags, and you have a thoughtful and delicious gift that will surely be appreciated during the holidays or for any special occasion.
- Make-Ahead Friendly: You can prepare the truffle centers in advance, making party prep a breeze. Simply store them in the refrigerator until you’re ready to dip and decorate.
Oreo Balls Ingredients
Crafting these irresistible Oreo truffles requires just a few key ingredients, each playing a crucial role in creating their signature taste and texture. For this recipe, you will need:
- Oreo Cookies: The star of the show! A package of regular Oreo cookies is ideal. While other flavors work, the classic chocolate cookie base provides the perfect foundation. You can use regular or even “Mega Stuf” for a slightly richer interior, but the standard size works best for consistency in the dough.
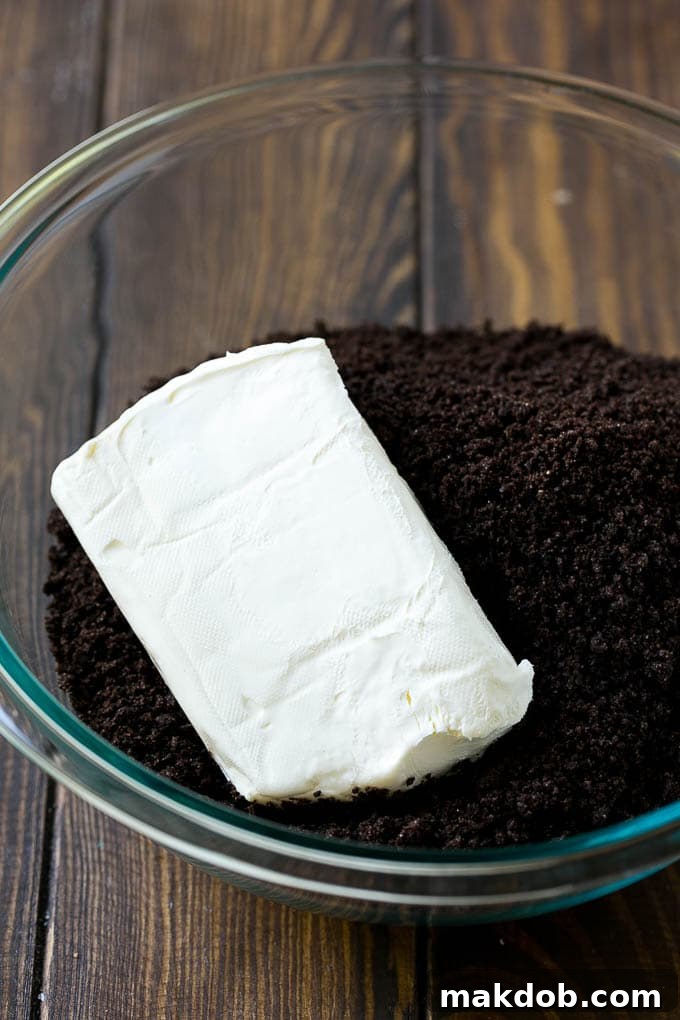
- Cream Cheese: Essential for binding the cookie crumbs into a smooth, pliable dough and adding that characteristic tangy richness. Always opt for full-fat cream cheese for the best flavor and texture. Ensure it’s softened to room temperature for effortless mixing.
- Candy Melts or Chocolate Chips: This will form the delicious outer shell of your truffles. Candy melts (like Wilton Candy Melts or Ghirardelli Melting Wafers) are specifically designed for easy melting and a smooth, thin coating without the need for tempering. If you prefer the taste of pure chocolate, high-quality chocolate chips (semi-sweet, milk, or dark) can be used, but they might require a little help to achieve the perfect dipping consistency.
- Vegetable Shortening: (Only if using chocolate chips) If you choose chocolate chips over candy melts, a small amount of vegetable shortening is vital. It helps to thin out the melted chocolate, making it smoother and easier to dip your Oreo balls, and gives them a beautiful glossy finish. You won’t need this if you’re using candy melts.
- Sprinkles: For decoration! These add a festive touch and a satisfying crunch. Choose colors and shapes that match your occasion – holiday-themed, birthday brights, or elegant metallics.
Essential Kitchen Tools
To make your Oreo ball creation process smooth and enjoyable, here are a few tools you’ll find indispensable:
- Food Processor: The quickest and most efficient way to turn your Oreo cookies into fine, uniform crumbs. If you don’t have one, a sturdy Ziploc bag and a rolling pin will do the trick.
- Large Mixing Bowl: For combining the cookie crumbs and cream cheese.
- Baking Sheet(s): Essential for chilling your truffle centers and later, for letting the chocolate-dipped balls set.
- Parchment Paper or Silicone Baking Mats: To line your baking sheets. This prevents the truffles from sticking and makes for easy cleanup.
- Cookie Dough Scoop (1-tablespoon size): Ensures all your Oreo balls are uniform in size, making for a more professional and even presentation.
- Microwave-Safe Bowls: For melting your chocolate or candy melts.
- Dipping Fork or Candy Dipping Tools: These specialized tools make dipping the balls in chocolate much easier, allowing excess chocolate to drip off cleanly. A regular dinner fork can also work in a pinch.
How Do You Make Oreo Balls? A Step-by-Step Guide
Creating these delightful Oreo truffles is a straightforward process that yields impressive results. Follow these steps for perfect homemade treats:
- Prepare the Cookie Crumbs: Begin by placing your entire package of Oreo cookies into a food processor. Pulse the cookies until they are transformed into very fine crumbs. The finer the crumbs, the smoother your truffle centers will be. If you don’t have a food processor, you can place the cookies in a large, sturdy Ziploc bag and crush them with a rolling pin until uniformly fine.
- Form the Dough: Transfer the finely crushed Oreo crumbs into a large mixing bowl. Add the softened cream cheese to the bowl. Using a sturdy spoon or your hands (it can get a bit messy, but it’s often the most effective!), mix the crumbs and cream cheese together until a cohesive dough forms. Ensure there are no streaks of plain cream cheese and that the mixture is evenly combined. The consistency should be firm enough to roll but still pliable.
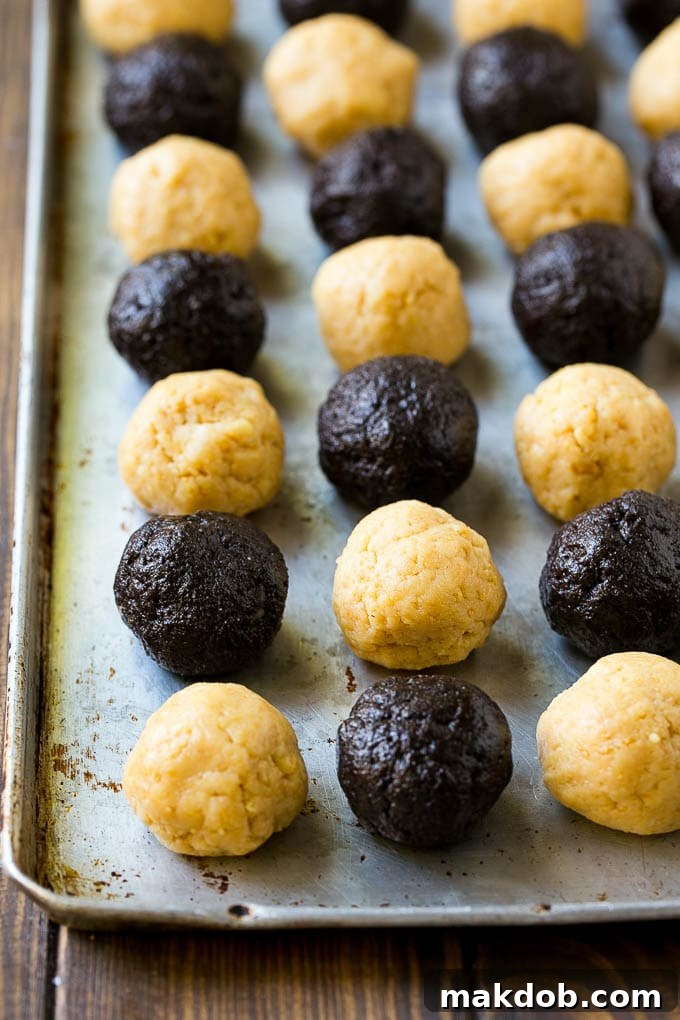
- Roll the Balls: Take small portions of the dough and roll them into uniform, 1-inch balls. A 1-tablespoon cookie scoop is highly recommended here to ensure consistent sizing, which helps them chill and dip evenly. Place the rolled balls onto a baking sheet lined with parchment paper or a non-stick baking mat.
- Chill Until Firm: This step is crucial for preventing your truffles from falling apart during the dipping process. Place the baking sheet with the Oreo balls into the freezer for at least 20 minutes, or until they are firm to the touch. Alternatively, you can refrigerate them for about an hour.
- Melt the Chocolate: While the Oreo balls are chilling, prepare your chocolate coating. Place your candy melts or chocolate chips in a microwave-safe bowl. Heat in the microwave in 30-second increments, stirring well after each interval, until the chocolate is fully melted and smooth. Be careful not to overheat the chocolate, as this can cause it to seize.
- Add Shortening (If Using Chocolate Chips): If you opted for chocolate chips instead of candy melts, stir in the vegetable shortening once the chocolate is completely melted. This will thin the chocolate slightly, making it much easier to dip the balls and achieve a smooth, glossy coating. You do not need to add shortening to candy melts.
- Dip the Balls: Working with one chilled Oreo ball at a time, gently place it on a fork (a specialized candy dipping fork works best, but a regular dinner fork will also do). Submerge the ball completely into the melted chocolate. Lift the ball out of the chocolate and gently tap the fork against the side of the bowl to allow any excess chocolate to drip off. This helps create a smooth, even coat without thick puddles.
- Decorate and Set: Carefully transfer each chocolate-dipped ball back onto the parchment-lined baking sheet. Immediately sprinkle with your chosen decorations while the chocolate is still wet. Repeat this process with all remaining Oreo balls.
- Final Chill and Serve: Once all the balls are dipped and decorated, place the baking sheet back into the refrigerator. Chill for another 15-30 minutes, or until the chocolate coating has fully set and is firm. Once firm, your delicious Oreo balls are ready to serve and enjoy!
Tips For The Perfect Dessert
- Choose Your Chocolate Wisely: You have options for dipping! Chocolate chips or candy melts both work. For the easiest, smoothest finish, especially if you’re new to dipping, I highly recommend using Ghirardelli Melting Wafers. These are readily available in the baking aisle of most grocery stores and are designed to melt smoothly and thinly, providing a beautiful, professional-looking coating that tastes like real chocolate. If you opt for regular chocolate chips, remember to add a bit of vegetable shortening to thin out your melted chocolate. This makes it more fluid and suitable for dipping, preventing a thick, clumpy coating.
- Plan Ahead for Easier Prep: The Oreo truffle centers can be prepared up to a day in advance. Simply roll them into balls, place them on a parchment-lined baking sheet, cover loosely with plastic wrap, and refrigerate until you’re ready to dip them in chocolate. This is a fantastic time-saver for busy schedules.
- Ensure Uniform Size: For a professional appearance and consistent serving sizes, use a tablespoon or a cookie dough scoop when forming your balls. This also helps them chill and coat evenly.
- Softened Cream Cheese is Key: Don’t skip this! Make sure your cream cheese is thoroughly softened to room temperature. This ensures it blends seamlessly with the cookie crumbs, creating a smooth, lump-free truffle mixture.
- Work Quickly with Melted Chocolate: Melted chocolate or candy melts will start to set quickly, especially when dipping cold truffle centers. Work efficiently when dipping and decorating to ensure your sprinkles adhere before the chocolate hardens. If your chocolate starts to thicken, you can gently reheat it in short bursts.
Quick Tip: Cream Cheese
Be sure that your cream cheese is soft before you start the recipe. If you don’t have time for it to soften naturally on the counter, you can microwave it in its foil wrapper for 15-30 seconds on a low setting, flipping halfway through. Just be careful not to overheat it.

Recipe FAQs
Oreo balls are quite durable! They will keep for up to 2 weeks in the refrigerator when stored in an airtight container. For longer storage, you can freeze them for up to 2 months. Just make sure they are in a freezer-safe, airtight container to prevent freezer burn.
The easiest and cleanest way to dip an Oreo ball is to use a fork or a specialized candy dipping tool. Place a chilled Oreo ball on the tines of the fork, then spoon the melted chocolate over the top until it’s completely covered. Gently tap the fork against the side of the bowl to shake off any excess chocolate. This helps to create a thin, even coating. Immediately transfer the dipped ball to parchment paper to dry and add your sprinkles while the chocolate is still wet to ensure they stick.
At their core, Oreo balls are made from just three main ingredients: finely crushed Oreo cookies, softened cream cheese, and a chocolate or candy melt coating. Sprinkles or other toppings are optional but highly recommended for an extra touch of flair.
Absolutely! A stand mixer with a paddle attachment works wonderfully for mixing the crushed Oreos and cream cheese. Start on low speed to incorporate the ingredients, then increase to medium until a uniform, pliable dough forms. This can save you some arm work!
To prevent chocolate from seizing (becoming thick and grainy), always melt it slowly and gently. Use short bursts in the microwave (30 seconds at a time) and stir thoroughly after each burst, even if it doesn’t look fully melted. The residual heat will continue to melt the chocolate. Avoid introducing any water or steam into the chocolate, as even a tiny drop can cause it to seize. A double boiler method is also a great way to melt chocolate slowly and prevent seizing.
FOLLOW ME

Unleash Your Creativity: Flavor Variations
One of the most exciting aspects of making Oreo balls is the endless possibilities for customization. Get creative and tailor this recipe to suit your taste or the theme of your event!
- Chocolate Coating Options: Don’t limit yourself to just one type of chocolate! Experiment by dipping your cookie balls in semi-sweet chocolate for a classic rich flavor, milk chocolate for a sweeter profile, or white chocolate for a creamy contrast. For special occasions, you can even use colored candy melts to match a specific holiday (think red and green for Christmas, pastels for Easter, or orange and black for Halloween) or party theme.
- Cookie Creations: The world of Oreos is vast and ever-expanding! While the classic chocolate Oreo is always a winner, feel free to use any flavor of Oreo cookie in this recipe. Golden Oreos create a delightful vanilla-flavored truffle. We’ve had great success with chocolate peanut butter Oreos for a nutty twist, and chocolate mint cookies for a refreshing zing. Seasonal flavors like pumpkin spice or gingerbread Oreos can also add a unique touch to your holiday treats.
- Dazzling Toppings: Sprinkles are just the beginning! Instead of (or in addition to) traditional sprinkles, elevate your Oreo balls with a variety of toppings. Consider finely crushed nuts (pecans, walnuts, almonds), toasted coconut flakes for a tropical note, more crushed Oreos for an extra cookie crunch, or a decorative drizzle of a contrasting type of chocolate. You could even use a dusting of cocoa powder or powdered sugar for a more sophisticated look.
- Exciting Add-ins: For an extra layer of flavor within the truffle itself, try mixing in a small amount of extract (peppermint, almond, or vanilla bean paste) into the cream cheese mixture. Mini chocolate chips or a touch of citrus zest can also add an unexpected burst of flavor.

Oreo truffles truly are the perfect bite-sized dessert for any crowd or occasion. Their rich, fudgy texture and intense chocolate flavor are simply irresistible. We love that you can make them ahead of time, which means less last-minute stress when you’re hosting a party. If you’re a fan of Oreo cookies, you are going to absolutely adore these delightful and easy-to-make Oreo cookie balls. Get ready to impress your guests with these no-bake wonders!
Serving and Storing Oreo Balls
Once your delectable Oreo balls have fully set, they are ready to be enjoyed! Serve them chilled for the best texture and flavor. They make a fantastic addition to any dessert platter, holiday cookie exchange, or as a sweet treat for everyday indulgence.
For storage, place your finished Oreo balls in an airtight container. They will stay fresh and delicious in the refrigerator for up to two weeks. If you’ve made a large batch or want to prepare them well in advance, Oreo balls freeze beautifully. Store them in a single layer in a freezer-safe, airtight container, separating layers with parchment paper to prevent sticking. They can be frozen for up to two months. Simply thaw them in the refrigerator for a few hours before serving.
These truffles also make wonderful gifts! Arrange them in small decorative boxes, tins, or cellophane bags tied with a ribbon for a thoughtful and delicious homemade present during the holidays, birthdays, or as a thank-you gesture.
More Recipes For Chocolate Lovers
Oreo Cheesecake (No Bake)
21 mins
Chocolate Peanut Butter Fudge
10 mins
Brownie Pizza
50 mins
Haystack Cookies
10 mins
Earthquake Cake
50 mins
Oreo Balls Video
While this recipe is simple to follow with our detailed instructions, sometimes seeing it in action can be incredibly helpful! Watch the video below for a visual guide on how to prepare your delicious Oreo Balls from start to finish. See exactly how to crush the cookies, mix the dough, roll the perfect spheres, and achieve that flawless chocolate coating. This video will make sure your Oreo Truffles turn out perfectly every time.
Love This Recipe?
Please leave a 5-star 🌟🌟🌟🌟🌟 rating in the recipe card below & a review in the comments section further down the page. Your feedback helps other home cooks discover and enjoy this fantastic recipe!
Oreo Balls
Pin

Time
Ingredients
- 36 Oreo cookies
- 8 ounces cream cheese softened
- 16 ounces candy melts or chocolate chips
- 1 tablespoon vegetable shortening ONLY use shortening if you’re using chocolate chips, you do not need to add it to candy melts
- 1/2 cup sprinkles
Instructions
-
Place the Oreo cookies in a food processor and pulse until fine crumbs form.
-
Pour the cookie crumbs into a large bowl and add the softened cream cheese. Stir until a uniform dough forms.
-
Roll the dough mixture into 1-inch balls. Place the balls on a sheet pan lined with parchment paper or a non-stick baking mat.
-
Freeze the balls for 20 minutes or until they become firm.
-
Heat the chocolate or candy melts in the microwave using 30-second increments, stirring after each, until completely melted and smooth.
-
If you are using chocolate chips, stir in the vegetable shortening until fully incorporated.
-
Use a fork to dip each chilled Oreo ball into the melted chocolate, ensuring it’s fully coated. Tap the fork gently against the side of the bowl to remove any excess chocolate.
-
Transfer each dipped ball to parchment paper and immediately top with sprinkles while the chocolate is still wet.
-
Chill the decorated balls in the refrigerator until the chocolate coating is completely firm. Serve and enjoy! Store leftover balls in the fridge for up to 2 weeks, or in the freezer for up to 2 months.
Notes
- You can make the Oreo truffle centers up to a day in advance. Simply cover them loosely with plastic wrap and refrigerate until you’re ready to dip them in chocolate.
- Use a tablespoon or cookie dough scoop to ensure all your balls are uniformly sized for a professional presentation.
Nutrition
Tweet
Pin