
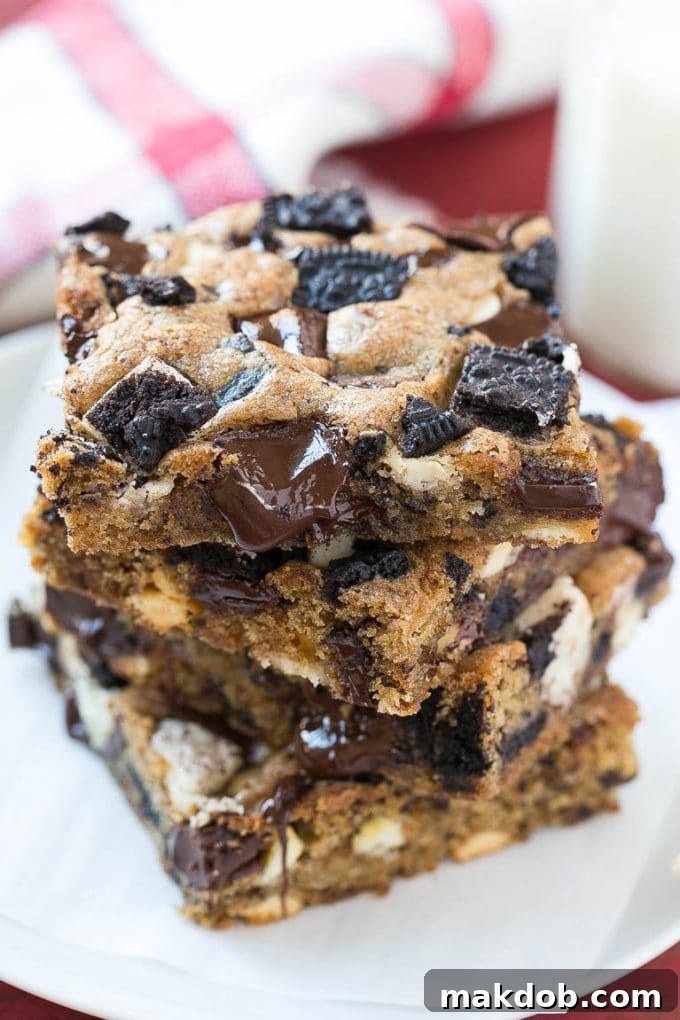
Ultimate Chewy Oreo Bars: Your Go-To Cookies and Cream Blondie Recipe
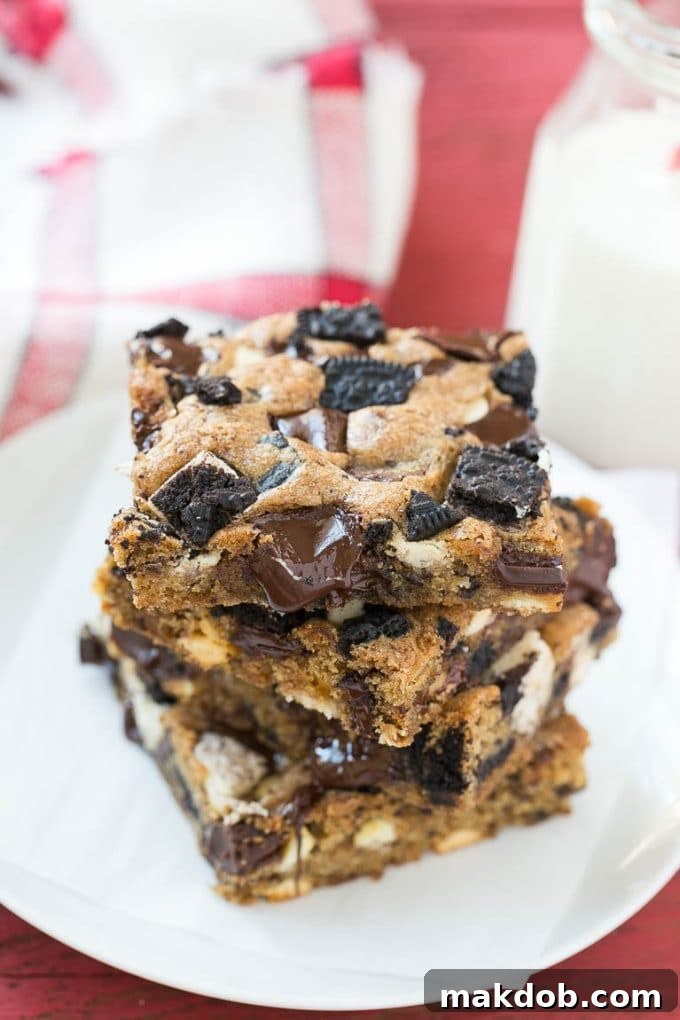
Welcome to the ultimate guide for crafting the most irresistible Oreo bars you’ll ever taste! These aren’t just any ordinary dessert bars; they’re a dream come true for anyone who loves the classic cookies and cream flavor. Imagine a perfectly chewy brown sugar blondie base, generously loaded with a harmonious blend of rich white and dark chocolate, and, of course, an abundance of crunchy Oreo cookies. This recipe promises a quick, easy, and undeniably decadent treat that is guaranteed to be a massive hit at any gathering, from casual family nights to festive celebrations.
If your heart beats for Oreos, then prepare to fall head over heels for these sensational cookies and cream bars! For more delightful Oreo-infused creations, be sure to explore our recipes for Oreo balls, Oreo brownies, and Oreo stuffed cookies – each offering a unique twist on this beloved cookie.
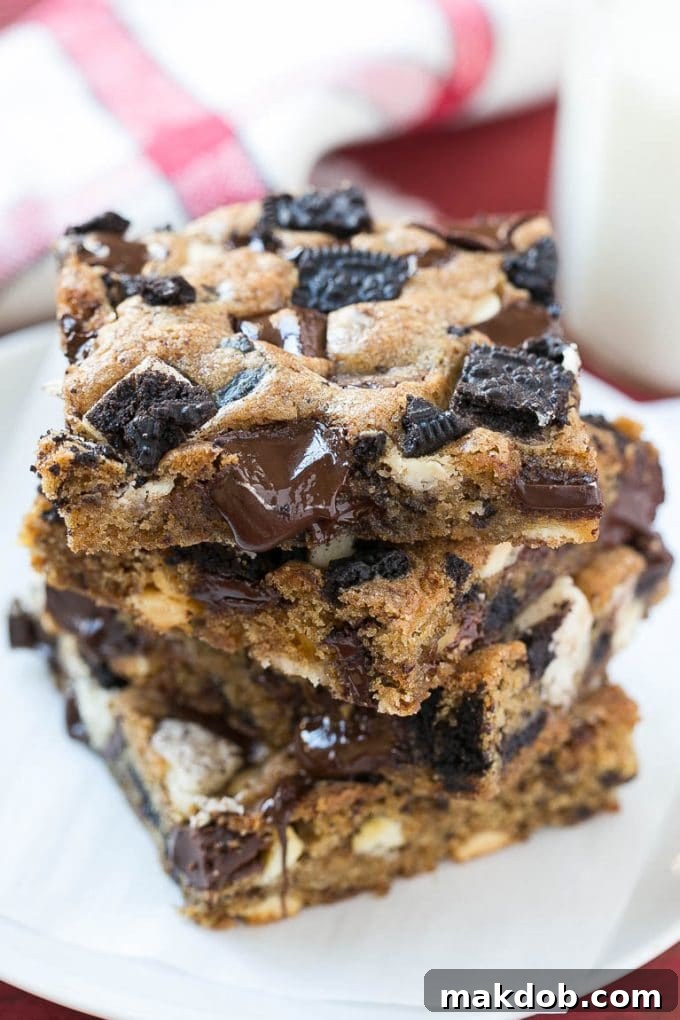
Why Bar Cookies Are the Best for Busy Bakers
As an avid baker and a busy individual, I am a huge proponent of the humble bar cookie. While there’s absolutely nothing wrong with classic round cookies – and I certainly enjoy the process of rolling out dough and baking multiple batches, especially when baking with children and time isn’t an issue – there are those days when I need a delicious treat in a flash. Those are the moments when simple, impressive, and utterly delicious desserts like these Oreo bars truly shine.
Bar cookies offer unparalleled convenience. They require minimal shaping, bake in a single pan, and yield a large batch that’s easy to cut and serve. This efficiency makes them a go-to for potlucks, parties, or simply satisfying a sudden craving for something sweet without spending hours in the kitchen. When you elevate an already great concept by adding everyone’s favorite sandwich cookie and two kinds of rich chocolate, you create something truly sublime.
Looking for more irresistible chocolate desserts to satisfy your sweet tooth? Don’t miss out on my chocolate fudge cookies, a rich and decadent bite; my almond roca cookies, boasting a delightful crunch; and my incredibly moist Nutella cake, for the ultimate hazelnut chocolate experience!
Table of Contents
- The Irresistible Ingredients for Your Oreo Bars
- Step-by-Step: How to Make the Best Oreo Bars
- Expert Tips for Flawless Oreo Blondies
- Quick Baking Hack
- Frequently Asked Questions About Oreo Bars
- Endless Flavor Creativity: Oreo Bar Variations
- More Mouthwatering Dessert Recipes You’ll Love
- Share Your Love For This Recipe?
- Full Oreo Bars Recipe Card
The Irresistible Ingredients for Your Oreo Bars
Crafting these extraordinary Oreo bars requires a selection of common pantry staples, transformed into something truly magical. Here’s a detailed look at the components that make up this delightful dessert:
- All-purpose flour: The structural backbone of our blondies, ensuring a tender yet firm crumb.
- Baking soda: Our leavening agent, creating a slight lift and contributing to that desirable chewy texture.
- Salt: A crucial flavor enhancer that balances the sweetness and brings out the depth of the chocolate and Oreos. Don’t skip it!
- Unsalted butter: Softened to perfection, butter provides richness and helps create that creamy base when creamed with sugars. Using unsalted butter allows you to control the total salt content in your recipe.
- Brown sugar (packed light): The star of our blondie base! Brown sugar is essential for that signature moist, chewy texture and its molasses notes perfectly complement the chocolate and vanilla flavors. Make sure it’s packed firmly in your measuring cup for accuracy.
- Granulated sugar: Adds additional sweetness and helps with the crisp edges of the blondie while keeping the interior soft.
- Large egg: Binds all the ingredients together, adding structure and moisture, contributing to the overall chewiness.
- Vanilla extract: A fundamental flavor enhancer that brightens and deepens all the other ingredients. Use good quality pure vanilla extract for the best results.
- Oreo cookies (chopped): The unmistakable hero of these bars! We’ll use a generous amount of chopped Oreos, both mixed into the batter and sprinkled on top, ensuring an explosion of cookies and cream flavor in every bite.
- White chocolate chips or chunks: Adds a creamy sweetness and a different textural element. Chunks often melt more slowly, creating delightful pockets of gooey chocolate.
- Semisweet chocolate chips or chunks: Provides a classic chocolatey depth that perfectly contrasts the sweetness of the white chocolate and Oreos. A blend of both creates a more complex flavor profile.
- Cooking spray: For preparing your baking pan, ensuring easy removal of your perfectly baked bars.
Each ingredient plays a vital role in achieving the perfect balance of flavor and texture, making these Oreo bars a truly unforgettable treat. Quality ingredients lead to superior results, so always opt for the best you can find!
Step-by-Step: How to Make the Best Oreo Bars
Creating these delightful Oreo bars is a straightforward process, even for novice bakers. Follow these detailed steps to ensure perfectly chewy and flavorful blondies every time:
- Prepare Your Oven and Pan: Begin by preheating your oven to 350°F (175°C). This ensures the oven is at the correct temperature when your batter is ready to bake, promoting even cooking. Lightly spray an 8-inch square baking pan with cooking spray. Then, line the pan with parchment paper, allowing an overhang on two sides. This parchment “sling” will make lifting the cooled bars out of the pan incredibly easy. Spray the parchment paper lightly with cooking spray as well.
- Combine Dry Ingredients: In a medium-sized bowl, whisk together the all-purpose flour, baking soda, and kosher salt until well combined. This step ensures that the leavening agent and salt are evenly distributed throughout the dry mixture, preventing pockets of unmixed ingredients in your final product. Set aside.
- Cream Wet Ingredients: In the large bowl of a stand mixer fitted with the paddle attachment (or using a hand mixer), cream together the softened unsalted butter, packed light brown sugar, and granulated sugar on medium speed. Beat for about 2 minutes, or until the mixture is light, fluffy, and pale in color. This creaming process incorporates air into the butter and sugar, which is crucial for the blondies’ texture.
- Add Egg and Vanilla: Beat in the large egg and vanilla extract until just incorporated. Be careful not to overmix at this stage. Use a rubber spatula to scrape down the sides and bottom of the bowl as needed, ensuring all ingredients are fully combined.
- Incorporate Dry into Wet: With your mixer on low speed, gradually add the dry ingredients to the wet mixture. Mix only until just combined and no streaks of flour remain. Overmixing the flour can develop the gluten too much, leading to tough, rather than chewy, bars.
- Fold in Mix-Ins: Gently fold in half of your chopped Oreo cookies, white chocolate chips (or chunks), and semisweet chocolate chips (or chunks) using a spatula. We want to distribute these delicious additions throughout the batter without crushing the Oreos into fine crumbs.
- Prepare for Baking: Transfer the thick blondie batter into your prepared 8-inch square pan. Use the back of a spoon or a spatula to press the batter into an even layer, reaching all corners of the pan.
- Top with Remaining Goodies: Sprinkle the remaining chopped Oreo cookies and chocolate chips evenly over the top of the dough. This creates a beautiful, inviting crust and ensures every bite has plenty of mix-ins.
- Bake to Perfection: Bake for approximately 20-25 minutes. The baking time can vary depending on your oven and the type of pan used (metal pans tend to bake faster than glass). The bars are done when the edges are set and lightly golden, and a toothpick inserted into the center comes out with just a few moist crumbs attached, but not wet batter. Avoid overbaking, as this can lead to dry blondies.
- Cool and Serve: Once baked, transfer the pan to a wire rack and let the bars cool completely in the pan. Cooling thoroughly is critical for bars to set properly and achieve their ideal chewy texture. Attempting to cut them while warm will result in crumbly, messy squares. Once fully cooled, use the parchment paper overhang to gently lift the entire slab of bars out of the pan. Place on a cutting board and slice into perfect squares for serving. Enjoy your homemade Oreo bars!
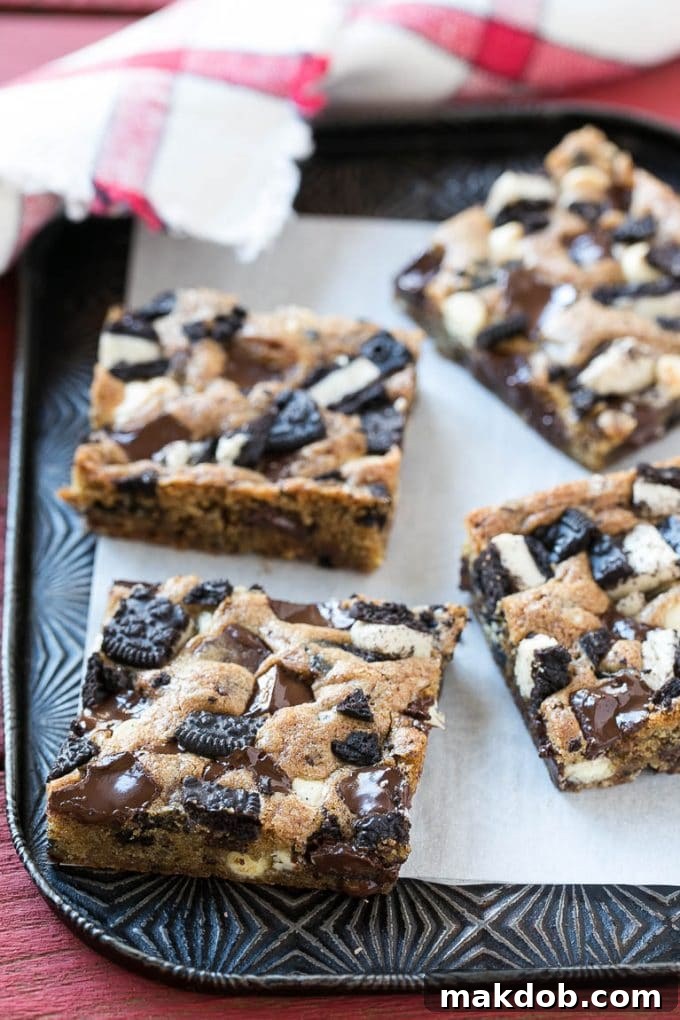
Expert Tips for Flawless Oreo Blondies
Achieving bakery-quality Oreo bars is simple with a few insider tricks. Here are some invaluable tips to ensure your cookies and cream blondies turn out perfect every time:
- Choose Your Chocolate Wisely: You have the flexibility to use either chocolate chips or chocolate chunks, depending on your preference. I personally love incorporating a combination of both chocolate chips and larger chunks. The chips melt smoothly, while chunks create delightful pockets of gooey chocolate, adding varying textures and making the bars more visually appealing.
- Chop Oreos Evenly: When preparing your Oreos, aim to chop them into similar-sized, bite-sized chunks. This ensures an even distribution of cookie throughout the bars and prevents some pieces from being too large or too fine. A good balance provides the perfect crunch in every bite.
- Quality White Chocolate Matters: For the best flavor and melting quality, seek out white chocolate where cocoa butter is listed as the primary ingredient. Many commercial brands are unfortunately made with palm oil and other substitutes, which simply don’t deliver the same rich, creamy taste and smooth texture. A higher quality white chocolate will elevate your blondies significantly.
- Handle Oreo Pieces Gently: When folding the chopped Oreos into the batter, try your best to leave the cookie pieces intact. Use a gentle hand and a spatula. The goal is to have distinct chunks of Oreo cookie embedded in your blondies, not a fine powder that disappears into the batter.
- Don’t Overbake: Blondies are prone to drying out if baked for too long. They should look slightly underdone in the center when you pull them from the oven, as they will continue to cook slightly from residual heat as they cool. A toothpick inserted into the center should come out with moist crumbs, not liquid batter. Avoid a completely clean toothpick for ultimate chewiness.
- Cool Completely for Clean Slices: Patience is a virtue when it comes to cutting bar cookies. Allow your Oreo bars to cool completely in the pan on a wire rack before attempting to slice them. This allows the bars to fully set, resulting in clean, perfect squares that hold their shape.
- Storage: Store cooled Oreo bars in an airtight container at room temperature for up to 3-4 days to maintain their freshness and chewiness. For longer storage, see our freezing instructions in the FAQ section.
Quick Baking Hack
For effortless mixing and perfectly incorporated ingredients, I highly recommend using a stand mixer for this recipe. However, don’t worry if you don’t have one; a reliable electric hand mixer will also do a fantastic job!
Frequently Asked Questions About Oreo Bars
Absolutely! Oreo bars freeze beautifully. To freeze, ensure the bars are completely cooled. Then, wrap individual bars tightly in plastic wrap, or place a layer of parchment paper between stacked bars in an airtight container or freezer-safe bag. They will last in your freezer for up to 3 months. Thaw at room temperature or gently warm in the microwave for a few seconds when ready to enjoy.
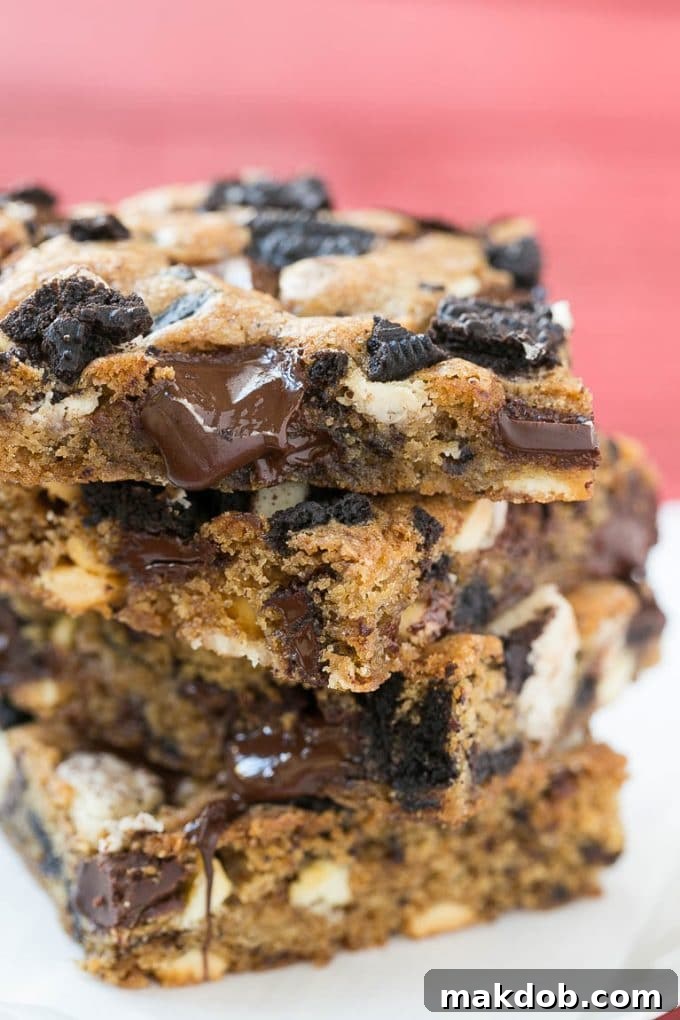
An Oreo bar is a delightful twist on a classic blondie. It features a rich, chewy, brown-sugar-based cookie bar, often likened to a brownie but without cocoa powder in the base. The defining characteristic of an Oreo bar is the generous inclusion of crushed Oreo cookies and typically a blend of chocolate chips or chunks, creating an irresistible cookies and cream flavor profile in a convenient bar form.
The key to moist, chewy blondies is not to overbake them. Pull them from the oven when the edges are just set and slightly golden, but the center still looks a little soft. A toothpick inserted into the center should come out with moist crumbs, not wet batter, but definitely not completely clean. Also, ensure your butter is softened (not melted) and your sugars are accurately measured and packed.
While this recipe is optimized for an 8×8 inch square pan (which yields thicker, chewier bars), you can adjust. A 9×13 inch pan will produce thinner bars, and you’ll likely need to reduce the baking time by about 5-10 minutes. If using a smaller pan, you may need to increase baking time. Always keep a close eye on doneness by checking with a toothpick and observing the edges.
For the perfect texture, place your Oreos in a sturdy zip-top bag and gently crush them with a rolling pin or the bottom of a heavy pan. You want a mix of larger chunks and smaller crumbs for maximum flavor and textural contrast in your bars, avoiding a fine powder. Alternatively, you can use a food processor for a few quick pulses, but be careful not to over-process them into dust.
When stored in an airtight container at room temperature, these Oreo bars will stay fresh and chewy for about 3-4 days. If refrigerated, they can last up to a week, though the texture might become slightly firmer. For longer storage, freezing is an excellent option as mentioned above.
Follow Me
Endless Flavor Creativity: Oreo Bar Variations
While these classic cookies and cream blondie bars are undeniably delicious on their own, part of the fun of baking is experimenting! Don’t hesitate to customize this recipe to incorporate your favorite flavors and create unique dessert experiences. Here are some fantastic variations to get your creative juices flowing:
- Cookie Swap:
- Seasonal Oreos: Elevate your bars by using different seasonal or limited-edition Oreo flavors! Think Pumpkin Spice Oreos for fall, Mint Oreos for a refreshing twist, Red Velvet Oreos for a festive look, or even Birthday Cake Oreos for an extra celebration.
- Double Stuf Oreos: If you’re a fan of extra cream, Double Stuf Oreos work wonderfully, adding an even richer cookies and cream experience.
- Beyond Oreos: Feel free to venture beyond Oreos! Chop up other favorite cookies like Nilla Wafers, chocolate chip cookies, shortbread, or even Graham Crackers for a s’mores-inspired blondie.
- Candy Craze:
- Colorful M&Ms: For a vibrant and fun cookie bar, substitute some of the chocolate chips with your favorite M&Ms. They add a pop of color and a delightful candy shell crunch.
- Mini Candies: Explore other small chocolate candies like chopped Snickers, Reese’s Peanut Butter Cups (miniature ones work great!), or even Heath bar bits for added texture and flavor complexity.
- Toffee Bits: Add a sprinkle of toffee bits for a buttery, caramel-like crunch that complements the chocolate beautifully.
- Marshmallow Marvel:
- Mini Marshmallows: For a soft, gooey addition, stir in mini marshmallows during the last few minutes of baking, or sprinkle them on top for a toasted marshmallow effect. They melt slightly, creating a wonderfully chewy layer. These are especially great when slightly toasted under the broiler for a minute or two right before cooling, creating a s’mores like topping.
- Nutty Nibblers:
- Toasted Nuts: Enhance the richness and texture by adding chopped pecans, walnuts, or almonds to the batter. Lightly toasting them beforehand will bring out their best flavor and add a satisfying crunch.
- Nut Butters: Swirl in a tablespoon or two of peanut butter or almond butter into the batter before baking for a rich, nutty blondie base that pairs perfectly with chocolate and Oreos.
- Saucy Swirls:
- Caramel or Fudge Swirl: Before baking, drizzle some caramel sauce, dulce de leche, or extra chocolate fudge sauce over the top of the batter and swirl gently with a knife for a beautiful marbling effect and an extra layer of sweetness and moisture.
No matter which variations you choose, these Oreo bars provide a fantastic canvas for your culinary creativity. My kids, of course, absolutely adored these classic Oreo bars, and the adults were equally enchanted! I served them cut into small squares after a generous meal, and they proved to be the perfect sweet bite to satisfy everyone’s appetite for dessert. They also make an incredibly decadent afternoon snack, a delightful addition to any dessert platter, or even a thoughtful homemade gift for friends and neighbors.
More Mouthwatering Dessert Recipes You’ll Love
Brownie Pizza
50 mins
Ice Cream Sandwich Cake
21 mins
Earthquake Cake
50 mins
Red Velvet Cookies
35 mins
Peanut Butter Brownies
50 mins
Share Your Love For This Recipe?
If you’ve enjoyed making and tasting these delicious Oreo Bars, please consider leaving a 5-star 🌟🌟🌟🌟🌟 rating in the recipe card below and a review in the comments section further down the page. Your feedback is greatly appreciated!
Oreo Bars
Pin
Time
Ingredients
- 1 cup all-purpose flour
- 1/2 teaspoon baking soda
- 1/2 teaspoon kosher salt
- 1/2 cup unsalted butter (1 stick, softened)
- 1/2 cup packed light brown sugar
- 1/4 cup granulated sugar
- 1 large egg
- 1 teaspoon vanilla extract
- 1 cup chopped Oreo cookies (divided)
- 1/2 cup white chocolate chips or chunks (divided)
- 1/2 cup semisweet chocolate chips or chunks (divided)
- Cooking spray
Instructions
-
Preheat oven to 350 degrees F (175 C). Spray an 8-inch square baking pan with cooking spray.
-
Line the pan with parchment paper, leaving excess on the sides to lift the bars out later. Spray the parchment with cooking spray.
-
Combine the flour, baking soda, and salt in a medium bowl. In the bowl of a stand mixer fitted with the paddle attachment, cream the softened butter, brown sugar, and granulated sugar on medium speed until light and fluffy, about 2 minutes.
-
Add the egg and vanilla extract, beating until just incorporated. Scrape down the sides and bottom of the bowl with a spatula if needed.
-
With the mixer on low speed, gradually add the dry ingredients, mixing just until combined. Be careful not to overmix.
-
Gently fold in half of the chopped Oreos and the white and semisweet chocolate chips with a spatula.
-
Transfer the dough to the prepared pan and press into an even layer using the back of a spoon or spatula.
-
Sprinkle the remaining Oreos and chocolate chips evenly over the top of the dough.
-
Bake for about 20-25 minutes, or until the edges are lightly golden and a toothpick inserted in the center comes out with just a few moist crumbs attached. (Baking in a glass pan may require an additional 5 minutes).
-
Transfer the pan to a wire rack and let the bars cool completely in the pan. Use the parchment overhang to lift the bars out and cut into squares for serving.
Notes
- Feel free to use your preferred combination of chocolate chips or chunks for varying textures and melt consistency.
- For a consistent crunch, chop your Oreo cookies into similar-sized, bite-sized pieces, avoiding overly fine crumbs.
- For the best flavor, choose white chocolate that lists cocoa butter as a main ingredient, rather than palm oil alternatives.
- A stand mixer makes mixing effortless, but a reliable electric hand mixer can also be used effectively for this recipe.
- Do not overbake your blondies; they should appear slightly underdone in the center when removed from the oven for ultimate chewiness.
- Allow the bars to cool completely before cutting for clean, well-formed squares.
Nutrition
Tweet
Pin