
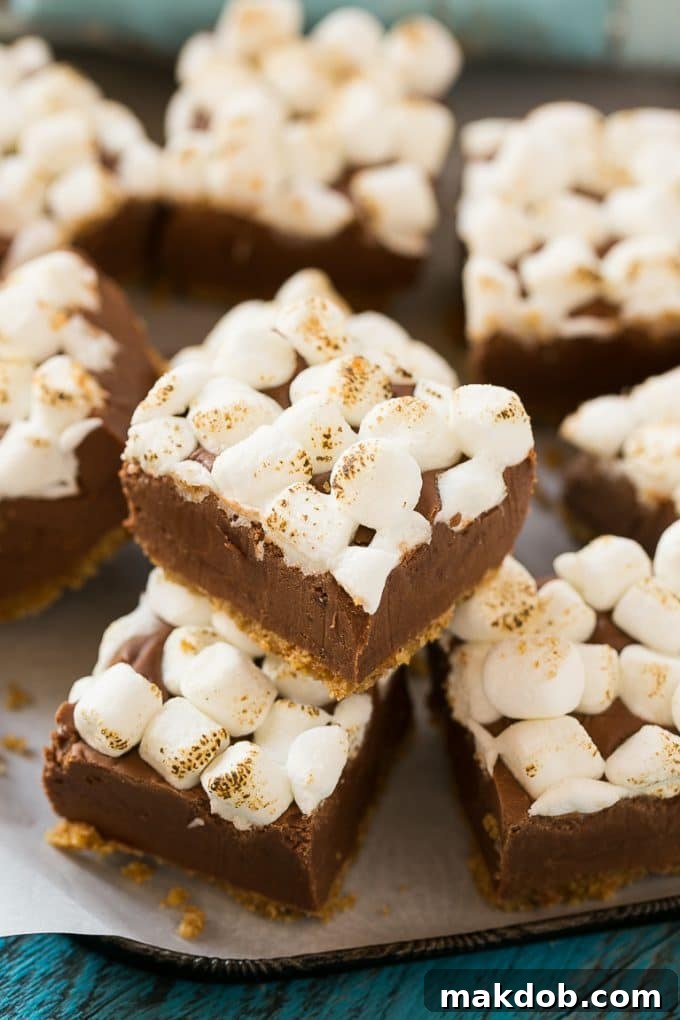
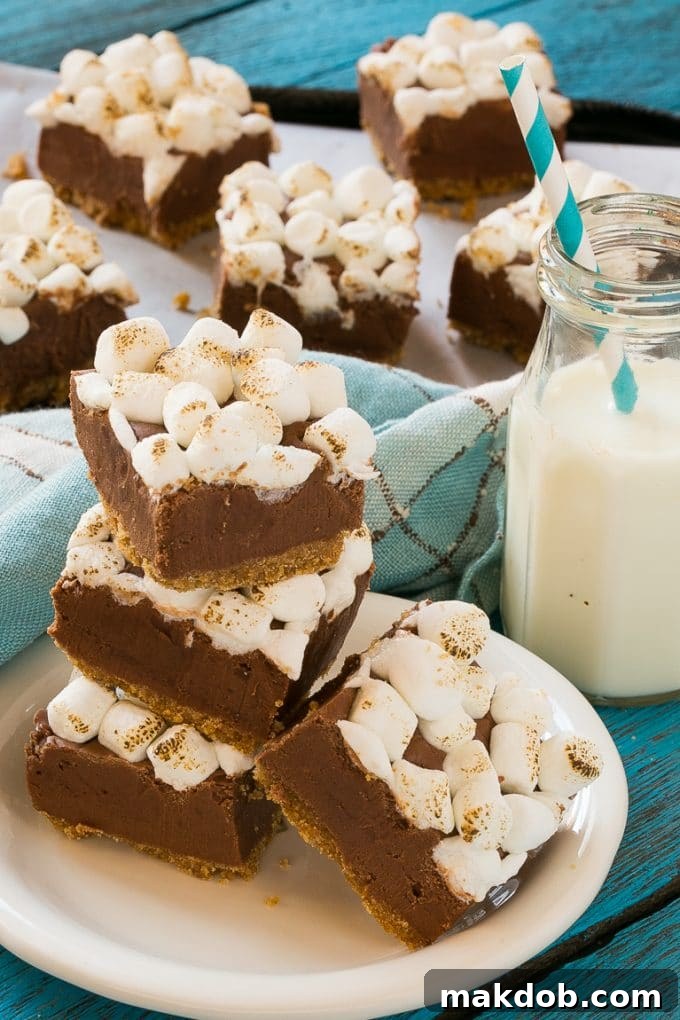
Indulge in the ultimate treat with this incredible S’mores Fudge, a dessert that perfectly captures the essence of a campfire classic in a rich, decadent square. Featuring a robust, crunchy graham cracker crust, a velvety smooth chocolate fudge filling, and a generous layer of perfectly toasted marshmallows on top, this recipe promises to be the best fudge you’ll ever encounter. It’s an absolute must-try for any occasion that calls for something truly special!
As the holiday season draws near, or simply when you crave an extraordinary homemade delight, this s’mores fudge stands out. It joins a cherished collection of festive sweets perfect for gifting or sharing, such as luscious chocolate covered cherries, the irresistibly addictive Christmas crack, refreshing peppermint patties, and spirited rum balls. But there’s something uniquely magical about this layered fudge that truly elevates it above the rest.
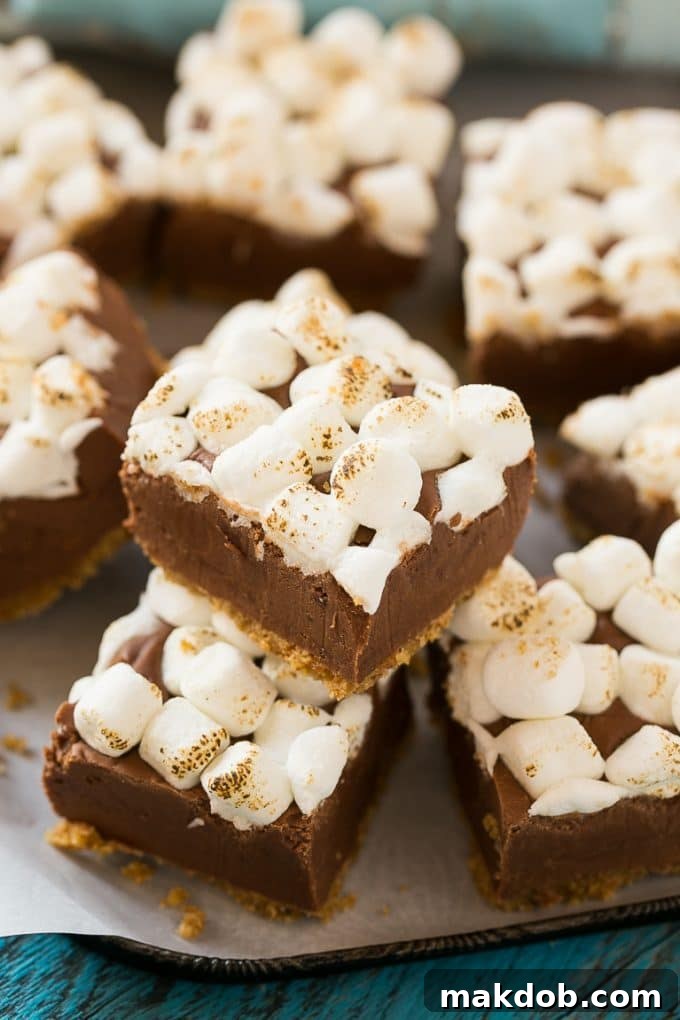
What makes this s’mores fudge so exceptional isn’t just its nostalgic flavor profile, but the harmonious interplay of textures and tastes. Each bite delivers the satisfying crunch of graham cracker, followed by the deep, comforting richness of chocolate, all crowned with the delicate, slightly caramelized sweetness of toasted marshmallow. It’s a symphony of flavors that evokes cherished memories of campfires and sweet summer nights, reimagined into an elegant, easy-to-make confection that’s perfect for year-round enjoyment.
Table of Contents
- The Irresistible Appeal of S’mores Fudge
- Key Ingredients for S’mores Fudge
- Mastering the S’mores Fudge Making Process
- Expert Tips for Flawless Fudge
- Common Fudge Questions Answered
- Delicious Flavor Variations
- More Mouthwatering Dessert Recipes
- Your Feedback Matters!
- S’mores Fudge Recipe Card
The Irresistible Appeal of S’mores Fudge
S’mores are a timeless treat, conjuring images of crackling campfires, starry nights, and shared laughter. This fudge transforms that beloved experience into a sophisticated yet simple confection that can be enjoyed anywhere, anytime. The classic combination of chocolate, graham cracker, and marshmallow is elevated by the creamy texture of homemade fudge, making it an ideal dessert for potlucks, parties, or simply a cozy night in. Its layered presentation is not only visually appealing but also ensures that every bite delivers a perfect balance of all three iconic s’mores elements. This fudge isn’t just a dessert; it’s an experience, a delightful journey back to simpler, sweeter times.
Key Ingredients for S’mores Fudge
Crafting this phenomenal s’mores fudge requires a few essential ingredients, each playing a crucial role in creating its distinct layers and irresistible flavor. Here’s what you’ll need to gather:
- Graham Cracker Crumbs: These form the sturdy, sweet, and slightly spiced base, providing that signature s’mores crunch.
- Butter: Essential for both the crust and the fudge, it adds richness and helps bind the ingredients.
- Granulated Sugar: The primary sweetener, crucial for achieving the classic fudge texture and sweetness.
- Evaporated Milk: This concentrated milk contributes to the fudge’s creamy consistency and depth of flavor, making it incredibly smooth.
- Semisweet Chocolate Chips: The heart of the fudge, delivering a rich, balanced chocolate flavor that isn’t overly sweet. High-quality chips melt beautifully.
- Marshmallow Cream: Incorporated into the fudge itself, it adds a unique softness and that unmistakable marshmallowy stretch.
- Vanilla Extract: A splash of vanilla enhances all the other flavors, adding warmth and complexity to the chocolate fudge.
- Miniature Marshmallows: These are for the glorious topping, ready to be toasted to golden perfection, providing the final, iconic s’mores touch.
Each ingredient is carefully selected to ensure that every layer contributes to the overall S’mores experience, guaranteeing a truly unforgettable dessert.
Mastering the S’mores Fudge Making Process
Creating this layered s’mores fudge is a delightful culinary adventure, broken down into manageable steps to ensure a perfect outcome every time. Precision and attention to detail are key to achieving the ideal texture and flavor profile.
Step-by-Step Instructions:
- Prepare the Pan and Oven: Begin by preheating your oven to 350°F (175°C). Line a 9-inch square baking pan with parchment paper, allowing an overhang on two sides. This overhang will serve as a convenient “sling” later for easy removal of the set fudge. Lightly spray both the pan and the parchment paper with cooking spray to prevent sticking.
- Craft the Graham Cracker Crust: In a medium bowl, combine the graham cracker crumbs, 6 tablespoons of melted butter, and 1/4 cup of granulated sugar. Mix these ingredients thoroughly until the crumbs are evenly moistened and resemble wet sand. This ensures a cohesive crust.
- Bake the Crust: Firmly press the graham cracker mixture into the bottom of the prepared pan, ensuring an even and compact layer. A solid base is crucial for structural integrity. Bake for precisely 8 minutes, then remove from the oven and allow it to cool completely on a wire rack while you prepare the fudge. This cooling step prevents the fudge layer from melting into the crust.
- Begin the Fudge Base: In a heavy-bottomed saucepan, combine 3 cups of granulated sugar, 3/4 cup of butter, and the 5-ounce can of evaporated milk. Place the saucepan over medium-high heat. Stir constantly as you bring the mixture to a rapid boil. Continuous stirring prevents scorching and promotes even sugar dissolution.
- Achieve the Perfect Fudge Temperature: Continue to cook the mixture, stirring constantly, for 4-5 minutes, or until a candy thermometer registers exactly 234°F (112°C). This precise temperature is critical for the fudge to set correctly – too low, and it will be too soft; too high, and it will be hard and grainy. Immediately remove the saucepan from the heat once the desired temperature is reached.
- Incorporate Chocolate and Marshmallow Cream: Quickly add the 12 ounces of semisweet chocolate chips and the 7-ounce jar of marshmallow cream to the hot milk mixture. Stir vigorously until both are completely melted and smoothly incorporated into a rich, glossy fudge. The residual heat will melt the chocolate and marshmallow cream.
- Add Vanilla and Pour: Stir in 1 teaspoon of vanilla extract until well combined. Immediately pour the hot fudge mixture over the cooled graham cracker crust in the prepared pan. Work swiftly as fudge sets quickly.
- Top with Marshmallows: While the fudge is still warm and soft, evenly press the 1 1/4 cups of miniature marshmallows in a single layer over the surface. The warmth of the fudge will help them adhere.
- Chill to Set: Transfer the pan to the refrigerator and chill for at least one hour, or until the fudge is completely firm and set. This is crucial for clean cuts and a stable dessert.
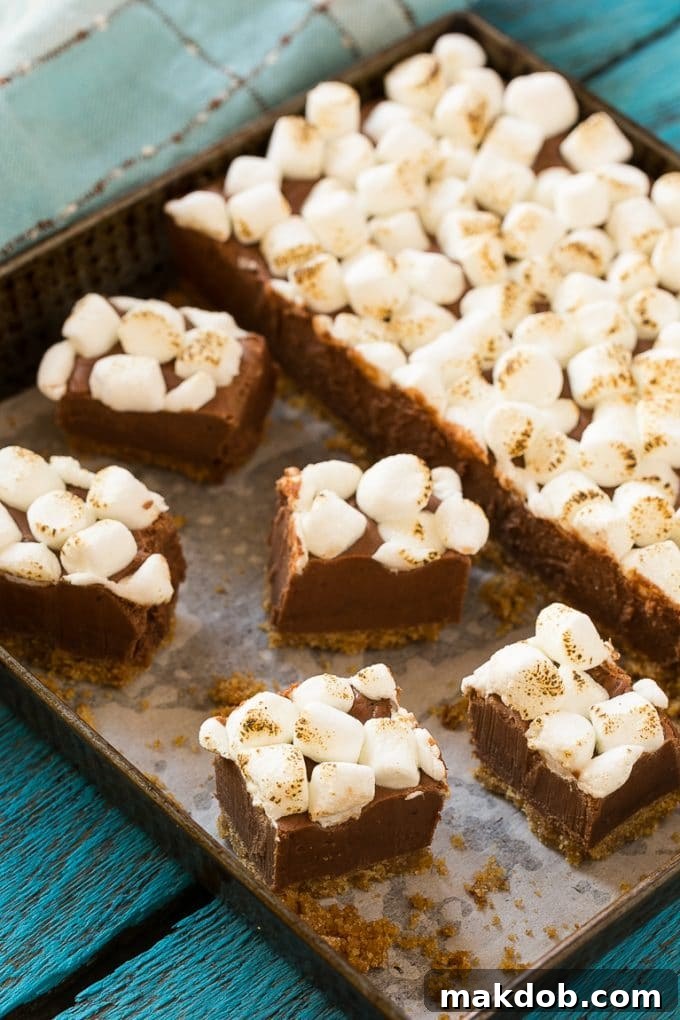
- Toast the Marshmallows: Once firm, use a culinary torch to lightly brown the tops of the miniature marshmallows, creating that classic s’mores char. Alternatively, you can place the pan under a preheated broiler for 1-2 minutes, keeping a very close watch to prevent burning. If using the broiler, position the pan 4-6 inches away from the heat source.
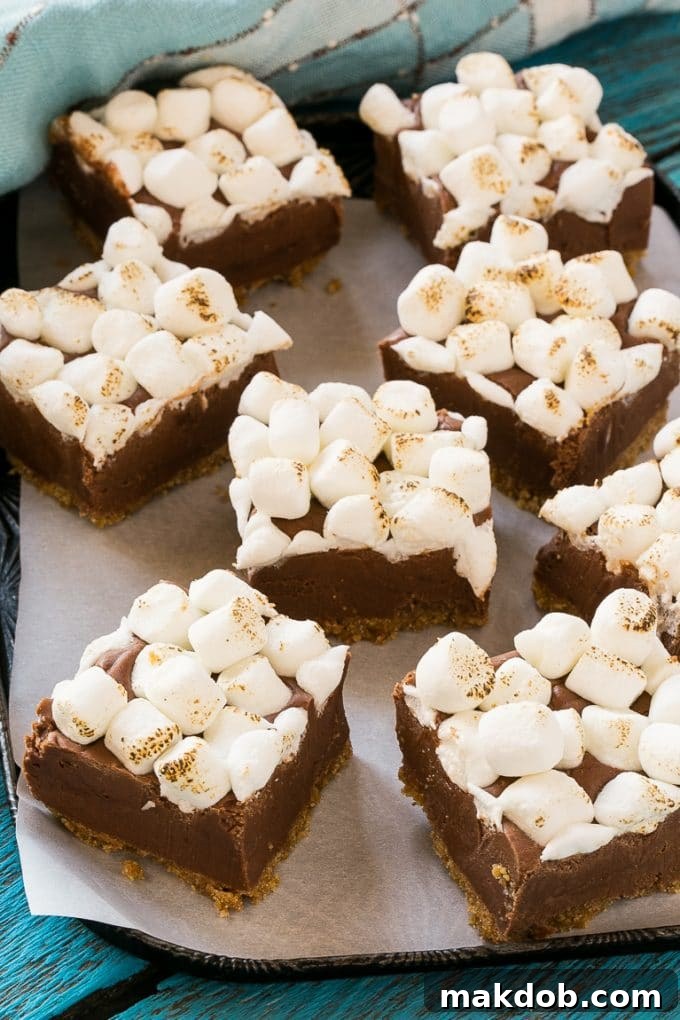
- Slice and Serve: Use the parchment paper overhang to lift the entire block of fudge out of the pan. Place it on a cutting board and cut it into small, uniform squares. Serve and enjoy this incredibly delicious, layered s’mores fudge!
Following these steps will ensure a beautifully textured, perfectly balanced s’mores fudge that will impress everyone who tries it.
Expert Tips for Flawless Fudge
Making fudge can seem intimidating, but with these expert tips, you’ll achieve perfect results every time, ensuring your s’mores fudge is smooth, creamy, and utterly delicious.
- Achieving the Perfect Toasted Marshmallows:
- Culinary Torch Method: This is the preferred method for precise browning. A small culinary torch gives you excellent control, allowing you to achieve a beautiful, even golden-brown char without affecting the fudge below.
- Broiler Method: If you don’t have a torch, a broiler works well. Place the pan of fudge on a rack 4-6 inches below the broiler flame. Watch it *very* closely – marshmallows can go from perfectly toasted to burnt in seconds. This method is fast, usually taking only 1-2 minutes. The key is constant supervision. If the fudge softens too much from the heat, simply pop it back into the fridge for 15-30 minutes to firm up again before serving.
- Skipping the Toasting: While toasted marshmallows add an authentic s’mores flavor and visual appeal, the fudge will still be incredibly delicious if you choose to skip this step. The untasted miniature marshmallows will provide a soft, chewy contrast to the creamy fudge.
- Making Graham Cracker Crumbs: For the quickest and most consistent crumbs, use a food processor. Simply pulse whole graham crackers until they reach a fine, even crumb consistency. If you don’t have a food processor, place crackers in a zip-top bag and crush them with a rolling pin.
- The Importance of a Candy Thermometer: This tool is non-negotiable for fudge making. It ensures the sugar mixture reaches the exact temperature required for proper setting. Without it, you risk grainy fudge (if cooked too long) or fudge that doesn’t set (if not cooked long enough). Calibrate your thermometer annually by checking its reading in boiling water (should be 212°F or 100°C at sea level).
- Storage Solutions: S’mores fudge stays wonderfully fresh when stored in an airtight container in the refrigerator for up to one week. To enjoy it at its best, remove it from the fridge about 15 minutes before serving to allow it to come to a slightly softer, more palatable room temperature.
- Patience is a Virtue: Allow the fudge to cool completely and set firmly before attempting to cut it. Rushing this step can lead to messy cuts and a less appealing presentation. Refrigeration helps speed this process along.
Incorporating these tips will help you create a s’mores fudge that is not only delicious but also perfectly textured and presented, making it a truly professional-grade homemade treat.
Quick Tip: Candy Thermometer
A reliable candy thermometer is your best friend when making fudge. It ensures the sugar syrup reaches the precise temperature of 234°F (112°C), which is essential for the perfect consistency. Without it, your fudge might not set properly or could become disappointingly grainy.
Common Fudge Questions Answered
Traditional fudge is typically made with simple, wholesome ingredients: sugar, butter, milk (often evaporated milk or cream), and a flavoring agent like chocolate or vanilla. The key to its creamy texture lies in cooking the sugar mixture to a specific temperature and then allowing it to cool and crystallize correctly. The base of this s’mores fudge adheres closely to this traditional formula, ensuring a truly authentic and delicious foundation.
Boiling fudge for an excessive period will cause too much moisture to evaporate, leading to a higher sugar concentration and larger sugar crystals. This results in fudge that is hard, dry, and often crumbly or grainy, rather than smooth and creamy. It’s a common pitfall in fudge making, highlighting the importance of precise temperature control. A candy thermometer is crucial to avoid overcooking and achieve the perfect texture.
If your fudge doesn’t set, it’s most likely due to not cooking the sugar mixture to a high enough temperature. The critical point for fudge is usually 234°F (112°C) – the soft-ball stage. If it doesn’t reach this temperature, there isn’t enough sugar crystallization to form a solid structure. While it’s difficult to salvage completely unset fudge, you can sometimes reheat it slowly, bring it back to the correct temperature, and re-beat it, though the texture might be slightly different.
While it’s possible to make fudge without a candy thermometer using the “cold water test,” it significantly increases the risk of over or undercooking your fudge. The cold water test involves dropping a small amount of the boiling sugar mixture into cold water to see if it forms a soft ball. However, this method requires experience and can be inconsistent. For best results and guaranteed success, a candy thermometer is highly recommended.
FOLLOW ME
Delicious Flavor Variations
While this s’mores fudge recipe is undeniably delicious in its classic form, it also serves as an excellent base for creative culinary experimentation. Don’t hesitate to customize it to perfectly match your personal preferences or the occasion!
- Crust Alternatives:
- Vanilla Wafers: If graham crackers aren’t available, or you prefer a slightly different flavor profile, crushed vanilla wafers make an excellent substitute for the crust. They provide a delicate, buttery sweetness.
- Chocolate Graham Crackers: For an intensified chocolate experience, consider using chocolate graham crackers for the crust. This adds an extra layer of cocoa richness that complements the fudge beautifully.
- Oreo Cookie Crumbs: For an ultra-decadent twist, replace graham cracker crumbs with crushed Oreo cookies (creme filling included!). This creates a rich, dark chocolate crust that pairs wonderfully with the s’mores flavors.
- Chocolate Choices:
- Semisweet or Dark Chocolate: These are traditionally used for fudge, offering a deep, robust chocolate flavor that balances the sweetness of the marshmallows. Dark chocolate will yield a more intense, less sweet fudge.
- Milk Chocolate Chips: For those who prefer a sweeter, creamier chocolate, milk chocolate chips can be used. Be aware that milk chocolate is softer, so the fudge might have a slightly less firm set.
- White Chocolate: For a striking contrast, consider a white chocolate fudge layer. You’ll need to adjust the sweetness as white chocolate is typically much sweeter, and it will lose some of the “s’mores” authenticity, but it can be a fun variation.
- Exciting Flavorings and Mix-ins:
- Caramel Swirl: After pouring the fudge into the pan, gently swirl in some warm caramel sauce. This adds a buttery, sticky sweetness that is absolutely divine.
- Peanut Butter Swirl: For a classic flavor pairing, dollop spoonfuls of smooth peanut butter into the warm fudge and swirl gently before chilling. The combination of chocolate, peanut butter, and marshmallow is a timeless favorite.
- Chopped Nuts: Introduce a delightful textural contrast and nutty flavor by adding up to 1/2 cup of finely chopped pecans, walnuts, or almonds to the fudge mixture just before pouring it into the pan.
- Espresso Powder: A teaspoon of instant espresso powder mixed into the chocolate fudge can deepen the chocolate flavor without adding a coffee taste.
- Sea Salt Flakes: A delicate sprinkle of flaky sea salt over the finished, toasted marshmallows can enhance the chocolate and marshmallow flavors, offering a sophisticated sweet-and-salty balance.
With these simple modifications, you can transform this s’mores fudge into a unique creation tailored to any palate or celebration.
It’s clear that this s’mores fudge is a standout dessert, and it’s not just my opinion—everyone who tries it raves about its unique layers and unforgettable taste. This delightful fudge is an ideal addition to your holiday dessert spread, bringing a touch of nostalgic charm and irresistible sweetness to any festive table. Beyond special occasions, it serves as a wonderfully decadent treat for those moments when you simply crave something extraordinary on the sweet side. Its ease of preparation combined with its impressive presentation makes it a go-to recipe for any dessert lover.
More Mouthwatering Dessert Recipes
Rocky Road Fudge
12 mins
Chocolate Peanut Butter Fudge
10 mins
Oreo Cheesecake (No Bake)
21 mins
Oven S’mores Dip
10 mins
Red Velvet Cookies
35 mins
Your Feedback Matters!
We love hearing from you! If you tried and enjoyed this recipe, please consider leaving a 5-star 🌟🌟🌟🌟🌟 rating in the recipe card below. Your valuable review in the comments section further down the page helps others discover and love this incredible s’mores fudge too. Thank you for your support!
S’mores Fudge
Pin
Time
Ingredients
For the crust
- 1 1/2 cups graham cracker crumbs
- 6 tablespoons butter melted
- 1/4 cup granulated sugar
For the fudge layer
- 3 cups granulated sugar
- 3/4 cup butter
- 5 ounce can evaporated milk
- 12 ounces semisweet chocolate chips
- 7 ounce jar marshmallow cream
- 1 teaspoon vanilla extract
For the topping
- 1 1/4 cups miniature marshmallows
- cooking spray
Instructions
For the crust
-
Preheat the oven to 350 degrees F (175 C). Line a 9-inch square pan with parchment paper, allowing an overhang on two sides. Spray the pan and parchment with cooking spray.
-
In a large bowl, mix together the graham cracker crumbs, 6 tablespoons of melted butter, and 1/4 cup of granulated sugar until well incorporated.
-
Press the graham cracker mixture firmly into the bottom of the prepared pan. Bake for 8 minutes; let cool completely on a wire rack.
For the fudge layer
-
In a medium saucepan, combine 3 cups of granulated sugar, 3/4 cup of butter, and the 5-ounce can of evaporated milk. Bring to a rapid boil over medium-high heat, stirring constantly to prevent scorching.
-
Continue to cook, stirring constantly, for 4-5 minutes, or until a candy thermometer registers 234 degrees F (112 C). Immediately remove the pan from the heat.
-
Quickly add the 12 ounces of semisweet chocolate chips and the 7-ounce jar of marshmallow cream. Stir vigorously until both are completely melted and smoothly combined. Add 1 teaspoon of vanilla extract and mix well.
-
Pour the hot fudge mixture evenly into the prepared pan, directly over the cooled graham cracker crust.
For the topping
-
While the fudge is still warm, gently press the 1 1/4 cups of miniature marshmallows in a single, even layer on top. Let the fudge cool and set in the refrigerator for at least one hour, or until firm.
-
To toast the marshmallows, use a culinary torch to lightly brown the tops. Alternatively, preheat your oven broiler and place the pan of fudge 4-6 inches away from the heat source. Broil for 1-2 minutes, watching constantly, until the marshmallows are golden brown and slightly charred. If the fudge softens, return it to the fridge to firm up.
-
Use the parchment paper overhang to carefully lift the fudge from the pan. Transfer to a cutting board, cut into small squares, and serve immediately.
Notes
- There are two excellent ways to achieve perfectly toasted marshmallows:
- Culinary Torch: Offers precise control for a beautiful, even char.
- Oven Broiler: A quick alternative, but requires constant vigilance as marshmallows can burn quickly. Position the pan 4-6 inches from the heat source and watch continuously for 1-2 minutes. If the fudge softens, refrigerate to firm up before serving.
- If you prefer not to toast the marshmallows or don’t have the tools, simply omit this step. The s’mores fudge will still be wonderfully delicious with soft, un-toasted marshmallows providing a lovely textural contrast.
- For optimal freshness, store the fudge in an airtight container in the refrigerator for up to one week. For the best taste and texture, allow it to sit at room temperature for about 15 minutes before serving.
Nutrition
Tweet
Pin