
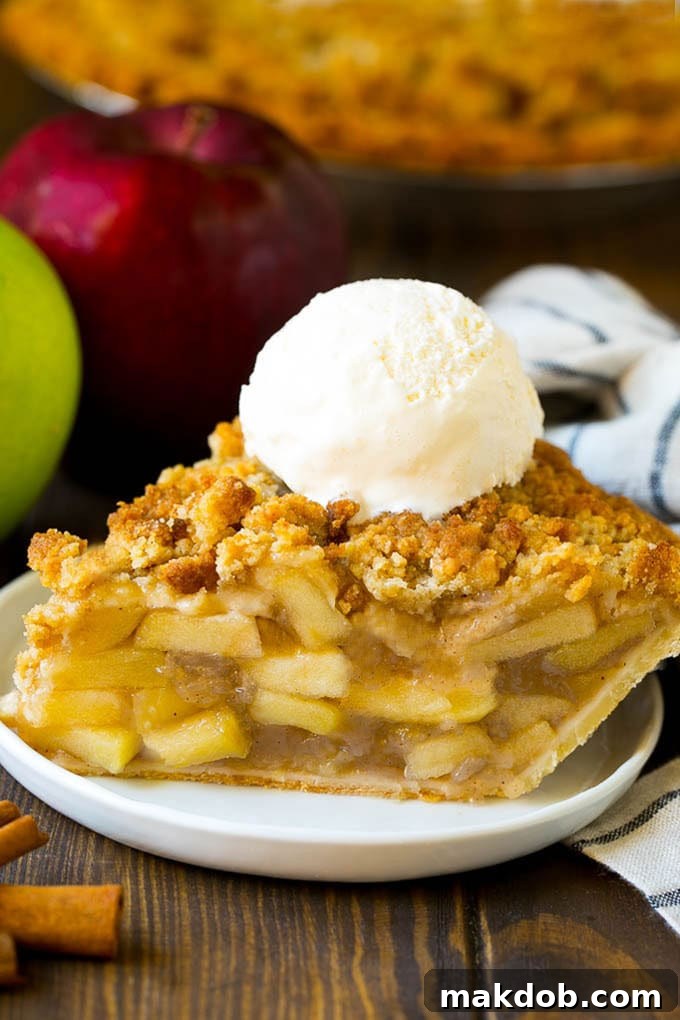
Welcome to the ultimate guide for creating the most exquisite Dutch Apple Pie you’ll ever taste! This beloved dessert brings together a tender, flaky crust, a luscious filling of perfectly sweetened apples, and an irresistible, golden-brown brown sugar crumb topping. Imagine serving a warm slice, crowned with a scoop of melting vanilla ice cream – it’s a guaranteed showstopper that will earn rave reviews from everyone at your table.
As the crisp air of autumn arrives and apples hang heavy on the branches, there’s no better time to embrace the bounty of the season. While I enjoy whipping up a variety of apple treats like apple crisp, baked apples, and apple cobbler, this particular Dutch Apple Pie recipe holds a special place. It’s not just a dessert; it’s a comforting experience, a taste of home, and quite frankly, the best apple pie I’ve ever had the pleasure of baking and devouring.
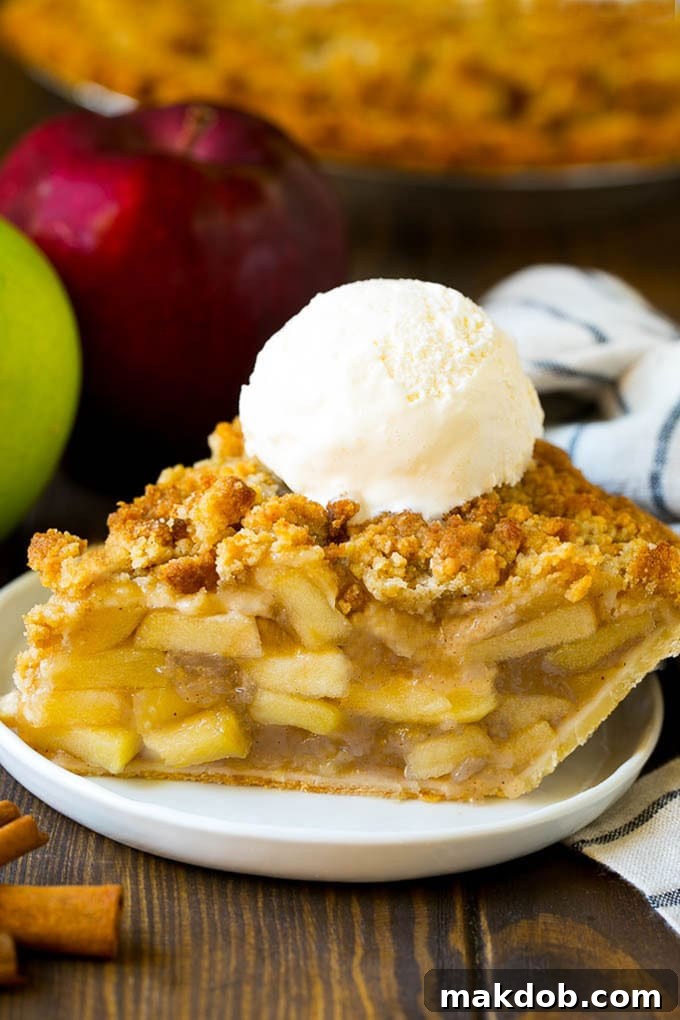
Apple pie is a timeless classic dessert recipe, cherished for its harmonious blend of sweet, tender apples, warm cinnamon, and delightful pastry. This Dutch Apple Pie elevates that classic to new heights, primarily through its signature brown sugar streusel topping. It’s truly my all-time favorite pie, and what makes it even better is how surprisingly simple it is to create in your own kitchen.
Perfect for a cozy fall gathering or any time you crave a comforting treat, this apple pie pairs wonderfully with a themed dinner. Imagine it alongside a savory cider-glazed chicken, rich roasted acorn squash, and a refreshing fennel salad with apples and pecans. It provides the perfect sweet ending to any meal.
Table of Contents
- The Ultimate Dutch Apple Pie Experience
- Why Dutch Apple Pie Reigns Supreme
- Dutch Apple Pie Ingredients Demystified
- The Best Apples for Dutch Apple Pie
- Crafting the Perfect Apple Pie Filling
- Mastering the Streusel Topping
- How to Make Dutch Apple Pie: Step-by-Step
- Expert Tips for a Flawless Dutch Apple Pie
- Recipe FAQs: All Your Dutch Apple Pie Questions Answered
- Delightful Flavor Variations for Your Dutch Apple Pie
- Serving and Storing Your Dutch Apple Pie
- More Irresistible Apple Recipes
The Ultimate Dutch Apple Pie Experience
There’s something inherently comforting about a freshly baked apple pie. The aroma alone can fill a home with warmth and nostalgia. Our Dutch Apple Pie recipe takes this comfort to the next level by focusing on a balanced profile of flavors and textures. The base is a sturdy yet delicate pie crust that holds its own against the juicy apple filling. The star, however, is undoubtedly the crumbly streusel topping, a rich blend of butter, brown sugar, and flour that bakes into a golden, textured blanket. This topping provides a satisfying crunch that contrasts beautifully with the soft, spiced apples underneath, creating a truly unforgettable dessert that embodies the essence of homemade baking. It’s not just a pie; it’s an experience waiting to be shared.
Why Dutch Apple Pie Reigns Supreme
What sets Dutch Apple Pie apart from its traditional double-crust cousin? It’s all about that magnificent streusel topping. While a classic pie often features a lattice or full top crust, the Dutch version celebrates a buttery, crumbly mixture that delivers a unique texture and flavor dimension. This brown sugar streusel adds a delightful crunch and a caramelized sweetness that perfectly complements the tartness of the apples. It creates a dessert that feels both rustic and elegant, less fussy than intricate pastry designs but equally, if not more, satisfying. The streusel acts as a protective layer, trapping the moisture and spices within the apple filling, resulting in an exceptionally flavorful and aromatic pie that truly shines. It’s this textural interplay that makes Dutch Apple Pie a true masterpiece in the world of baked goods.
Dutch Apple Pie Ingredients Demystified
Crafting this incredible Dutch apple pie requires a few key ingredients, each playing a vital role in achieving that perfect balance of flavor and texture. Understanding the purpose of each component will help you create a truly spectacular dessert. You’ll need:
- Pie Crust: The foundation of any great pie. While a homemade pie crust offers unparalleled flakiness and flavor, a high-quality store-bought crust is a perfectly acceptable shortcut, especially if you’re short on time. Look for one made with real butter for the best possible taste and texture.
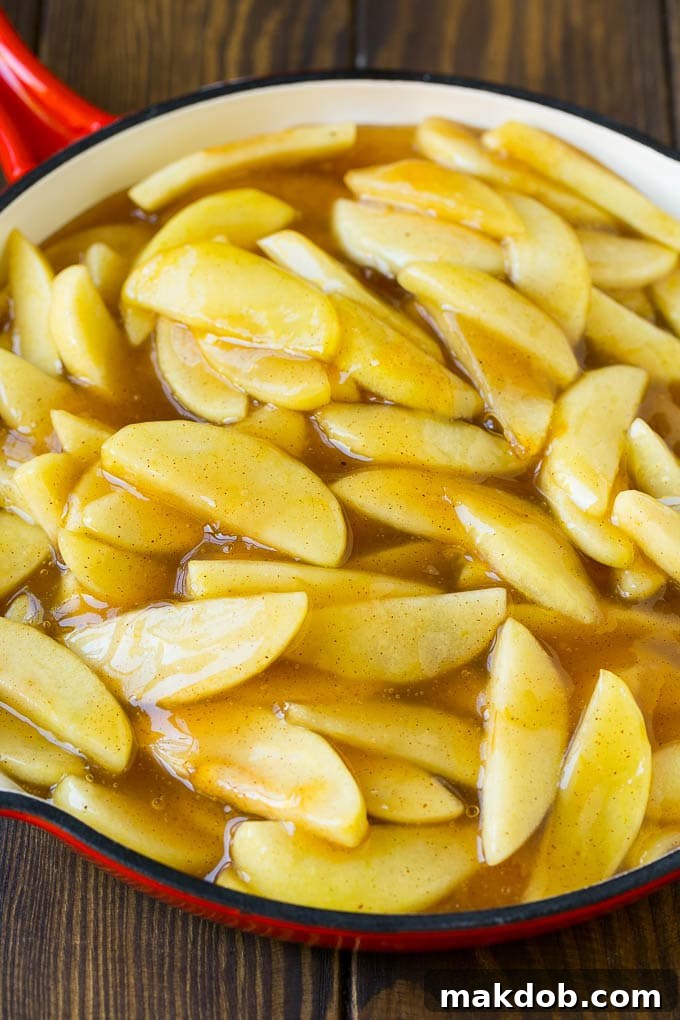
- Apple Pie Filling: This is where the magic happens! I highly recommend making your own homemade apple pie filling. Our linked recipe features tender sliced apples simmered with two types of sugar, lemon juice, water, cornstarch, nutmeg, butter, and cinnamon, creating a perfectly spiced and thickened filling. If time is a constraint, a good quality canned apple pie filling can be used, though homemade always offers superior freshness and customized flavor.
- Cold Butter: Essential for the streusel topping. Using cold butter, cut into cubes, is crucial for creating those signature coarse, crumbly pieces that make the Dutch topping so special. The cold butter melts slowly during baking, creating pockets of steam that result in a light and crispy streusel.
- All-Purpose Flour: The primary dry ingredient for the streusel. It binds the butter and sugar together, forming the delightful crumbly texture. Ensure it’s fresh for optimal results.
- Light Brown Sugar: This is the sweetener of choice for our streusel topping. Light brown sugar provides a molasses-rich flavor and moisture that contributes to the topping’s characteristic golden-brown color and slightly chewy, yet crumbly, texture. Dark brown sugar is too intense for this application, so stick with light brown for the best outcome.
The Best Apples for Dutch Apple Pie
Choosing the right apples is paramount to achieving a truly exceptional apple pie. The ideal apple for baking possesses a few key characteristics: a nice, slightly tart flavor that cuts through the sweetness of the sugar, and a firm texture that allows it to hold its shape beautifully without turning into mush during baking. While personal preference plays a role, certain varieties consistently deliver outstanding results in a Dutch apple pie.
My go-to choice for Dutch apple pie is often **Granny Smith** apples. Their distinct tartness provides a fantastic counterpoint to the rich brown sugar streusel topping and the sweetened filling. Furthermore, their firm flesh stands up wonderfully to the baking process, ensuring your pie has delightful chunks of apple rather than a watery puree. If you’re looking for alternatives or wish to blend varieties for more complex flavor, consider these other excellent options:
- Braeburn: Offers a good balance of sweet and tart with a firm texture.
- Golden Delicious: A sweeter apple that softens nicely; often good for mixing with a tart apple.
- Pink Lady (Cripps Pink): Known for its crisp texture and sweet-tart flavor, it holds its shape well.
- Honeycrisp: A popular choice for its incredible crispness and sweet, juicy flavor. It maintains its structure even after baking.
For the most balanced pie, many bakers enjoy using a combination of apples – perhaps a tart Granny Smith with a slightly sweeter Honeycrisp or Golden Delicious. This blend can add layers of flavor and a more interesting texture to your filling. Whichever you choose, ensure your apples are fresh and firm, as they are truly the star of this comforting dessert.
Crafting the Perfect Apple Pie Filling
While convenience sometimes calls for store-bought, there’s nothing quite like the vibrant flavor and ideal texture of a homemade apple pie filling. Making your own allows you to control the sweetness, spice level, and the consistency of the apples. Our recommended filling recipe involves simmering freshly sliced apples with a blend of granulated and brown sugars, a touch of lemon juice for brightness, water, cornstarch for thickening, and classic warm spices like nutmeg and cinnamon, all finished with a knob of butter for richness. This method ensures the apples are perfectly tender but still retain a slight bite, encased in a glossy, flavorful sauce that won’t make your crust soggy. The cornstarch is key here, creating a thick filling that sets beautifully when the pie cools, making for clean, delicious slices.
Mastering the Streusel Topping
The streusel topping is what truly gives Dutch Apple Pie its distinctive charm and name. It’s a simple yet incredibly impactful component, adding a delightful textural contrast and a layer of caramelized sweetness. To create the perfect streusel, you’ll combine cold butter, all-purpose flour, and light brown sugar. The trick lies in the temperature of the butter: it must be cold, straight from the refrigerator, and cut into small cubes. This ensures that as you mix or “cut” the butter into the dry ingredients using two forks or a pastry blender, it creates coarse, uneven crumbs. These crumbs are what bake into that wonderfully crisp, golden-brown topping. Avoid overmixing; you want a rustic, crumbly texture, not a smooth dough. This streusel will transform your pie, providing a satisfying crunch and rich, buttery flavor with every bite.
How to Make Dutch Apple Pie: Step-by-Step
Baking this delightful Dutch Apple Pie is a straightforward process that yields incredibly rewarding results. Follow these steps for a perfect pie:
- Prepare for Baking: Begin by preheating your oven to 400 degrees Fahrenheit (200 degrees Celsius). This ensures the oven is at the correct temperature when your pie is ready to go in, promoting even baking.
- Crust Preparation: If using a homemade pie crust, gently fit it into a 9-inch pie plate and flute the edges decoratively. If using a store-bought frozen crust, simply place it in the pie plate – no need to thaw. Place the pie plate on a larger baking sheet; this is a crucial step to catch any potential drips or overflow during baking, saving you from a messy oven cleanup.
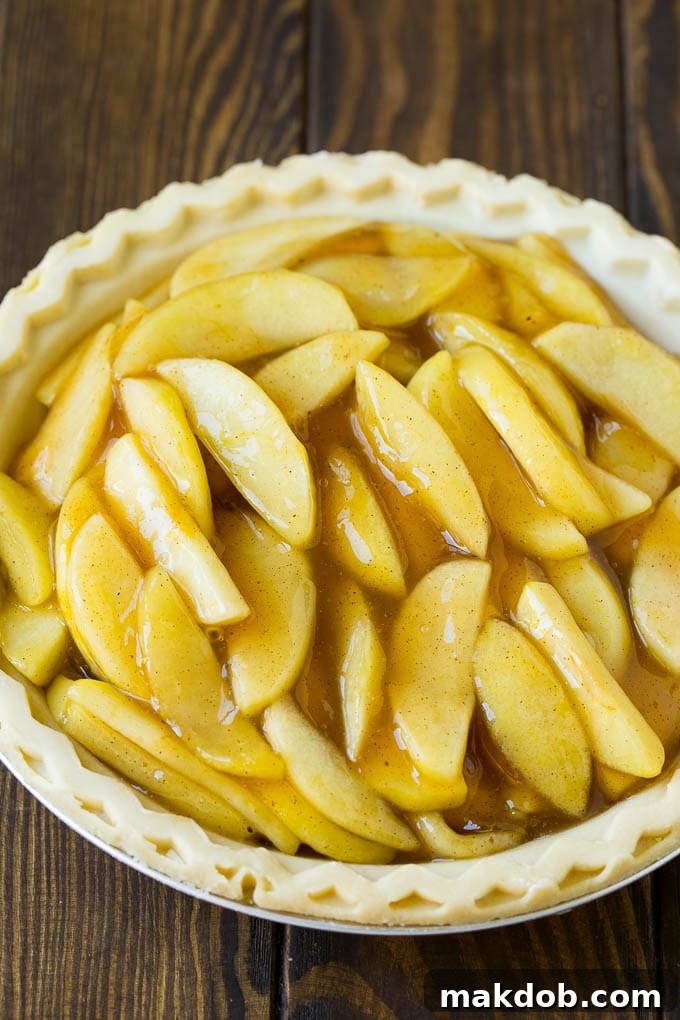
- Filling the Pie: Next, prepare your apple pie filling. Whether you opt for a homemade batch (highly recommended!) or a quality store-bought alternative, ensure it’s ready. Carefully pour the entire apple filling into the prepared pie crust, spreading it evenly.
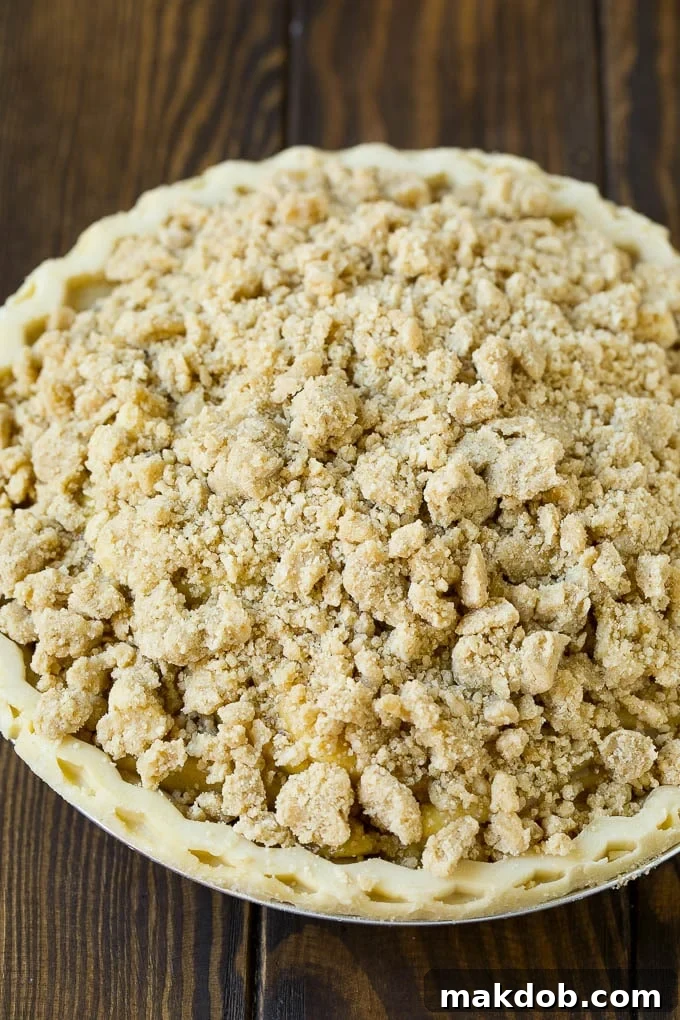
- Crafting the Streusel Topping: In a medium bowl, combine the cold, cubed butter, all-purpose flour, and light brown sugar. Using two forks or a pastry blender, “cut” the butter into the dry ingredients. Work quickly until the mixture resembles coarse crumbs, with some pea-sized pieces of butter remaining. The key here is not to overmix, as you want distinct crumbles, not a uniform dough.
- Topping the Pie: Generously sprinkle the prepared streusel crumb topping evenly over the apple filling in the pie crust. Ensure good coverage across the entire surface.
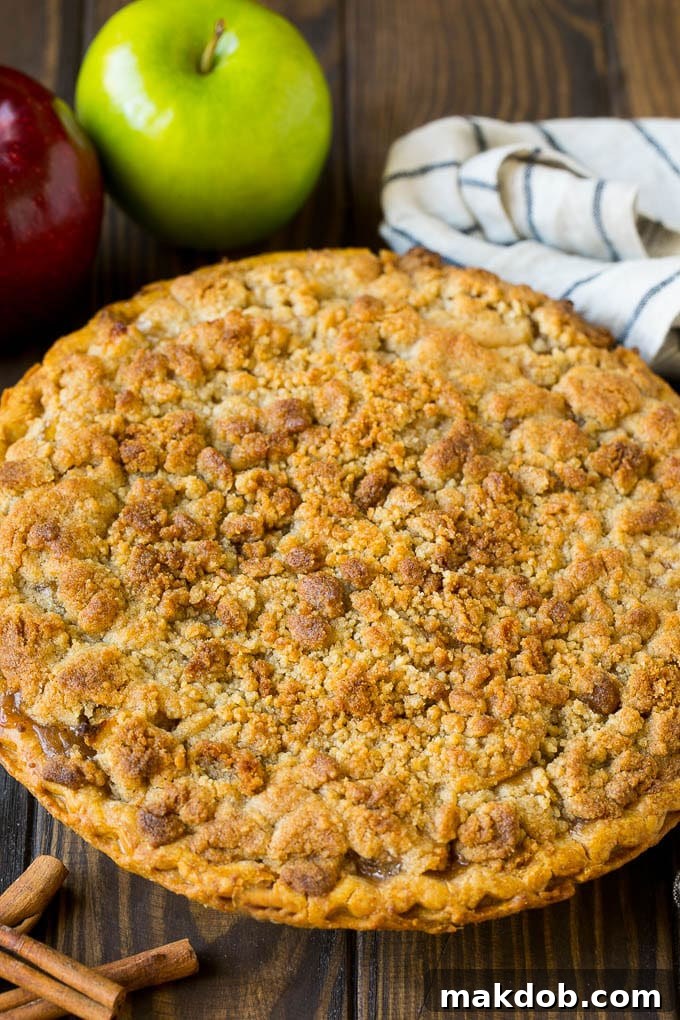
- Bake to Perfection: Carefully transfer the baking sheet with the pie into your preheated oven. Bake for approximately 45-50 minutes, or until the crumb topping is beautifully deep golden brown, and the pie crust edges are golden and cooked through. You might see the apple filling bubbling slightly through the crumbs, which indicates it’s hot and delicious.
- Cool Before Serving: Once baked, remove the pie from the oven and place it on a wire rack to cool. It’s essential to let the pie cool for at least 20-30 minutes, or even longer (up to an hour), before slicing. This cooling time allows the filling juices and the streusel topping to set properly, resulting in cleaner, more stable slices and a better overall texture.
Serve warm with your favorite accompaniments, and enjoy the fruits of your labor!
Expert Tips for a Flawless Dutch Apple Pie
- This pie is incredibly forgiving and can be prepared up to 2 days in advance of when you plan to serve it. Simply store it covered at room temperature. When ready to serve, you can warm it gently in the oven for about 15-20 minutes at 300°F (150°C) to bring out its fresh-baked aroma and warmth.
- When you’re preparing your streusel topping, the importance of using cold butter cannot be overstated. The butter should be firm, straight out of the refrigerator. Cold butter prevents it from fully incorporating into the flour, which is precisely what creates those desirable little crumbles of streusel. These distinct pieces melt slower, contributing to a lighter, crispier, and more evenly textured topping.
- Always bake your pie on a sheet pan or baking sheet. This simple step is a safeguard against any potential drips or overflow from the pie filling bubbling over the crust, keeping your oven clean and preventing burnt sugar messes.
- Allowing the pie to cool sufficiently before serving is crucial for optimal slicing and flavor. The longer the pie cools, the more the pie filling juices will thicken and set, and the streusel topping will firm up. This patience will be rewarded with beautiful, neat slices and a well-structured pie. Aim for at least 20-30 minutes, but an hour is even better for perfect slices.
- For an extra layer of flavor and aroma, consider adding a pinch of freshly grated nutmeg or a dash of allspice to your apple filling. These warm spices beautifully complement the apples and cinnamon.
Quick Tip for Time-Saving
In a pinch and don’t have time to make your own apple pie filling from scratch? Don’t fret! A high-quality store-bought canned apple pie filling will also work wonderfully, making this delicious dessert even more accessible.
Recipe FAQs: All Your Dutch Apple Pie Questions Answered
The best apples for an apple pie have a nice, slightly tart flavor and are firm enough to keep their shape when baked. I particularly love using Granny Smith apples for Dutch apple pies because they are wonderfully firm and their tart flavor perfectly complements the rich brown sugar streusel topping. Other excellent firm apple varieties include Braeburn, Golden Delicious, Pink Lady, or Honeycrisp apples. A blend of two or three types can also offer a more complex flavor profile.
Apple pie, especially with a crumb topping, can generally stay fresh at room temperature for about 2 days, assuming your kitchen isn’t excessively warm or humid. To extend its freshness, you can store your pie in the refrigerator for up to 4 days. When refrigerating, make sure to wrap it tightly in plastic wrap, aluminum foil, or place it in an airtight container to prevent it from drying out and to protect the topping from softening over time.
Absolutely! Apple pie freezes exceptionally well and can remain fresh for up to 6 months. For convenience, I recommend cutting individual slices of the cooled pie and wrapping each slice tightly in plastic wrap, then placing them in an airtight freezer-safe container or freezer bag. When you’re ready to enjoy a slice, you can thaw it in the refrigerator overnight or warm it directly from frozen in the oven until heated through.
A soggy bottom crust is a common baking woe, but it can be avoided! Key strategies include making sure your apple filling isn’t too watery (use cornstarch or flour to thicken it), pre-baking (blind baking) your pie crust for about 10-15 minutes before adding the filling, and baking the pie on a hot baking sheet. Also, ensure your pie cools completely before slicing, as the filling continues to set as it cools.
CONNECT WITH US
Delightful Flavor Variations for Your Dutch Apple Pie
While this classic Dutch apple pie is perfectly sweet, tart, and utterly delicious on its own, it also serves as a fantastic canvas for creative flavor additions. Don’t hesitate to customize this recipe to perfectly match your taste preferences or to experiment with seasonal ingredients:
- Fruit Swaps: Introduce other seasonal fruits for a delightful twist. You can swap one cup of the apples for one cup of sliced peaches, pears, blueberries, or raspberries. Alternatively, for a completely different profile, try using cherry pie filling instead of apples for a beautiful cherry crumb pie.
- Cran-Apple Twist: For a vibrant burst of color and a tart-sweet punch, add 1/2 cup of fresh cranberries to your apple filling. If you incorporate cranberries, remember to increase the sugar in your filling by an additional 1/4 cup to balance the tartness.
- Nutty Crunch: Enhance the streusel topping with an extra layer of texture and nutty flavor. Feel free to add 1/2 cup of finely chopped nuts to the topping mixture. Excellent choices include candied walnuts, slivered almonds, or candied pecans. Toasting the nuts lightly before adding them can deepen their flavor.
- Caramel Apple Indulgence: Transform your pie into a decadent caramel apple masterpiece. Drizzle 1/2 cup of rich caramel sauce directly into the apple filling before adding the streusel. The caramel will meld beautifully with the apples during baking, creating an incredibly rich and gooey pie.
- Enhanced Toppings: Beyond the traditional vanilla ice cream, consider a dollop of freshly whipped cream or a generous drizzle of homemade caramel sauce for serving. For a gourmet touch, you could even garnish each slice with a thin slice of fresh apple, a sprinkle of apple pie spice, or a dusting of ground cinnamon over your ice cream or whipped cream for an amazing presentation.
This apple pie, with its sweet, crisp, and crumbly topping that beautifully highlights the wonderful tartness of the apples, is a timeless classic. It’s one of my absolute favorites, a go-to for holiday gatherings, special occasions, or simply whenever the craving for a truly satisfying homemade treat strikes.
Serving and Storing Your Dutch Apple Pie
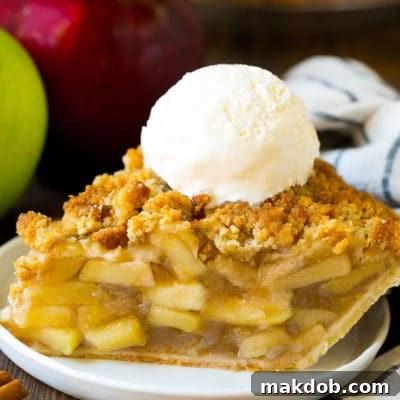
The beauty of Dutch apple pie lies not only in its taste but also in its versatility regarding serving and storage. For the ultimate dessert experience, serve this pie warm. A scoop of rich vanilla bean ice cream is the quintessential accompaniment, melting slightly into the warm apple filling and streusel. For those who prefer, a dollop of freshly whipped cream or a drizzle of warm caramel sauce also makes a delightful addition. Don’t be afraid to experiment with other pairings, such as a slice of sharp cheddar cheese, a traditional complement to apple pie in some regions, offering a unique sweet and savory balance.
When it comes to storing your delicious creation, proper handling ensures freshness and enjoyment for days. A freshly baked Dutch apple pie can be stored at room temperature for up to two days, provided it’s covered loosely. If you wish to extend its shelf life, refrigerate the pie, tightly wrapped in plastic wrap or foil, for up to four days. Be aware that the streusel topping may lose some of its crispness in the refrigerator. To restore some of its original warmth and texture, you can gently reheat individual slices in a microwave for a quick treat or in a preheated oven (around 300°F/150°C) for 10-15 minutes until warmed through.
If you have leftovers or want to prepare a pie for future enjoyment, Dutch apple pie freezes exceptionally well. Once completely cooled, wrap the entire pie tightly in several layers of plastic wrap and then foil, or slice it into individual servings and wrap each slice before freezing. It will keep beautifully in the freezer for up to six months. Thaw frozen slices in the refrigerator overnight before warming, or reheat directly from frozen in the oven until heated through, making this a perfect make-ahead dessert for any occasion.
More Irresistible Apple Recipes
Fried Apple Pies
30 mins
Slow Cooker Apple Cider
2 hrs 5 mins
Caramel Apples
17 mins
Apple Fries
30 mins
Caramel Apple Dip
6 mins
Share Your Thoughts!
We would love to hear from you! Please leave a 5-star 🌟🌟🌟🌟🌟 rating in the recipe card below and a review in the comments section further down the page. Your feedback helps us and other home bakers!
Dutch Apple Pie
Pin Recipe
Ingredients
- 1 pie crust homemade or store bought
- 1 recipe apple pie filling
- 1/2 cup cold butter cut into cubes
- 1 cup all purpose flour
- 2/3 cup brown sugar packed
Instructions
- Prepare the apple pie filling according to recipe instructions. Preheat the oven to 400 degrees F.
- Place a 9 inch pie plate on a sheet pan. Fit the pie crust into the pan, fluting the edges of the crust. Alternatively, you can use a frozen pie crust that’s already in a pan (no need to thaw it).
- Pour the pie filling into the crust.
- Place the butter, flour and brown sugar in a bowl. Use two forks or a pastry blender to cut the butter into the flour and sugar until coarse crumbs form.
- Sprinkle the crumb mixture over the pie.
- Bake the pie for 45-50 minutes, or until crust and topping are deep golden brown. Cool for at least 20 minutes, then serve.
Notes
- This pie can be made up to 2 days before you plan to serve it. I recommend serving your pie with a scoop of ice cream on top.
- When you are making your streusel topping, make sure the butter is cold and right out of the refrigerator. The cold butter helps create the little crumbles of streusel that make a good, even topping.
Nutrition
Carbohydrates: 32g |
Protein: 2g |
Fat: 17g |
Saturated Fat: 7g |
Cholesterol: 24mg |
Sodium: 155mg |
Potassium: 49mg |
Fiber: 1g |
Sugar: 14g |
Vitamin A: 284IU |
Calcium: 20mg |
Iron: 1mg
Tweet
Pin