
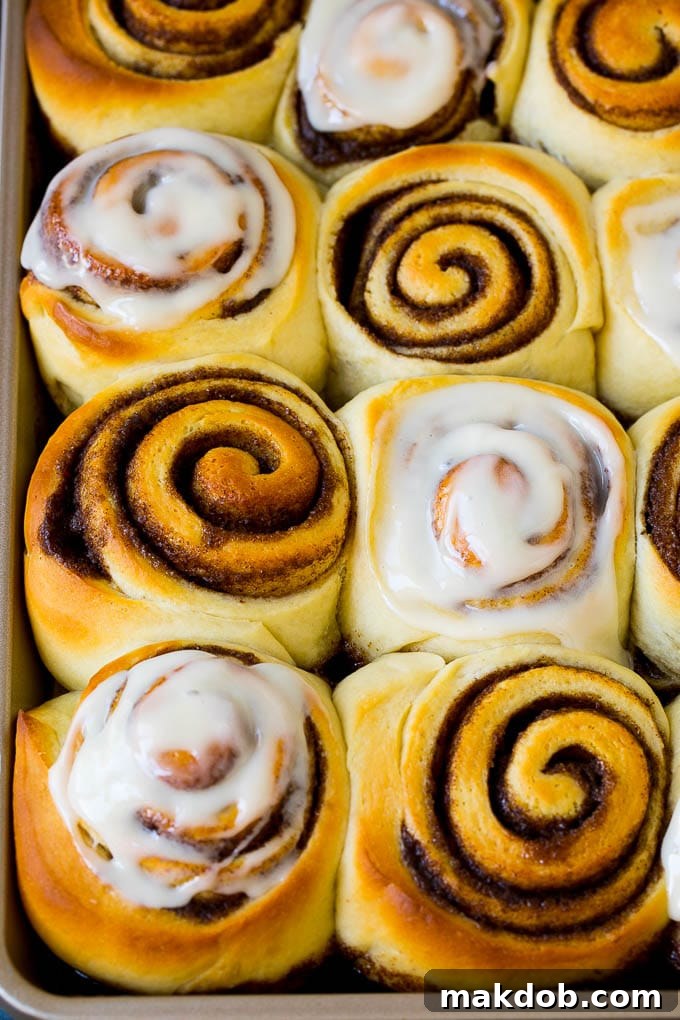
Welcome to the ultimate guide for creating the most heavenly homemade cinnamon rolls you’ve ever tasted! Imagine waking up to the irresistible aroma of warm, fluffy dough, rich brown sugar, and aromatic cinnamon, all generously topped with a decadent cream cheese frosting. These aren’t just any cinnamon rolls; they are a labor of love that promises to elevate your breakfast or brunch experience to an unforgettable culinary event. Each bite offers a perfect balance of tender sweetness and spice, making them a staple for festive mornings, leisurely weekends, or whenever you crave a truly special treat.
There’s something uniquely satisfying about baking from scratch, and these cinnamon rolls are no exception. They bring a cozy, comforting atmosphere to any home and are guaranteed to impress guests, family, and friends alike. Hosting brunch parties is one of my favorite things to do, and alongside favorites like my savory breakfast casserole with bacon and a vibrant tropical fruit salad, these homemade cinnamon rolls always steal the show. Get ready to embrace your inner baker and create bakery-worthy cinnamon buns right in your own kitchen!
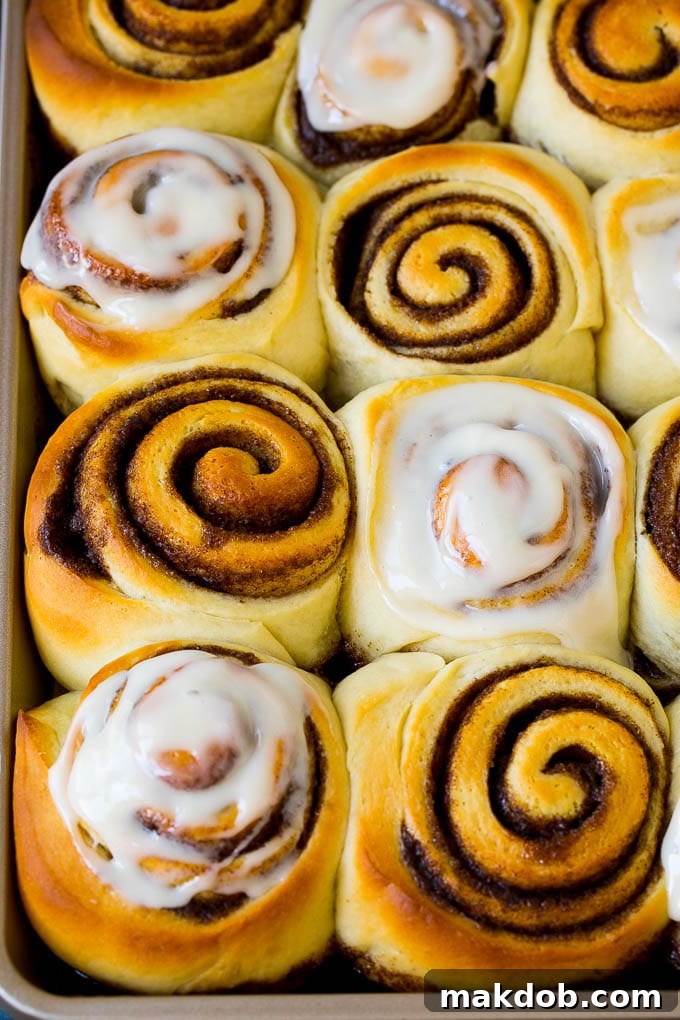
While the thought of making fluffy cinnamon rolls from scratch might seem daunting, I assure you, it’s a surprisingly straightforward process. The secret lies in patience, especially during the dough’s rising times, which truly develop its exquisite texture and flavor. With just a little effort and attention to detail, you can achieve picture-perfect, melt-in-your-mouth cinnamon buns that rival any professional bakery. These rolls are not only a fantastic everyday indulgence but also make for an especially heartwarming treat on special occasions like Christmas morning.
If you’re a fan of delightful breakfast creations, then these cinnamon rolls are a must-try! They effortlessly join the ranks of my most beloved morning recipes. For those eager to explore more breakfast delights, be sure to check out my delightful mini banana pancakes, comforting donut bread pudding, innovative cinnamon roll French toast casserole, and the ever-popular overnight yeast waffles. Each recipe offers a unique way to start your day with something truly delicious.
Table of Contents
- Homemade Cinnamon Roll Ingredients
- How Do You Make Homemade Cinnamon Rolls?
- Tips For The Perfect Rolls
- Quick Tip: Achieve More Layers!
- Recipe FAQs
- Why Didn’t My Dough Rise? Troubleshooting Common Issues
- Homemade Cinnamon Roll Flavor Variations
- Serving and Storing Your Cinnamon Rolls
- More Breakfast Recipes To Try
- Love This Recipe?
- Cinnamon Rolls Recipe
Homemade Cinnamon Roll Ingredients: Crafting Perfection from Scratch
Creating the best homemade cinnamon rolls starts with understanding the role each ingredient plays in achieving that coveted soft, fluffy texture and rich flavor. My recipe calls for simple, accessible ingredients that, when combined correctly, yield extraordinary results. Here’s a detailed look at what you’ll need for each component:
For the Dough: The Foundation of Fluffiness
The dough is the heart of your cinnamon rolls, and achieving a light, airy texture is crucial. You will need:
- Warm Water: Essential for activating the yeast. It should be between 100-110 degrees F (38-43 degrees C) – warm enough to awaken the yeast, but not so hot as to kill it.
- Active Dry Yeast: The leavening agent that makes your rolls rise and become wonderfully soft. Ensure your yeast is fresh and active for the best results.
- Warm Milk: Adds richness and tenderness to the dough. Like the water, it should be warm but not scalding. Room temperature is ideal.
- Eggs: Contribute to the dough’s richness, structure, and golden hue. Using them at room temperature helps them incorporate more easily into the dough.
- Granulated Sugar: Not just for sweetness, sugar also feeds the yeast, aiding in the rising process and contributing to a tender crumb.
- Salt: Balances the sweetness and enhances the overall flavor profile of the rolls, as well as strengthening the gluten structure.
- Melted Butter: Provides moisture, flavor, and further tenderness. Be sure it’s melted and slightly cooled, not hot, when adding to the dough.
- All-Purpose Flour: The primary structural component. You’ll need about 4 1/4 cups, with a little extra for dusting or if the dough is too sticky.
- Cooking Spray: For greasing bowls and pans, preventing sticking.
For the Filling: The Sweet and Spicy Core
The luscious filling is what gives cinnamon rolls their iconic taste and beautiful swirl. Gather these:
- Softened Butter: Acts as a binder for the sugar and cinnamon, and creates a moist, flavorful layer. Ensure it’s truly softened for easy spreading.
- Dark Brown Sugar: Offers a deeper, more molasses-rich sweetness compared to light brown sugar, perfectly complementing the cinnamon.
- Ground Cinnamon: The star spice! Use high-quality ground cinnamon for the most aromatic and flavorful results.
For the Cream Cheese Frosting: The Dreamy Topping
No cinnamon roll is complete without a generous slathering of tangy, sweet cream cheese frosting. You’ll need:
- Softened Butter: Forms the base of the frosting, giving it a smooth and creamy texture.
- Cream Cheese: The essential ingredient for that signature tangy flavor and rich creaminess. Softened cream cheese is a must for a lump-free frosting.
- Vanilla Extract: Enhances the sweetness and adds a warm, aromatic note to the frosting.
- Powdered Sugar: Also known as confectioners’ sugar, it dissolves easily to create a smooth, pipeable, or spreadable consistency without a gritty texture.
- Milk or Heavy Cream: Used to adjust the frosting’s consistency, making it as thick or thin as you prefer.
How Do You Make Homemade Cinnamon Rolls? A Step-by-Step Baking Guide
Making homemade cinnamon rolls is a delightful journey that transforms simple ingredients into an extraordinary treat. Follow these detailed steps to achieve perfect results:
Step 1: Activating the Yeast for the Perfect Dough
Begin by gently warming a small amount of water to between 100-110 degrees F (38-43 degrees C). Pour this warm water into the bowl of your stand mixer, then sprinkle in the active dry yeast and a teaspoon of granulated sugar. Give it a gentle stir. This sugar will “feed” the yeast, helping it become active. Let the mixture sit undisturbed for 2-3 minutes. You’ll know your yeast is alive and ready when it becomes foamy and bubbly on the surface. If it doesn’t foam, your yeast may be old or the water temperature was off, and it’s best to start again with fresh yeast.
Step 2: Mixing and Kneading the Dough
Once your yeast is activated, it’s time to build the dough. To the foamy yeast mixture in your stand mixer, add the remaining dough ingredients: warm milk, room temperature eggs, the rest of the granulated sugar, salt, melted (but not hot) butter, and the all-purpose flour. Attach the paddle attachment to your mixer and mix on low speed for about 1 minute, or until all the ingredients come together to form a shaggy dough. Switch to the dough hook attachment and knead the dough for 4-5 minutes on medium-low speed. The goal is to develop the gluten, resulting in a smooth, elastic, and soft dough. It should pull away from the sides of the bowl, but a slight stickiness to the bottom is perfectly fine. If the dough seems overly sticky, add an additional tablespoon or two of flour, one at a time, until it reaches the desired consistency.
Step 3: The First Rise – Developing Flavor and Volume
Once kneaded, form your dough into a neat ball. Lightly coat a clean bowl with cooking spray, then place the dough ball inside, turning it once to ensure the top is also lightly coated. Cover the bowl snugly with plastic wrap. Find a warm spot in your kitchen (around 75-85 degrees F or 24-29 degrees C) and let the dough rise until it has doubled in size. This typically takes about 1 1/2 hours, but can vary depending on the warmth of your environment.
Step 4: Preparing the Filling and Shaping the Rolls
While the dough is on its first rise, prepare your baking pan. Line a 15″ x 10″ jelly roll pan with parchment paper and lightly coat it with cooking spray. For the irresistible filling, combine softened butter, packed dark brown sugar, and ground cinnamon in a small bowl. Mix thoroughly until you have a uniform, spreadable paste. Once the dough has doubled, gently punch it down to release the air. Transfer the dough to a lightly floured, non-stick surface. Using a rolling pin, roll the dough into a large rectangle, approximately 16 inches by 20 inches.
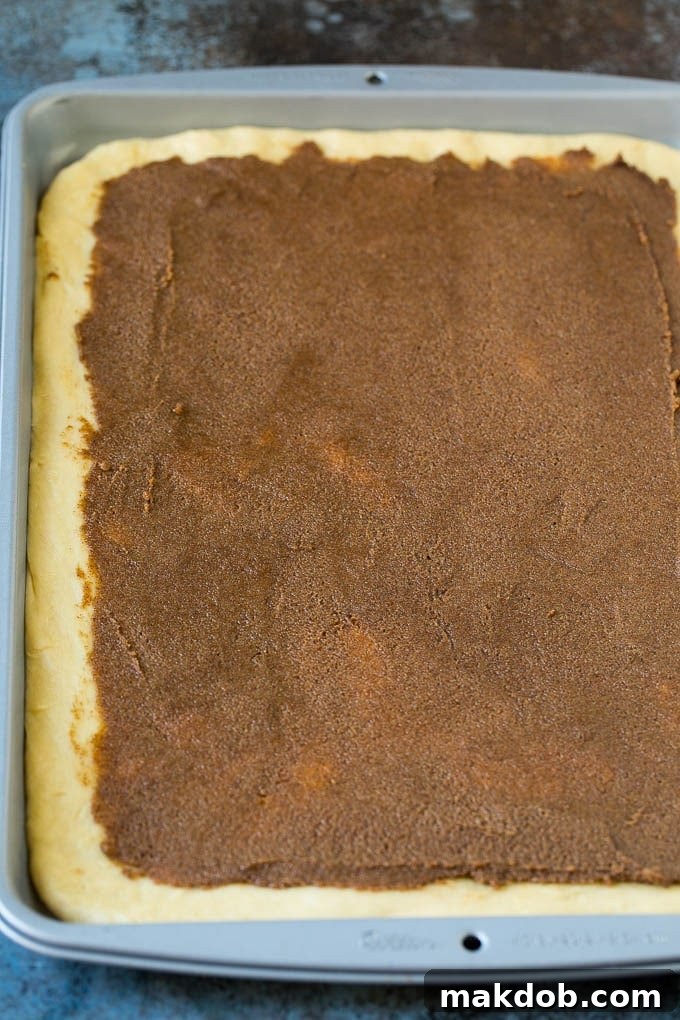
Now, evenly spread the prepared cinnamon-sugar filling over the entire surface of the rolled-out dough, leaving a small 1/2-inch border along all edges. Starting from one of the longer ends, carefully and tightly roll the dough into a log. The tighter you roll, the more spirals your cinnamon rolls will have.
Step 5: Cutting and the Second Rise
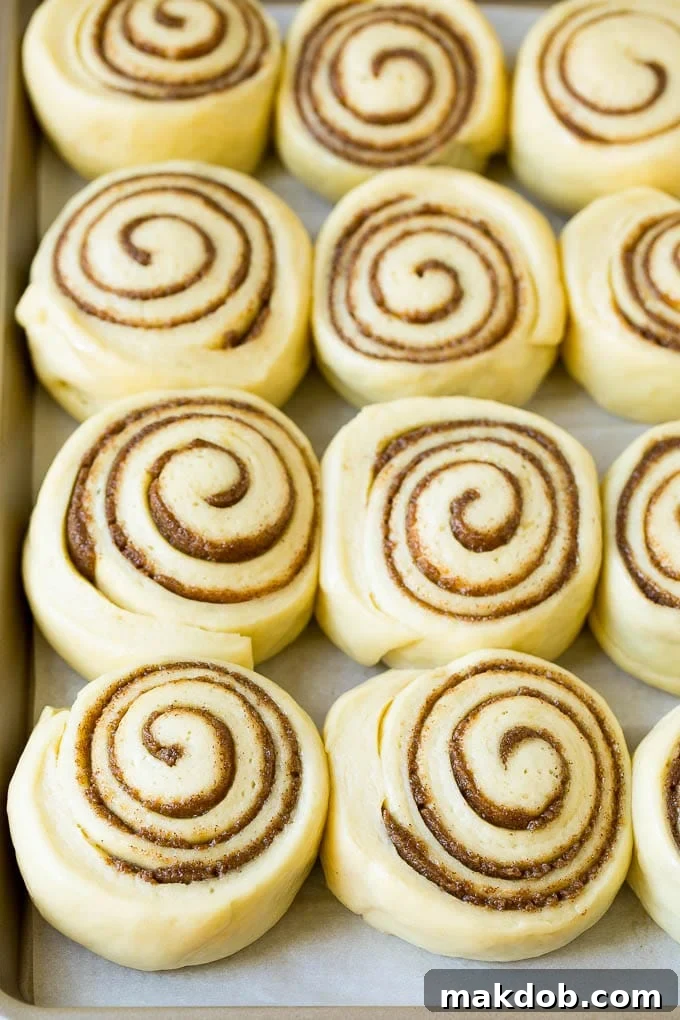
For perfectly uniform rolls, use a sharp knife or, for an even cleaner cut, a piece of unflavored dental floss. To use floss, slide it underneath the dough log where you want to make a cut, cross the ends over the top of the log, and pull to slice through. Cut the log crosswise into 12 equal rounds. Arrange these rounds on your prepared jelly roll pan, leaving a little space between each roll for them to expand. Lightly coat the tops of the rolls with cooking spray and cover the pan loosely with plastic wrap.
Allow the rolls to undergo their second rise in a warm place until they have nearly doubled in size again, about another 1 1/2 hours. Alternatively, you can prepare the rolls the night before and let them rise slowly overnight in the refrigerator (see tips below for details). If refrigerating, let them come to room temperature for about 1 1/2 hours the next morning before baking.
Step 6: Baking to Golden Perfection
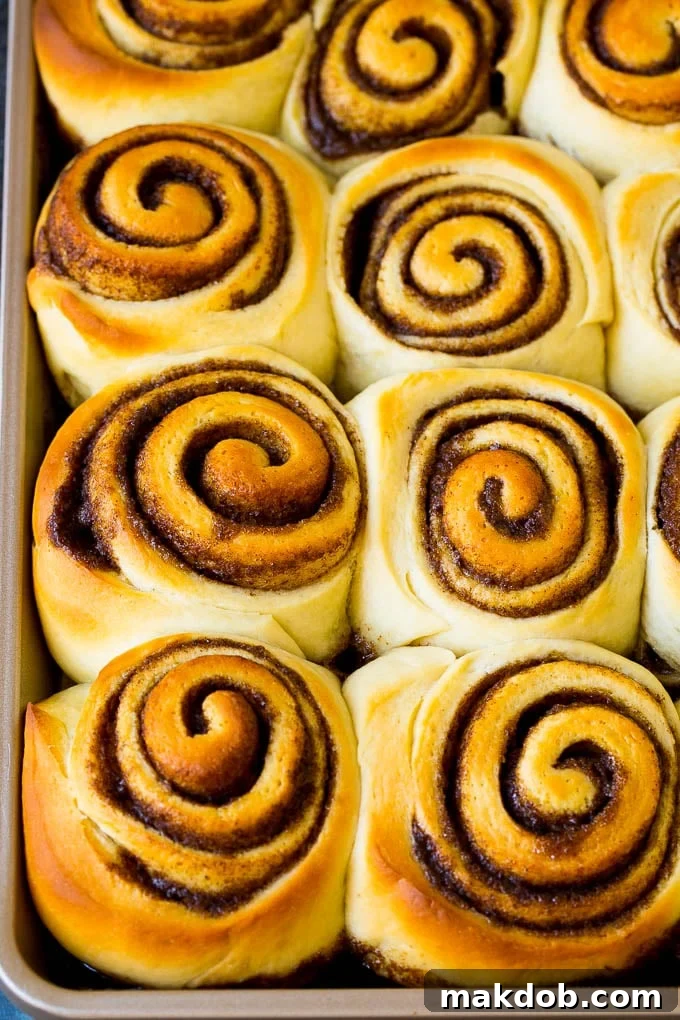
Preheat your oven to 375 degrees F (190 degrees C). Once the rolls have completed their second rise, uncover them and place the pan into the preheated oven. Bake for 18-20 minutes, or until the tops are beautifully golden brown and the centers are cooked through. The rolls will smell incredible!
Step 7: The Cream Cheese Frosting Finale
While the cinnamon rolls are baking, whip up the dreamy cream cheese frosting. In the bowl of a stand mixer or with an electric hand mixer, combine softened butter and softened cream cheese. Beat on medium speed until the mixture is smooth, light, and fluffy. Gradually add the vanilla extract, powdered sugar, and 1 tablespoon of milk or heavy cream. Continue beating until the frosting is creamy and lump-free. If you desire a thinner consistency, add a little more milk or cream, one teaspoon at a time, until it’s just right.
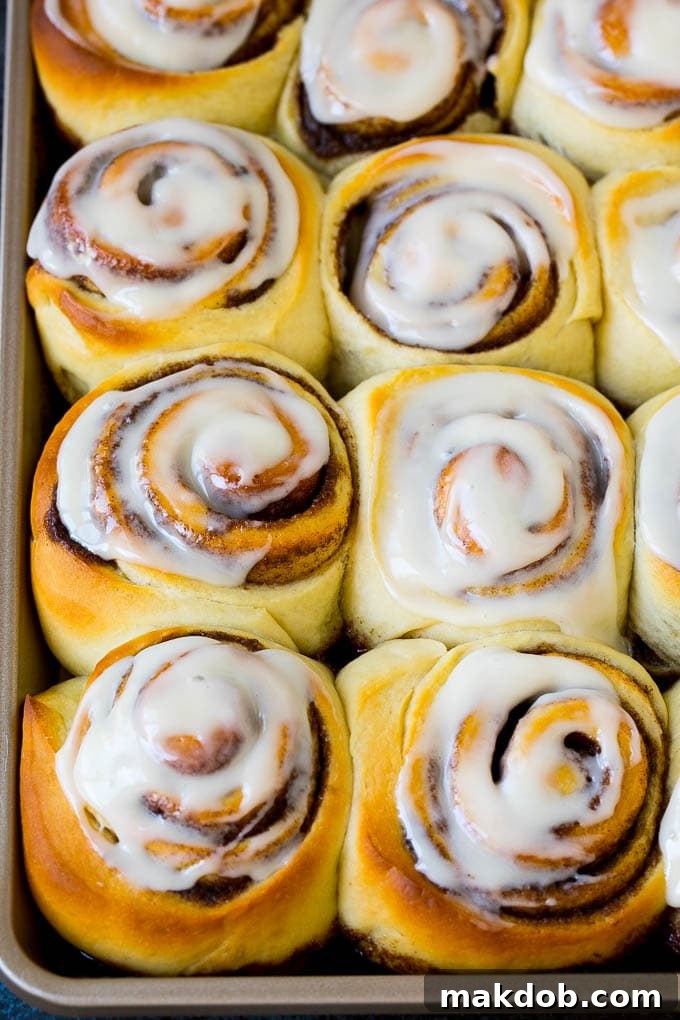
As soon as you remove the golden-brown rolls from the oven, generously spread the warm, luscious cream cheese frosting over them. The warmth of the rolls will allow the frosting to melt slightly, seeping into every nook and cranny, creating an incredibly moist and flavorful experience. Let the rolls cool for about 5 minutes before serving to allow the frosting to set slightly and the rolls to be handled easily. Enjoy them warm, straight from the oven!
Expert Tips For The Perfect Homemade Cinnamon Rolls
Achieving bakery-quality cinnamon rolls at home is entirely possible with a few key techniques and considerations. Here are my top tips to ensure your homemade cinnamon buns are always a success:
- Temperature is Key for Yeast Activation: The liquids in your dough, such as water and milk, must be warm but never boiling. High temperatures will kill the delicate yeast, preventing your dough from rising. Aim for a temperature range of 90-100 degrees F (32-38 degrees C). You should be able to comfortably touch the liquid without it feeling hot.
- Test Your Yeast: Before proceeding with the full recipe, always perform the yeast test. If your yeast does not become actively foamy and bubbly after dissolving in warm water and a pinch of sugar (Step 1 of the instructions), it means your yeast is likely inactive or dead. Discard it and start again with fresh yeast; otherwise, your rolls will not rise properly.
- Rising Times are Flexible: The stated rising times in this recipe (1 1/2 hours for each rise) are approximations. Yeast activity is highly dependent on ambient temperature. On a warmer day, your dough will likely rise faster, while on a cooler day, it may take longer. Look for visual cues – the dough should double in size, irrespective of the clock.
- Achieve Evenly Sized Rolls with Dental Floss: For perfectly uniform cinnamon rolls that bake evenly and look professional, try using a piece of unflavored, unwaxed dental floss to cut your dough log. Simply slide the floss underneath the dough log at your desired cut point, wrap the floss around the roll, cross the ends, and pull firmly to slice through. This method prevents squishing the delicate layers.
- Give Them Room to Grow: When placing the sliced rolls onto your baking pan, leave a little space between each one. This allows them to expand and puff up beautifully during their second rise and baking, resulting in rounder, distinct cinnamon rolls. If you prefer them to stick together and create pull-apart rolls, you can place them closer.
- Frost While Warm for Maximum Melt: The best time to apply the cream cheese frosting is when the cinnamon rolls are still hot, immediately after they come out of the oven. The residual heat will cause the frosting to melt slightly, allowing it to seep into all the glorious nooks and crannies of the rolls, creating an incredibly moist and flavorful experience.
- Overnight Preparation for Ease: You can easily prepare these cinnamon rolls the night before. After shaping and placing the rolls in the pan for their second rise (Step 5), instead of letting them rise at room temperature, simply cover them tightly with plastic wrap and place them in the refrigerator overnight. In the morning, remove the rolls from the fridge and let them come to room temperature for about 1 1/2 hours before baking according to the recipe instructions. This is a fantastic way to enjoy fresh, warm cinnamon rolls without an early start!
Quick Tip: Achieve More Layers!
For cinnamon buns with numerous, delicate layers, make sure to roll your dough out as thinly as possible (to the specified dimensions) before spreading the filling and rolling it up. A thinner dough yields more beautiful spirals and a more tender texture.
Recipe FAQs: Your Cinnamon Roll Questions Answered
Freshly baked homemade cinnamon rolls are best enjoyed on the day they are made. However, they will stay delightfully fresh when stored in an airtight container at room temperature for about 2 days. If you store them in the refrigerator, they can maintain their freshness for up to 5 days. For the best experience with leftovers, I highly recommend reheating individual rolls in the microwave for about 30 seconds; this brings back their warmth and softness beautifully.
The key indicators that your cinnamon rolls are perfectly baked are a beautiful golden-brown color on the tops and edges, and the dough in the center of the pan being fully cooked through. To double-check, you can gently insert a thin knife or a wooden skewer into the center of a roll; it should come out clean without any gooey or raw dough attached. A little bit of melted filling on the knife is absolutely fine and expected. Avoid over-baking, as this can lead to dry rolls.
Absolutely! Cinnamon rolls freeze exceptionally well, allowing you to enjoy them at a later date. To freeze baked rolls, ensure they are completely cooled (with or without frosting). Individually wrap each cinnamon roll tightly in plastic wrap, then place the wrapped rolls in an airtight freezer-safe container or a heavy-duty freezer bag. They can be frozen for up to 3 months. To reheat, thaw them at room temperature, then warm in the microwave or a low oven until heated through.
Yes, you can often substitute instant yeast for active dry yeast. Instant yeast doesn’t require prior activation (foaming) like active dry yeast. If using instant yeast, you can mix it directly with the dry ingredients. However, I still recommend dissolving it in the warm liquids with a pinch of sugar first, just to confirm it’s active and ensure your dough will rise.
Follow Me for More Delicious Recipes!
Why Didn’t My Dough Rise? Troubleshooting Common Issues
Dough that doesn’t rise can be incredibly frustrating, but it’s a common issue with usually straightforward solutions. If your homemade cinnamon roll dough isn’t proofing as expected, consider these potential culprits:
- Hot Liquids are the Enemy of Yeast: The most frequent reason for dough not rising is using liquids that are too hot. Yeast is a living organism, and extremely hot water, milk, or melted butter will kill it instantly, rendering it ineffective. Always aim for liquids to be between 90-110 degrees F (32-43 degrees C), which feels lukewarm to the touch. Using a thermometer is the best way to be precise.
- Old or Inactive Yeast: If your yeast has been sitting in your pantry for a long time, or if its expiration date has passed, it may no longer be active. Dead yeast simply won’t produce the gas needed to make your dough rise. Always perform the initial yeast activation test (Step 1) to ensure your yeast is viable and foamy before adding other ingredients. If it doesn’t foam, get a fresh packet of yeast.
- A Cold Room Environment: Yeast thrives in warmth. If the room where you’ve placed your dough to rise is too cold (typically below 70 degrees F or 21 degrees C), the yeast will become sluggish or completely inactive, leading to a very slow or non-existent rise. Ideally, yeast works best when the dough’s internal temperature is between 80-90 degrees F (27-32 degrees C).
- Solutions for a Cold Room:
- Sunny Window: Place the covered bowl near a sunny window.
- Warm Oven Trick: Turn your oven to its lowest setting for just 1-2 minutes, then turn it OFF. Place the covered dough bowl inside the slightly warmed, but off, oven. Ensure the oven is not above 90 degrees F (32 degrees C).
- Warm Water Bath: Place the dough bowl in a larger bowl of warm (not hot) water, ensuring no water gets into the dough.
- Retain Warmth: Always keep your dough covered with plastic wrap or a damp kitchen towel to retain warmth and prevent a crust from forming.
- Too Much Flour: An overly stiff dough due to too much flour can restrict the yeast’s ability to expand the gluten network. Ensure you’re measuring your flour accurately, preferably by weight if possible, or by spooning flour into your measuring cup and leveling it, rather than scooping directly from the bag.
- Insufficient Kneading: Proper kneading is essential for developing gluten, which gives the dough its elasticity and strength to trap the gasses produced by the yeast. If the dough isn’t kneaded enough, it won’t have the structure to hold its rise.
Homemade Cinnamon Roll Flavor Variations: Get Creative!
While these classic cinnamon rolls are already sweet, fluffy, and utterly delicious as they are, one of the joys of baking from scratch is the ability to customize and experiment with flavors. Here are some delightful variations to suit your taste and impress your palate:
- Decadent Chocolate Swirls: For the chocolate lovers, incorporate mini chocolate chips into the dough during the mixing stage, or sprinkle them over the cinnamon-sugar filling before rolling. Dark chocolate or milk chocolate chips work equally well.
- Nutty Perfection: Add a wonderful crunch and depth of flavor by scattering finely chopped pecans, walnuts, or almonds over the butter and brown sugar filling before you roll the dough. Toasted nuts will provide an even richer taste.
- Caramel Pecan Glaze Upgrade: Elevate your rolls with a luxurious caramel pecan glaze. Instead of the cream cheese frosting, try adapting the luscious glaze from my sticky buns recipe. The combination of sticky caramel and crunchy pecans is simply divine.
- Fruity Raisin Infusion: For a touch of fruity sweetness, add plump raisins (or golden raisins) to the dough during the last minute of kneading, or sprinkle them over the filling along with the cinnamon and brown sugar.
- Citrus Zest Brightness: Zest of one orange or lemon can be added to the dough for a bright, refreshing hint, or mixed into the cream cheese frosting for a zesty twist.
- Gingerbread Spice: In cooler months, add 1/2 teaspoon of ground ginger and a pinch of ground cloves to the cinnamon filling for a warm, festive gingerbread flavor.
- Pumpkin Spice Dream: For an autumn-inspired treat, replace half of the ground cinnamon in the filling with a tablespoon of pumpkin pie spice mix. You can also add a tablespoon or two of pumpkin puree to the dough for a subtle pumpkin flavor and beautiful color.
- Maple Glaze Alternative: If you prefer a less tangy topping, create a simple maple glaze by whisking powdered sugar with maple syrup and a splash of milk until smooth.
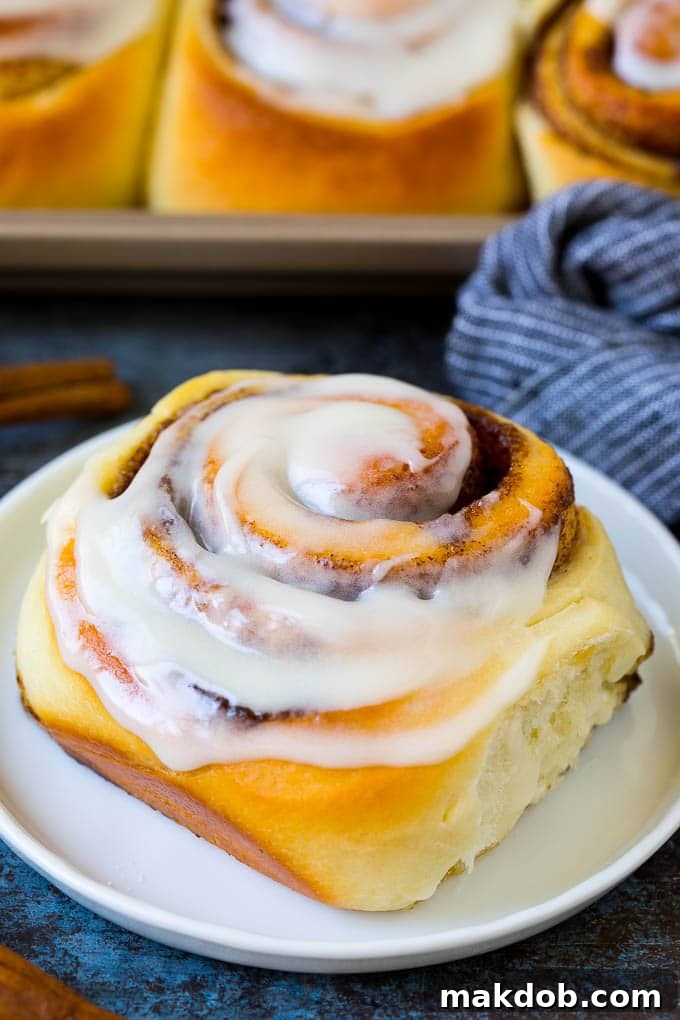
These cinnamon rolls are a joy to devour right out of the oven, particularly when the frosting is still warm and slightly melted. They are perfect to share with friends and family, making any gathering more special, or simply to treat yourself on a lazy weekend morning. No matter the occasion, these rolls promise to deliver comfort and pure delight.
Serving and Storing Your Homemade Cinnamon Rolls
Once your homemade cinnamon rolls emerge from the oven, glistening with frosting, they are ready to be savored. Serving them warm is highly recommended, as the dough is at its softest and the frosting at its most luscious. They pair wonderfully with a hot cup of coffee, a soothing tea, or a cold glass of milk. For a complete brunch spread, consider serving them alongside fresh fruit, scrambled eggs, or crispy bacon.
Optimal Storage for Freshness
To keep your cinnamon rolls fresh, store them in an airtight container at room temperature for up to 2 days. For longer storage, you can refrigerate them in an airtight container for up to 5 days. Be aware that the dough might firm up slightly when chilled, but a quick reheat will restore its softness.
Reheating for That “Just Baked” Feel
The best way to enjoy leftover cinnamon rolls is by reheating them. Pop an individual roll into the microwave for 20-30 seconds, or until warmed through. Alternatively, you can reheat a pan of rolls in a preheated oven at 250°F (120°C) for about 10-15 minutes, covering them with foil to prevent drying out. This will bring back their wonderful warmth and tender texture, making them taste almost as good as fresh from the oven.
Make-Ahead Options for Convenience
For ultimate convenience, these cinnamon rolls are excellent for make-ahead preparation. As mentioned in the tips, you can assemble the rolls and let them undergo their second rise in the refrigerator overnight. This allows you to simply bake them off in the morning, enjoying warm, fresh rolls with minimal morning effort. Just remember to let them come to room temperature for about 1.5 hours before baking.
More Breakfast Recipes To Try
Breakfast Egg Muffins
20 mins
Buttermilk Waffles
30 mins
Cranberry Muffins with Orange Glaze
27 mins
Baked Oatmeal Cups
35 mins
Ham and Egg Cups
25 mins
Love This Recipe?
We would be absolutely thrilled if you could leave a 5-star 🌟🌟🌟🌟🌟 rating in the recipe card below and a review in the comments section further down the page. Your feedback helps us share these delicious recipes with more home bakers!
Homemade Cinnamon Rolls
Pin Recipe
Time
Ingredients
For the dough
- 1/4 cup warm water 100-110 degrees F
- 1 packet active dry yeast
- 3/4 cup milk room temperature
- 2 eggs room temperature
- 1/2 cup +1 teaspoon granulated sugar divided use
- 1 teaspoon kosher salt
- 6 tablespoons butter melted
- 4 1/4 cups all purpose flour plus more if needed
- cooking spray
For the filling
- 1/2 cup butter softened
- 1 cup dark brown sugar packed
- 1 1/2 tablespoons ground cinnamon
For the frosting
- 1/4 cup butter softened
- 4 ounces cream cheese softened
- 1/2 teaspoon vanilla extract
- 2 cups powdered sugar
- 1 tablespoon milk or heavy cream
Instructions
For the dough
-
Place the warm water in the bowl of a stand mixer, along with the yeast and 1 teaspoon of sugar. Stir gently to combine, then let the yeast mixture sit until it becomes foamy, indicating it’s active, about 2-3 minutes.
-
To the foamy yeast mixture, add the milk, eggs, the remaining 1/2 cup sugar, salt, melted butter (ensure it’s not hot), and the all-purpose flour. Using the paddle attachment, mix for approximately 1 minute on low speed, or until all the ingredients are well combined and a shaggy dough forms.
-
Switch to the dough hook attachment. Knead the dough for 4-5 minutes on medium-low speed until it is smooth, soft, and elastic. You may need to add a little more flour, 1-2 tablespoons at a time, if the dough is overly sticky. The dough should generally pull away from the sides of the bowl, though a slight stickiness to the bottom is acceptable.
-
Form the kneaded dough into a ball, then transfer it to a large bowl that has been lightly coated with cooking spray. Turn the dough once to ensure the top is also lightly greased. Cover the bowl tightly with plastic wrap.
-
Let the dough rise in a warm, draft-free place until it has visibly doubled in size. This process typically takes about 1 1/2 hours, depending on your room temperature.
-
While the dough is rising, prepare your baking pan. Line a 15″ x 10″ jelly roll pan with parchment paper, then lightly coat the parchment paper and sides of the pan with cooking spray.
-
Once the dough has risen, gently punch it down to release the air. Transfer the dough to a lightly floured, non-stick surface. Using a rolling pin, roll the dough into a large rectangle measuring approximately 16 inches by 20 inches.
For the filling
-
In a separate small bowl, combine the softened butter, packed dark brown sugar, and ground cinnamon. Stir thoroughly until all ingredients are well combined and form a thick, spreadable paste.
-
Evenly spread the cinnamon-sugar filling over the entire surface of the rolled-out dough, making sure to leave a 1/2-inch plain border around all edges.
-
Starting from one of the shorter ends of the rectangle, carefully and tightly roll up the dough into a log shape. A tight roll ensures beautiful, defined spirals.
-
Using a very sharp knife or a piece of unflavored dental floss, cut the dough log crosswise into 12 equal rounds. This helps to maintain the circular shape of the rolls.
-
Place the cut rolls onto the prepared pan, leaving a small amount of space between each roll to allow for expansion. Lightly coat the tops of the rolls with cooking spray and cover the pan loosely with plastic wrap.
-
Allow the pan of rolls to rise in a warm place until they have nearly doubled in size again, which will take about 1 1/2 hours. Alternatively, for a make-ahead option, you can refrigerate the covered rolls overnight. If you choose this route, be sure to remove the rolls from the fridge in the morning and let them come to room temperature (approximately 1 1/2 hours) before proceeding to bake.
-
Preheat your oven to 375 degrees F (190 degrees C).
-
Once the rolls have finished rising, uncover the pan. Bake for 18-20 minutes, or until the rolls are beautifully golden brown on top and cooked through in the center.
For the frosting
-
While the cinnamon rolls are in the oven, prepare the cream cheese frosting.
-
In the bowl of a stand mixer fitted with the paddle attachment (or using an electric hand mixer), place the softened butter and softened cream cheese. Beat on medium speed until the mixture is smooth, light, and fluffy.
-
Add the vanilla extract, powdered sugar, and 1 tablespoon of milk or heavy cream to the mixer. Continue beating until the frosting is creamy, well combined, and lump-free.
-
If you prefer a thinner consistency for your frosting, you can add more milk (or heavy cream), 1 teaspoon at a time, until you achieve your desired spreadability.
-
Once the rolls are removed from the oven, immediately and generously spread the prepared cream cheese frosting over the warm cinnamon buns. The heat will allow the frosting to melt slightly, seeping into the layers. Let the rolls cool for about 5 minutes before serving to allow the frosting to set just a bit. Enjoy!
Notes
- Liquids like water and milk in the dough should be warm but not boiling to keep the yeast active. The liquids should be in the 90-100 degrees F range.
- If your yeast is not foamy after dissolving in the sugar and water, your rolls will not rise. Discard the yeast and try again.
- Make sure to roll your dough out thin to get more layers in your cinnamon buns.
- For rounder rolls, leave a little space between the rolls when you bake them.