
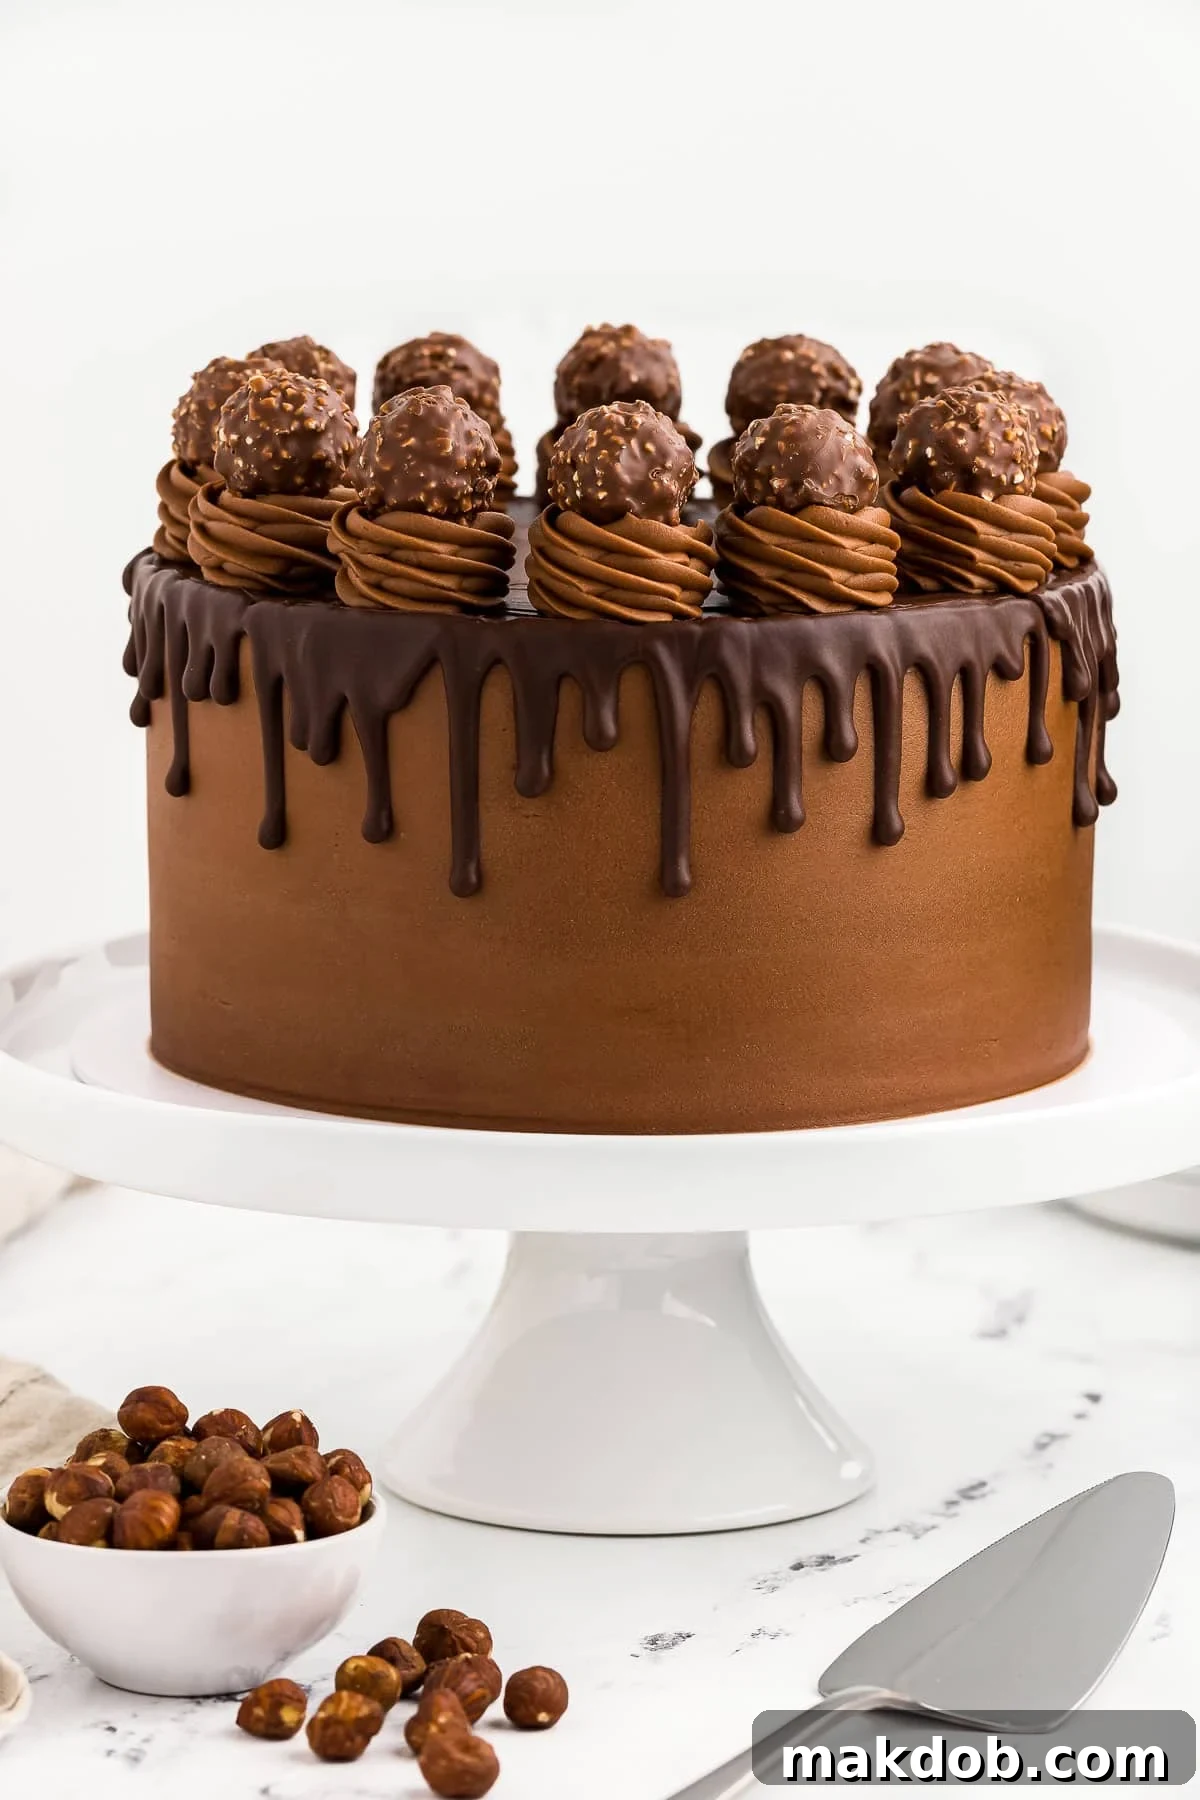
The Ultimate Nutella Chocolate Hazelnut Layer Cake
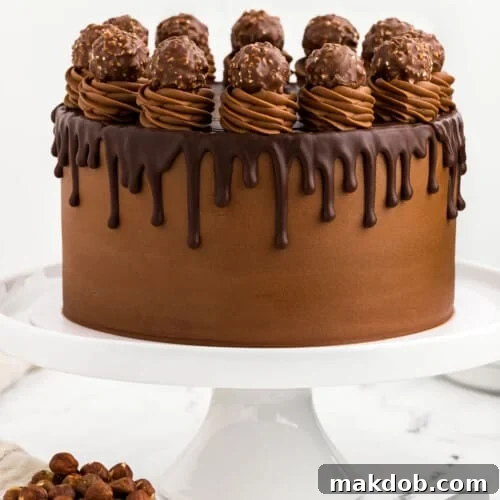
Prepare to impress with this truly spectacular Nutella Cake! Imagine three layers of rich, moist chocolate cake, each generously filled and coated with a decadent Nutella buttercream, then crowned with a silky smooth Nutella ganache drizzle and elegantly garnished with exquisite hazelnut chocolates. It’s more than just a dessert; it’s an experience – a sophisticated and utterly irresistible showstopper perfect for any special occasion or simply to indulge your deepest chocolate cravings.
For those moments when you want to elevate your dessert game and leave a lasting impression, a carefully crafted cake like this one is the answer. Just like other crowd-pleasing dessert recipes such as red velvet brownies, berry chantilly cake, eggnog cake, or black forest cupcakes, this Nutella cake is designed to delight. If you are a true chocolate aficionado, the profound depth of flavor and the wonderfully tender texture of this chocolate hazelnut cake will undoubtedly captivate your palate.
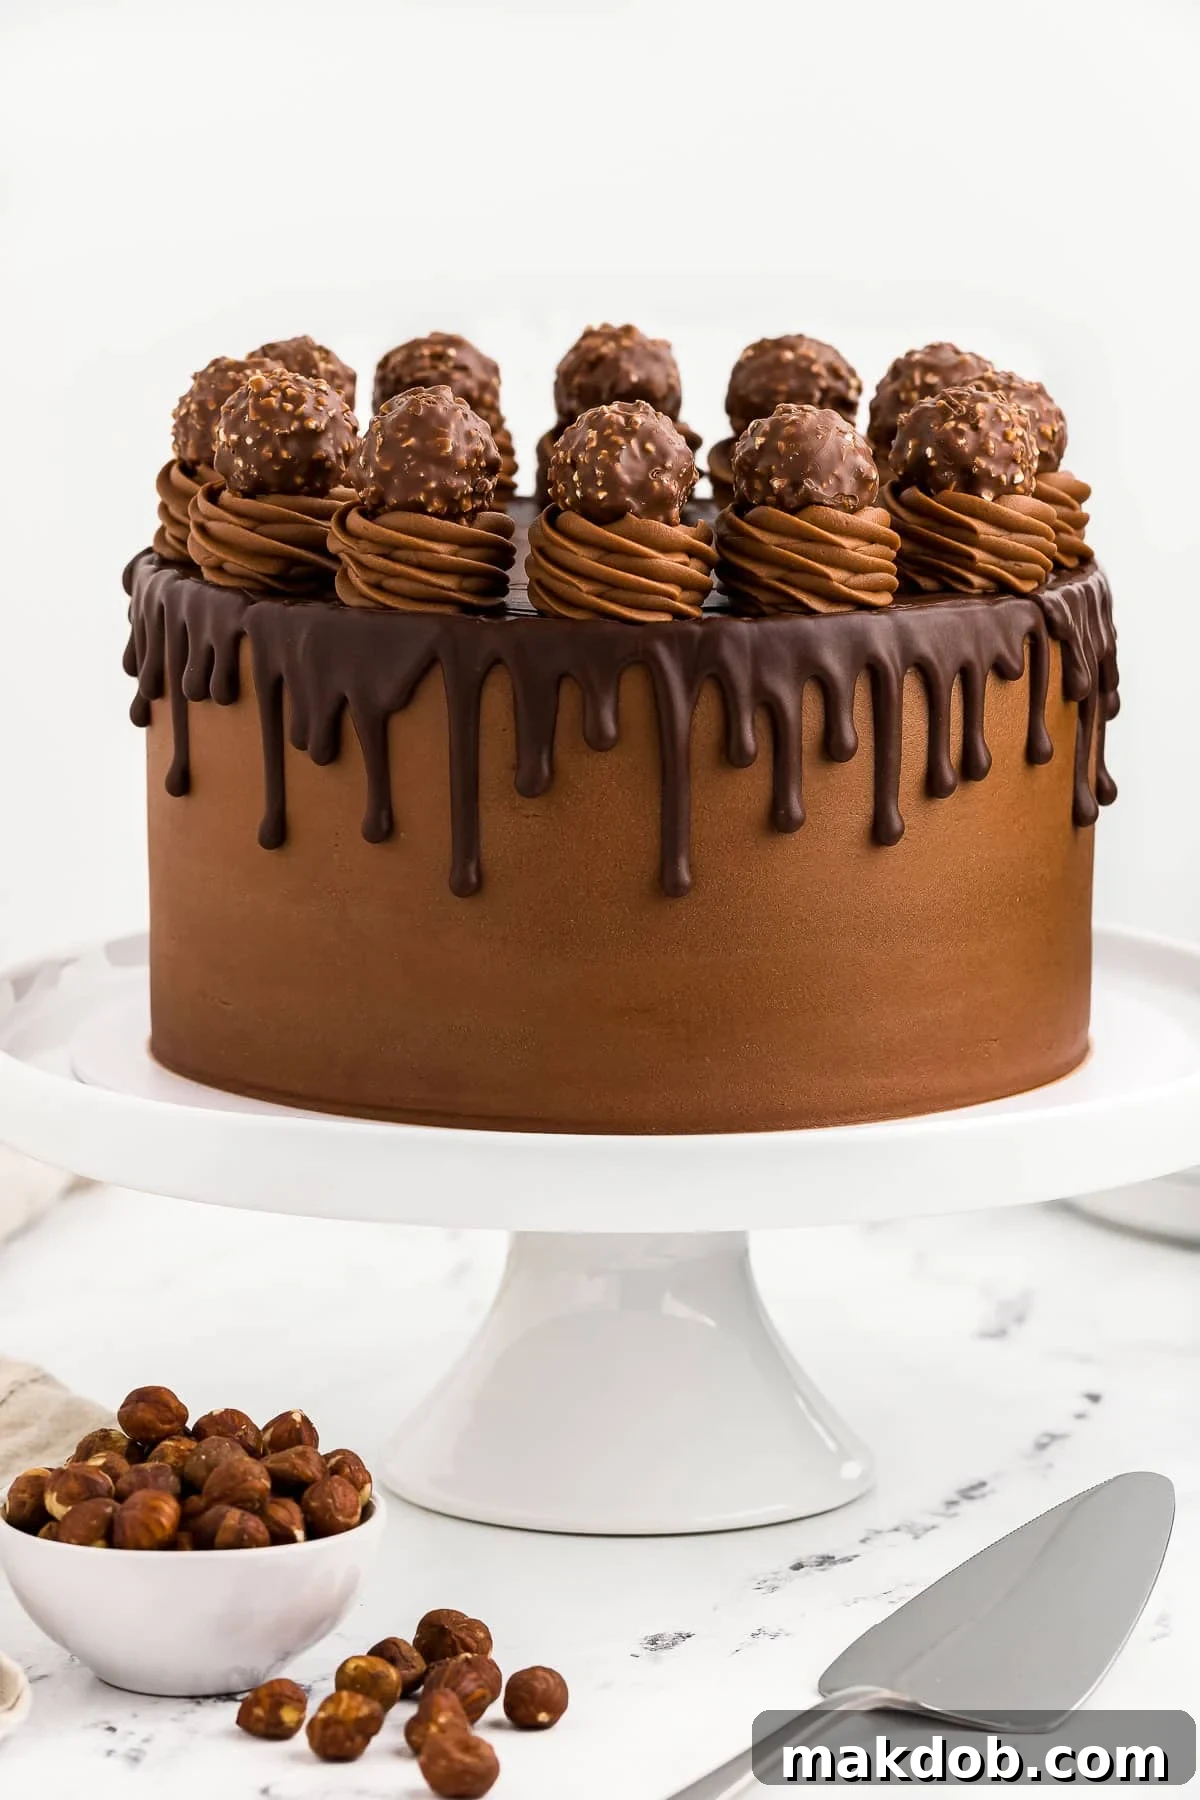
Nutella, that beloved hazelnut cocoa spread, is fantastic in so many forms – smeared on fresh berries, spread generously over toast, or even enjoyed straight from the jar (we won’t tell!). But its true potential shines when it’s incorporated into a show-stopping dessert like this magnificent chocolate Nutella cake. The combination of rich chocolate and the distinct, creamy hazelnut flavor creates a symphony of taste that is simply unforgettable.
Table of Contents
- The Allure of Nutella Cake
- Key Ingredients for Your Nutella Masterpiece
- Crafting Your Nutella Dream Cake: Step-by-Step
- Preparing the Moist Chocolate Cake Layers
- Whipping Up the Silky Nutella Ganache
- Creating the Velvety Nutella Buttercream Frosting
- Assembling Your Showstopping Cake
- Expert Tips for Nutella Cake Success
- Quick Baking Insight
- Frequently Asked Questions About Nutella Cake
- More Irresistible Dessert Recipes
- Love This Recipe?
- Nutella Cake Recipe
The Allure of Nutella Cake
There’s something inherently magical about a layer cake, and when that cake features the universally adored flavor of Nutella, it transcends into a realm of pure culinary bliss. This isn’t just any chocolate cake; it’s a meticulously crafted dessert designed to deliver an explosion of rich, nutty, and chocolatey goodness with every single bite. The deep cocoa notes of the cake layers are perfectly complemented by the creamy, hazelnut-infused Nutella buttercream, creating a harmonious balance that will satisfy even the most discerning sweet tooth. Whether it’s a birthday, an anniversary, a holiday gathering, or simply a desire to treat yourself and your loved ones, this Nutella cake promises to be the star of the dessert table, creating lasting memories and delighted smiles.
Key Ingredients for Your Nutella Masterpiece
Crafting this incredible Nutella cake requires a selection of fresh, high-quality ingredients. Each component plays a crucial role in achieving the desired texture, flavor, and overall decadence of this impressive dessert. Understanding the purpose of each ingredient can also help you achieve perfect results every time.
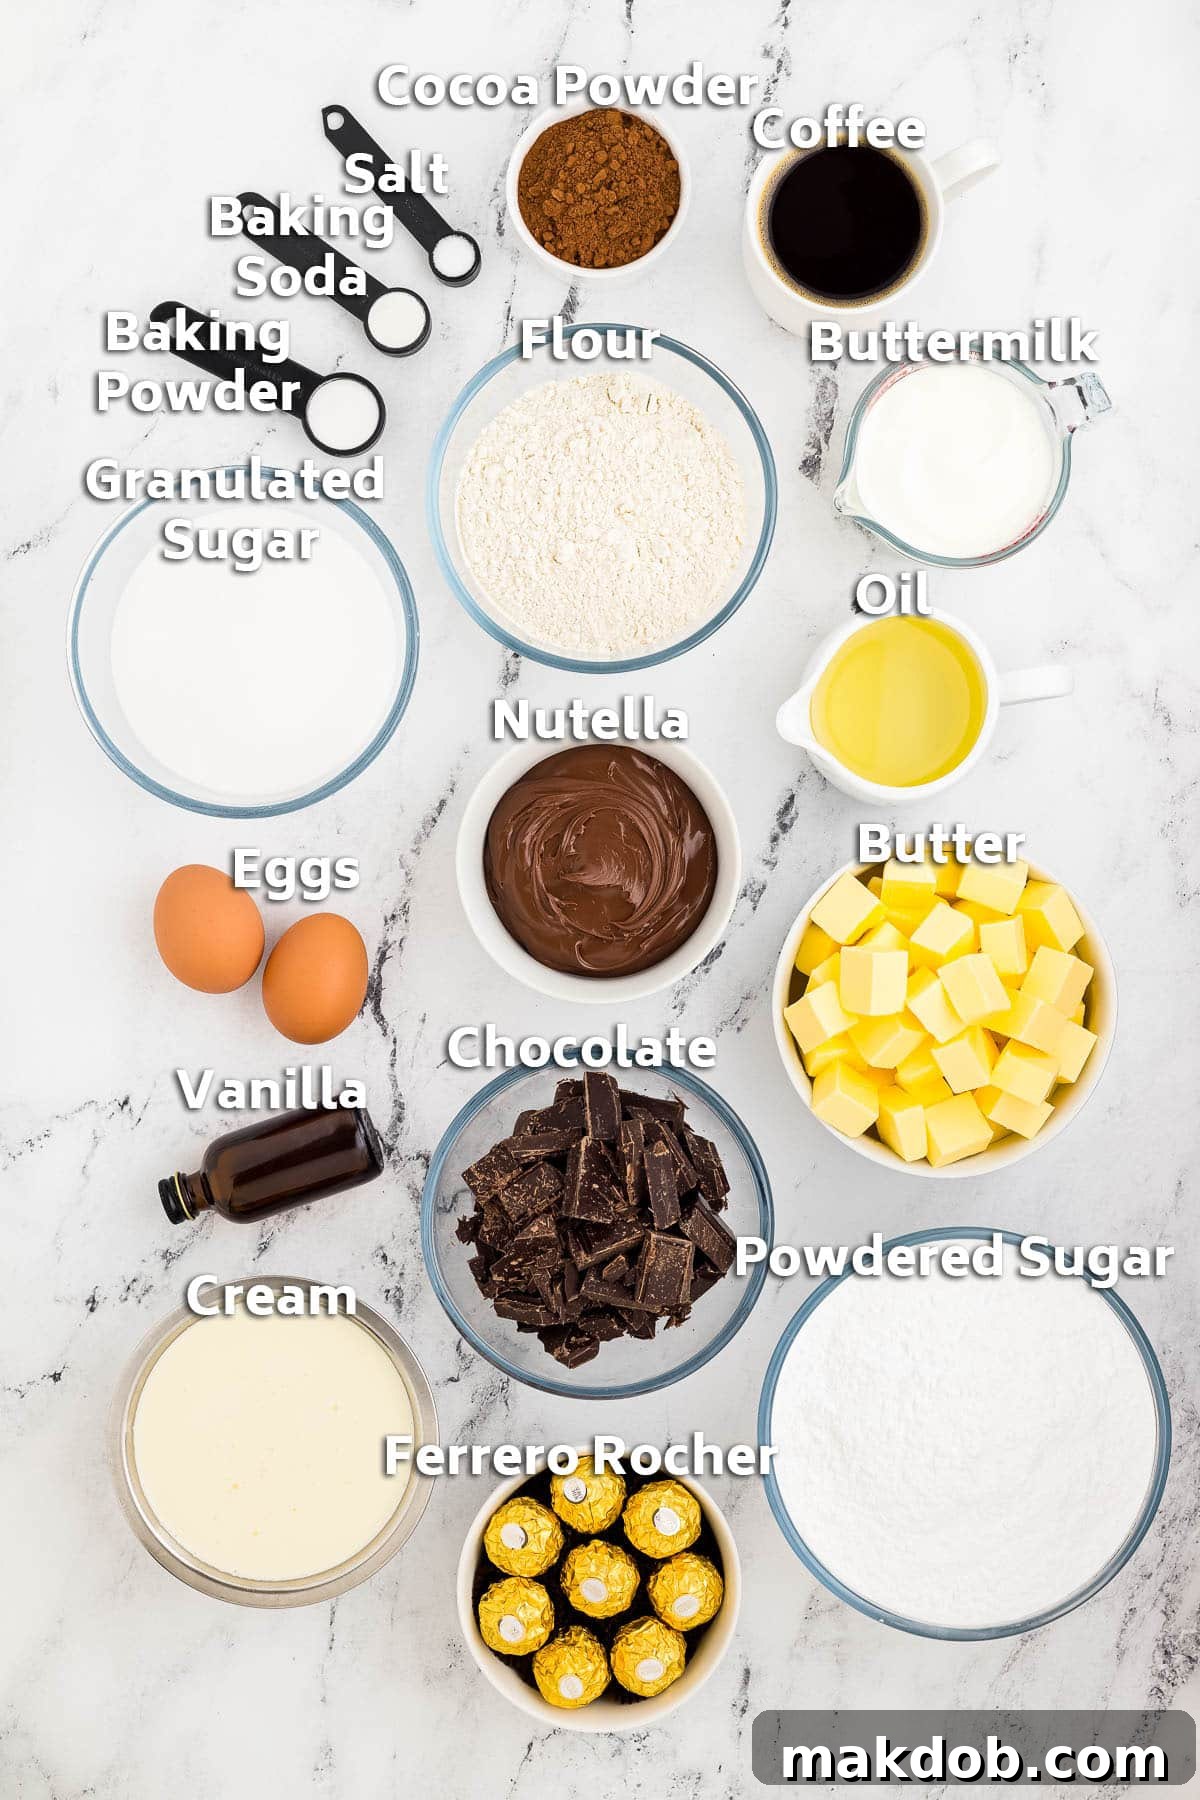
For the sumptuous chocolate cake layers, you will need all-purpose flour for structure, unsweetened cocoa powder to deliver that intense chocolate flavor, baking soda and baking powder for lift and tenderness, and a touch of salt to balance the sweetness. Granulated sugar provides sweetness, while buttermilk adds incredible moisture and a subtle tang that reacts with the leavening agents. Vegetable oil ensures a consistently moist crumb, and a generous amount of Nutella is incorporated directly into the batter for its signature hazelnut flavor. Instant coffee, dissolved in hot water, isn’t for taste but rather to deepen and enhance the chocolate’s natural richness. Eggs bind everything together and add richness, and vanilla extract rounds out the flavors. Don’t forget cooking spray and parchment paper for preparing your cake pans.
The silky Nutella ganache requires quality semisweet chocolate, heavy cream for its rich texture, and more Nutella for an extra layer of hazelnut goodness. For the luscious Nutella buttercream, you’ll need unsalted butter (at room temperature for optimal creaming), powdered sugar for a smooth, lump-free frosting, vanilla extract, and a portion of your freshly made Nutella ganache for incredible flavor and a beautiful color. Finally, for an elegant garnish, chocolate hazelnut candies like Ferrero Rocher provide the perfect finishing touch.
Crafting Your Nutella Dream Cake: Step-by-Step
While this cake appears elaborate, each individual component is surprisingly straightforward to make. The key to success lies in proper planning and allowing ample time for each stage, especially for cooling and chilling. Let’s break down the process into manageable steps to create your Nutella masterpiece.
Begin by preheating your oven to the specified temperature. This ensures a consistent baking environment from the moment your batter enters the oven. Next, prepare your cake pans meticulously. Soaking cake baking strips in water and applying them around the pans helps ensure even heat distribution, preventing domed tops and promoting level cake layers. Thoroughly coat your cake pans with cooking spray and line their bases and sides with parchment paper; this crucial step ensures your beautiful cakes release effortlessly.
Preparing the Moist Chocolate Cake Layers
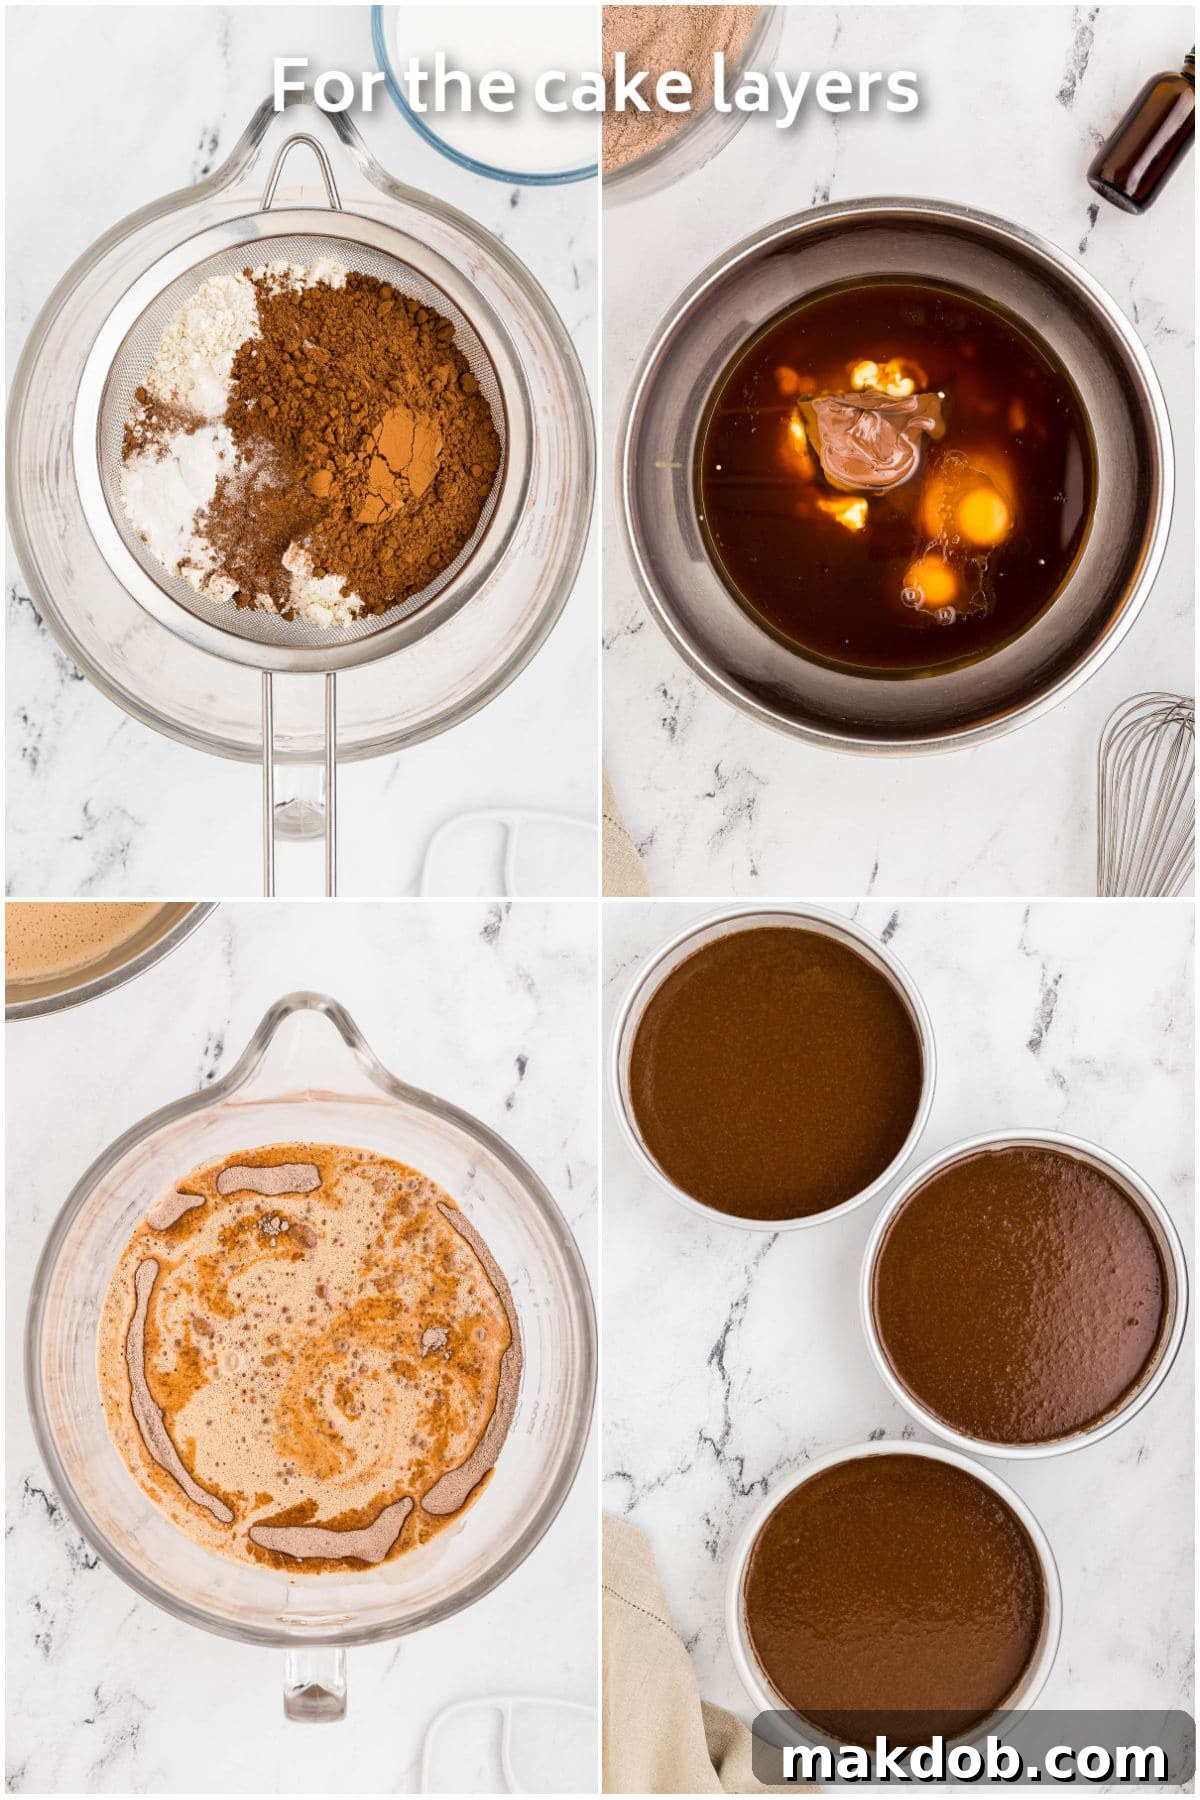
First, in the bowl of your stand mixer (or a large mixing bowl if using a hand mixer), sift together all your dry ingredients: flour, cocoa powder, baking soda, baking powder, and salt. Sifting is essential to remove any lumps and incorporate air, resulting in a lighter cake texture. Once sifted, stir in the granulated sugar. In a separate bowl, whisk together the wet ingredients: buttermilk, vegetable oil, Nutella, the dissolved instant coffee, eggs, and vanilla extract. The coffee won’t make your cake taste like coffee; instead, it remarkably intensifies the chocolate flavor, making it richer and more profound.
With the mixer on low speed, gradually add the wet ingredient mixture to the dry ingredients. Mix continuously until just combined, being careful not to overmix, as this can develop the gluten and lead to a tougher cake. The batter will be quite runny, which is perfectly normal for this recipe, contributing to its incredible moisture. Divide the cake batter evenly among your prepared cake pans. Bake until a wooden skewer or toothpick inserted into the center comes out clean or with only a few moist crumbs attached. Avoid opening the oven door too frequently during baking to prevent the cakes from sinking.
Once baked, allow the cakes to cool in their pans for about 15 minutes. This cooling period helps them firm up slightly before you attempt to remove them. After 15 minutes, carefully invert the cakes onto a wire rack to cool completely. Cooling thoroughly is vital before frosting, as warm cakes will melt your beautiful buttercream.
Whipping Up the Silky Nutella Ganache
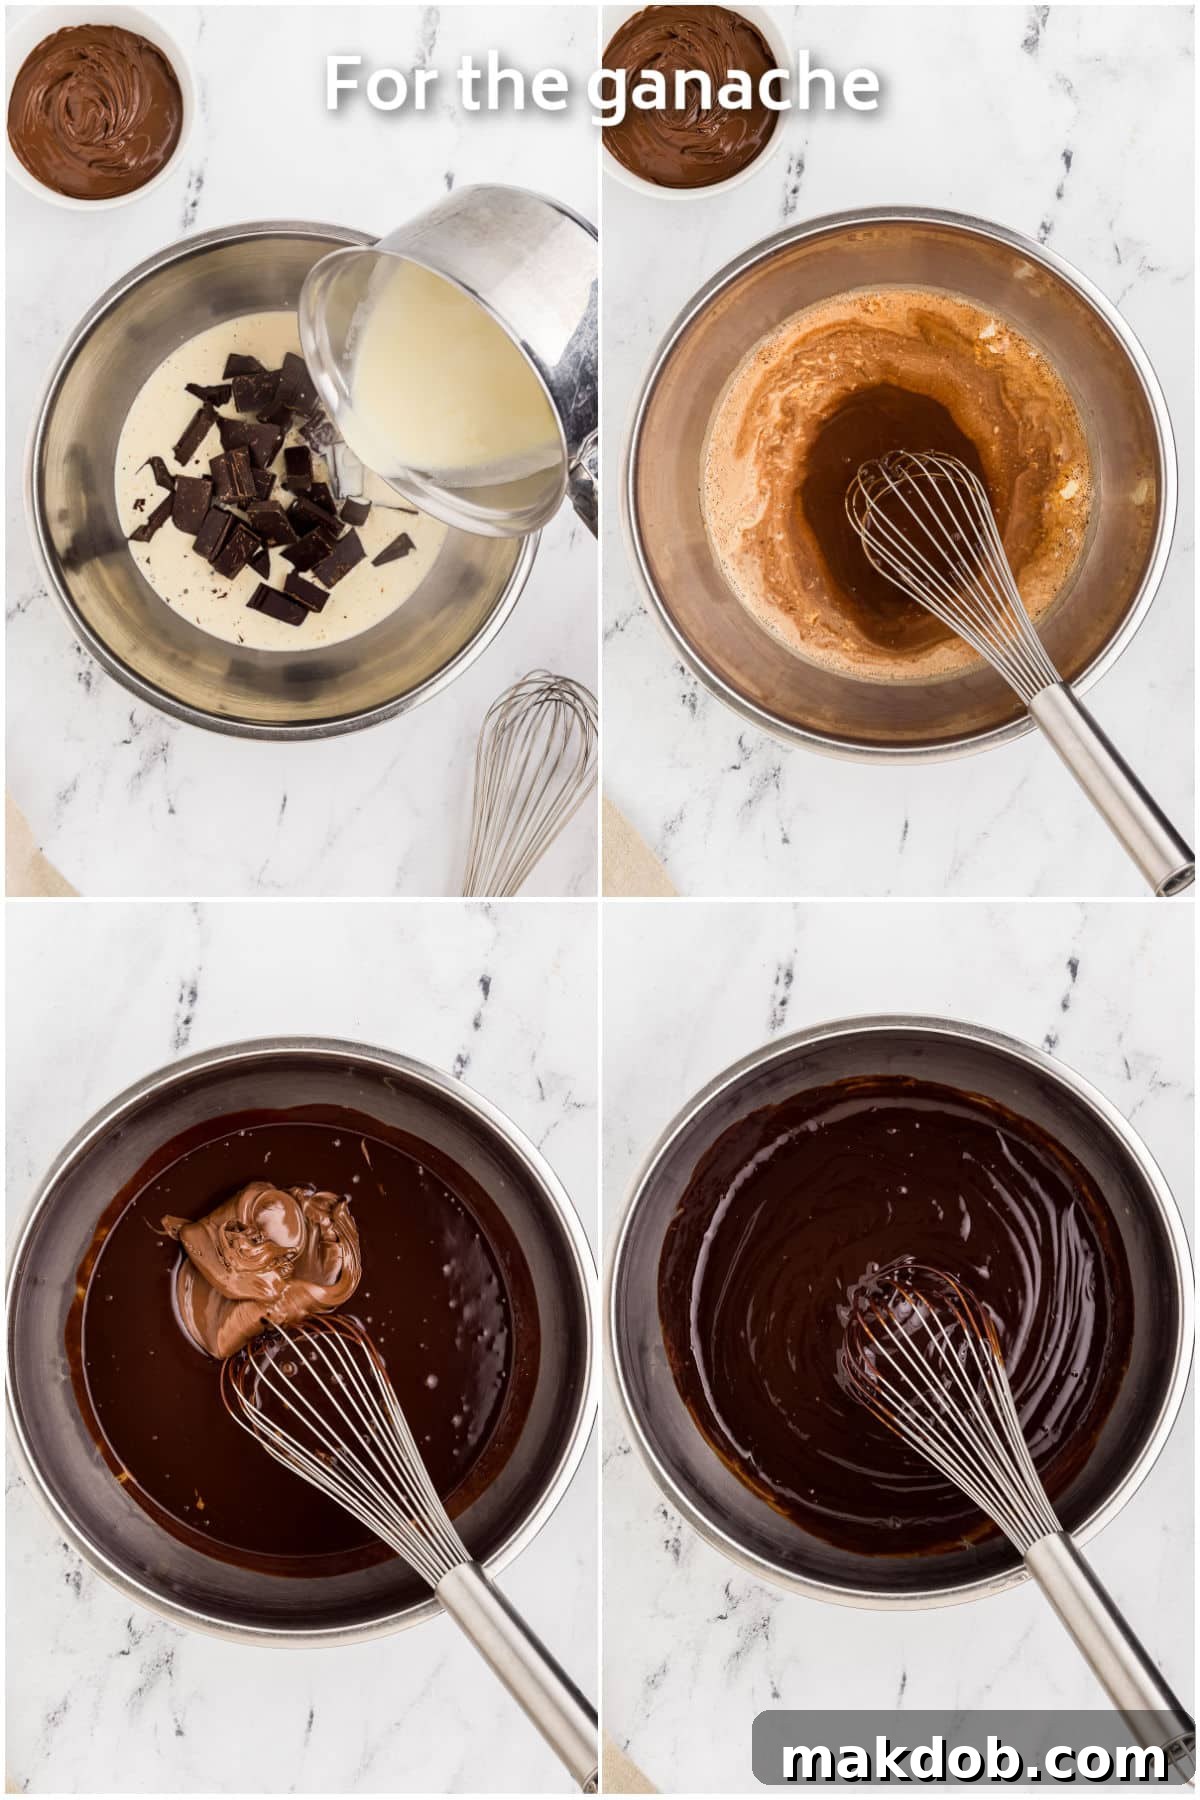
For the exquisite Nutella ganache, begin by placing your chopped semisweet chocolate in a large, heatproof bowl. Chopping the chocolate into small, uniform pieces ensures it melts evenly and quickly. In a small saucepan, heat the heavy cream over medium heat until it just begins to bubble gently around the edges. It should reach about 185°F (85°C), but you don’t need to boil it vigorously. This controlled heating ensures the chocolate melts smoothly without seizing.
Pour the hot cream directly over the chopped chocolate in the bowl. Resist the urge to stir immediately! Let the mixture sit undisturbed for about 10 minutes. This allows the hot cream to gently melt the chocolate, resulting in a smoother, more stable ganache and preventing a grainy texture. After 10 minutes, start whisking the cream and chocolate together, beginning from the center of the bowl and gradually expanding outwards until the mixture is completely smooth and emulsified. Finally, add the Nutella and stir until it’s fully incorporated, resulting in a beautiful, glossy, and irresistibly shiny ganache.
Once your ganache is ready, reserve approximately 1½ cups for incorporating into your buttercream frosting. The remaining ganache will be used for the decorative drip on the cake, so transfer it to a separate heatproof bowl and allow it to cool slightly. As it cools, it will naturally thicken to the ideal consistency for dripping.
Creating the Velvety Nutella Buttercream Frosting
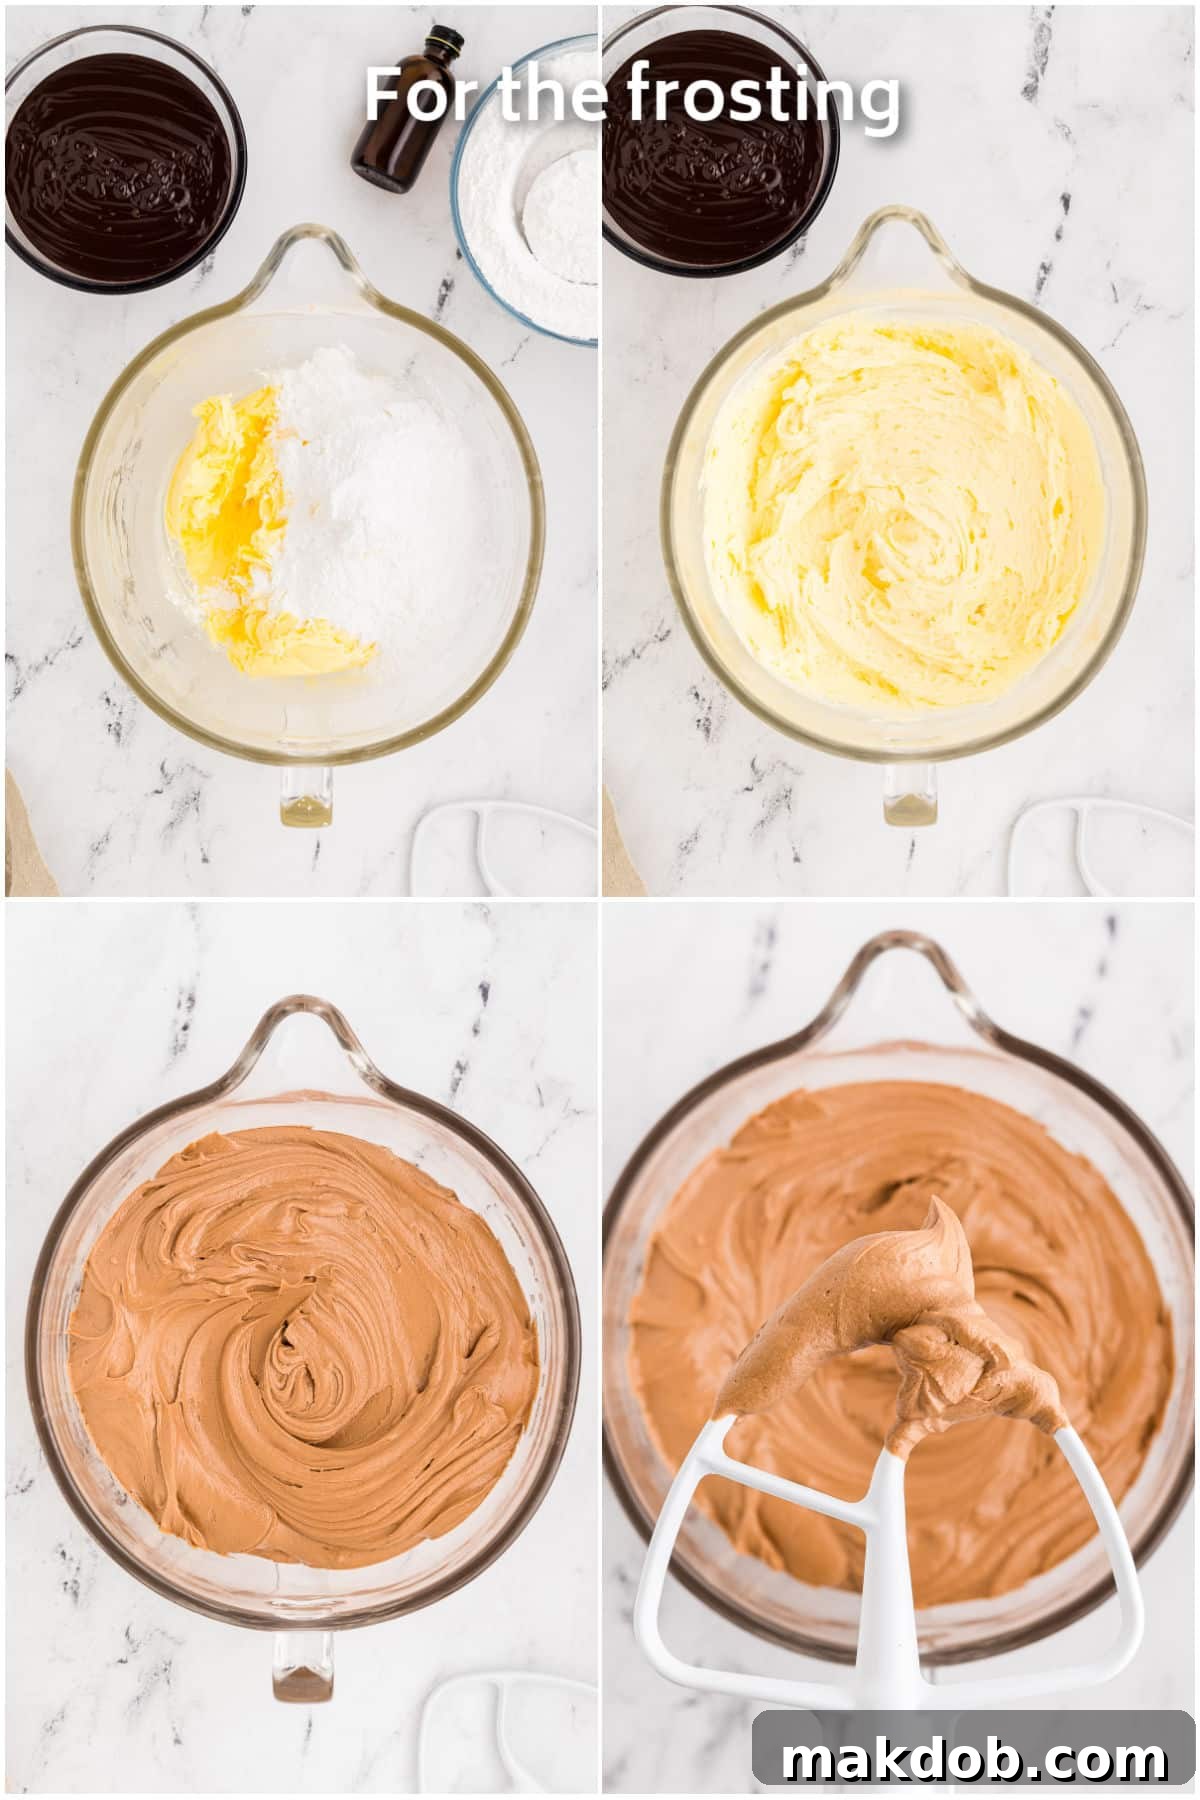
The Nutella buttercream frosting is the luscious binder that brings this cake together. In the bowl of your stand mixer fitted with the paddle attachment (or using an electric hand mixer), beat the softened butter on medium-high speed until it becomes incredibly smooth, pale, and creamy. This usually takes several minutes and is essential for light, fluffy frosting. Gradually add 1 to 2 cups of the sifted powdered sugar, along with the vanilla extract, and mix on low speed until combined. Sifting the powdered sugar beforehand prevents lumps in your finished frosting.
Continue adding the remaining powdered sugar, one cup at a time, mixing slowly after each addition until fully incorporated. Once all the sugar is added, increase the mixer speed to medium-high and beat for an additional 2-3 minutes. This aerates the frosting, making it wonderfully light and fluffy. Finally, gently mix in the reserved 1½ cups of Nutella ganache until it’s completely combined and the frosting has a uniform color and texture. If your reserved ganache has become too firm, you can gently rewarm it in short bursts in the microwave until it softens to a spreadable consistency before adding it to the buttercream.
Assembling Your Showstopping Cake
With your perfectly baked cake layers, luxurious frosting, and decadent ganache ready, it’s time for the exciting assembly phase. This is where your cake truly comes to life! Begin by using a large, serrated knife to carefully trim the tops of your cooled cake layers, ensuring they are perfectly flat and level. This creates a stable base for stacking and a professional appearance. Aim for each layer to be approximately 1¼ inches thick.
Place a 10-inch cake board on a cake turntable. Secure an 8-inch cake board to the center of the larger board with a small dab of frosting; this provides stability and a clean base. Apply another dab of frosting to the 8-inch board to “glue” your first cake layer in place. Using a piping bag fitted with a large round tip, pipe a generous, even layer of Nutella buttercream onto the first cake layer. This method helps achieve an even distribution of frosting. Carefully place the second cake layer on top, gently pressing to secure it. Repeat the piping process for the second layer, then top with the final cake layer.
Once stacked, use your serrated knife to trim around the sides of the cake, ensuring all layers are flush and any overhang is removed. This creates perfectly flat sides, which are essential for a smooth frosting finish. Now, apply a thin, even layer of frosting over the entire cake – this is known as the “crumb coat.” The crumb coat traps any loose crumbs, preventing them from mixing into your final layer of frosting. Chill the cake in the refrigerator for about 15-20 minutes until the crumb coat is firm to the touch.
After the crumb coat is set, generously spread a thick layer of the remaining Nutella buttercream over the entire cake using an offset spatula. For a professional, smooth finish, use a tall cake scraper. Hold the scraper perpendicular to the cake, gently pressing against the sides, and slowly turn the turntable. Scrape off excess frosting, returning it to the bowl, and repeat until the sides are smooth. For the top, use the offset spatula to smooth the surface, working from the outside in. You might need to apply a few coats to achieve a flawless finish. A pro tip: chilling the cake for 10 minutes between coats helps significantly in achieving that ultra-smooth surface. For an extra polished look, heat your scraper in hot water, wipe it dry, then sweep it around the sides one final time.
Once the final frosting layer is smooth, chill the cake in the refrigerator for another 30 minutes. This firms up the buttercream, creating a perfect canvas for the ganache drip.
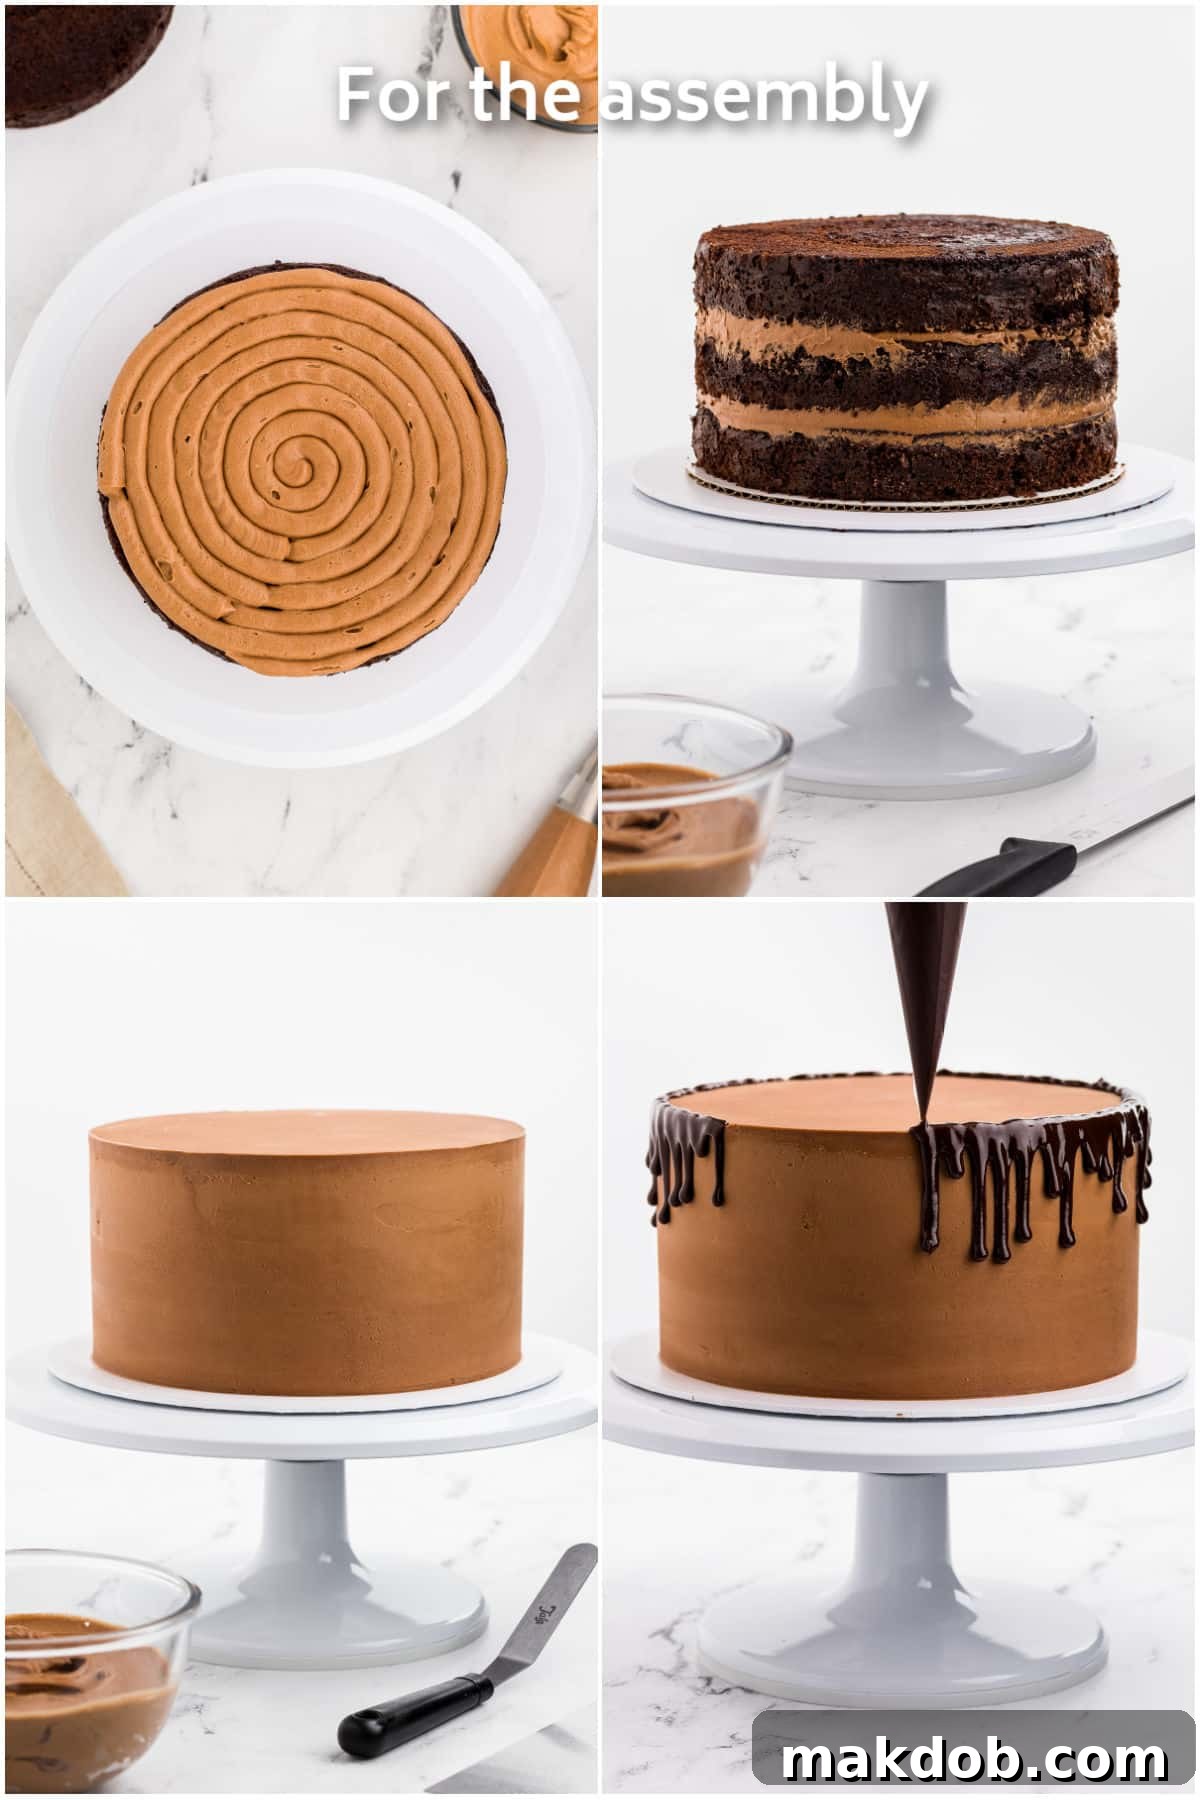
Now for the mesmerizing ganache drip! Before applying it to your cake, it’s crucial to test the consistency. If your reserved ganache has hardened, gently rewarm it in short bursts in the microwave or over a pan of simmering water until it reaches the consistency of thick syrup – flowing but not too thin. To test, place an empty cake tin upside down on your turntable. Fill a piping bag a third full with the ganache and snip off a small tip, about 3/16ths of an inch. Gently squeeze the piping bag above the edge of the cake tin, allowing the ganache to drip down the side as you turn the turntable. The ideal consistency will see the ganache drip about a third to halfway down the side. If it runs all the way to the bottom, it’s too runny; let it cool and thicken slightly. If it barely drips, it’s too thick; rewarm it a few seconds more.
Once you achieve the perfect consistency, replace the test cake tin with your chilled cake. Carefully create random drips along the top edge of the cake with your piping bag. Vary the pressure to create drips of different lengths, adding visual interest. After creating the drips, fill in the entire top surface of the cake with the remaining ganache, spreading it evenly with an offset spatula. Chill the cake in the refrigerator for another 15 minutes to allow the ganache to set firmly.
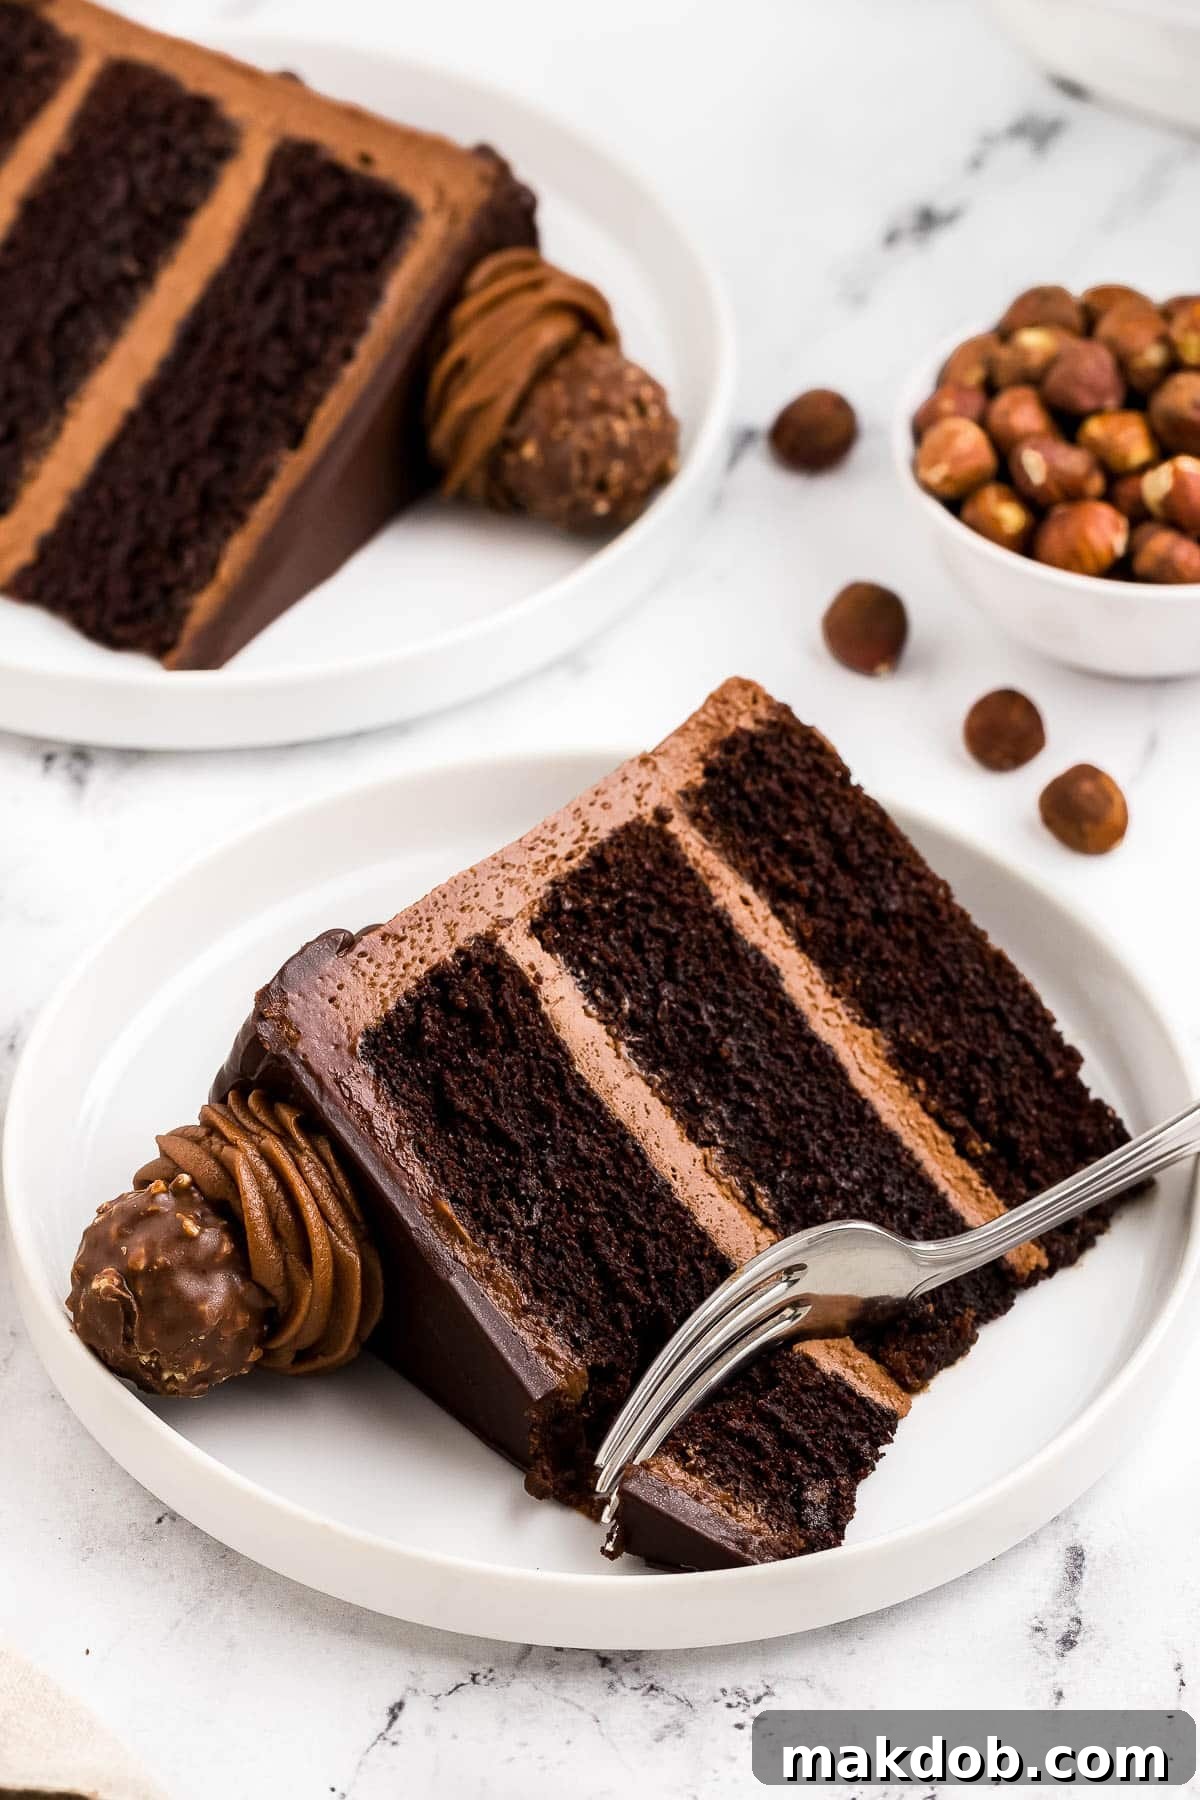
For the final decorative flourish, fit a piping bag with a large closed star tip and fill it with any remaining Nutella buttercream. Pipe elegant rosettes onto the top of the cake. To ensure even spacing, you can use a simple guide: draw an 8-inch circle on parchment paper, fold it into 12 even sections, and use a toothpick to gently mark corresponding points on the chilled ganache layer. Place a beautiful Ferrero Rocher chocolate on top of each frosting rosette for that ultimate touch of luxury and serve this magnificent Nutella cake to your eager guests.
Expert Tips for Nutella Cake Success
Achieving a bakery-quality Nutella cake is well within your reach with these helpful tips and tricks:
- Practice Makes Perfect Piping: Before you pipe rosettes directly onto your cake, practice a few on a piece of parchment paper. This allows you to get a feel for the pressure and motion required. The great thing is you can scrape the practice frosting back into the piping bag to reuse it!
- Ingredient Temperature is Key: Ensure your butter and eggs are at room temperature for the frosting and cake batter, respectively. This allows for better emulsification and a smoother, more uniform mixture, leading to lighter cakes and fluffier frosting.
- Planning Ahead for Freshness: The individual cake layers, frosting, and ganache can be prepared in advance. Store the cake layers, tightly wrapped, at room temperature overnight, or for up to 3 days in the refrigerator. The frosting and ganache can also be refrigerated for up to 3 days in airtight containers. When ready to assemble, allow them to come to room temperature and re-whip the frosting if needed. The fully assembled Nutella cake can be stored for 3 days at room temperature (in a cool, dry place) or for up to 5 days in the refrigerator. For longer storage, wrap the entire cake or individual slices tightly and freeze for up to three months. Defrost overnight in the refrigerator before serving at room temperature.
- Chilling for a Smooth Finish: Freezing or chilling your cake for 10-15 minutes between frosting coats (especially the crumb coat and final coat) is incredibly helpful. This firms up the frosting, making it much easier to achieve a smooth, professional finish with your cake scraper. To get an exceptionally smooth surface, briefly heat your cake scraper under hot water, wipe it completely dry, and then make a final sweep around the sides of the chilled cake.
- The Secret to Flat Cake Layers: Don’t underestimate the power of cake baking strips. These ingenious strips wrap around the outside of your cake pans before baking. They insulate the sides of the pan, causing the cake to bake more evenly from the edges to the center, preventing the edges from setting too quickly and rising higher than the middle. This results in perfectly flat cake layers, minimizing the need for extensive trimming. You can easily purchase cake strips online or find them at specialty craft or kitchen stores.
Quick Baking Insight
For the moistest and most level cakes, bake at a slightly lower temperature for a longer duration. This gentle baking process allows the cake to rise evenly without developing undesirable rounded tops.
Frequently Asked Questions About Nutella Cake
This particular Nutella cake is a masterpiece composed of several delightful elements. It features rich, moist chocolate cake layers that are themselves subtly flavored with Nutella. These layers are then brought together and generously covered in a creamy Nutella buttercream. To finish, the cake is topped with a smooth, shiny Nutella-infused ganache and garnished with hazelnut chocolates for an extra touch of elegance and flavor.
Generally, oil tends to make a cake significantly more moist than butter. This is because oil is 100% fat, while butter contains water and milk solids. Oil also remains liquid at room temperature, contributing to a softer, more tender crumb that feels moist on the palate. In this Nutella cake recipe, we opt for vegetable oil to ensure an exceptionally moist texture, providing a wonderful contrast to the rich flavors. While butter offers a distinct flavor, it can sometimes result in a slightly drier cake if not balanced properly.
Absolutely! If you don’t have buttermilk on hand, you can easily make a substitute. For 1⅓ cups of buttermilk, measure out 1⅓ cups of regular milk (dairy or non-dairy). Remove 1⅓ tablespoons of milk, then add 1⅓ tablespoons of white vinegar or lemon juice. Stir gently and let it sit for 5-10 minutes until it slightly curdles. This homemade version works wonderfully in this chocolate Nutella cake recipe.
Several crucial steps ensure your cake layers release perfectly. First, always grease your pans thoroughly with cooking spray or butter. Second, line the bottom of each pan with a circle of parchment paper. You can even add thin strips of parchment around the sides if desired. Lastly, ensure your cakes are completely cooled in their pans for the recommended time (15 minutes in this recipe) before inverting them onto a wire rack. Cooling allows the cake structure to stabilize, making it less prone to tearing.
FOLLOW ME
This beautiful and incredibly delicious Nutella cake is more than just a dessert; it’s a labor of love that will undoubtedly impress your family and friends. Get ready for a chorus of compliments and requests for the recipe!
More Irresistible Dessert Recipes
Nutella Cookies
25 mins
Chocolate Chip Cupcakes
35 mins
Chocolate Pudding Cake
45 mins
Chocolate Hazelnut Cupcakes
50 mins
Chocolate Coconut Cake
50 mins
Love This Recipe?
Please leave a 5-star 🌟🌟🌟🌟🌟 rating in the recipe card below & a review in the comments section further down the page.
Nutella Cake
Pin
Time
1 hour 30 minutes
1 hour
3 hours
5 hours 30 minutes
Equipment
- 3 cake pan strips
- 3 8-inch cake pans
- Stand mixer or electric hand mixer
- 10-inch cake board
- 8-inch cake board
- Cake turntable
- Cake scraper
- Piping bags
- Large round piping tip
- Large closed star piping tip
Ingredients
For the cake
- 2⅔ cups all purpose flour
- 1 cup unsweetened cocoa powder
- 2½ teaspoons baking soda
- 1½ teaspoons baking powder
- ¾ teaspoon salt
- 2⅓ cups granulated sugar
- 1⅓ cups buttermilk
- ½ cup vegetable oil
- ⅓ cup Nutella
- 2½ teaspoons instant coffee dissolved in 1⅓ cups hot water
- 2 large eggs
- 2 teaspoons vanilla extract
- Cooking spray
For the Nutella ganache
- 1¾ cup semisweet chocolate, chopped
- 1¼ cups heavy whipping cream
- ⅔ cup Nutella
For the frosting
- 1 pound butter, softened
- 7 cups powdered sugar, sifted
- 2 teaspoons vanilla extract
- 1½ cups Nutella ganache (reserved from above)
For the garnish
- 12 Ferrero Rocher chocolates
Instructions
For the cake
- Preheat your oven to 325°F (160°C) and prepare your cake baking strips by soaking them thoroughly in water.
- Lightly spray three 8-inch round cake pans with cooking spray. Line the bottom of each pan with a circle of parchment paper and the sides with a thin strip of parchment for easy release.
- In a large mixing bowl, sift together the all-purpose flour, unsweetened cocoa powder, baking soda, baking powder, and salt. Stir in the granulated sugar until well combined.
- In a separate bowl, whisk together the wet ingredients: buttermilk, vegetable oil, Nutella, the instant coffee (dissolved in hot water), large eggs, and vanilla extract.
- Gradually pour the wet mixture into the dry ingredients while continuously mixing on low speed to prevent lumps. The resulting batter will be quite runny, which is normal for this moist cake.
- Divide the batter evenly among the three prepared cake pans.
- Bake for 60-70 minutes. To check for doneness, insert a toothpick into the center of a cake. If it comes out clean or with a few moist crumbs attached, the cakes are ready. If the batter is still wet, bake for another 5-10 minutes before retesting.
- Once baked, transfer the cakes (still in their pans) to a wire rack. Remove the soaked baking strips. Allow the cakes to cool in the pans for 15 minutes to firm up slightly.
- After 15 minutes, carefully invert the cakes onto the wire rack and gently peel off the parchment paper. Allow them to cool completely before proceeding.
- For best results, once cooled, wrap the cake layers in plastic wrap. You can then assemble the cake the same day, or pop them into the freezer for 30 minutes to make them easier to handle for stacking, or store them overnight for assembly the next day.
For the Nutella ganache
- Place the finely chopped semisweet chocolate into a large, heatproof bowl.
- Pour the heavy cream into a small saucepan and heat over medium heat, stirring occasionally, until it reaches about 185°F (85°C) or just begins to bubble around the edges.
- Remove the cream from the heat and pour it directly over the chopped chocolate. Let it sit undisturbed for 10 minutes; this allows the residual heat to melt the chocolate evenly and helps prevent a grainy texture.
- After 10 minutes, start whisking the cream and chocolate mixture gently from the center of the bowl, gradually expanding outwards until a smooth, emulsified ganache forms.
- Add the Nutella and mix until the ganache is completely smooth and wonderfully shiny.
- Reserve 1½ cups of this ganache aside to be incorporated into the buttercream frosting. Pour the remaining ganache into a separate heatproof bowl; this will be used for the decorative drip on the cake and will thicken as it cools.
For the frosting
- In a large mixing bowl (preferably a stand mixer), beat the softened butter on medium-high speed until it is smooth, pale, and creamy, about 3-5 minutes.
- Reduce speed to low. Gradually mix in 1-2 cups of the sifted powdered sugar and the vanilla extract until just combined.
- Continue adding the remaining powdered sugar, one cup at a time, mixing slowly until all the sugar is incorporated. Increase speed to medium-high and beat for 2-3 minutes until the frosting is light and fluffy.
- Finally, mix in the reserved 1½ cups of Nutella ganache until it is fully combined and the frosting has a uniform color and texture. If your reserved ganache has become too firm, gently rewarm it in short bursts in the microwave until softened before adding.
For assembly
- Using a large, serrated knife, carefully trim the domed tops off your cooled cake layers to create flat, even surfaces. Each layer should be approximately 1¼ inches thick.
- Place a 10-inch cake board on a cake turntable. Secure an 8-inch cake board to the center of the larger board with a small dab of frosting.
- Place the first trimmed cake layer onto the 8-inch board, securing it with a dab of frosting underneath.
- Fit a piping bag with a large round tip and fill it halfway with the Nutella buttercream frosting. Pipe a generous, even layer of frosting onto the first cake layer. Place the second cake layer on top, repeat the piping process, and then top with the final cake layer.
- Using your serrated knife, carefully trim around the sides of the stacked cake, ensuring any cake that overhangs the 8-inch board is removed. This helps create perfectly flat sides for a smooth frosting finish.
- Remove the trimmed offcuts. Apply a thin, even layer of frosting all over the entire cake to create a crumb coat. This layer traps any loose crumbs. Chill the cake in the refrigerator for 15 minutes until the crumb coat is firm.
- Using an offset spatula, liberally spread a thick layer of frosting over the entire cake. Use a tall cake scraper to smooth the top and sides, rotating the turntable as you work. You may need to apply a few coats to achieve a flawlessly smooth finish. Chilling the cake for 10 minutes between coats can also aid in achieving a super smooth result.
- For an exceptionally smooth finish, heat your cake scraper under hot water, wipe it completely dry, and then make a final sweep around the sides of the cake.
- Chill the frosted cake in the refrigerator for 30 minutes to firm up the buttercream before adding the ganache drip.
For the Nutella ganache drip
- If your reserved ganache has started to harden, gently rewarm it in short bursts in the microwave or over a pan of simmering water until it reaches the consistency of thick syrup – flowing but not too watery.
- To test the consistency, place an empty cake tin (upside down) onto your turntable.
- Fill a piping bag about a third full of the ganache and snip off a small tip, approximately 3/16ths of an inch.
- Hold the piping bag above the edge of the cake tin and gently, then firmly, squeeze in intervals to create varying lengths of drips down the side as you turn the turntable. The ideal consistency will result in drips that flow a third to halfway down the tin. If they run all the way, it’s too runny; let it cool slightly. If it doesn’t drip, scrape the ganache back into the bowl and rewarm it briefly.
- Once the ganache consistency is perfect, replace the cake tin with your chilled, frosted cake. Create random drips around the top edge of the cake with your piping bag.
- Fill in the entire top surface of the cake with the remaining ganache, spreading it evenly with an offset spatula.
- Chill the cake in the refrigerator for 15 minutes to allow the ganache to set firmly before decorating further.
For the decorations
- On a piece of parchment paper, draw an 8-inch circle (using an 8-inch cake board as a guide) and cut it out.
- Fold the parchment circle in half, then in half again, and then fold the resulting quarter into three equal sections. When opened, it should have 12 creases, providing equally spaced guide points.
- Place this folded parchment circle on top of the set ganache on your cake and use a toothpick to gently mark the cake at each fold. These marks will serve as your guides for piping the rosettes.
- Fit a piping bag with a large closed star tip and fill it halfway with any remaining Nutella buttercream frosting.
- Pipe beautiful frosting rosettes onto each of the marked points on the cake.
- Crown each rosette with a Ferrero Rocher chocolate for a luxurious finish. Slice and serve your magnificent Nutella cake!
Notes
- Baking cakes at a slightly lower temperature and utilizing cake baking strips are excellent techniques to achieve even layers and prevent the tops from rounding, ensuring a uniform and professional appearance.
- For convenience, the individual cake layers, frosting, and ganache can be prepared a day in advance. Store the wrapped cake layers at room temperature overnight, or for up to 3 days in the refrigerator. The frosting and ganache should be stored in airtight containers in the refrigerator for up to 3 days. Allow them to come to room temperature and re-whip frosting if necessary before assembly. The finished Nutella cake can be stored at room temperature for 3 days or in the refrigerator for 5 days. For longer preservation, wrap the cake whole or in individual portions and freeze for up to three months. Thaw overnight in the refrigerator before bringing to room temperature for serving.
Nutrition
Did you make this recipe?
Tag @dinneratthezoo on Instagram and hashtag it #dinneratthezoo
Tweet
Pin