
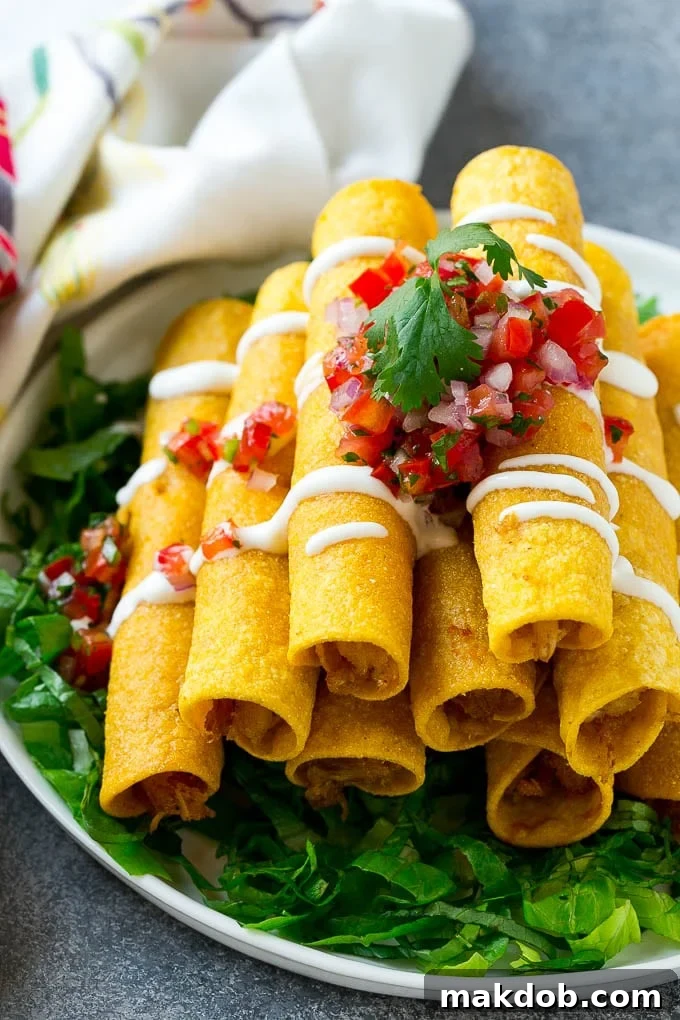
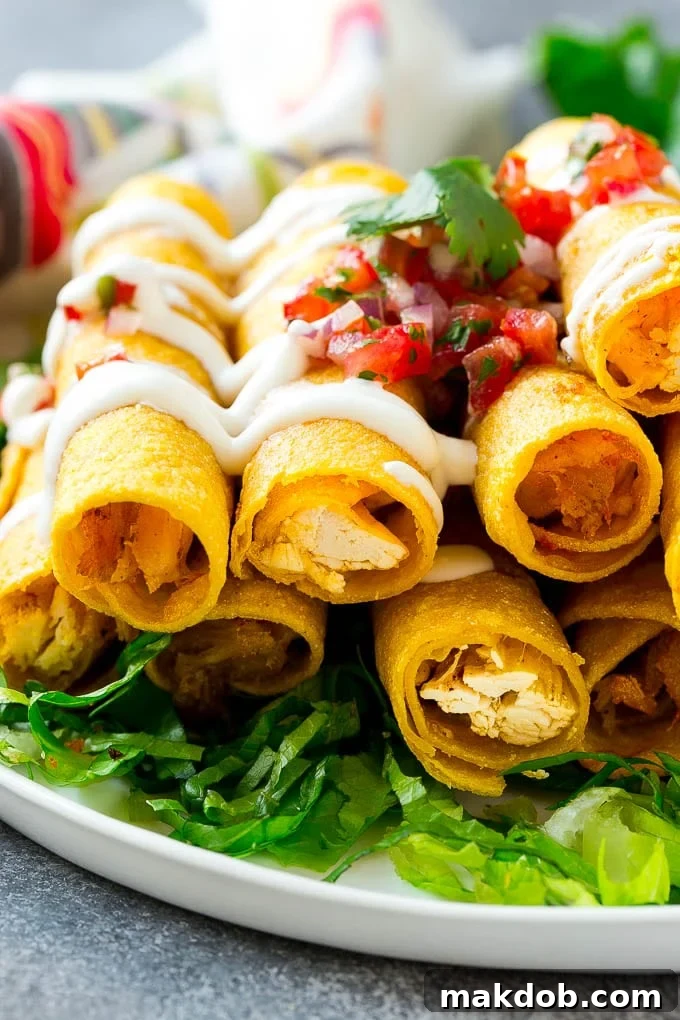
These homemade chicken taquitos are a true culinary delight, offering a crispy exterior and a savory, cheesy chicken filling. Whether you prefer them baked to a golden crisp or deep-fried for ultimate crunch, these taquitos are designed for perfection. Serve them with your favorite dipping sauces for a fun party snack, a satisfying appetizer, or a complete family meal that everyone will rave about.
Far beyond the freezer aisle, homemade chicken taquitos are an effortless yet impressive dish, ideal for feeding a crowd or enjoying a cozy night in. We’ll guide you through both baking and frying methods, ensuring you achieve those irresistible crispy bites of goodness every time. Pair your taquitos with classic Mexican sides like fresh salsa fresca, hearty black bean soup, vibrant cilantro lime rice, and creamy Chipotle guacamole for an authentic and complete Mexican feast.
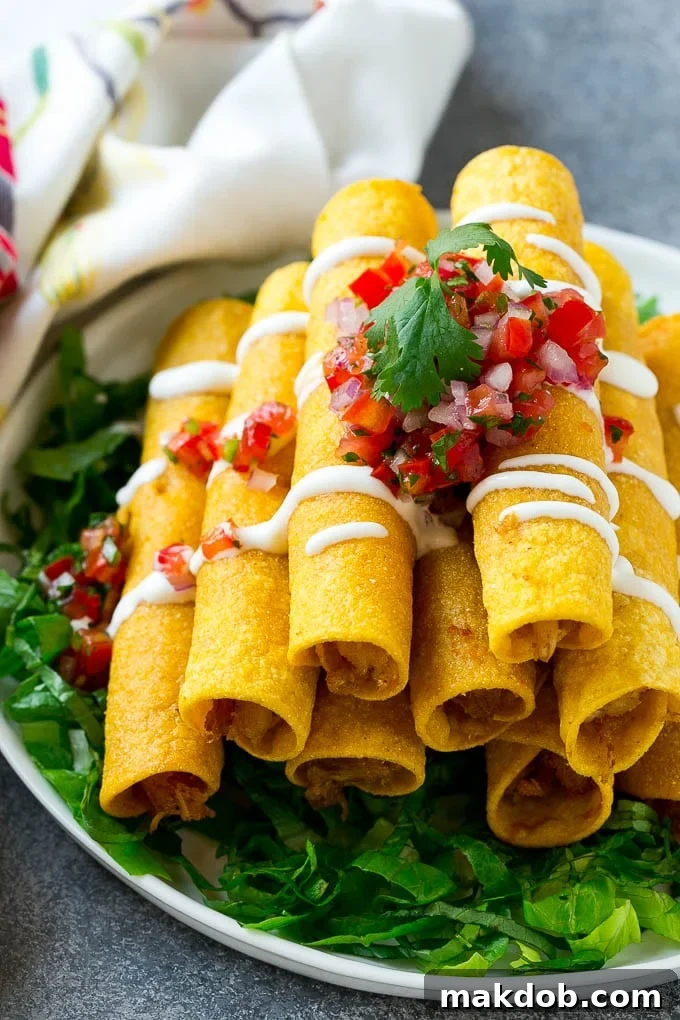
Why Choose Homemade Chicken Taquitos?
For too long, many of us have associated taquitos solely with the frozen food section – a quick, convenient snack, perhaps, but often lacking in flavor and texture. However, once you experience the magic of **homemade chicken taquitos**, there’s truly no turning back. They are incredibly superior to their store-bought counterparts, boasting fresher ingredients, richer flavors, and a satisfying crispness that only comes from preparing them from scratch. Plus, the process of assembling them can be a fun and engaging activity for the whole family!
Table of Contents
- The Essential Ingredients for Flavorful Taquitos
- Crafting Your Perfect Chicken Taquitos
- Baking or Frying Your Taquitos
- Master Your Taquitos: Expert Tips for Success
- Frequently Asked Questions About Taquitos
- Unleash Your Creativity: Exciting Flavor Variations
- More Mexican Favorites You’ll Love
- Chicken Taquitos (Baked or Fried) Recipe
The Essential Ingredients for Flavorful Taquitos
Creating these delightful chicken taquitos begins with a carefully selected blend of ingredients that ensure maximum flavor and optimal texture. Here’s what you’ll need to gather:
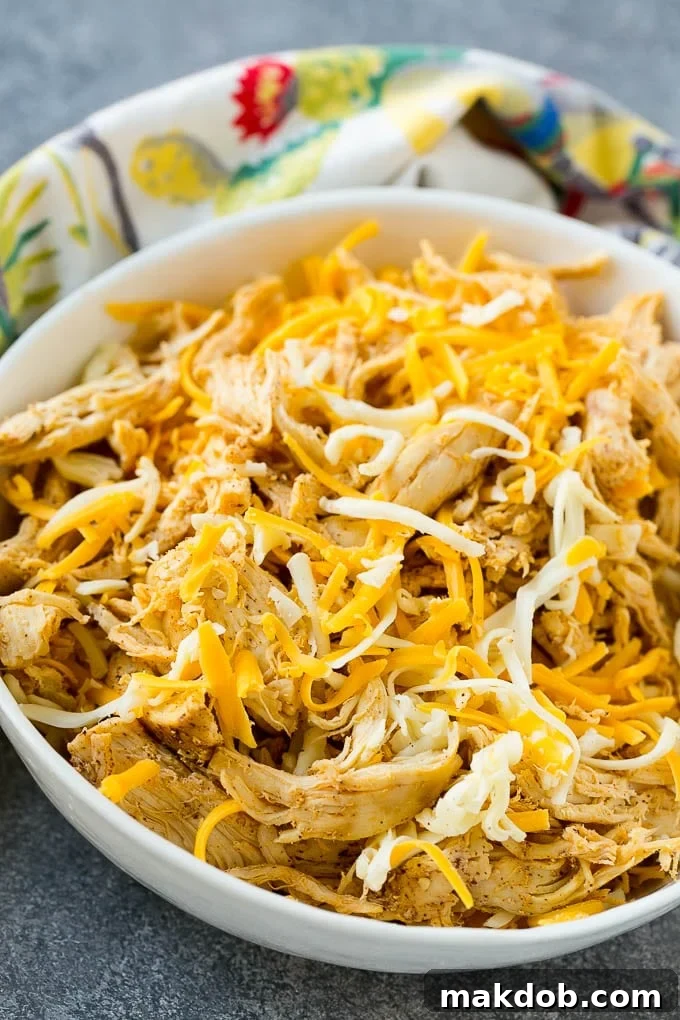
- Chicken: The star of our filling! You’ll need cooked, shredded chicken. This is a fantastic recipe for using up leftover roast chicken, or you can pick up a pre-cooked rotisserie chicken from your local grocery store for a convenient shortcut.
- Spices: A robust blend of seasonings is crucial for that authentic Mexican flair. We’ll use salt, pepper, garlic powder, chili powder, and ground cumin to create a warm, aromatic, and slightly smoky profile that perfectly complements the chicken.
- Cheeses: A duo of cheeses ensures a wonderfully melty and savory interior. Shredded cheddar cheese brings a sharp, classic flavor, while Monterey Jack cheese adds a milder, creamier texture and excellent melting capabilities. The combination creates a rich, gooey center that contrasts beautifully with the crispy tortilla.
- Tortillas: Small corn tortillas are traditional for taquitos, providing the signature texture and flavor. They become incredibly crispy when cooked, whether baked or fried.
- Oil (for frying) or Cooking Spray (for baking): Depending on your preferred cooking method, you’ll need either a good quality oil for deep frying or a non-stick cooking spray for baking.
Each ingredient plays a vital role in building the layers of flavor and texture that make these chicken taquitos so irresistible. Using fresh, quality ingredients will truly elevate your homemade taquito experience.
Crafting Your Perfect Chicken Taquitos: A Step-by-Step Guide
Making homemade chicken taquitos is surprisingly simple and incredibly rewarding. Follow these steps to assemble your crispy, flavorful Mexican treats:
- Prepare the Flavorful Filling: In a medium-sized bowl, combine your cooked, shredded chicken with the shredded cheddar cheese, Monterey Jack cheese, and all the spices: salt, pepper, garlic powder, chili powder, and cumin. Mix everything thoroughly until the chicken is evenly coated and the cheeses are well distributed. This ensures every bite of your taquito bursts with delicious flavor.
- Soften the Tortillas: This crucial step prevents your tortillas from cracking when you roll them. Wrap the corn tortillas in a damp paper towel and place them on a microwave-safe plate. Microwave them for about 1 minute, or until they are warm and noticeably pliable. This flexibility is key to tight, secure rolls.
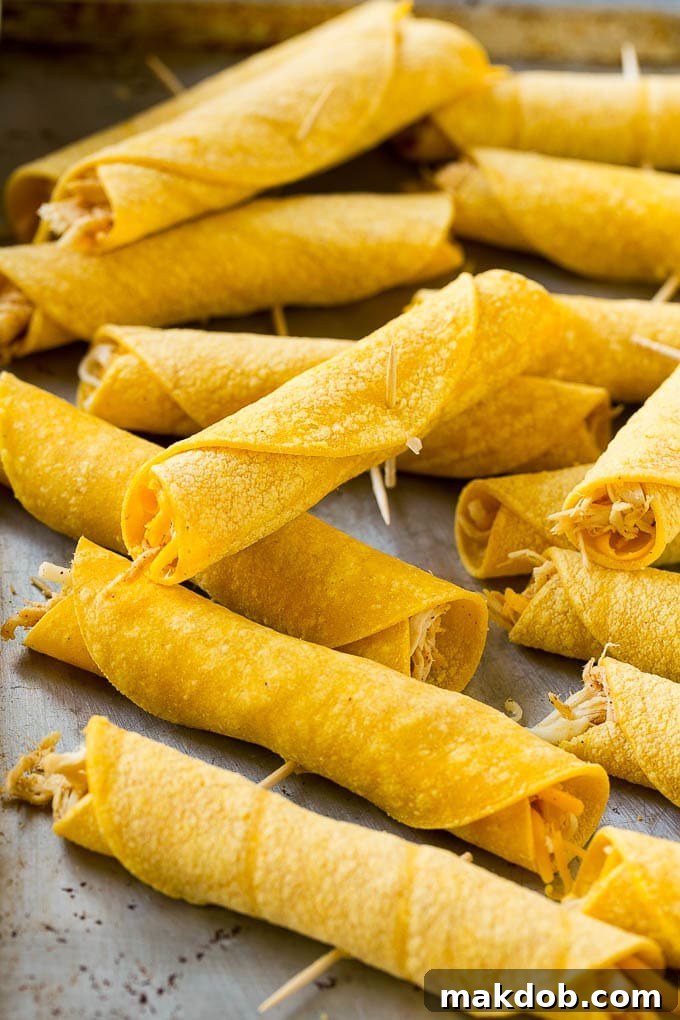
- Fill and Roll with Precision: Lay out the softened tortillas on a clean, flat surface. Divide the chicken and cheese mixture evenly among all 12 tortillas, placing a small mound of filling slightly off-center towards one edge of each tortilla. Roll up each tortilla tightly from the filled end, creating a compact cylinder. To ensure they hold their shape during cooking, secure each rolled taquito with a toothpick, piercing through the center.
Once your taquitos are assembled, you have a choice: bake them for a lighter, healthier option or fry them for that undeniable golden crisp. Both methods yield fantastic results, and the choice is yours based on preference.
Baking or Frying Your Taquitos
Both baking and frying offer unique advantages for achieving perfectly crispy taquitos. Choose the method that best suits your taste and kitchen equipment:
Frying for Ultimate Crispness
If you love a truly deep-fried crunch and golden-brown exterior, frying is the way to go. It delivers that authentic taquito experience you might find at your favorite Mexican restaurant.
- Heat the Oil: In a deep pan or a Dutch oven, heat about 3/4 inch of your preferred cooking oil (vegetable, canola, or peanut oil work well) to 350°F (175°C). Using a kitchen thermometer is highly recommended to maintain a consistent temperature, which is key to preventing soggy or burnt taquitos.
- Fry in Batches: Carefully place 3-4 taquitos into the hot oil, ensuring not to overcrowd the pan. Fry them for approximately 3-5 minutes, turning occasionally, until they are beautifully crisp and golden brown on all sides.
- Drain and Repeat: Remove the fried taquitos with tongs and place them on a wire rack set over a baking sheet lined with paper towels to drain any excess oil. Repeat this process with the remaining taquitos until all are cooked.
Baking for a Lighter Option
For a slightly healthier alternative that still offers a satisfying crisp, baking your taquitos is an excellent choice. This method requires less oil and cleanup.
- Preheat the Oven: Preheat your oven to 425°F (220°C). Prepare a baking sheet by coating it generously with cooking spray, or lining it with parchment paper for easier cleanup.
- Arrange and Spray: Arrange the rolled taquitos in a single layer on the prepared baking sheet, making sure they don’t touch each other. Lightly spray the tops of the taquitos with cooking spray. This helps them achieve a golden, crispy texture.
- Bake to Perfection: Bake for 15-20 minutes, or until the taquitos are crispy and have turned a beautiful golden brown. Keep an eye on them, as oven temperatures can vary.
Regardless of your chosen method, remember to remove the toothpicks before serving. Serve your hot, crispy taquitos immediately with your favorite toppings and dipping sauces!
Master Your Taquitos: Expert Tips for Success
Achieving perfectly crispy, flavorful homemade chicken taquitos is easy with a few insider tips:
- Toothpick Purpose: The toothpicks are your best friends during the cooking process! They are essential for holding the tightly rolled taquitos together as they fry or bake. However, always remember to discard them before serving to ensure safe and enjoyable eating.
- Chicken Convenience: Any type of cooked chicken will work wonderfully for this dish. For ultimate ease, I often utilize leftover rotisserie chicken or shredded chicken from a previous meal. You can also quickly boil or bake chicken breasts and shred them for this recipe.
- Storage and Reheating: Taquitos are excellent make-ahead options! Leftovers will stay fresh in an airtight container in the refrigerator for up to 3 days. For longer storage, you can freeze them for up to 2 months. To reheat, simply bake the taquitos at 350°F (175°C) for 7-8 minutes (or longer if frozen) until they are hot, crispy, and warmed through. Air fryers also work wonders for reheating!
- Tortilla Pliability is Key: Don’t skip the step of warming your corn tortillas. Cold tortillas will crack and break when rolled, making it difficult to assemble your taquitos. A quick microwave session with a damp paper towel makes them soft and easy to work with.
- Roll Them Tight: The secret to a well-formed taquito is a tight roll. This prevents the filling from spilling out and helps the taquito maintain its shape and crispness.
- Don’t Overcrowd the Pan: When frying, cooking in batches is essential. Overcrowding the pan will lower the oil temperature, leading to greasy, soggy taquitos instead of crispy ones. For baking, ensure a single layer for even browning.
- Temperature Control (Frying): If frying, maintaining an oil temperature of 350°F (175°C) is crucial. Too low, and taquitos absorb too much oil; too high, and they burn before the filling heats through. A kitchen thermometer is a valuable tool here.
- Essential Toppings: I personally love a generous drizzle of cool sour cream and a scoop of fresh pico de gallo or zesty chipotle salsa on my chicken taquitos. However, the possibilities are endless! Other fantastic options include creamy guacamole, homemade ranch dressing, finely grated cotija cheese, or a sprinkle of fresh chopped cilantro leaves. Get creative with your favorites!
- Meal Pairing Ideas: Serve these taquitos as a delightful snack on their own, or integrate them into a larger Mexican-inspired meal alongside dishes like savory taco lasagna, rich chicken tinga, flavorful Mexican tortilla pinwheels, or zesty cilantro lime shrimp.
Quick Tip: Choose Your Cheese Wisely!
For the best melt and flavor, avoid store-bought pre-shredded cheeses. These often contain preservatives and anti-caking agents that can hinder their melting capabilities. Freshly shredding your own block of cheese will make a noticeable difference in the creaminess of your taquito filling!
Frequently Asked Questions About Taquitos
What exactly are chicken taquitos made of?
Chicken taquitos typically consist of a savory filling, usually shredded chicken mixed with cheese and seasonings, tightly rolled inside small corn tortillas. These rolls are then either deep-fried or baked until crispy and golden brown.
What is the main difference between taquitos and flautas?
The primary distinction between taquitos and flautas lies in the type of tortilla used. Taquitos are traditionally made with smaller corn tortillas, resulting in their characteristic slender shape. Flautas, on the other hand, are typically prepared with larger flour tortillas, which makes them longer and sometimes thicker. Both are delicious rolled and fried/baked Mexican dishes!
How do you ensure taquitos stay together during cooking?
The best way to keep your taquitos from unraveling is to roll them very tightly. Once rolled, secure each taquito with a toothpick, piercing it through the center to hold the layers in place. After the taquitos are cooked and have crisped up (either in the oven or fryer), they will naturally hold their shape, and you can easily remove the toothpicks before serving.
Can I make chicken taquitos ahead of time?
Absolutely! Taquitos are a great make-ahead option. You can assemble them entirely, including rolling and securing with toothpicks, and then store them uncooked in the refrigerator for up to 24 hours. Alternatively, you can bake or fry them, let them cool completely, and then store them in the fridge for up to 3 days or freeze them for up to 2 months. Reheat them in the oven or air fryer for best results.
Are taquitos naturally gluten-free?
Since traditional taquitos use corn tortillas, they are naturally gluten-free, provided all other ingredients (chicken, seasonings, cheeses) are also gluten-free. Always double-check ingredient labels if you have a severe gluten allergy or intolerance.
FOLLOW ME
Unleash Your Creativity: Exciting Flavor Variations
While this classic chicken taquito recipe is absolutely delicious as-is, don’t hesitate to get creative! You can easily customize the ingredients to match your personal preferences or what you have on hand, making this dish incredibly versatile.
- Protein Power: Not a fan of chicken, or simply craving something different? Instead of shredded chicken, try cooked ground beef or ground turkey seasoned with taco spices. For a richer, more robust flavor, consider using tender cooked shredded beef or pork carnitas.
- Veggie Boost: Add some extra nutrition and flavor by incorporating vegetables into your filling. Sautéed diced peppers and onions are a classic choice, or you could try adding some cooked, finely diced mushrooms for an earthy touch. A handful of corn kernels or black beans would also be delicious.
- Cheese Please: The cheese blend is a highlight of these taquitos, but feel free to experiment! Swap out the cheddar and Monterey Jack for other fantastic melting cheeses like mozzarella for a milder taste, spicy pepper jack for a kick, or authentic Mexican cheeses such as queso oaxaca or queso asadero. For an extra creamy filling, stir in a dollop of cream cheese with your other shredded cheeses.
- Spice it Up: Adjust the spice levels to your liking. Add a pinch of cayenne pepper or a dash of hot sauce to the chicken mixture for a spicier taquito. Experiment with different chili powders or a smoky paprika for nuanced flavors.
- Herbaceous Freshness: Stir in some fresh chopped cilantro or parsley into your filling for an added layer of freshness.
My kids simply adore these homemade chicken taquitos, which is why they appear on our dinner table quite frequently. There’s truly no need to resort to the frozen versions when you can whip up fresh, hot, and incredibly flavorful taquitos any time you crave them!
More Mexican Favorites You’ll Love
Mexican Pizza
30 mins
Carne Asada Tacos
1 hr 20 mins
Mexican Caesar Salad
15 mins
Chipotle Barbacoa
8 hrs 15 mins
Chicken Enchilada Casserole
45 mins
Love This Recipe?
Please leave a 5-star 🌟🌟🌟🌟🌟 rating in the recipe card below & a review in the comments section further down the page. Your feedback helps us share more delicious recipes!
Chicken Taquitos (Baked or Fried)
Pin
Time
Ingredients
- 2 1/2 cups cooked shredded chicken
- salt and pepper to taste
- 2 teaspoons chili powder
- 1/2 teaspoon garlic powder
- 1 teaspoon ground cumin
- 1 cup shredded cheddar cheese
- 1/2 cup shredded Monterey Jack cheese
- 12 small corn tortillas
- oil if frying
- cooking spray if baking
Instructions
-
Place the chicken, salt, pepper, chili powder, garlic powder, cumin, cheddar cheese and Monterey Jack cheese in a bowl. Stir until combined.
-
Wrap the tortillas in a damp paper towel and place on a plate. Microwave for 1 minute or until tortillas are warm and pliable.
-
Lay out the tortillas on a flat surface and divide the chicken and cheese mixture among the 12 tortillas. Roll up each tortilla tightly and secure with a toothpick.
-
To fry the taquitos: Heat 3/4 inch of oil in a deep pan to 350 degrees F. Add 3-4 taquitos and fry until crisp and golden brown, 3-5 minutes. Repeat with remaining taquitos.
-
To bake the taquitos: Preheat the oven to 425 degrees. Place the taquitos in a single layer on a sheet pan coated with cooking spray. Spray the tops of the taquitos with the cooking spray. Bake for 15-20 minutes or until crispy and golden brown.
-
Remove toothpicks, then serve immediately.
Notes
- Nutritional information is for the baked taquitos as it is difficult to determine how much oil the taquitos will absorb during the frying process.
- The toothpicks are to hold everything together while the taquitos are cooking, and should be removed before serving.
- Any type of cooked chicken works for this dish. I often use leftover chicken from the night before, or else I purchase a rotisserie chicken to save time.
- Avoid store bought pre-shredded cheeses, as they often contain preservatives and anti caking agents and will not melt as well.
Nutrition
Tweet
Pin