
Easy & Elegant Cream Cheese Danish with Fruit
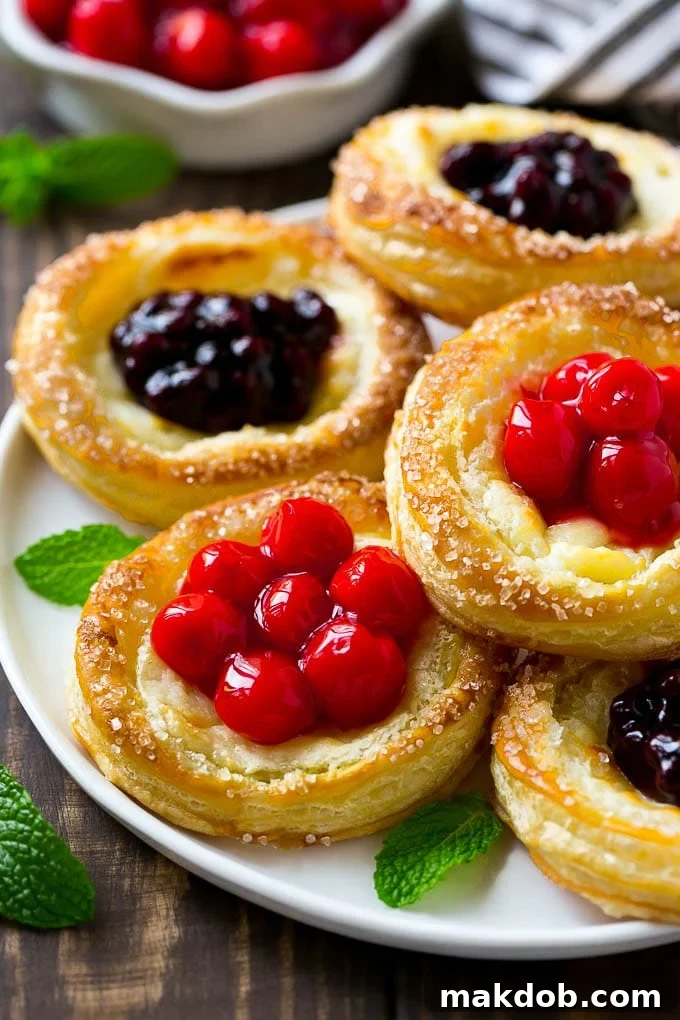
Indulge in the simple pleasure of homemade Cream Cheese Danish, featuring a light, flaky pastry, a lusciously sweet cream cheese filling, and vibrant fruit toppings. This recipe offers an easy yet elegant breakfast or brunch option that truly outshines store-bought varieties!
There’s something uniquely satisfying about a perfectly crafted cheese danish. It’s that delightful balance of buttery, airy pastry and rich, sweet cream cheese that makes it an irresistible treat. While I often lean towards savory options for breakfast, a warm, golden-brown cream cheese danish topped with fresh fruit is one sweet indulgence I simply cannot pass up. The good news? Crafting these bakery-worthy pastries at home is surprisingly straightforward, especially when you have a few clever shortcuts up your sleeve. Forget the long lines at the bakery or the often-disappointing supermarket versions – with this recipe, you’ll be enjoying superior homemade danishes in no time.
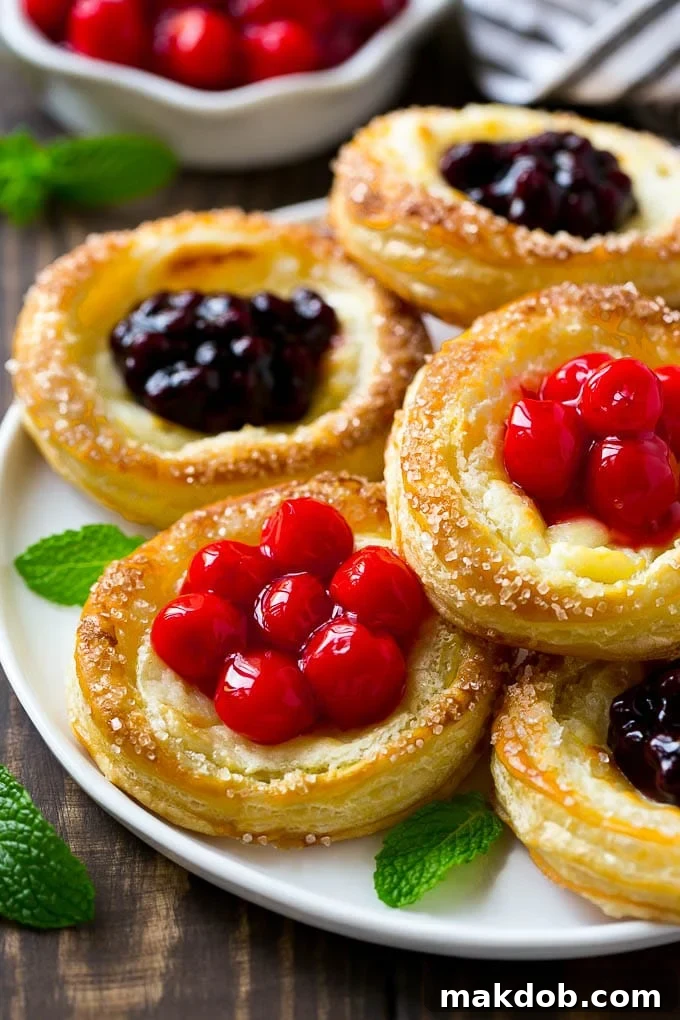
These cream cheese danishes are not just incredibly delicious; they also present beautifully, making them an impressive addition to any breakfast spread, Sunday brunch, or holiday gathering. The secret to their effortless preparation lies in using store-bought frozen puff pastry, which provides a shortcut to that classic flaky texture without the demanding labor of traditional danish dough. This allows you to focus on the simple, yet essential, steps that transform basic ingredients into a truly gourmet experience.
The Simplicity of Homemade Cream Cheese Danish
Many people are intimidated by the thought of making danishes from scratch, envisioning complex doughs and intricate folding techniques. However, this recipe makes the process incredibly accessible. The cornerstone of this easy cream cheese danish recipe is a package of frozen puff pastry. This versatile ingredient is a true game-changer, delivering a result that’s remarkably close to a traditional homemade danish dough in terms of flakiness and buttery flavor, but without any of the intensive effort. Thawed puff pastry is pliable and easy to work with, making it the perfect foundation for these delectable pastries.
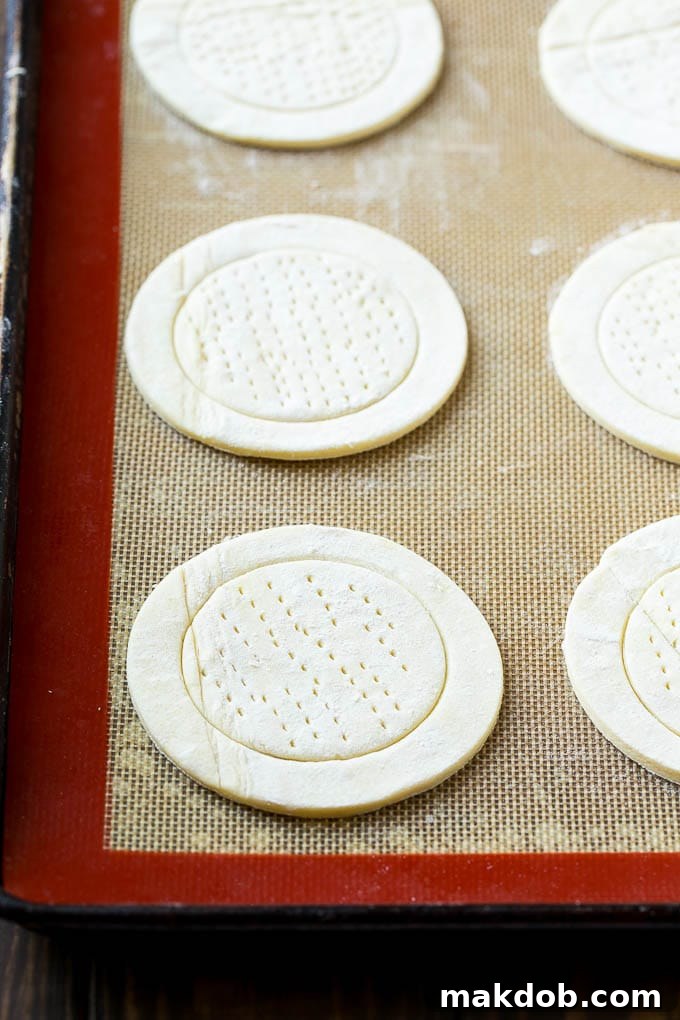
The initial step involves preparing your puff pastry. Once thawed, you’ll unroll the sheets and cut them into uniform rounds. A 4-inch cookie cutter is ideal for this, but if you don’t have one, the rim of a standard drinking glass works just as well. Precision here isn’t critical, but consistency helps with even baking. After cutting the rounds, you’ll use a smaller knife or cutter to gently score a circle about ½ inch from the edge of each pastry. This scoring creates a border that puffs up beautifully in the oven, forming the classic danish edge and creating a perfect well for your delicious filling. To prevent the center from puffing up excessively and spilling your filling, lightly prick the interior of the smaller circle with a fork. This allows steam to escape, ensuring a flat, stable base for the cream cheese.
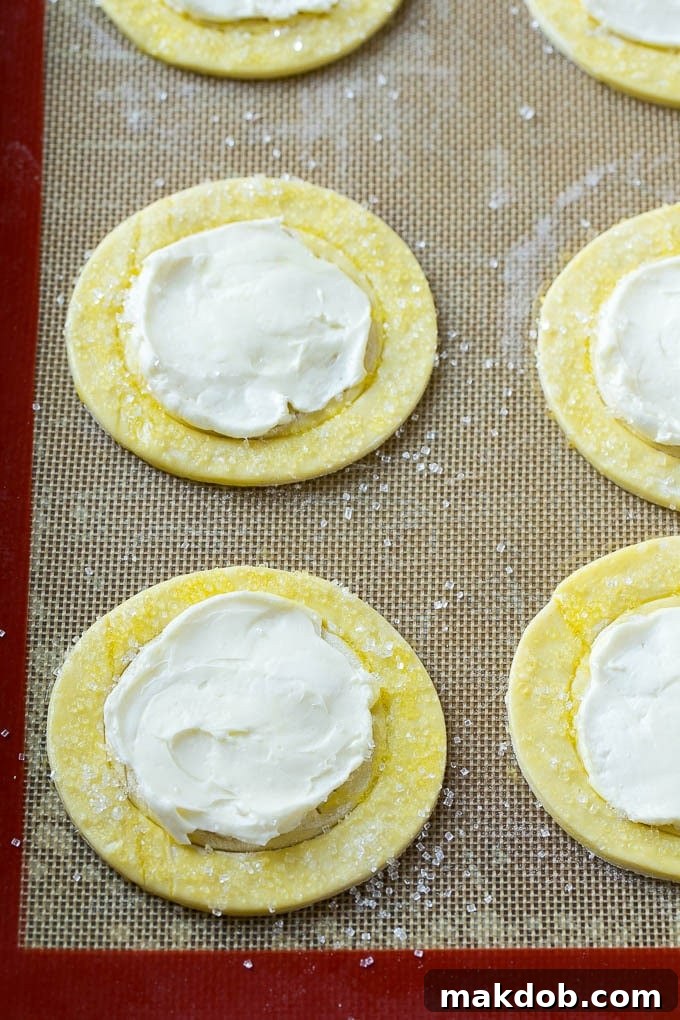
Next comes the star of the show: the rich and sweet cream cheese filling. This filling is a simple yet indulgent blend of softened cream cheese, granulated sugar, and a touch of vanilla extract. It’s whipped until smooth and creamy, creating a luxurious counterpoint to the flaky pastry. Once prepared, this delightful mixture is gently spread into the pricked centers of your pastry rounds, staying within the scored borders. Before baking, the edges of the pastries are brushed with a beaten egg wash. This magical step is what gives your danishes that gorgeous golden-brown sheen and helps to create a slightly crisp crust. A sprinkle of coarse sugar around the edges adds an extra layer of sweetness and a pleasant textural crunch, elevating the overall experience.
After a quick trip through a hot oven, you’ll be rewarded with an irresistible aroma and a tray of golden, puffed, and utterly delicious cream cheese danishes!

Customizing Your Cream Cheese Danish
While these danishes are absolutely exquisite on their own, the real fun begins when you add your favorite toppings. A spoonful of fruit pie filling or fresh fruit in the center of each danish takes them to another level of deliciousness and visual appeal. For the danishes pictured, luscious blueberry and sweet cherry pie fillings were used, providing a burst of color and flavor. But the possibilities are endless! Consider apple pie filling for a classic twist, or a vibrant strawberry filling. During berry season, fresh raspberries, blackberries, or sliced strawberries make for an incredibly fresh and elegant topping. You could also drizzle a simple glaze made from powdered sugar and milk over the cooled danishes for an extra touch of sweetness.
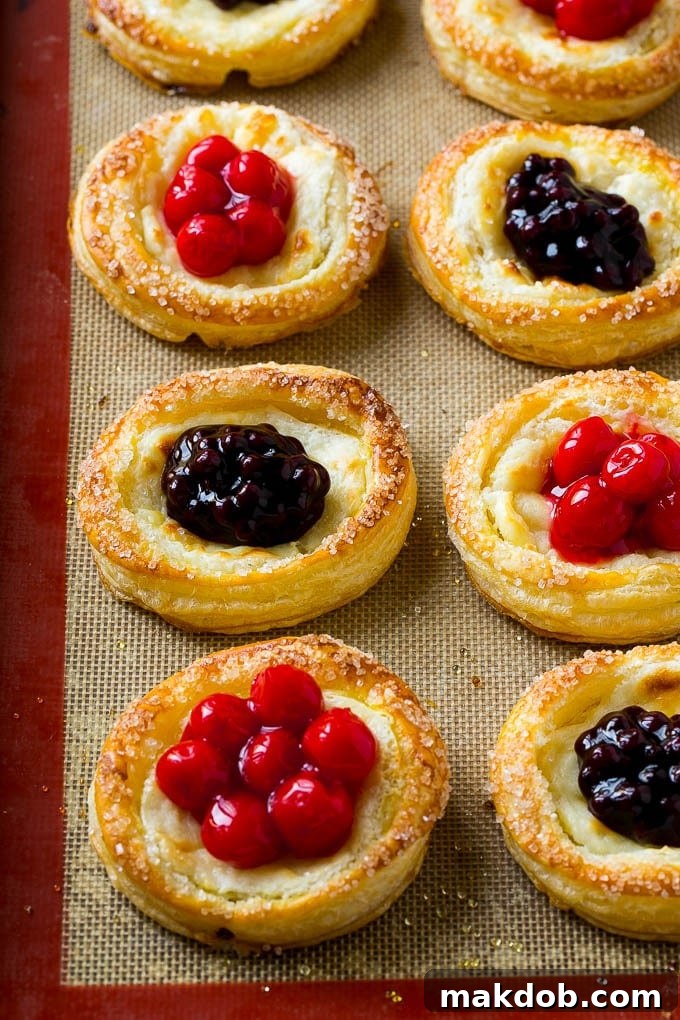
Imagine the delight of your family and friends when they bite into these homemade pastries! They taste significantly better than anything you’d find at a typical supermarket, and the ease of customizing the flavors means you can cater to everyone’s preferences. One batch could feature a mix of fruit toppings, while another might incorporate a sprinkle of toasted nuts or chocolate chips into the cream cheese filling itself. The versatility makes them perfect for any occasion.
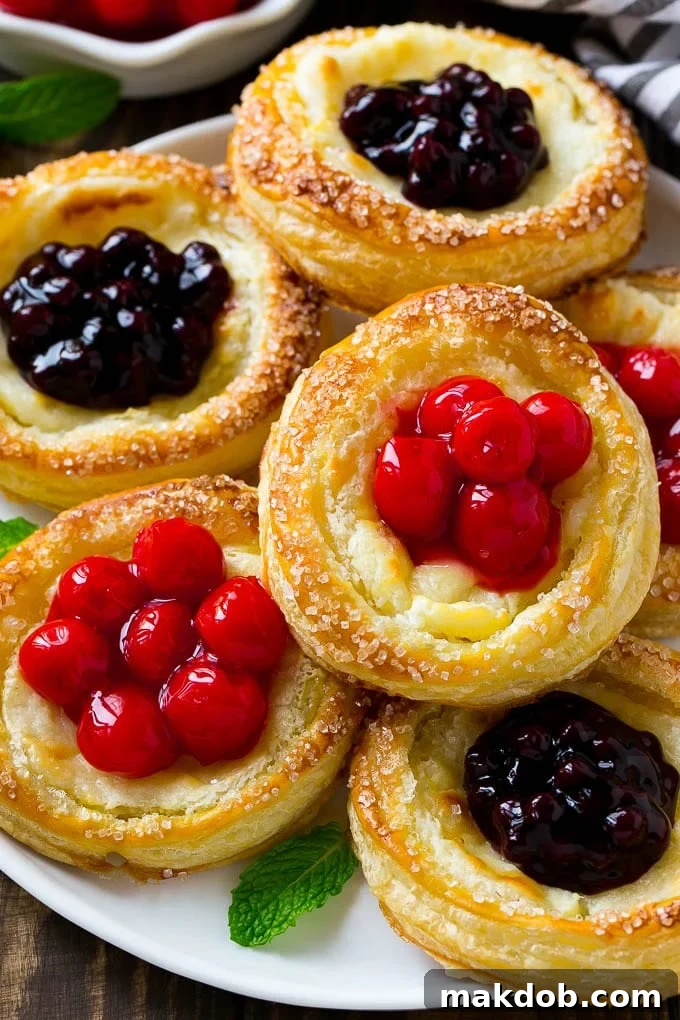
These easy breakfast pastries are also fantastic for holiday celebrations. They add a special touch to Christmas morning breakfasts, Easter brunch, or any festive gathering. I always make sure to keep a box or two of puff pastry tucked away in my freezer, so I’m always prepared when the craving strikes or an unexpected occasion arises. It’s a simple ingredient that unlocks a world of quick and delicious baking.
Tips for Perfect Cream Cheese Danish Every Time
Achieving bakery-quality danishes at home is easier than you think with a few key tips:
- **Puff Pastry Temperature:** Ensure your puff pastry is properly thawed but still cold. If it gets too warm, it becomes sticky and harder to handle, and the layers of butter will melt, reducing flakiness. Work quickly, and if the pastry becomes too warm, pop it back into the fridge for a few minutes.
- **Cream Cheese Consistency:** For the smoothest filling, make sure your cream cheese is truly softened to room temperature. This prevents lumps and ensures it blends perfectly with the sugar and vanilla.
- **Don’t Overfill:** Be mindful not to overfill the pastry centers with cream cheese. Too much filling can bubble over during baking, making a mess and potentially preventing the pastry edges from rising properly.
- **Egg Wash for Shine:** The egg wash isn’t just for color; it also helps to seal the edges and gives the pastry a beautiful, professional shine. For an even richer color, you can add a tablespoon of milk or water to the beaten egg.
- **Coarse Sugar:** Coarse sugar (like turbinado or demerara sugar) adds a wonderful sparkle and satisfying crunch to the danish edges. If you don’t have coarse sugar, regular granulated sugar will work, but the texture will be less pronounced.
- **Baking Temperature & Time:** A hot oven is crucial for puff pastry to rise quickly and create those distinct flaky layers. Resist the urge to open the oven door frequently, as this can cause the pastry to deflate.
- **Cooling is Key:** Allow the danishes to cool slightly before adding your fruit toppings. This prevents the fruit from sinking or making the pastry soggy.
Creative Flavor Variations & Serving Ideas
The beauty of this cream cheese danish recipe lies in its adaptability. Here are more ideas to inspire your culinary creativity:
- **Citrus Zing:** Add a teaspoon of lemon or orange zest to your cream cheese filling for a bright, refreshing flavor.
- **Nutty Crunch:** Sprinkle finely chopped toasted nuts (almonds, pecans, walnuts) over the cream cheese filling before baking, or as a garnish after adding fruit.
- **Chocolate Lovers:** Mix mini chocolate chips into the cream cheese filling, or drizzle melted chocolate over the cooled danishes.
- **Spiced Apple Danish:** Combine diced apples with a pinch of cinnamon and a touch of brown sugar for a warm, comforting autumn flavor.
- **Savory Twist:** For a savory brunch option, omit the sugar from the cream cheese, add herbs like chives or dill, and top with smoked salmon or cherry tomatoes and a sprinkle of feta cheese after baking.
- **Glaze it Up:** A simple powdered sugar glaze (powdered sugar, milk, and a tiny bit of vanilla) drizzled over the cooled danishes adds extra sweetness and a professional finish.
These versatile pastries are perfect for a variety of occasions:
- **Weekend Breakfast:** Elevate a leisurely weekend breakfast into a special occasion.
- **Brunch Spread:** They are an absolute showstopper for any brunch buffet, pairing well with eggs, bacon, and fresh fruit.
- **Coffee Break:** A delightful companion to your morning coffee or afternoon tea.
- **Dessert:** Serve warm with a scoop of vanilla ice cream for a unique dessert.
- **Potlucks & Gifting:** Easily transportable and always a crowd-pleaser for potlucks or as a thoughtful homemade gift.
Storage & Reheating
Leftover cream cheese danishes can be stored at room temperature in an airtight container for up to 2 days, or in the refrigerator for up to 4 days (especially if topped with fresh fruit). To enjoy them warm again, simply pop them into a preheated oven at 300°F (150°C) for 5-10 minutes, or until warmed through. Avoid microwaving, as it can make the pastry soggy.
This recipe transforms a simple box of puff pastry into an extraordinary treat that tastes like it came from a high-end bakery. The ease of preparation combined with the endless possibilities for customization makes these Cream Cheese Danishes a must-try for any home baker. Enjoy the flaky layers, the creamy sweetness, and the vibrant fruit in every delightful bite!
More Delicious Breakfast Recipes to Try
- Hearty Breakfast Casserole with Bacon
- Decadent Cinnamon Roll French Toast Casserole
- Irresistible Donut Bread Pudding
- Simple & Savory Hash Brown Egg Casserole
- Quick & Easy Breakfast Egg Muffins
Cream Cheese Danish with Fruit Recipe
These cream cheese danish are a light and flaky pastry topped with a sweet cream cheese filling and fruit. An easy yet elegant breakfast option!
Sara Welch
15 minutes
15 minutes
30 minutes
Breakfast
American
8
Ingredients
- 2 sheets frozen puff pastry, thawed
- 6 ounces cream cheese, softened
- 3 tablespoons sugar
- 1 teaspoon vanilla extract
- 1 egg, beaten (for egg wash)
- 1/4 cup coarse sugar (for sprinkling)
- 1/2 cup pie filling of choice or diced fresh fruit
Instructions
- Preheat the oven to 400 degrees F (200°C). Line a baking sheet with parchment paper or a silicone baking mat.
- Place the thawed puff pastry sheets on your prepared non-stick surface.
- Use a 4-inch round cookie cutter or the rim of a drinking glass to cut 4 circles out of each sheet of pastry. You should have 8 rounds in total.
- Using a small knife or a smaller cookie cutter (about 3 inches), gently score a circle about 1/2 inch in from the edges of the pastry rounds. Do not cut all the way through the pastry.
- Use a fork to prick holes all over the pastry inside the smaller, scored circle. This will help prevent it from puffing up too much.
- In the bowl of a mixer (or using a hand mixer), combine the softened cream cheese, 3 tablespoons of sugar, and vanilla extract. Beat until the mixture is completely smooth and creamy.
- Gently spread about 1 tablespoon of the cream cheese filling into the center of each pastry round, staying within the scored border.
- Brush the outer edges of the pastries (the part outside the scored circle) with the beaten egg.
- Sprinkle the egg-washed edges with the coarse sugar for added sweetness and crunch.
- Bake for 17-20 minutes, or until the pastry edges are golden brown and puffed.
- Remove from the oven and let cool slightly on the baking sheet, then transfer to a wire rack to cool completely.
- Once cooled, spoon approximately 1 tablespoon of your chosen pie filling or fresh diced fruit into the center of each pastry. Serve immediately or store as directed.
Notes
- Don’t throw away your puff pastry scraps! Brush the scraps with a little melted butter, then sprinkle with seasonings of your choice (e.g., cinnamon sugar for sweet, or garlic powder and Parmesan for savory). Twist the pastry into breadsticks and bake at 400 degrees F for 8-10 minutes or until golden brown for a quick snack.
- This recipe was adapted from Just a Taste.
Nutrition Information (Approximate per serving)
Calories: 336 kcal | Carbohydrates: 33g | Protein: 6g | Fat: 14g | Saturated Fat: 10g | Cholesterol: 43mg | Sodium: 228mg | Potassium: 74mg | Sugar: 9g | Vitamin A: 315 IU | Calcium: 30mg | Iron: 1.7mg