
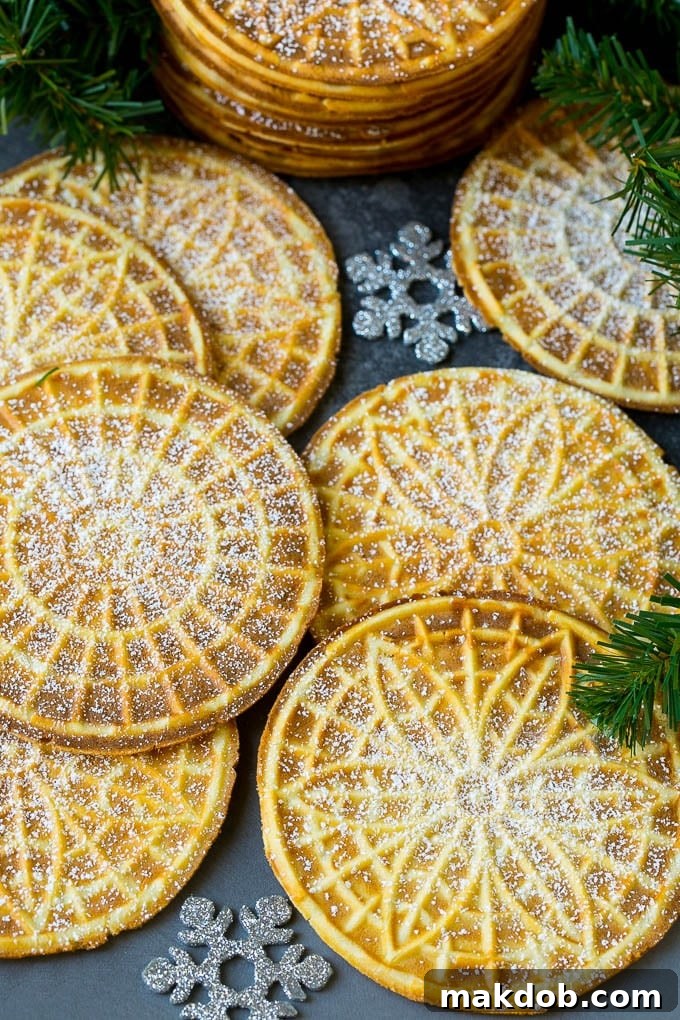
Welcome to the ultimate guide for crafting the most exquisite **Pizzelle cookies** – a classic Italian delicacy that promises a delightful crispness and a delicate vanilla flavor. These beautiful, flat, waffle-like cookies, traditionally baked in a special iron and delicately dusted with powdered sugar, are more than just a dessert; they are a cherished tradition, perfect for any celebration, thoughtful gift-giving, or simply a comforting treat at home. Prepare to embark on a culinary journey that will fill your kitchen with the sweet aroma of Italy.
There’s something incredibly special about sharing homemade treats, especially when the holiday season approaches. While I adore making and gifting classics like our festive monster cookies, rich gooey butter cookies, charming chocolate spritz cookies, a variety of Italian cookies, classic Christmas sugar cookies, fun reindeer chow, and irresistible chocolate covered pretzels, these elegant Italian Pizzelle cookies truly stand out. Their intricate patterns and delicate texture make them a uniquely impressive and universally loved gift that speaks volumes of care and craftsmanship.
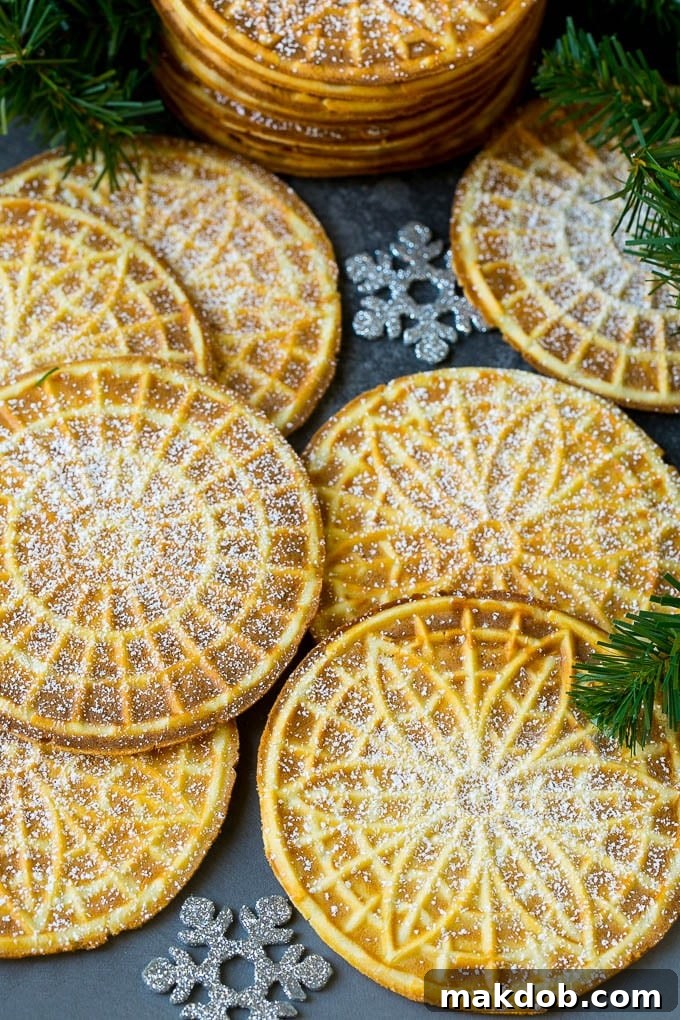
When seeking a truly unique and effortlessly elegant dessert recipe, Pizzelle cookies are my go-to choice. Their distinctive light and crispy texture, combined with a rich vanilla essence, makes them irresistible. Beyond their captivating flavor, the ease of preparation is a significant bonus, making them accessible even for novice bakers. Pizzelles are wonderfully versatile – enjoy them simply dusted with powdered sugar, or get creative by molding them into charming cups or cones while they’re still warm. These edible vessels are perfect for serving scoops of creamy ice cream, fresh berries, or even rich chocolate mousse, elevating any dessert spread to a gourmet experience.
Originating from the Abruzzo region of Italy, Pizzelles are believed to be among the oldest cookies in the world, dating back to ancient Roman times. Their name, derived from the Italian word “pizze,” meaning “round and flat,” perfectly describes their characteristic shape. Traditionally, each family would have a specially engraved iron, often bearing family crests or symbolic designs, passed down through generations. These patterns would then be imprinted onto the cookies, adding a personal and artistic touch. Today, while most irons feature beautiful floral or geometric designs, the spirit of tradition and artistry remains, making each batch of pizzelles a link to a rich culinary past. They are deeply ingrained in Italian culture, frequently gracing tables during weddings, Easter, and Christmas, symbolizing good fortune and celebration.
Table of Contents
- Pizzelle Ingredients: The Foundation of Flavor
- How Do You Make Pizzelle Cookies? Step-by-Step Perfection
- Expert Tips for the Perfect Pizzelle Cookies
- Choosing the Right Pizzelle Iron
- Pizzelle Recipe FAQs
- Exciting Flavor Variations & Creative Toppings
- More Great Cookie Recipes
- Love This Recipe?
- Pizzelle Recipe Card
Pizzelle Ingredients: The Foundation of Flavor
Crafting these delectable Italian cookies requires a simple yet carefully chosen list of ingredients, each playing a crucial role in achieving the signature crispy texture and rich vanilla taste. To make this recipe, you will need:
- Large Eggs: These provide structure and richness to the batter, helping to create the delicate crispness.
- Granulated Sugar: For sweetness and to contribute to the golden-brown color during baking.
- Milk: Adds moisture and helps in achieving a smooth, pourable batter consistency.
- Butter (Melted): Essential for a tender crumb and rich flavor. Using unsalted butter allows you to control the overall saltiness.
- Vanilla Extract: The star flavoring in traditional pizzelles. Opt for high-quality pure vanilla extract for the best aromatic results.
- All-Purpose Flour: The primary dry ingredient that forms the structure of the cookie.
- Baking Powder: A leavening agent that helps the cookies rise slightly and contributes to their light texture.
- Vegetable Oil: Used for lightly greasing the pizzelle iron, preventing sticking and ensuring easy removal.
- Powdered Sugar: The final flourish, dusted over cooled cookies for an elegant presentation and an extra touch of sweetness.
For an authentic touch, some traditional pizzelle recipes might call for anise extract instead of vanilla, offering a distinct liquorice-like flavor that is also very popular in Italy. Feel free to experiment with this variation if you’re feeling adventurous!
How Do You Make Pizzelle Cookies? Step-by-Step Perfection
Making Pizzelle cookies is an enjoyable and straightforward process, quite similar to preparing waffles, but with a thinner, crispier result. The key lies in a well-mixed batter and a properly heated pizzelle iron. Here’s how to achieve perfectly crisp and beautifully patterned cookies:
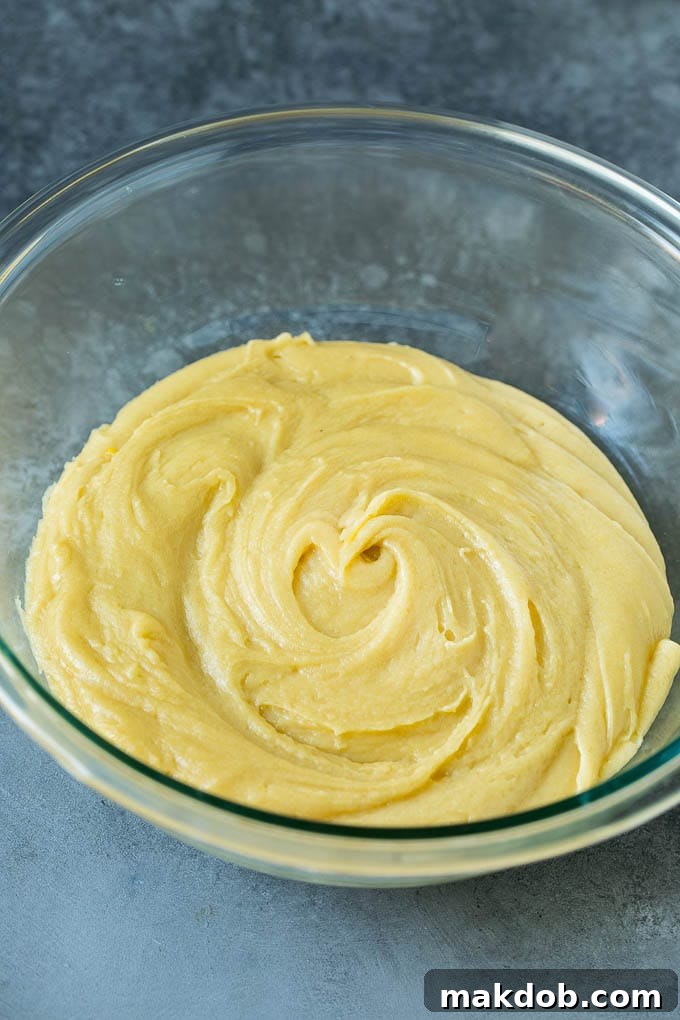
- Prepare the Wet Ingredients: In a generously sized mixing bowl, whisk together the large eggs, granulated sugar, milk, melted butter, and vanilla extract until the mixture is smooth and thoroughly combined. Ensure the sugar is mostly dissolved.
- Incorporate Dry Ingredients: Sift the all-purpose flour and baking powder directly into the wet ingredient mixture. Sifting is crucial here as it helps prevent lumps and creates a lighter, airier batter. Gently stir the batter until it is smooth and uniform, being careful not to overmix, which can lead to tough cookies.
- Preheat Your Pizzelle Iron: Before adding any batter, brush both the top and bottom plates of your pizzelle iron with a thin, even coating of vegetable oil. This initial seasoning is important for preventing sticking and ensuring a clean release of your cookies. Allow the iron to heat up completely according to the manufacturer’s instructions. Most irons will indicate readiness with a light.
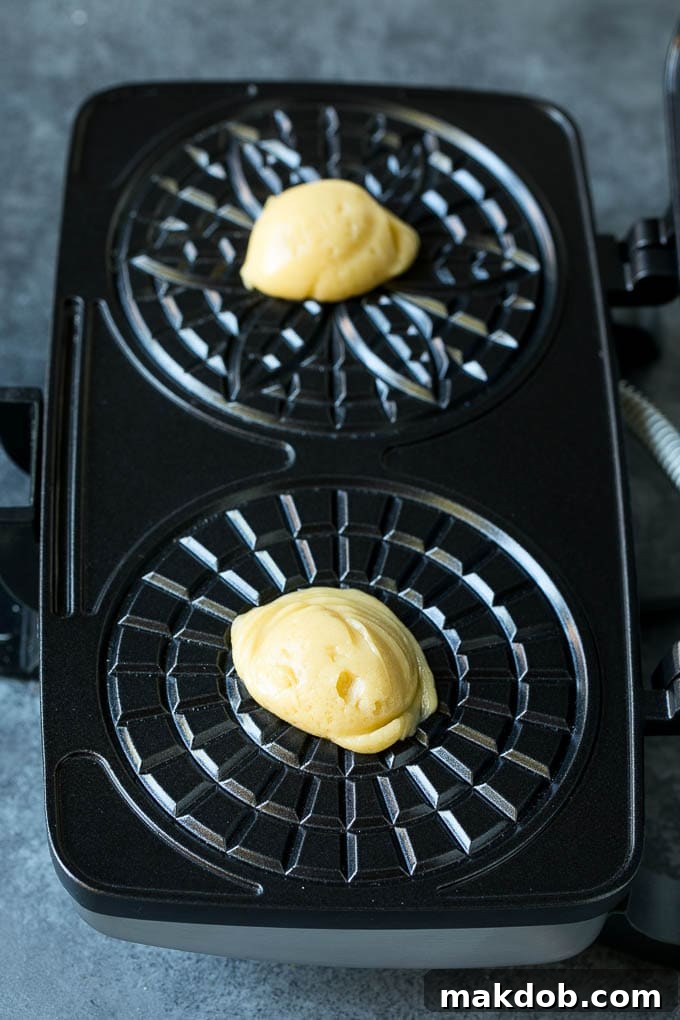
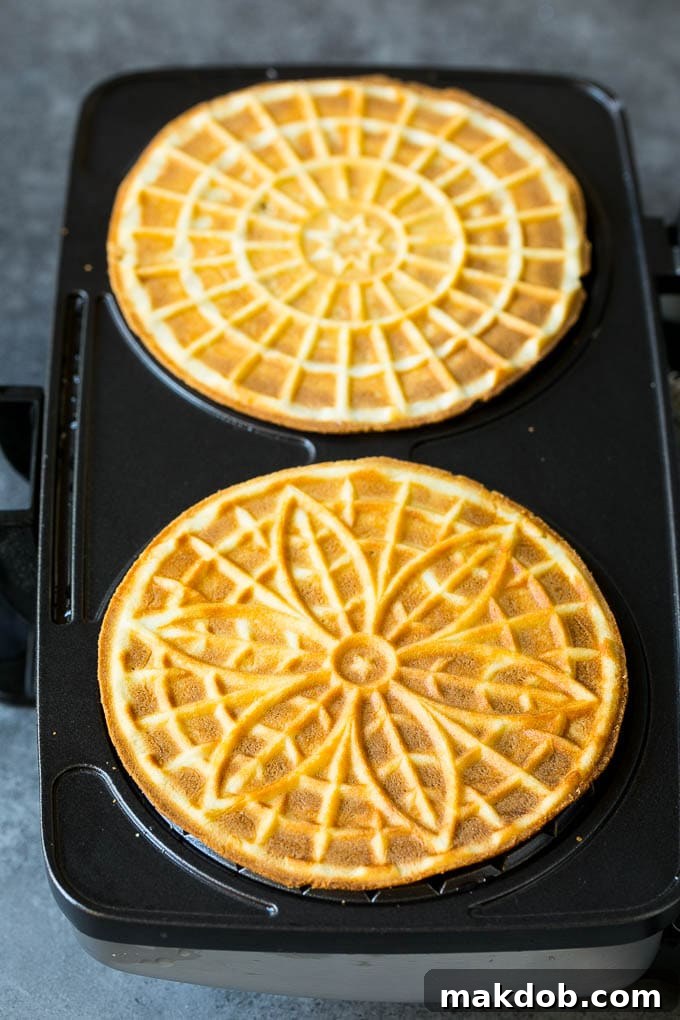
- Portion and Cook: Once the iron is hot, place approximately one tablespoon of batter at the center of each patterned design on the iron. The exact amount may vary slightly depending on your iron size; you’ll learn the perfect quantity after a couple of tries. Carefully close the lid, pressing down gently but firmly.
- Bake to Golden Perfection: Allow the pizzelles to cook for about 30 to 45 seconds. The cooking time is relatively short due to the thinness of the cookies. Keep an eye on them – they should turn a beautiful golden brown and become perfectly crisp. A good indicator that they’re nearly done is when the steam stops escaping from the sides of the iron.
- Cool and Harden: Using a thin wooden skewer or a non-scratch spatula, carefully remove the hot pizzelles from the iron. They will be very delicate and pliable at this stage. Immediately transfer them to a wire cooling rack or a flat surface. As they cool, they will quickly harden and become crisp. If you plan to mold them into cups or cones, do so gently while they are still warm and flexible.
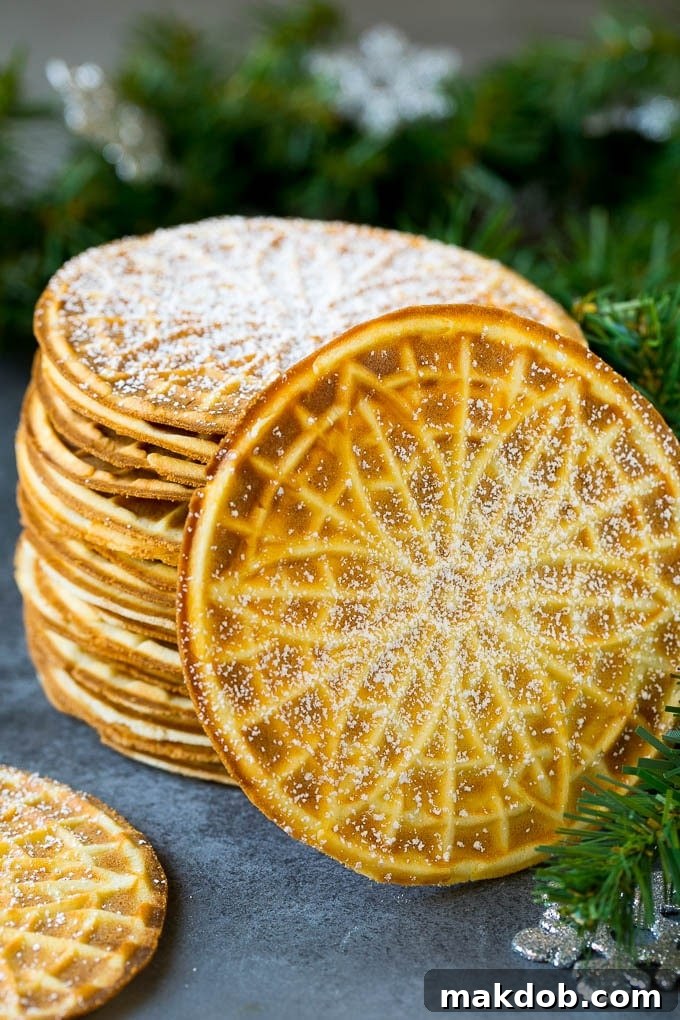
- Dust and Serve: Once completely cooled and firm, arrange the pizzelles on a serving platter. Just before serving, lightly dust them with powdered sugar using a small sieve. This adds an elegant finish and a touch of sweetness.
Each pizzelle iron can behave slightly differently, so don’t be discouraged if your first few cookies aren’t absolutely perfect. Consider them test runs to adjust your batter quantity and cooking time for optimal results. Consistency is key, and with a little practice, you’ll be making flawless pizzelles every time!
Expert Tips for the Perfect Pizzelle Cookies
Achieving consistently beautiful and delicious pizzelles is simple with a few insider tricks. Here are some essential tips to ensure your cookies turn out perfectly every time:
- Even Batter Spreading: If you find your cookies are coming out uneven or not filling the entire pattern, try placing the batter slightly towards the hinged side (the back) of the center pattern. When you close the lid, the pressure will naturally push the batter forward and outwards, resulting in a more uniform, perfectly round cookie.
- Safe Removal from the Hot Iron: The pizzelle iron gets very hot, so exercise caution. A **wooden skewer** or a thin, heat-resistant, non-scratch spatula is ideal for gently lifting and removing the delicate cookies without damaging them or scratching your iron’s non-stick surface.
- The Steam Test for Doneness: A reliable indicator that your pizzelle is just about finished baking is when the steam stops escaping from the sides of the iron. This signifies that most of the moisture has evaporated, leaving you with a wonderfully crisp cookie.
- Achieving a Perfectly Round Shape: For those who desire impeccably round cookies, you can experiment with adding a tiny bit more batter so it spreads slightly beyond the edges of the patterns. Once the cookies are cool enough to handle, simply use clean kitchen shears to trim off any excess for a flawless, circular shape.
- Molding Warm Pizzelles: If you plan to shape your pizzelles into cones or cups (perfect for ice cream or fruit), you must do so immediately after removing them from the iron while they are still warm and pliable. They harden very quickly, so work swiftly!
- Batter Consistency: The batter should be thick enough to hold its shape on a spoon but thin enough to spread easily when the iron is closed. If it’s too thick, add milk a teaspoon at a time; if too thin, add flour a tablespoon at a time.
- Cooling is Key: Always cool pizzelles on a wire rack in a single layer. Stacking them while warm will trap moisture and make them soft instead of crispy.
- Don’t Overfill: While a perfectly round cookie is desired, overfilling the iron can lead to messy overflow and uneven cooking. Start with a tablespoon and adjust as needed.
Choosing the Right Pizzelle Iron
Quick Tip
You can use a dedicated pizzelle iron or certain waffle irons or sandwich makers that come with detachable pizzelle plates. Always check compatibility!
Investing in the right pizzelle iron is crucial for consistent and beautiful results. While a dedicated pizzelle maker is ideal, there are other options available:
- Dedicated Pizzelle Irons: These are specifically designed for pizzelles, often featuring traditional intricate patterns. They usually have a non-stick coating and temperature control for optimal baking. Electric models are the most common and convenient, ensuring even heating.
- Waffle Irons with Pizzelle Plates: Some modern waffle makers come with interchangeable plates, including those designed for pizzelles. This offers versatility if you enjoy making various pressed treats. Ensure the plates are sturdy and heat evenly.
- Sandwich Makers with Pizzelle Attachments: Similar to waffle irons, certain sandwich makers can also accommodate pizzelle plates. This is a space-saving option for kitchens with limited storage, but always prioritize models that offer consistent heat distribution.
- Stovetop Pizzelle Irons: For a more traditional experience, stovetop irons are available. These require careful attention to heat distribution but offer a direct connection to the cookie-making heritage. They are typically made from cast iron or aluminum.
When selecting your iron, consider the number of pizzelles it makes per batch (usually two to four), the design pattern, and ease of cleaning. A good non-stick surface is paramount for easy release and cleanup.
Pizzelle Recipe FAQs
A pizzelle is a traditional Italian cookie, often described as a crisp, flat, and sweet waffle. These delicate treats are made by cooking a simple batter in a specialized pizzelle iron, which imparts beautiful, intricate patterns onto the cookie’s surface. Pizzelles are deeply rooted in Italian festive traditions, commonly enjoyed at celebrations like weddings, Easter, and Christmas. Beyond their classic flat form, they are incredibly versatile and can be shaped into elegant cups or cones while warm, or even rolled and filled with sweet creams, jams, or chocolate ganache.
When stored properly in an airtight container at room temperature, freshly baked pizzelles will maintain their crispness and flavor for up to two weeks. The key to preserving their delicate texture is to ensure the container is truly airtight. Any exposure to moisture can cause them to soften, losing their signature crunch. For best results, avoid direct sunlight and humidity.
Absolutely! Pizzelles freeze beautifully and can be stored in an airtight freezer-safe container for up to three months. To prevent breakage, it’s advisable to layer them with parchment paper. When you’re ready to enjoy them, simply transfer the airtight container to your countertop and allow the cookies to thaw gradually at room temperature. If you plan to freeze your pizzelles, it’s best to add the powdered sugar dusting *after* they have thawed, as the moisture from thawing can cause the sugar to clump or dissolve.
Several factors can lead to soft pizzelles. The most common reasons include not cooking them long enough (they need to be golden brown to ensure moisture has evaporated), or not allowing them to cool completely and properly on a wire rack. Storing them in a non-airtight container or in a humid environment will also quickly diminish their crispness. Ensure your batter isn’t too thick, as this can also hinder crisping.
Yes, pizzelles are an excellent make-ahead dessert! Because they store well for up to two weeks (or three months frozen), you can prepare them well in advance of your event. Just remember to store them in an airtight container to preserve their crispness, and dust with powdered sugar right before serving for the freshest look.
FOLLOW ME
Exciting Flavor Variations & Creative Toppings
While the classic vanilla pizzelle recipe is undeniably delicious and a staple, these versatile cookies invite endless creativity. Feel free to customize the ingredients and toppings to suit your unique tastes and the occasion.
- Flavorings: Transform your pizzelles by swapping out the vanilla extract for other enticing flavors. Try a teaspoon of almond extract for a delicate nutty note, lemon or orange extract for a bright citrusy zing, or traditional anise extract for an authentic Italian liquorice flavor. You can also incorporate zests from citrus fruits like lemon or orange directly into the batter for a fresher, more intense aroma. For chocolate lovers, whisk in a few tablespoons of unsweetened cocoa powder to the dry ingredients for a rich chocolate pizzelle.
- Toppings & Garnishes: Beyond the simple powdered sugar, the topping possibilities are vast.
- Chocolate Dipped: For an elegant touch, dip half of each cooled pizzelle into melted dark, milk, or white chocolate. Before the chocolate sets, sprinkle with festive sprinkles, finely chopped nuts (like pistachios or hazelnuts), or shredded coconut.
- Glazes: A simple lemon glaze (powdered sugar mixed with lemon juice) or a vanilla glaze (powdered sugar with milk/vanilla) can add another layer of sweetness and a soft sheen.
- Cinnamon Sugar: For a cozy, spiced version, sprinkle cooled pizzelles with a mix of cinnamon and granulated sugar.
- Cocoa Dusting: Instead of powdered sugar, dust with unsweetened cocoa powder for a sophisticated, less sweet finish.
- Stuffings & Spreads: If shaping your pizzelles into cannoli-like rolls or cones, consider filling them with:
- Sweetened ricotta cheese (a classic cannoli filling)
- Nutella or other chocolate hazelnut spreads
- Fruit curds like lemon curd
- Whipped cream and fresh berries
- Jams or preserves
These crispy, golden, and incredibly delicious pizzelle cookies are truly a joy to make and share. While they are often associated with holiday tables and special occasions, their simple elegance and delightful flavor make them a treat that’s good enough to bake and enjoy year-round!
More Great Cookie Recipes for Every Occasion
S’mores Cookies
27 mins
Monster Cookies
25 mins
Eggnog Cookies
30 mins
Nutella Cookies
25 mins
Cake Mix Cookies
20 mins
Love This Recipe?
We hope you cherish this classic pizzelle recipe as much as we do! Please consider leaving a 5-star 🌟🌟🌟🌟🌟 rating in the recipe card below and share your thoughts and experiences in the comments section further down the page. Your feedback helps our community of home bakers!
Pizzelle: Classic Italian Crispy Cookies
Pin
Save
Time
Equipment
-
Pizzelle iron (electric or stovetop), or a waffle iron / sandwich maker with compatible pizzelle attachments.
Ingredients
- 4 large eggs
- 1 cup granulated sugar
- 2 tablespoons whole milk
- 3/4 cup unsalted butter melted
- 1 tablespoon pure vanilla extract
- 2 1/4 cups all purpose flour
- 2 1/2 teaspoons baking powder
- 1 teaspoon vegetable oil for greasing
- 2 tablespoons powdered sugar for dusting
Instructions
-
In a large mixing bowl, thoroughly whisk together the eggs, granulated sugar, milk, melted butter, and pure vanilla extract until the mixture is smooth and the sugar has largely dissolved.
-
Carefully sift the all-purpose flour and baking powder into the wet ingredients. Stir the batter gently until it is smooth and no lumps remain. Be careful not to overmix the batter.
-
Lightly brush both the top and bottom plates of your pizzelle iron with vegetable oil. Preheat the iron according to the manufacturer’s instructions until it reaches optimal baking temperature.
-
Place approximately one tablespoon of batter onto the center of each pizzelle pattern on the heated iron. Close the lid firmly but gently.
-
Allow the pizzelles to cook for around 30-45 seconds, or until they are cooked through and achieve a beautiful golden-brown color and crisp texture. The steam escaping from the iron will typically subside when they are nearing completion.
-
Note that cooking times and batter amounts may vary slightly depending on your specific pizzelle iron. Adjust as necessary to achieve your desired crispness and shape.
-
Once each pizzelle is cooked, carefully remove it from the pizzelle maker using a wooden skewer or non-scratch spatula and immediately transfer it to a wire cooling rack or a flat surface. Allow them to cool completely, during which time they will harden and become crisp.
-
Just before serving, sift a generous dusting of powdered sugar over the cooled and hardened pizzelles for a beautiful finish.
Notes
- If your cookies are coming out uneven, try adding the batter slightly to the back (hinged side) of the center pizzelle pattern. Closing the lid will push the batter forward and help it spread evenly.
- Always use a wooden skewer or a thin, non-scratch utensil to carefully remove the hot cookies from the iron to avoid damage and burns.
- A key indicator that your pizzelle is perfectly cooked is when the steam stops actively escaping from the iron. This signals that adequate moisture has been removed for crispness.
- For shaped pizzelles (cones or cups), mold them immediately after removing from the iron while they are still warm and flexible.
- Store cooled pizzelles in an airtight container to maintain their crispness for up to two weeks.