
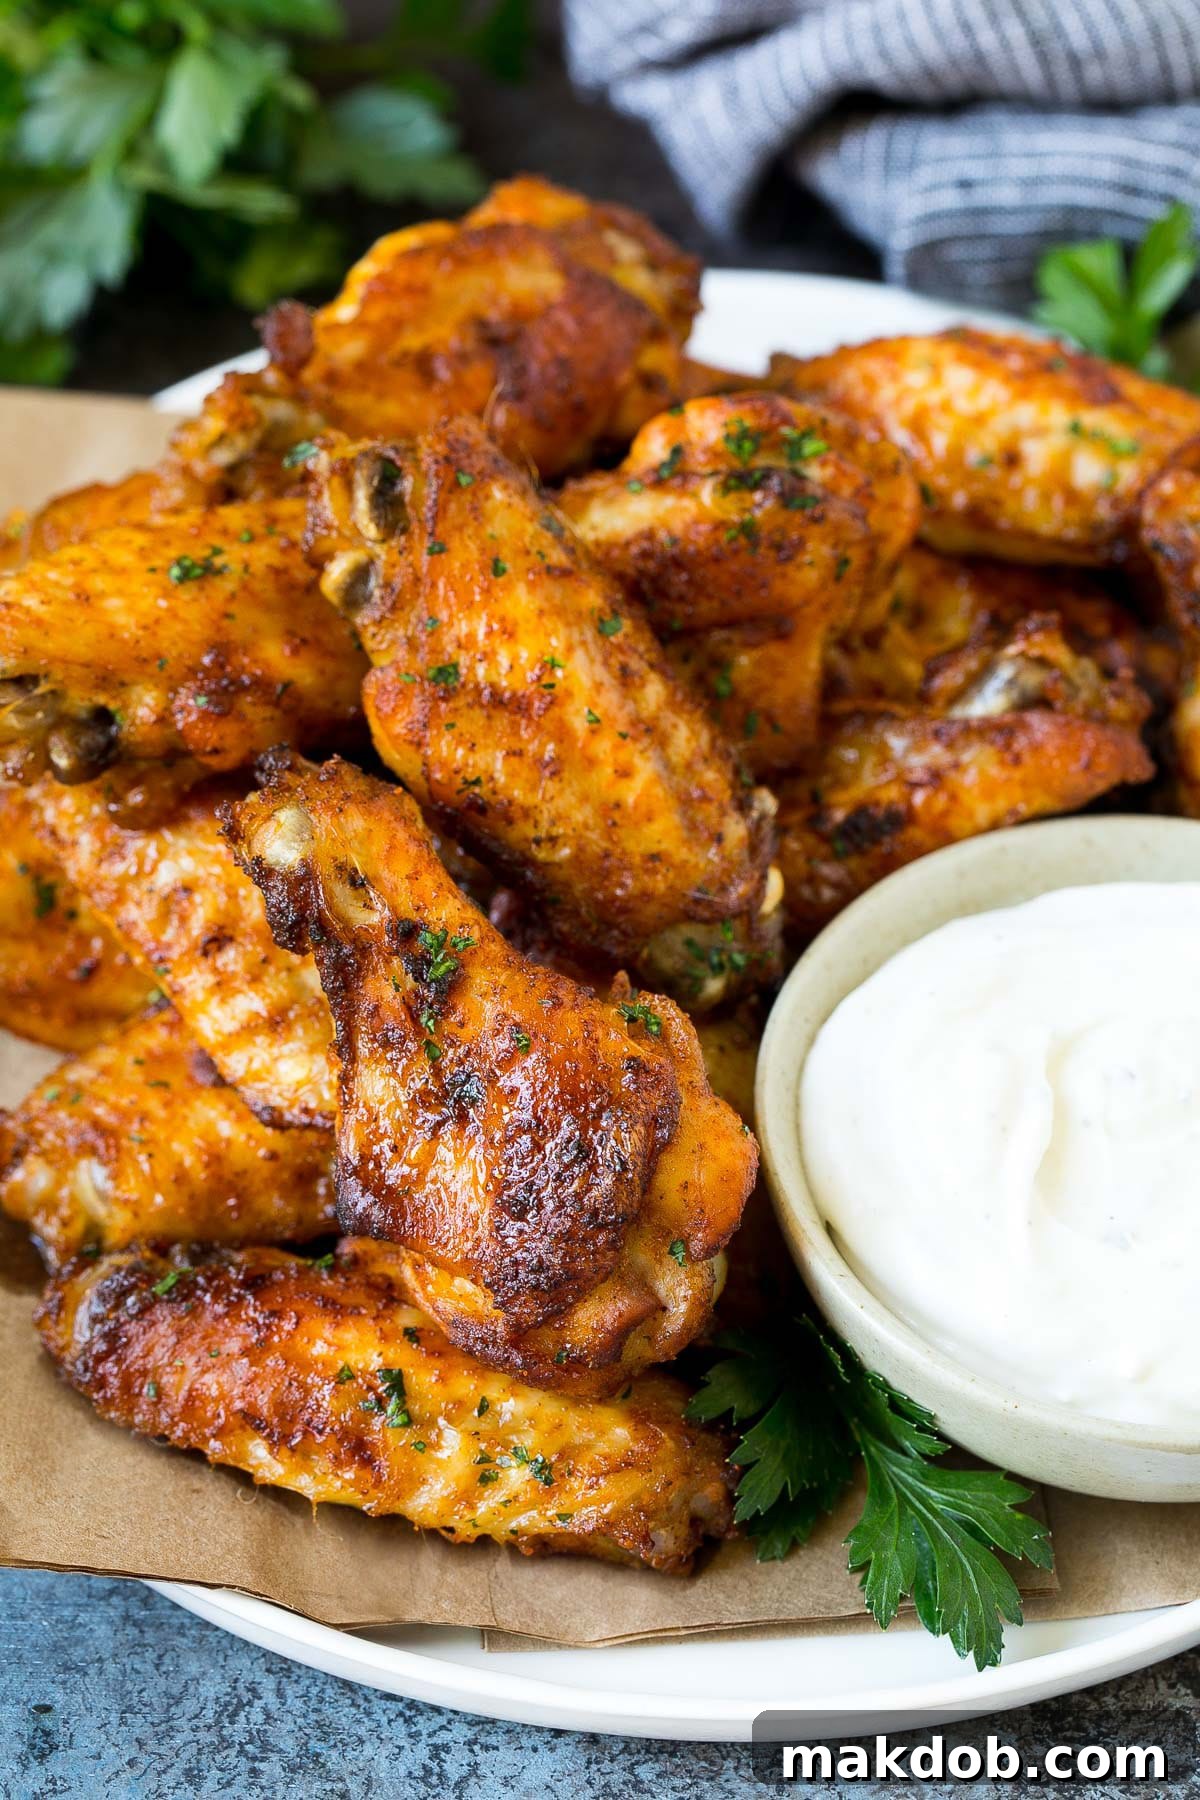
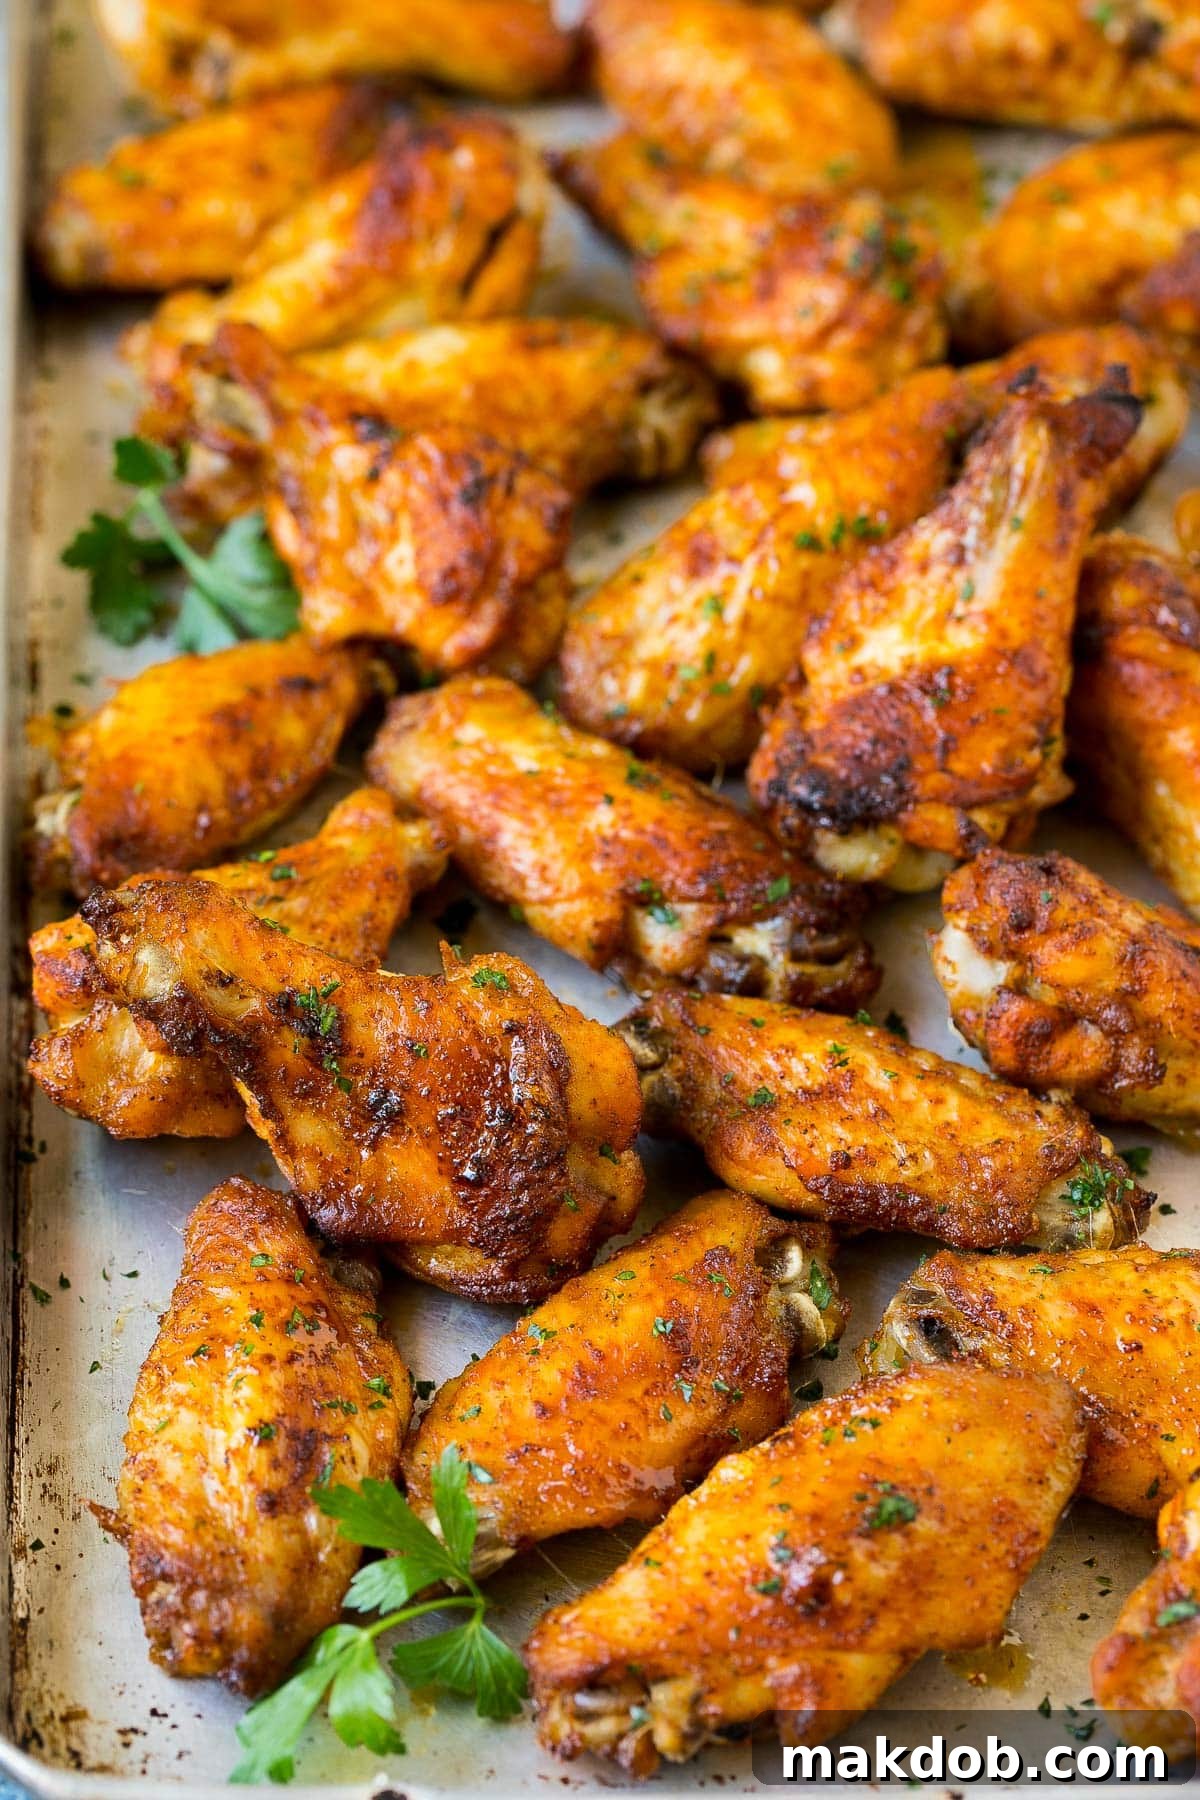
Unlock the secret to perfectly crispy, incredibly flavorful **baked chicken wings** every time. Forget the deep fryer and messy oil; this simple recipe transforms ordinary chicken wings into an extraordinary appetizer or a satisfying main course, coated in a rich, homemade spice rub and roasted to absolute golden-brown perfection. Ready in under an hour, these wings are a game-changer for entertaining or a casual weeknight meal.
Chicken wings hold a special place in the hearts of food lovers worldwide, and for good reason. They are inherently tender, versatile, and budget-friendly, making them an ideal canvas for a myriad of flavors. While varieties like garlic parmesan, lemon pepper, or classic buffalo wings always hit the spot, there’s an undeniable charm in a savory, dry-rubbed wing. Our baked wings feature a robust BBQ rub that infuses every bite with a smoky, sweet, and slightly spicy kick, delivering an explosion of flavor that will leave you craving more.
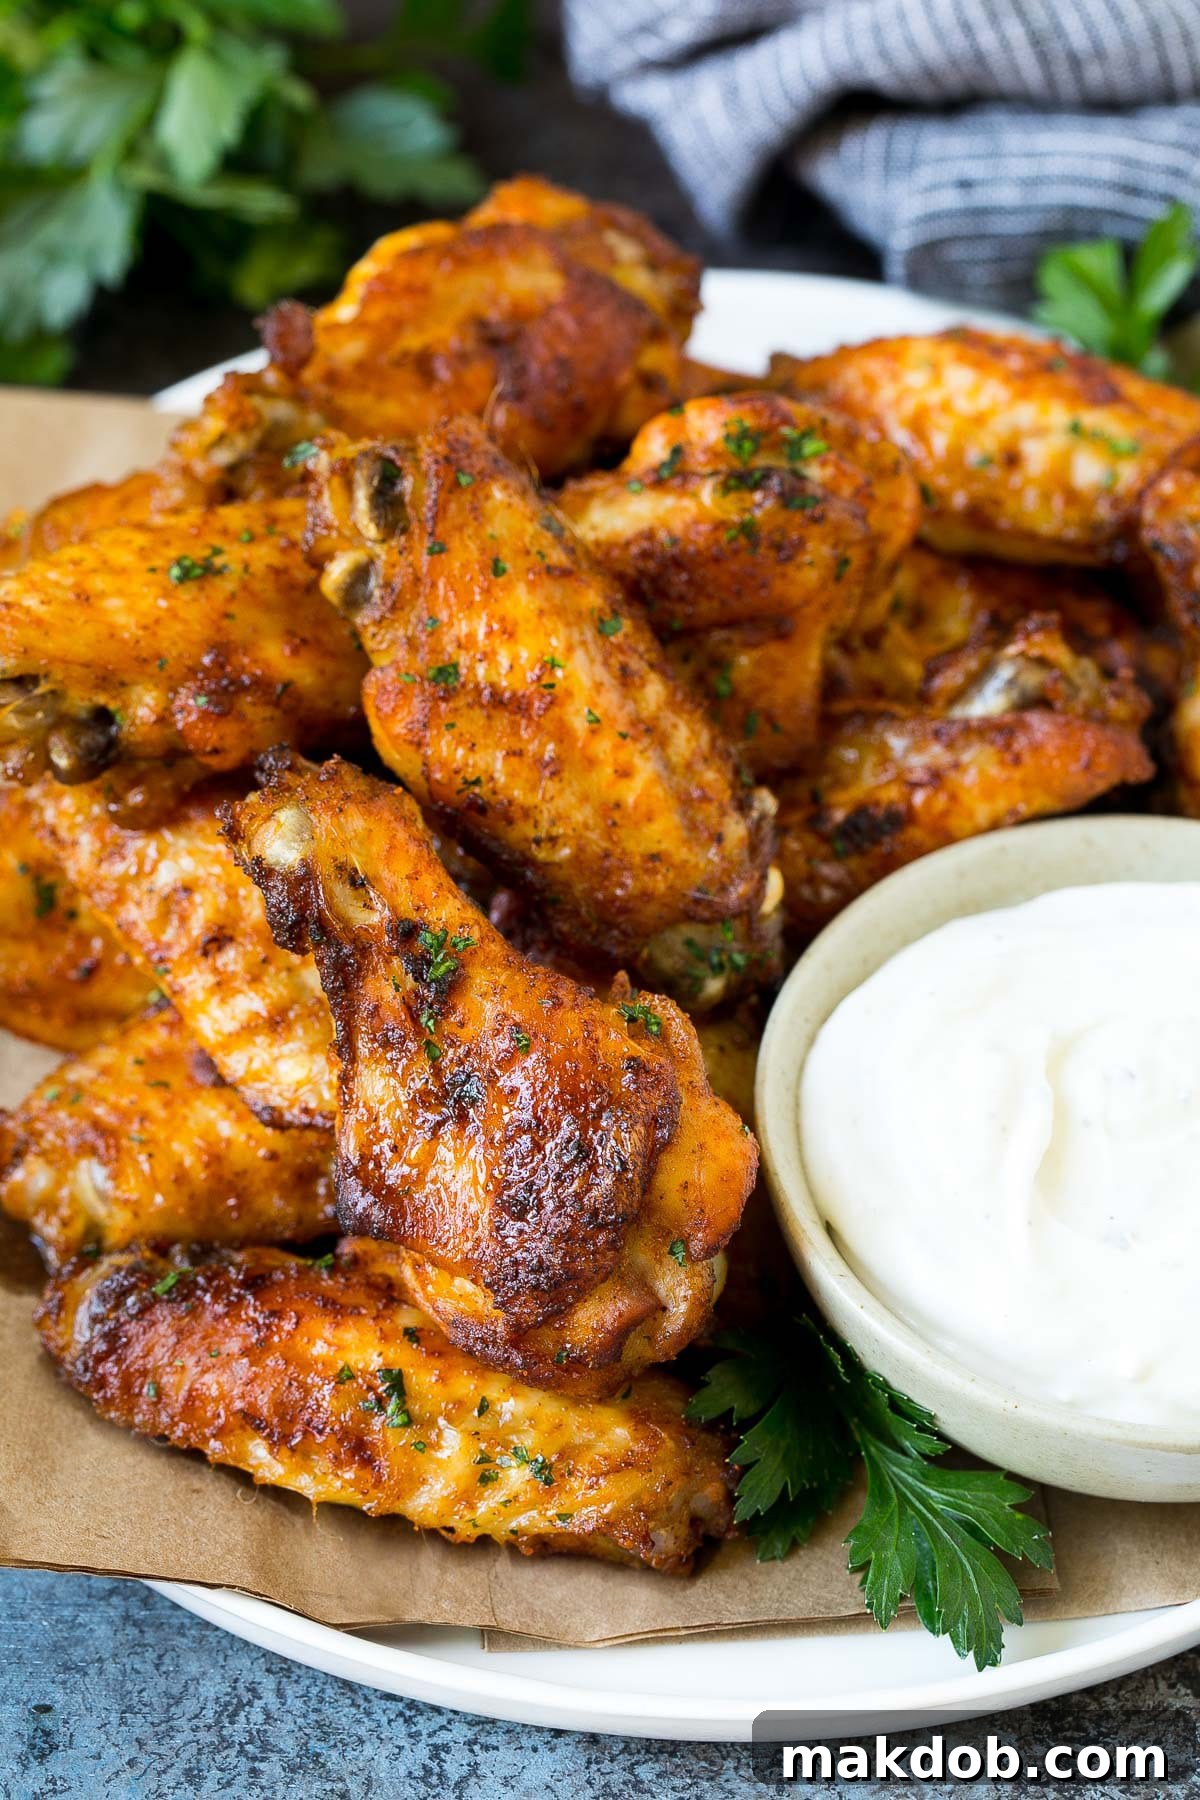
While the allure of a perfectly crispy chicken wing is universal, the thought of deep frying can often deter home cooks due to the associated hassle and mess. This recipe for baked chicken wings offers an effortless solution, yielding wings that are consistently crispy, beautifully golden brown, and packed with an incredible depth of flavor, all without the need for excessive oil or cleanup. They’re not just an appetizer; they’re an experience, perfect for any gathering, especially game day celebrations.
Elevate your party platter by pairing these magnificent wings with other crowd-pleasing appetizers. Imagine a spread featuring crunchy bacon-wrapped jalapeno poppers, gooey mozzarella sticks, and creamy artichoke dip. These baked wings will undoubtedly be the star of the show, offering a lighter yet equally satisfying alternative to their fried counterparts.
Table of Contents
- The Essential Ingredients for Flavorful Baked Chicken Wings
- Step-by-Step Guide to Baking Perfect Wings
- Expert Tips for Maximum Crispiness & Flavor
- Quick Flavor Customization Ideas
- Mastering Wing Preparation: How to Cut Chicken Wings
- Frequently Asked Questions (FAQs)
- Creative Flavor Variations for Your Baked Wings
- The Best Dips & Serving Suggestions
- More Delicious Chicken Recipes to Explore
- The Ultimate Baked Chicken Wings Recipe Card
The Essential Ingredients for Flavorful Baked Chicken Wings
Crafting these irresistible baked chicken wings requires a handful of simple yet powerful ingredients that come together to create a symphony of taste and texture. You’ll need fresh chicken wings, a robust BBQ rub (preferably homemade for superior flavor), a touch of vegetable oil to help achieve that coveted crisp, and a sprinkle of fresh parsley for a vibrant finish. Each ingredient plays a crucial role in delivering a truly memorable wing experience.
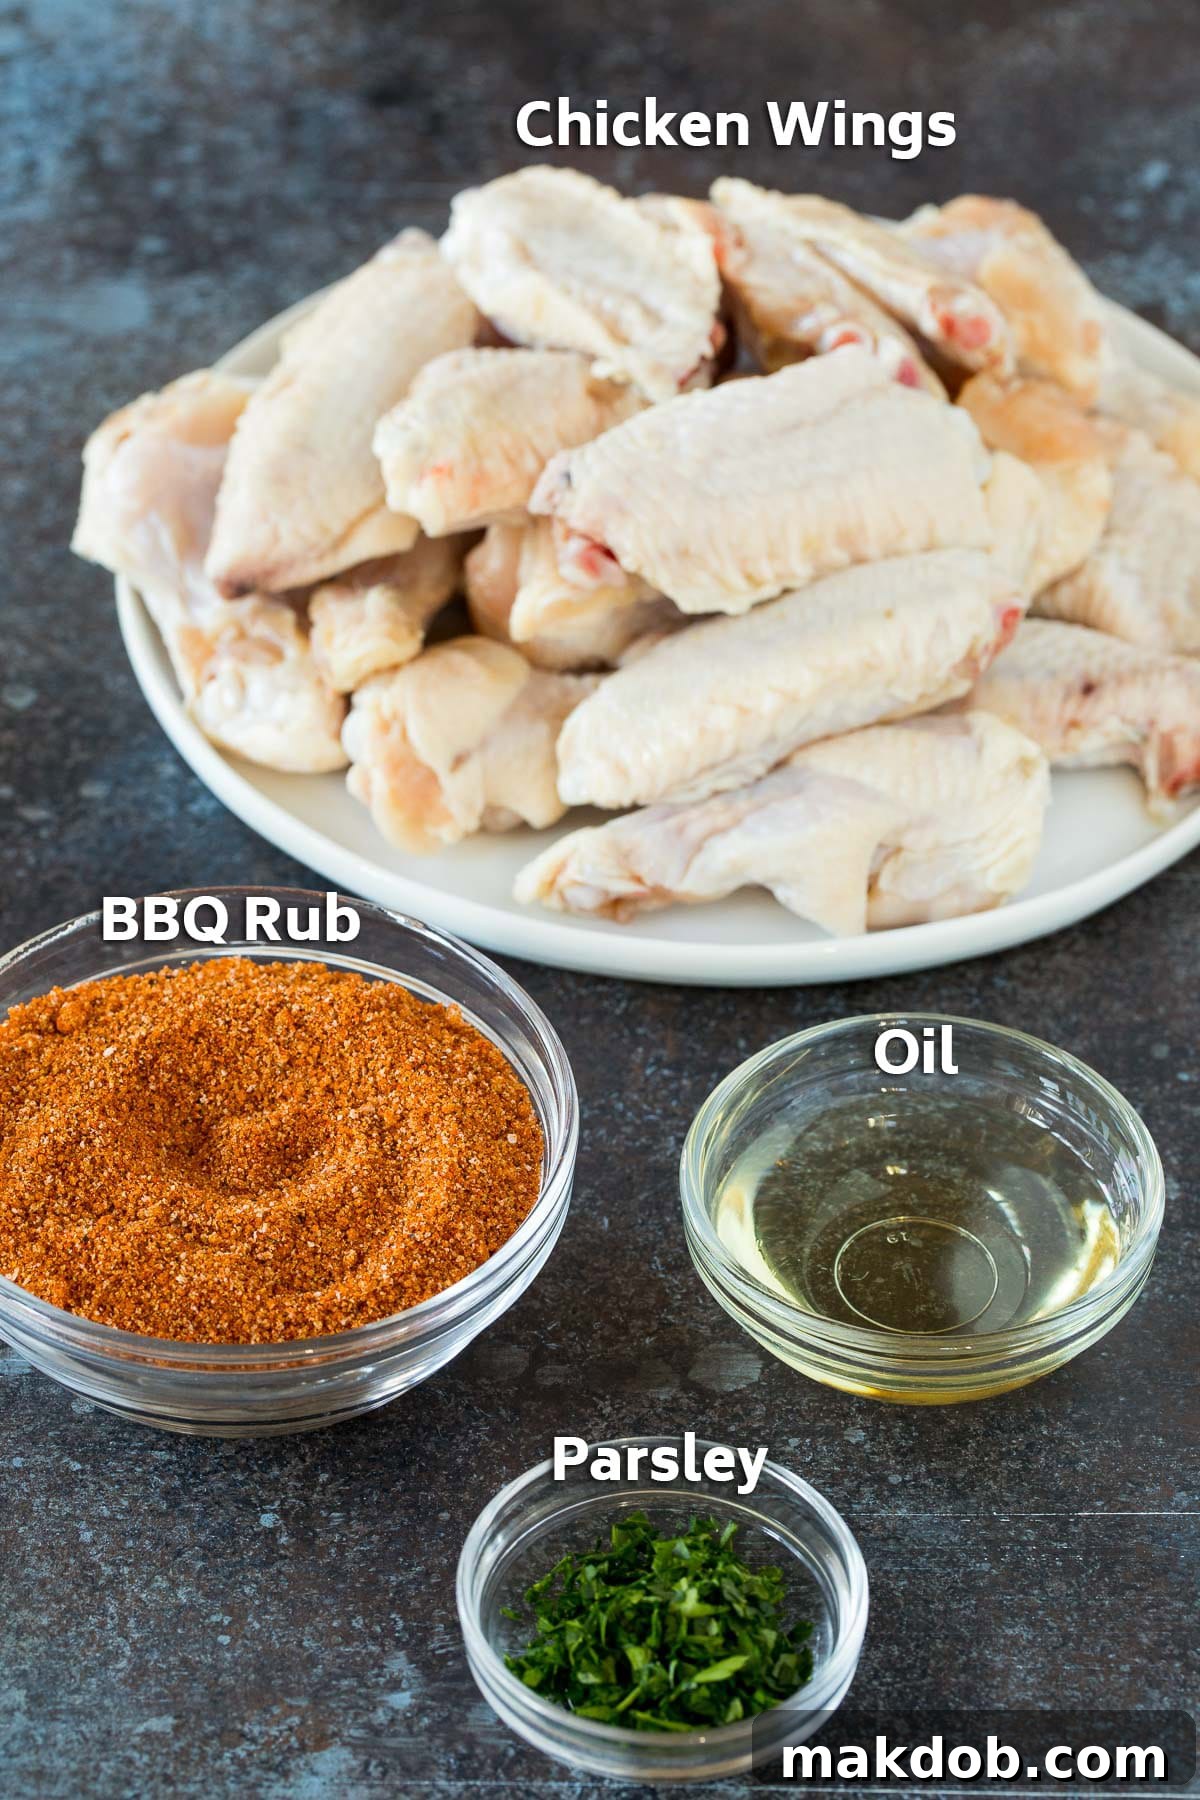
- Chicken Wings: The star of our dish. Opt for “party style” wings if available, as they come pre-separated into drumettes and wingettes, saving you prep time. If using whole wings, a quick cut through the joints is all it takes.
- BBQ Rub: This is where the magic happens. A good quality BBQ rub, whether homemade or store-bought, provides the foundational flavor profile. Our recommended homemade rub features a blend of salt, garlic powder, paprika, black pepper, and onion powder, offering a perfect balance of savory and aromatic notes.
- Vegetable Oil: A small amount of vegetable oil is key for two reasons: it acts as a binder, helping the spice rub adhere perfectly to the wings, and it contributes significantly to developing that desirable crispy skin during baking.
- Fresh Parsley: An optional but highly recommended garnish. A sprinkle of freshly chopped parsley adds a pop of color and a touch of herbaceous freshness that brightens the rich flavors of the wings.
Step-by-Step Guide to Baking Perfect Wings
Achieving perfectly crispy, tender, and flavor-packed baked chicken wings is surprisingly simple with this straightforward method. The key steps involve proper preparation, even seasoning, and baking at the right temperature to ensure maximum crispiness without drying out the meat. Follow these instructions for guaranteed success:
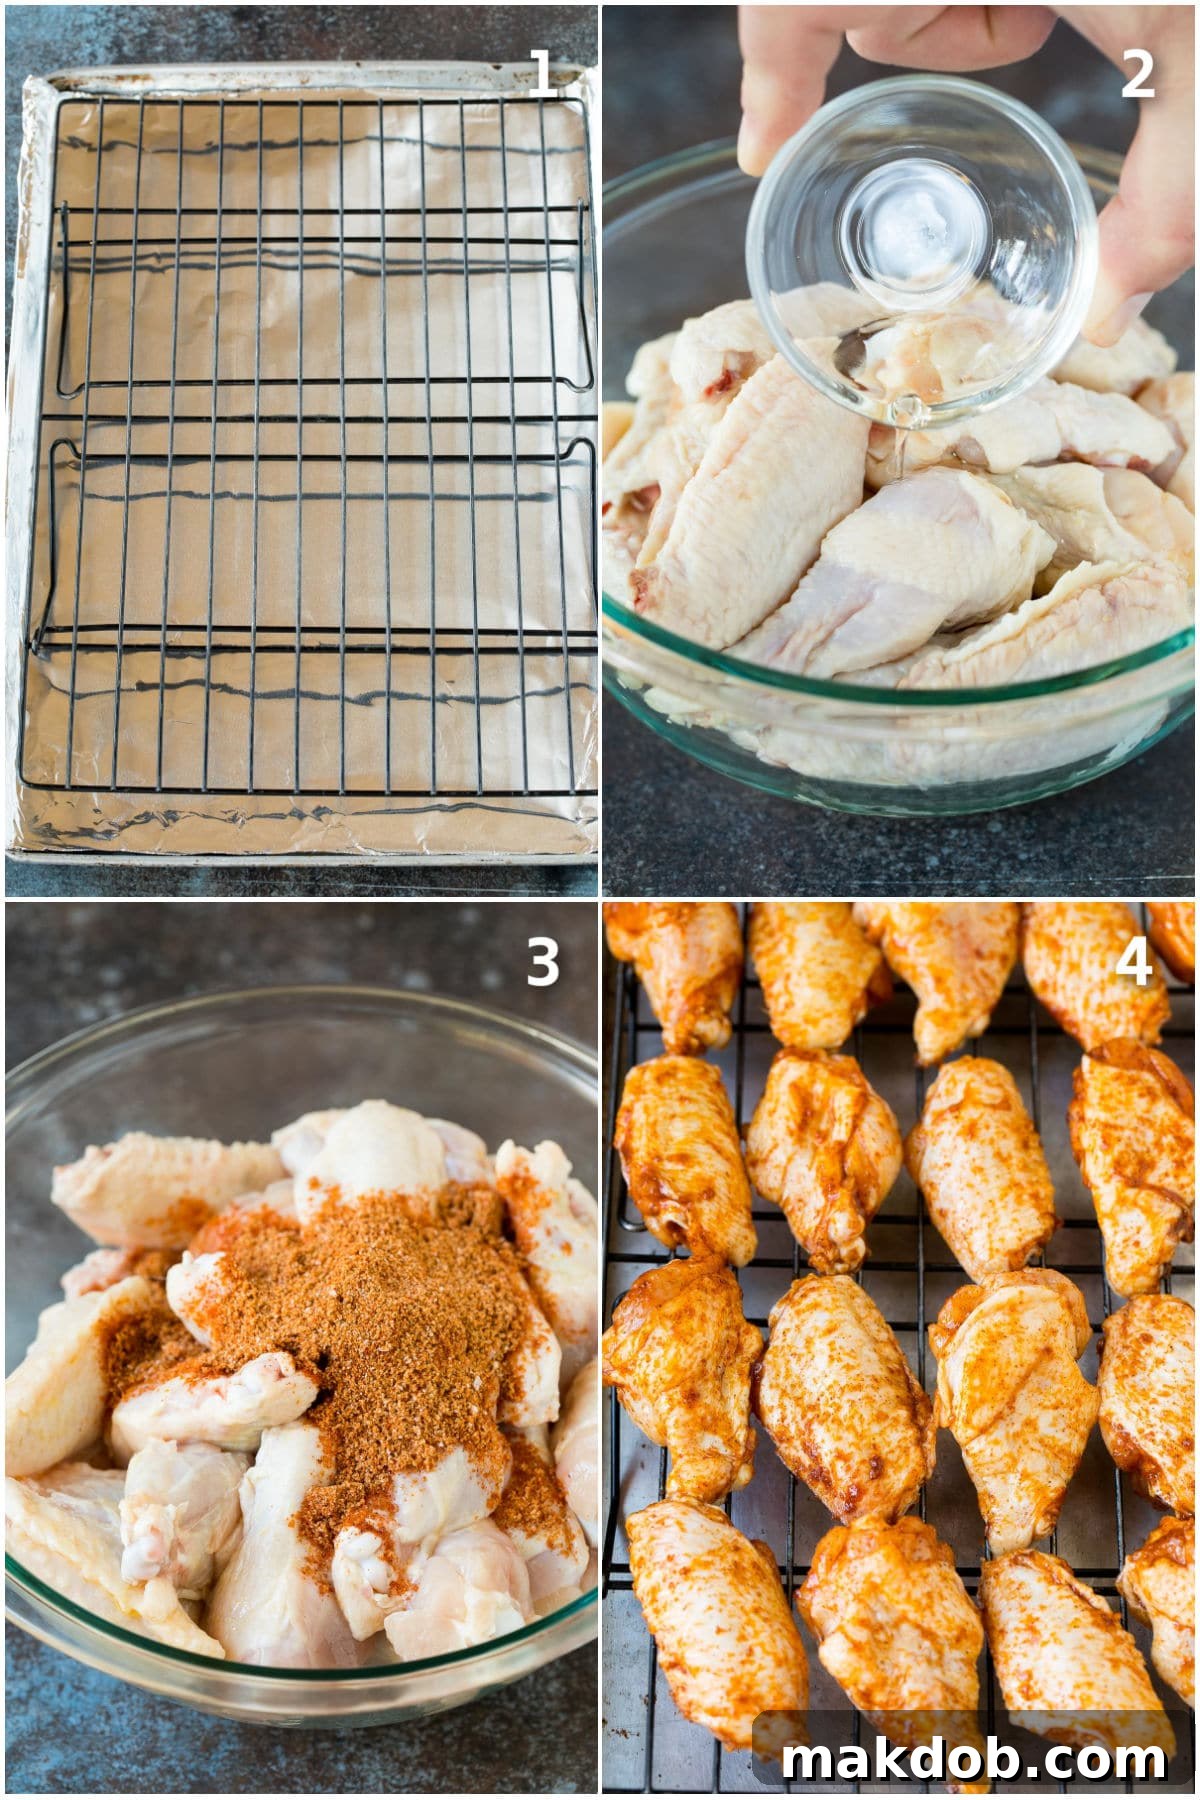
- Prepare Your Baking Setup: Begin by preheating your oven to a high temperature, ideally 400 degrees F (200 degrees C). Line a sturdy baking sheet or sheet pan with aluminum foil for easier cleanup. Crucially, place an oven-safe wire rack on top of the foil-lined pan. This setup is vital for allowing hot air to circulate around the entire surface of each wing, preventing them from sitting in their own rendered fat and steaming, which would result in soggy wings. Lightly coat the wire rack with cooking spray to prevent sticking.
- Oil the Wings: In a large mixing bowl, add your raw chicken wings. Drizzle them with a small amount of vegetable oil. Toss the wings thoroughly to ensure each piece is lightly and evenly coated. This oil layer is essential; it not only helps the dry rub stick but also promotes the development of a beautifully crisp skin during the baking process.
- Season with Flavor: Once the wings are oiled, add the BBQ spice rub to the bowl. Again, toss the wings meticulously until every surface is completely covered with the seasoning blend. Don’t be shy – a generous coating of rub is what gives these wings their incredible flavor and helps form a delicious crust.
- Arrange on the Rack: Carefully arrange the seasoned chicken wings in a single layer on the prepared wire rack. Ensure there is adequate space between each wing. Overcrowding the pan can lead to steaming, which is the enemy of crispy wings. Proper spacing allows for optimal air circulation and even cooking.
- Bake to Perfection: Transfer the baking sheet with the arranged wings to your preheated oven. Bake for approximately 45 minutes, or until the wings are gloriously crispy, deep golden brown, and cooked through. The internal temperature of the chicken should reach 165 degrees F (74 degrees C). Halfway through the baking time, you may optionally flip the wings to ensure even crisping on both sides.
- Garnish and Serve: Once baked to your desired crispiness, carefully remove the wings from the oven. For an added touch of freshness and visual appeal, sprinkle them with a tablespoon of freshly chopped parsley. Serve immediately with your favorite dipping sauces and enjoy!
Expert Tips for Maximum Crispiness & Flavor
Achieving the ultimate crispy, juicy, and flavorful baked chicken wings is an art, but one that’s easily mastered with a few key techniques. These expert tips will elevate your wing game, ensuring every batch is a resounding success:
- Homemade BBQ Rub is a Game-Changer: While store-bought rubs are convenient, nothing quite compares to a homemade BBQ rub. It takes mere minutes to mix together and allows you to control the quality and balance of flavors. Our signature homemade blend typically includes staples like salt, garlic powder, paprika (smoked paprika for extra depth!), black pepper, and onion powder, creating a multi-dimensional flavor profile that’s hard to beat. If time is truly of the essence, select a high-quality, low-sugar store-bought blend.
- Pat Your Wings Dry: This might seem like a small detail, but it’s incredibly important. Excess moisture on the chicken skin is the primary enemy of crispiness. Before adding any oil or seasoning, thoroughly pat the wings dry with paper towels. The drier the skin, the crispier your wings will be.
- Opt for “Party Style” Wings: To save valuable prep time, look for chicken wings labeled “party style” at your grocery store. These wings come pre-separated into drumettes and wingettes, ready for seasoning and baking. If you purchase whole wings, separating them yourself is straightforward (see “How to Cut Chicken Wings” section below).
- Don’t Skip the Oil: Always coat your wings in a light layer of vegetable oil before applying the barbecue rub. This not only acts as an adhesive, helping the spices stick uniformly to the chicken, but also creates a protective barrier for the seasonings, preventing them from burning at high temperatures. Most importantly, the oil is crucial for rendering out fat and creating that coveted golden, crispy skin.
- The Power of the Wire Rack: Baking wings directly on a flat baking sheet often leads to soggy bottoms because the wings sit in their own rendered fat and juices. Using a wire rack set over a foil-lined baking sheet allows air to circulate completely around each wing, ensuring even cooking and crisping on all sides. Any fat that renders out drips onto the foil below, keeping the wings dry and roasted rather than steamed.
- Avoid Overcrowding the Pan: Give your wings plenty of space! Arrange them in a single layer on the wire rack without any pieces touching. Overcrowding lowers the overall temperature of the pan, traps moisture, and inhibits air circulation, all of which contribute to less crispy results. If necessary, use two baking sheets.
- Consider a Broiler Finish (Optional): For an extra layer of crispiness, especially if your wings aren’t as golden as you’d like, you can briefly finish them under the broiler. After baking, carefully place the baking sheet under a preheated broiler for 1-3 minutes, watching them continuously to prevent burning.
- Serve Immediately for Best Results: Baked chicken wings are at their absolute best when served fresh out of the oven, when the skin is maximally crispy. While leftovers are delicious, the skin will soften. Store any remaining wings in an airtight container in the refrigerator for up to 3 days. Reheat them in a 400-degree F (200 degrees C) oven for 10-15 minutes to re-crisp.
Quick Flavor Customization Ideas
Beyond BBQ, you can easily customize the flavor profile of your baked wings by experimenting with different seasoning blends. Simply swap out the BBQ rub for other exciting options like Jamaican jerk seasoning for a spicy, vibrant kick, Creole seasoning for bold, savory notes, blackened seasoning for a smoky char, or taco seasoning for a Tex-Mex twist. The possibilities are endless!
Mastering Wing Preparation: How to Cut Chicken Wings
While many grocery stores offer pre-cut chicken wings, often labeled “party wings” or “wingettes and drummettes,” knowing how to cut whole wings yourself can save you money and ensure you always have the right pieces for your recipe. Party wings are ideal for this recipe as they cook more evenly and are easier to eat. However, if you purchase whole wings, separating them is a simple task that requires just a sharp knife or a pair of kitchen shears.
A whole chicken wing is typically composed of three sections: the drumette, the wingette (or flat), and the wing tip (or flapper). The “drumette” resembles a miniature drumstick and connects to the main part of the chicken. The “wingette” is the flat, middle section containing two parallel bones, offering more surface area for crisping. The “wing tip” is the smallest, pointy end. While some recipes call for using the wing tips, they contain very little meat and are often discarded or saved to make flavorful chicken stock.
Step-by-Step Guide to Cutting Whole Wings:
- Locate the Joints: Hold a whole wing in your hand and carefully feel for the two joints that connect the three sections. The first joint separates the drumette from the wingette, and the second separates the wingette from the wing tip.
- Separate the Drumette from the Wingette:
- Hold the drumette in one hand and the wingette in the other.
- Gently bend the wing at the joint where these two sections meet. You’ll often hear or feel a slight snap, indicating the joint has loosened.
- Using sharp kitchen shears or a sharp knife, carefully cut through the joint. Aim to cut through the soft connective tissue, avoiding the bone. If you encounter resistance, adjust your angle slightly.
- Separate the Wingette from the Wing Tip:
- Now take the wingette and the wing tip.
- Bend the wingette back at the joint where it meets the wing tip, similar to the first cut.
- Cut through this joint with your shears or knife. The wing tip can be discarded or reserved for stock.
You should now have perfectly separated drumettes and wingettes, ready to be seasoned and baked into crispy perfection!
Frequently Asked Questions (FAQs)
The ultimate trick to achieving exceptionally crispy baked chicken wings lies in a combination of high heat and proper air circulation. First, ensure your oven is preheated to at least 400 degrees F (200 degrees C) to create a hot environment for roasting. Second, and most importantly, bake your wings on a wire rack set over a foil-lined baking sheet. This setup allows hot air to circulate all around each wing, preventing them from sitting in any rendered fat or moisture. As the fat renders and drips away, the wings roast rather than steam, resulting in a perfectly crispy exterior. Patting the wings dry before seasoning also helps immensely.
For crispy, golden-brown chicken wings, you’ll typically cook them in an oven preheated to 400 degrees F (200 degrees C) for approximately 45 minutes to 1 hour. The exact time can vary slightly depending on the size of your wings and your oven’s calibration. It’s crucial to keep an eye on them, especially towards the end of the cooking time, to ensure the seasoning doesn’t burn or blacken. The wings are done when they are deeply golden, crispy, and the internal temperature reaches 165 degrees F (74 degrees C).
No, you should absolutely not cover chicken wings when baking them in the oven, particularly if your goal is crispy skin. Covering the wings traps steam and moisture, effectively steaming them rather than roasting. This will result in soft, rubbery skin and prevent them from developing that desirable golden, crispy texture. Always bake chicken wings uncovered on a wire rack for optimal crispiness.
For dry-rubbed baked chicken wings like this recipe, no sauce is applied during or after baking, as the rub provides all the flavor. However, if you wanted to add a wet sauce (like buffalo, BBQ, or honey garlic), it’s generally best to brush it on towards the very end of the baking time, typically during the last 5-10 minutes, or after the wings have come out of the oven. Applying sauce too early in the baking process, especially if it contains sugar, can cause it to burn or become sticky before the wings are fully cooked and crispy. For maximum crispiness, many prefer to serve sauces on the side for dipping.
FOLLOW ME
Creative Flavor Variations for Your Baked Wings
While our signature BBQ rub creates truly outstanding baked chicken wings, this recipe is incredibly adaptable, allowing you to customize the flavors to suit any craving or occasion. Experiment with these exciting variations to keep your wing game fresh and exciting:
- Spicy Sensation: For those who love a fiery kick, simply amp up the heat by adding extra cayenne pepper to your BBQ rub. You can also incorporate a pinch of chili powder or smoked paprika for deeper, more complex spicy notes. A drizzle of hot sauce after baking is another easy way to add a customizable level of heat.
- Buttery Richness: If you prefer a richer, more indulgent flavor profile, swap out the vegetable oil for melted unsalted butter. Butter will impart a luscious, savory depth to the wings. When using butter, consider reducing the oven temperature slightly to 350 degrees F (175 degrees C) and baking for a few extra minutes (approximately 50-60 minutes total) to ensure the butter doesn’t burn while the wings cook through.
- Italian Herb Infusion: Transport your taste buds to the Mediterranean by seasoning your wings with a vibrant Italian seasoning blend instead of BBQ rub. We recommend using about 2 teaspoons of Italian seasoning for every 3 pounds of wings. Don’t forget to add salt and freshly ground black pepper to taste. The aromatic herbs like oregano, basil, thyme, and rosemary will create a beautifully fragrant and savory wing.
- Cajun Zing: For a bold and zesty experience with a hint of Southern flair, liberally season your wings with authentic Cajun seasoning. This robust blend typically includes paprika, cayenne pepper, garlic powder, onion powder, and dried herbs, delivering a spicy, earthy, and highly addictive flavor.
- Zesty Lemon Pepper: For a bright and tangy alternative, coat your wings in a generous amount of good quality lemon pepper seasoning. The citrusy notes beautifully complement the savory chicken, making for a refreshing yet satisfying wing.
- Garlic Parmesan Perfection: After baking, toss your crispy wings with a mixture of melted butter, minced garlic, and grated Parmesan cheese for a classic and utterly delicious Garlic Parmesan Wing. The sharp, salty cheese and pungent garlic create an irresistible coating.
The Best Dips & Serving Suggestions
While these baked chicken wings are incredibly flavorful on their own, serving them alongside a variety of delicious dips and fresh sides can elevate the experience even further. Dips offer an extra layer of flavor and moisture, allowing your guests to customize each bite to their preference. The contrast of cool, creamy dips with hot, crispy wings is always a winning combination.
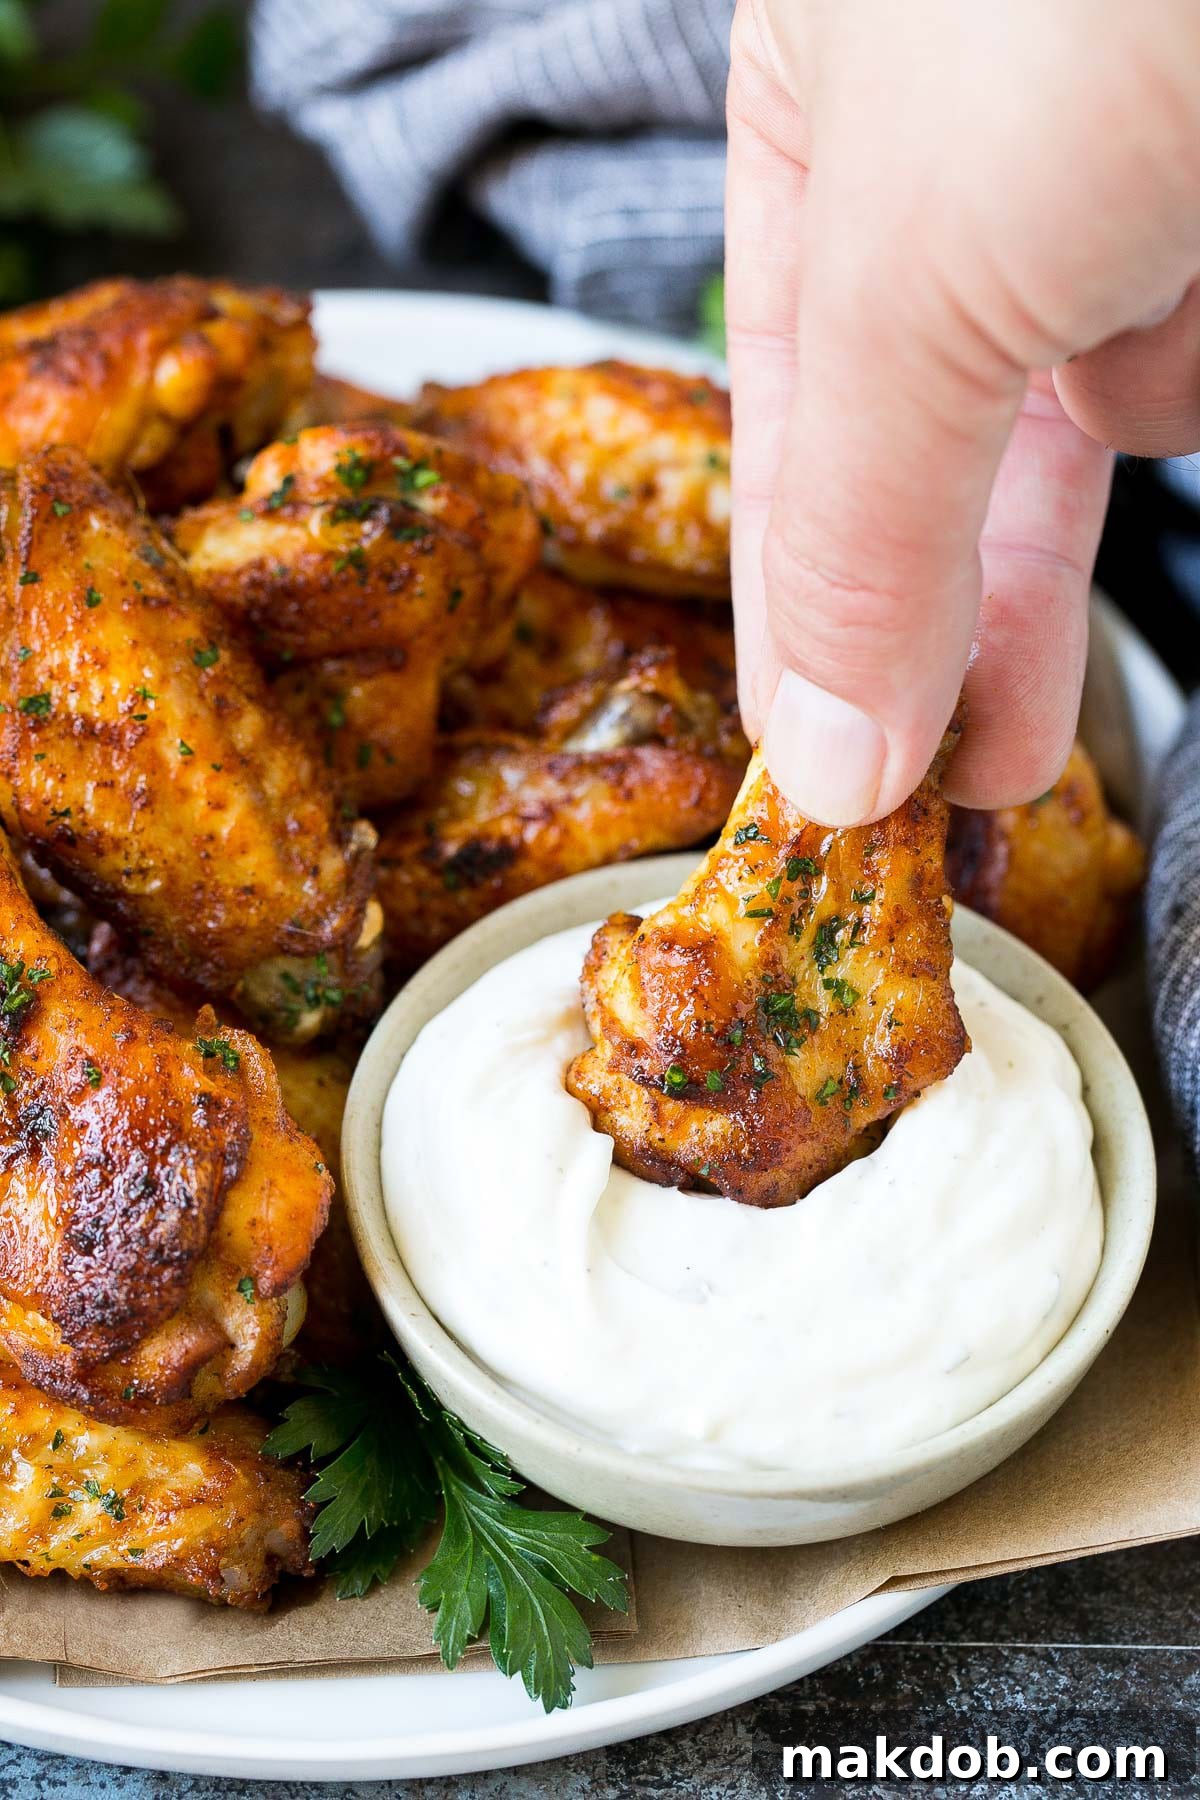
- Classic Ranch Dressing: A perennial favorite, homemade ranch dressing offers a creamy, herbaceous, and tangy counterpoint that pairs perfectly with the savory notes of BBQ wings. Its cool creaminess is incredibly refreshing.
- Robust Blue Cheese Dressing: For those who appreciate a bolder flavor, a rich and pungent blue cheese dressing provides a sharp, savory kick that stands up beautifully to the wings’ seasoning.
- Sweet and Tangy BBQ Sauce: If you love a saucy wing, offer a side of homemade BBQ sauce for dipping. Its sweet, tangy, and smoky profile complements the rub and adds a luscious texture.
- Creamy Pesto Dip: For a unique and vibrant twist, a flavorful creamy pesto dip offers bright, herbaceous notes that are surprisingly delicious with the rich chicken.
- Spicy Buffalo Sauce: A classic choice for any wing lover, a side of zesty buffalo sauce allows guests to add a customizable level of heat and tang to their wings.
- Fresh Vegetable Sticks: Always balance out the richness of the wings and dips with refreshing, crunchy vegetables. Serve your wings with an ample supply of crisp carrot sticks and cool celery sticks. These provide a welcome crunch and a palate cleanser between bites.
Whether you’re hosting a party, enjoying a casual meal, or simply craving a satisfying snack, these delicious crispy chicken wings, straight out of your oven, are guaranteed to impress. This seasoned and savory recipe provides an excellent foundation for a versatile dish that everyone will love.
More Delicious Chicken Recipes to Explore
Greek Chicken and Potatoes
Huli Huli Chicken
Fried Chicken Wings
Mediterranean Chicken
Braised Chicken with Carrots and Potatoes
Love this Recipe?
Please share your experience in the comments section further down the page!
Baked Chicken Wings
Sara Welch
10
45
55
Appetizer
American
6
Ingredients
- 3 pounds chicken wings party style, or separate the wingettes and drumettes yourself
- 1/3 cup BBQ Spice Rub homemade or store bought
- 2 tablespoons vegetable oil
- cooking spray
- 1 tablespoon chopped parsley optional
Instructions
-
Preheat the oven to 400 degrees F. Line a sheet pan with foil and place an oven safe rack on top of the foil. Coat the rack with cooking spray.
-
Place the chicken wings in a large bowl along with the oil. Toss to coat evenly.
-
Add the spice rub to the bowl. Toss the wings with the spice rub until they’re coated.
-
Arrange the chicken wings in a single layer on the rack.
-
Bake for 45 minutes or until crispy and golden brown. Top with parsley, then serve.
Notes
- I highly recommend using homemade barbecue rub. It takes just minutes to put together, and can be used in so many different ways. If you don’t have enough time to make your own rub, feel free to use your favorite store bought spice blend.
- To save time, look for “party style” wings which have the wingettes and the drummettes already separated.
Nutrition
Protein: 22g |
Fat: 20g |
Saturated Fat: 9g |
Cholesterol: 94mg |
Sodium: 89mg |
Potassium: 191mg |
Vitamin A: 180IU |
Vitamin C: 0.8mg |
Calcium: 15mg |
Iron: 1.2mg