

You can never go wrong with apples and caramel, whether it’s snicker apple salad, apple nachos, caramel apple dip or these classic caramel coated apples.

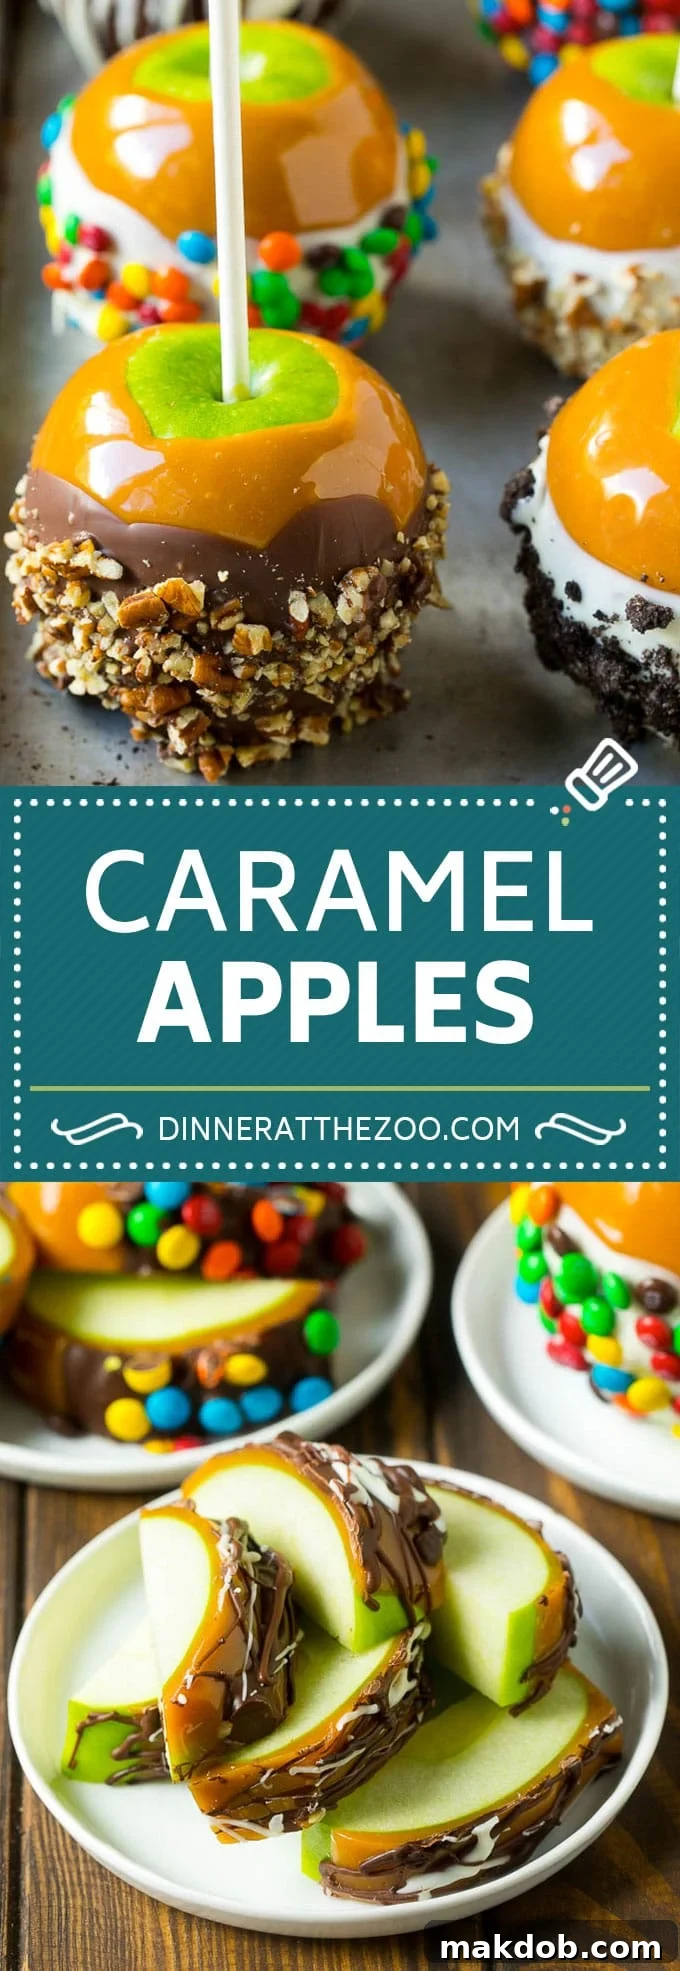

Irresistible Homemade Caramel Apples: Your Ultimate Guide to Gourmet Dipped Treats
Embrace the delightful charm of fall with a timeless treat that captures hearts and taste buds: homemade caramel apples. These impressive gourmet desserts, often seen gracing candy shop windows, are surprisingly simple to craft right in your own kitchen. Picture crisp, juicy apples enrobed in a luscious layer of sweet, chewy caramel, then generously dipped in rich melted chocolate and adorned with your favorite toppings like crunchy nuts or colorful candies. Perfect for festive gatherings, thoughtful gifts, or simply a delicious indulgence, these caramel apples are a celebration of flavor and texture that truly shine.
There’s an undeniable magic that happens when crisp apples meet decadent caramel. It’s a flavor combination that has inspired countless beloved treats, from vibrant Snickers Apple Salad to inventive Apple Nachos and the communal joy of Caramel Apple Dip. But for many, the classic caramel apple, with its elegant presentation and satisfying crunch, remains the ultimate expression of this perfect pairing. Forget the expensive store-bought versions; this guide empowers you to create stunning, bakery-quality caramel apples at a fraction of the cost, making them a truly rewarding culinary project.
Why Craft Your Own Gourmet Caramel Apples?
Making caramel apples at home isn’t just about saving money; it’s about unlocking a world of creative possibilities and enjoying a fun, hands-on experience. Here’s why homemade truly triumphs:
- **Cost-Effective Indulgence:** Gourmet caramel apples can fetch a hefty price at specialty stores. By making them yourself, you can produce a generous batch for the cost of one or two purchased apples.
- **Unleash Your Creativity:** From the type of apple to the endless array of toppings, you have complete control over every element. Personalize each apple to suit individual tastes, dietary preferences, or themed events.
- **Fresher, Finer Ingredients:** Choose the freshest, crispest apples and premium quality caramel and chocolate. You know exactly what goes into your treats, ensuring a superior taste experience.
- **A Fun Family Activity:** Dipping and decorating caramel apples is a wonderful activity for all ages. Kids love to get involved in choosing toppings and creating their own edible masterpieces.
- **Impressive Gifts & Party Favors:** Beautifully wrapped homemade caramel apples make unforgettable gifts for teachers, neighbors, or hosts, and they serve as show-stopping desserts or party favors at any gathering.
Choosing the Perfect Apple for Dipping
The foundation of any great caramel apple is, naturally, the apple itself. Selecting the right variety is crucial for achieving that delightful balance of sweet, tart, and crunchy. While many apples can work, certain types hold up better to the dipping process and offer a superior flavor profile.
- **Granny Smith:** Our top recommendation! These bright green apples are famously tart and incredibly crisp, providing a fantastic contrast to the sweet caramel and chocolate. Their firm texture ensures they won’t become mushy under the coatings.
- **Fuji:** A sweet and juicy apple with a firm, crisp texture. Fujis offer a milder tartness than Granny Smiths, making them a great choice if you prefer a sweeter overall flavor.
- **Honeycrisp:** Known for its explosive crispness and sweet-tart flavor, the Honeycrisp is another excellent contender. Its juicy flesh holds up well and provides a satisfying crunch.
- **Braeburn:** These apples are known for their firm texture and a good balance of sweetness and tartness, making them versatile for many applications, including caramel apples.
- **Gala:** A popular choice for its mild, sweet flavor and firm texture. Galas are widely available and are a crowd-pleaser for those who enjoy a less tart apple.
- **Pink Lady (Cripps Pink):** Offering a delightful crunch and a unique sweet-tart flavor with floral notes, Pink Lady apples are a beautiful and delicious option.
Regardless of your chosen variety, always select firm, blemish-free apples. The freshest apples will give you the best results, ensuring that satisfying crisp bite beneath the sweet coatings.
Essential Preparation for Flawless Caramel Apples
Before you even think about dipping, proper apple preparation is key to ensuring your caramel coating adheres perfectly and stays put. This critical step prevents frustrating sliding and uneven layers.
Removing Apple Wax
Most commercially grown apples are coated with a thin layer of food-grade wax to protect them during transit and enhance their appearance. While harmless to eat, this wax acts as a barrier, making it difficult for caramel to stick. Here’s how to remove it effectively:
- **Hot Water Scrub:** Place each apple under very hot running tap water. Use a clean, soft-bristled brush (like a vegetable brush or a clean toothbrush dedicated to kitchen tasks) to thoroughly scrub the entire surface of the apple. The hot water will soften and melt the wax, while the brush helps to dislodge it.
- **Thorough Drying:** After scrubbing, immediately dry each apple thoroughly with a clean, lint-free towel. Any moisture left on the apple will prevent the caramel from adhering properly.
By taking these few extra minutes, you ensure a perfectly smooth and adhesive surface for your caramel, guaranteeing a beautiful, even coating.
Inserting the Sticks
Once your apples are clean and dry, it’s time to insert the sticks. Remove the natural stem from each apple. Gently push a lollipop stick, wooden craft stick, or sturdy skewer into the stem end of each apple, pressing about halfway down. Choose sticks that are robust enough to support the weight of the apple and its coatings.
Chilling for Success
While not strictly necessary before the first caramel dip, lightly chilling your prepared apples (after cleaning and stoning) for about 15-30 minutes can help the caramel set more quickly once applied. This also applies after each layer of coating.
Crafting the Perfect Caramel Coating
The thought of making caramel from scratch can be daunting, often requiring precise temperatures and specialized equipment like a candy thermometer. However, this recipe takes all the guesswork out by utilizing a fantastic shortcut: store-bought caramels. This simple trick makes homemade caramel apples truly foolproof!
The Easy Caramel Method
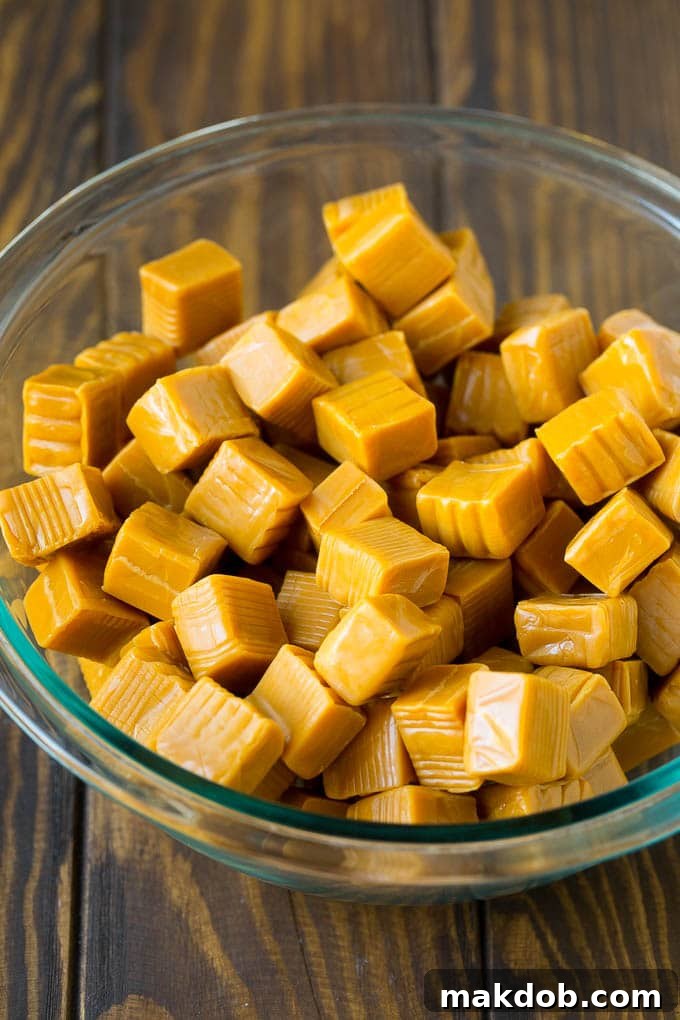
- **Gather Your Caramels:** Start with an 11-ounce package of individually wrapped caramels. Unwrapping them is the most time-consuming part of this step, so put on some music or enlist a helper!
- **Melt with Cream:** Place the unwrapped caramels in a large, microwave-safe bowl. Add 2 tablespoons of heavy cream (or water, though cream provides a richer texture). The cream helps create a smooth, dippable consistency.
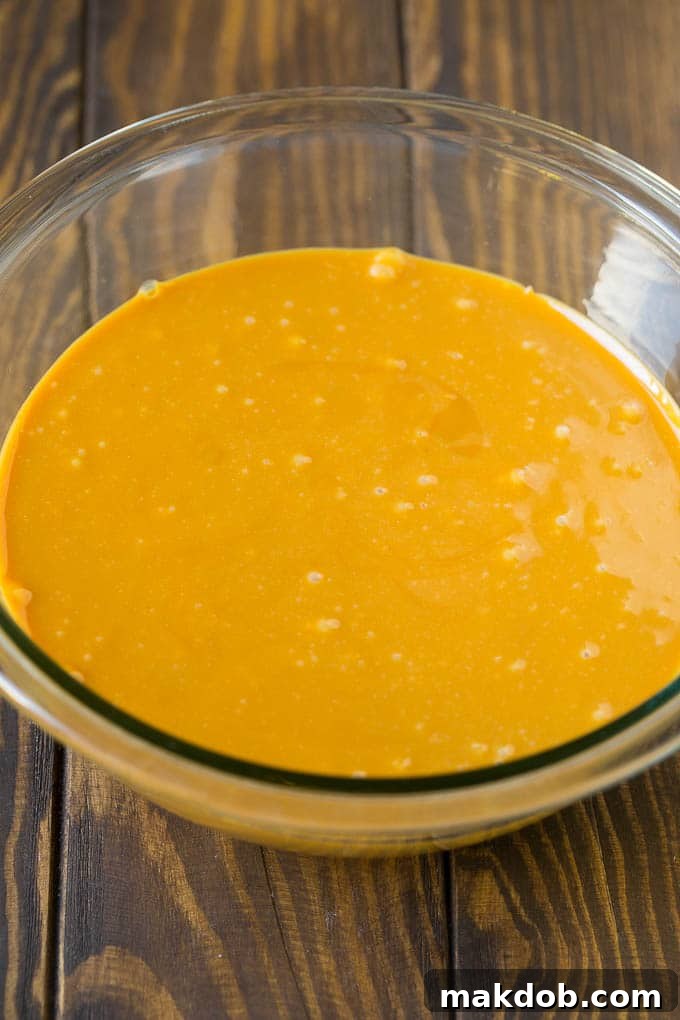
- **Microwave and Stir:** Microwave the caramels and cream for 1 minute. Remove and stir thoroughly. Continue microwaving in short 10-20 second intervals, stirring well after each, until the caramel is completely smooth and free of lumps. Be patient and avoid over-microwaving, as this can cause the caramel to seize or burn.
The goal is a caramel that is warm, fluid, and perfectly smooth for dipping. If it starts to thicken too much during the dipping process, a quick 10-20 second reheat in the microwave will bring it back to the ideal consistency.
The Art of Dipping and Decorating
Now for the fun part! This is where your homemade caramel apples transform into true gourmet masterpieces. With a little technique and a lot of imagination, you can create treats that rival any professional candy shop.
Caramel Dipping Technique
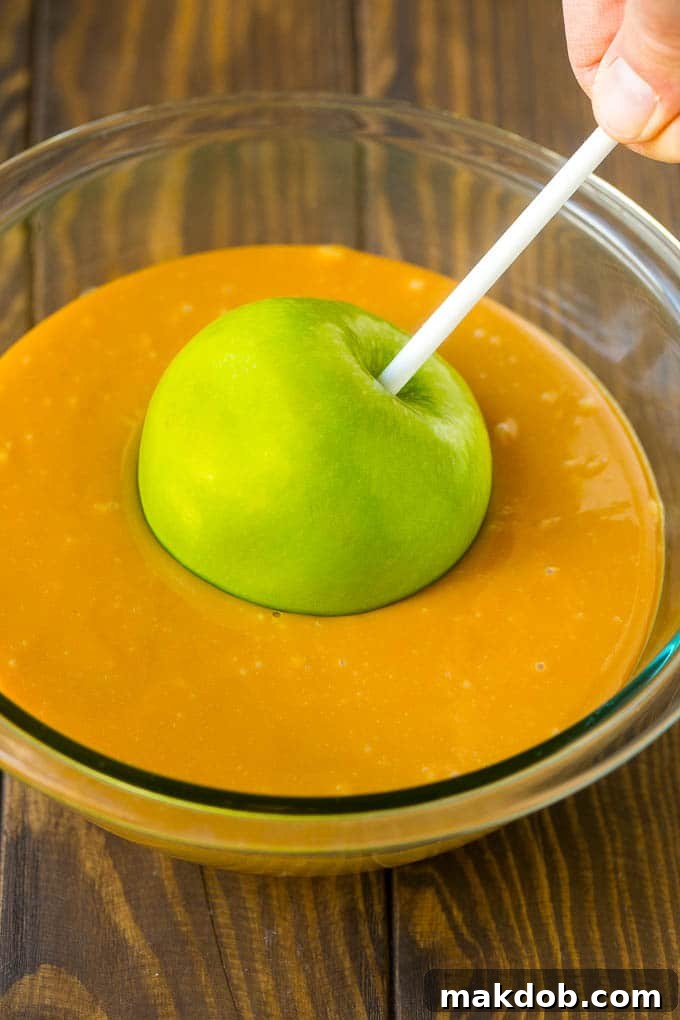
- **Dip Deep:** Hold the apple by its stick and immerse it into the warm, melted caramel, rotating to ensure an even coating. Don’t go too far up the stick, leave some room.
- **Scrape Excess:** Gently lift the apple from the caramel. Hold it over the bowl and allow any excess caramel to drip back into the bowl. You can also lightly scrape the bottom edge of the apple against the rim of the bowl to remove drips, creating a neater finish.
- **Chill to Set:** Place each caramel-coated apple on a baking sheet lined with wax paper or parchment paper. Chill in the refrigerator for about 30 minutes, or until the caramel is firm to the touch. This step is crucial for preventing the chocolate layer from melting the caramel.
The Chocolate Layer
Adding a chocolate layer elevates your caramel apples from delicious to truly decadent. For best results, consider using candy melts over traditional chocolate chips.
- **Candy Melts vs. Chocolate Chips:** While chocolate chips can be used, candy melts (also known as melting wafers) are typically easier to work with. They melt into a thinner, smoother consistency, making for a beautiful, even coating. They also dry quickly and resist developing the gray “bloom” that can sometimes appear on chocolate chips as they cool. Brands like Ghirardelli melting wafers offer a fantastic chocolate flavor.
- **Melting Chocolate:** Place your chocolate chips or candy melts (about 1.5 cups) in a microwave-safe bowl. Microwave in 30-second intervals, stirring thoroughly after each, until completely smooth. Stirring is key to prevent scorching and ensure even melting.
- **Chocolate Dipping:** Once the caramel layer is firm, dip each apple halfway (or fully, if preferred) into the melted chocolate. Let any excess chocolate drip off.
Topping Extravaganza
This is where your creativity truly shines! Have your chosen toppings ready in shallow bowls before you start dipping the chocolate, as the chocolate will set quickly.
The possibilities are endless. Here are some popular and delicious ideas:
- **Nuts:** Finely chopped peanuts, pecans, walnuts, almonds, or cashews.
- **Cookies:** Crushed Oreo cookies, graham crackers, Biscoff cookies, or shortbread.
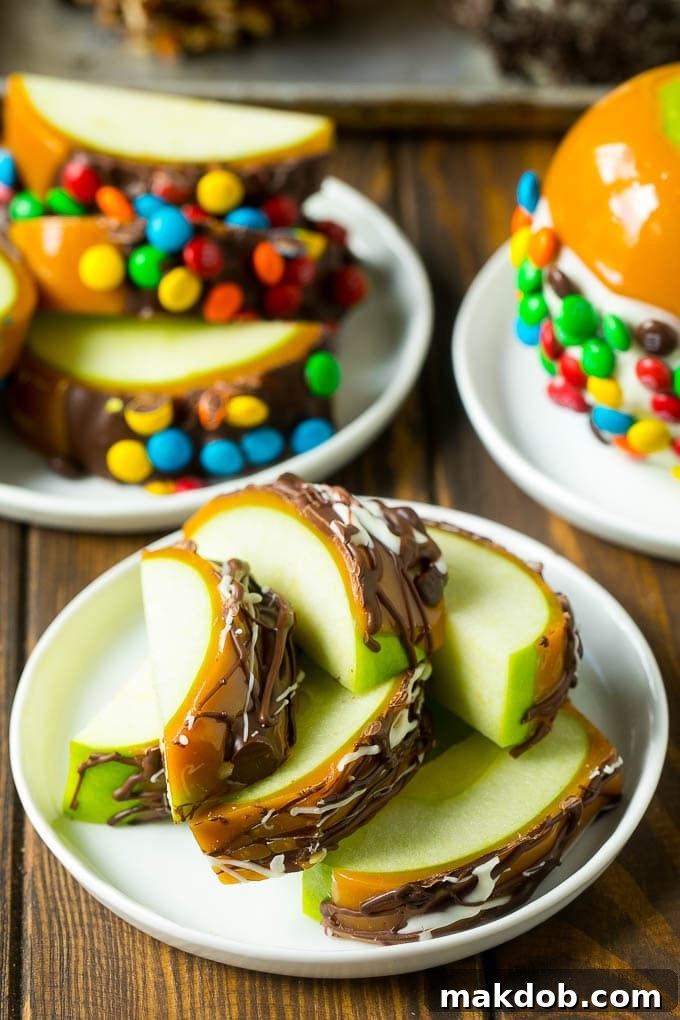
- **Candies:** Mini M&M’s, Reese’s Pieces, toffee bits, chopped peanut butter cups, crushed Butterfingers, or even gummy bears for a chewy contrast.
- **Sweet & Salty:** A sprinkle of flaky sea salt over the chocolate and caramel.
- **Coconut:** Toasted or plain shredded coconut.
- **Mini Marshmallows:** For a s’mores-like twist.
- **Drizzles:** After the toppings, you can drizzle additional melted white, dark, or milk chocolate in contrasting patterns for an extra artistic touch.
- **Cinnamon Sugar:** For a simpler, autumnal flavor.
To apply toppings, either roll the chocolate-dipped apple directly into a bowl of your desired topping, or gently sprinkle the toppings onto the chocolate while it’s still wet. Return the apples to the wax paper-lined baking sheet.
Once all your apples are dipped and decorated, chill them again in the refrigerator until all coatings are completely set, usually another 30-60 minutes.
Storage and Festive Presentation
Once your beautiful caramel apples are complete, proper storage ensures they remain fresh and delicious. If you’re planning to give them as gifts, a little extra care in wrapping can make all the difference.
How Long Do Caramel Apples Last?
Whole, fully coated caramel apples can be stored in the refrigerator for up to one week. To prevent them from sticking together or absorbing refrigerator odors, wrap each apple individually.
It’s important to note that once you cut into the apple, its flesh will begin to oxidize and turn brown when exposed to air. For this reason, it’s best to eat cut caramel apples right away. If serving at a party, slice them just before guests arrive or offer smaller, individual caramel apple slices on platters.
How to Wrap Caramel Apples Without Sticking
The trick to wrapping caramel apples without the sticky mess is to ensure the caramel and chocolate coatings are completely firm and chilled. Follow these steps:
- **Chill Thoroughly:** Ensure your caramel apples have been thoroughly chilled in the refrigerator for at least an hour after their final coating and toppings are applied. The cold temperature hardens the caramel, making it less prone to sticking.
- **Individual Wrapping:** Use clear cellophane bags or squares of food-grade cellophane wrap. Loosely wrap each apple, gathering the cellophane at the top around the stick.
- **Tie with a Ribbon:** Secure the gathered cellophane with a festive ribbon, string, or twist tie. This not only keeps the apple fresh but also adds a decorative touch, perfect for gift-giving or party presentation.
These individually wrapped treats are ideal for holiday baskets, birthday party favors, or simply storing in your fridge for a delightful snack throughout the week.
Caramel Apples
Pin
Sara Welch

15 minutes
2 minutes
17 minutes
Dessert, Snack
American
4
Ingredients
- 4 lollipop or wooden craft sticks
- 4 Granny Smith apples stems removed
- 11 ounce package of caramels unwrapped
- 2 tablespoons heavy cream can also use water
- 1 1/2 cups chocolate chips or candy melts white, dark or milk chocolate, or a combination
- 1 cup assorted toppings such as chopped nuts and candies
Instructions
-
Scrub each apple under very hot running water to remove any wax coating. Dry each apple thoroughly.
-
Line a tray or baking sheet with wax paper. Insert 1 stick firmly into the stem end of each apple.
-
Microwave unwrapped caramels and heavy cream in a large, microwave-safe bowl for 1 minute; stir until smooth. Continue microwaving in additional 10- to 20-second intervals, stirring thoroughly after each, until the caramel is completely smooth and liquid for dipping.
-
Dip each apple into the melted caramel, rotating to coat evenly. Scrape any excess caramel from the bottoms by gently tapping and rotating the apple against the rim of the bowl.
-
Place each caramel-coated apple on the prepared baking sheet. Chill in the refrigerator until the caramel is fully set, about 30 minutes.
-
Heat the chocolate chips or candy melts in a microwave-safe bowl. Microwave in 30-second increments, stirring until completely melted and smooth.
-
Dip each chilled, caramel-coated apple halfway into the melted chocolate, allowing excess chocolate to drip off. Immediately roll each apple into your selected toppings while the chocolate is still wet.
-
Return the decorated apples to the baking sheet and chill again until all coatings are completely set. Serve immediately, or store covered in the refrigerator for up to one week.
Notes
Nutrition
Carbohydrates: 76g |
Protein: 3g |
Fat: 12g |
Saturated Fat: 1g |
Cholesterol: 4mg |
Sodium: 164mg |
Potassium: 336mg |
Fiber: 4g |
Sugar: 62g |
Vitamin A: 125IU |
Vitamin C: 8.7mg |
Calcium: 102mg |
Iron: 0.3mg
Did you make this recipe?
Tag @dinneratthezoo on Instagram and hashtag it #dinneratthezoo
Tweet
Pin
More Sweet Treats to Satisfy Your Cravings
If you loved making these gourmet caramel apples, be sure to explore more delightful homemade dessert recipes:
- Peanut Brittle
- Chocolate Covered Oreos
- Chocolate Peanut Butter Fudge
- Chocolate Covered Cherries
- Rocky Road Fudge
This post was originally published on October 5, 2016 and was updated on May 23, 2019 with new content.