

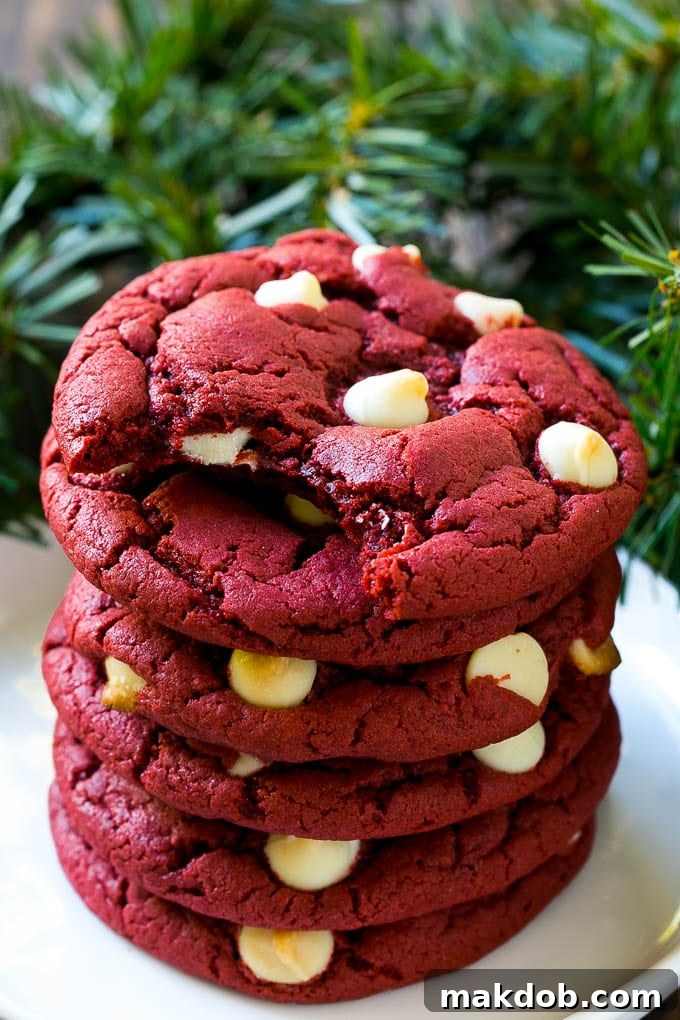
Indulge in the irresistibly soft, chewy, and vibrant delight of these easy Red Velvet Cookies. A true showstopper, each cookie boasts that classic red velvet flavor, infused with rich white chocolate chips, making them a perfect treat for any occasion. What’s the secret to their effortless preparation? They start with a simple cake mix, transforming baking into a quick, fun, and foolproof experience that yields spectacular results every time.
From festive holiday gatherings to romantic Valentine’s Day celebrations and everyday sweet cravings, these elegant red velvet cookies are a guaranteed crowd-pleaser. Their striking crimson hue and delicate flavor make them an instant favorite, adding a touch of sophistication to any dessert spread. Imagine serving these alongside other cherished festive dessert recipes, like decadent mint brownies, playful oreo stuffed cookies, sophisticated cake truffles, refreshing peppermint cookies, or charming Christmas tree brownies. For a romantic touch, they pair exquisitely with a homemade heart cake, creating an unforgettable experience.

Life can be busy, and sometimes, you crave a homemade treat without spending endless hours in the kitchen. This is where these unbelievably simple and chewy red velvet cookies shine. They are an eye-catching dessert that captivates everyone, whether it’s the festive season or a special everyday moment. The beauty of this recipe lies in its foundation: a convenient red velvet cake mix, which streamlines the baking process without compromising on flavor or texture. Prepare to impress with minimal effort!
Table of Contents
- The Allure of Red Velvet Cookies
- Why Choose Cake Mix for Cookies?
- Red Velvet Cookies Ingredients
- How Do You Make Red Velvet Cookies?
- Tips For The Perfect Dessert
- Quick Tip
- Troubleshooting Common Cookie Problems
- Recipe FAQs
- Flavor Variations
- Serving and Pairing Suggestions
- Storing and Freezing for Freshness
- More Cookie Recipes
- Love This Recipe?
- Red Velvet Cookies Recipe
The Allure of Red Velvet Cookies
Red velvet is more than just a flavor; it’s an experience. Originating from the Southern United States, traditional red velvet cake is renowned for its tender crumb, subtle cocoa notes, and the iconic deep red hue that hints at its rich character. The flavor profile is often described as a delightful blend of chocolate and vanilla, with a distinct tang from buttermilk and sometimes a hint of vinegar, which also helps activate the baking soda and enhance the red color. When translated into a cookie, this beloved profile delivers a soft, chewy texture that simply melts in your mouth. These red velvet cake mix cookies capture that signature taste and stunning visual appeal, making them a festive and sophisticated choice for any occasion, from Christmas and Valentine’s Day to birthdays or just because.
Why Choose Cake Mix for Cookies?
Using a cake mix as the base for cookies is a brilliant baking hack, especially when you’re short on time but refuse to compromise on homemade goodness. This simple trick minimizes prep work and the number of ingredients needed, making it incredibly beginner-friendly. A good quality cake mix already contains a harmonious blend of dry ingredients like all-purpose flour, sugar, baking soda, and a touch of cocoa powder, often with red food coloring already incorporated. This means you skip measuring multiple dry components, reducing mess and ensuring consistent results every time. It’s a convenient shortcut that doesn’t skimp on flavor, producing reliably soft, chewy, and wonderfully flavored cookies that taste like they were made from scratch.
Red Velvet Cookies Ingredients
The beauty of this red velvet cookie recipe lies in its minimal ingredient list, thanks to the cake mix shortcut. To create these delectable treats, you will only need a handful of items: a red velvet cake mix, vegetable oil, fresh eggs, and luscious white chocolate chips. The cake mix serves as the hero, providing the essential dry elements like flour, sugar, leavening agents, and the signature red color and cocoa notes. Vegetable oil contributes to the cookies’ moist and tender texture, while eggs bind the ingredients together, adding richness and structure. Finally, white chocolate chips are folded in, providing a creamy contrast and a burst of sweet indulgence that perfectly complements the subtle cocoa of the red velvet.
How Do You Make Red Velvet Cookies?
Crafting these sensational red velvet cookies is a straightforward process, designed for ease and enjoyment. First, begin by preheating your oven to 350 degrees Fahrenheit (175°C) and prepare your baking sheet by lining it with parchment paper or a nonstick silicone mat. This crucial step ensures easy release and prevents sticking. In a spacious mixing bowl, combine the red velvet cake mix, vegetable oil, and eggs. Stir these ingredients thoroughly until they are well-incorporated and a cohesive dough begins to form. Once your vibrant red dough is ready, gently fold in the white chocolate chips, distributing them evenly throughout. Cover the bowl securely with plastic wrap and transfer it to the refrigerator or freezer to chill the dough for at least 20 minutes. This chilling period is vital as it helps prevent the cookies from spreading too much during baking, ensuring a perfectly chewy texture. After chilling, retrieve the dough and form it into uniform balls, approximately 2 tablespoons each. A cookie scoop works wonders for achieving consistent sizing, which leads to even baking. Arrange the dough balls on your prepared baking sheet, leaving about two inches between each to allow for slight spreading. You will likely need to bake in batches, so repeat this process until all the dough has been utilized. Bake the cookies for 11-13 minutes, or until their edges appear set and slightly firm, while the centers remain wonderfully soft. Once baked, let the cookies cool on the baking sheet for a few minutes before carefully transferring them to a wire rack to cool completely. This brief rest on the hot pan allows them to set further and maintain their shape. Serve these delightful red velvet cookies and savor every bite!

Tips For The Perfect Dessert
- **Choose Your Cake Mix Wisely:** For the absolute best results, seek out a 15.25 ounce box of red velvet cake mix that specifically states it contains pudding in the batter. The added pudding enhances moisture and creates a wonderfully soft, chewy texture.
- **Quality White Chocolate:** The type of white chocolate chips you use can significantly impact the final flavor. I highly recommend opting for white chocolate chips that contain cocoa butter rather than palm oil. They offer a richer, creamier taste that elevates these cookies.
- **Uniformity is Key:** To ensure all your cookies bake evenly and look professionally made, use a cookie scoop or a standard tablespoon to portion out the dough. Consistent size means consistent baking times.
- **Don’t Overbake:** Red velvet cookies are best when slightly underbaked in the center, ensuring they remain soft and chewy. The edges should be just set, and the centers still look a little soft when you remove them from the oven. They will continue to set as they cool on the baking sheet.
- **Cooling Process:** Allow the cookies to cool on the baking sheet for at least 5 minutes before transferring them to a wire rack. This helps them firm up and prevents them from breaking apart when moved.
Quick Tip
For an even more decorative and appealing look, gently press a few extra white chocolate chips into the top of each cookie dough ball right before they go into the oven. This ensures plenty of visible chocolate goodness on the surface.
Troubleshooting Common Cookie Problems
Even with an easy cake mix recipe, baking can sometimes present little challenges. Here are solutions to common cookie issues:
- **Cookies Spreading Too Much?** This is often due to dough that isn’t chilled enough or butter that’s too soft (though this recipe uses oil, ensuring your eggs aren’t excessively warm helps). Ensure you chill the dough for the full 20 minutes in the freezer or at least 30 minutes in the refrigerator. If your kitchen is very warm, consider popping the baking sheet with formed dough balls into the fridge for 5-10 minutes before baking each batch.
- **Cookies Too Dry or Crumbly?** This usually indicates overbaking. Keep a close eye on your oven and start checking for doneness at the lower end of the suggested baking time (11 minutes). Remember, cookies continue to bake slightly from residual heat after being removed from the oven. Using a cake mix with pudding in the batter, as recommended, also significantly helps with moisture.
- **Unevenly Baked Cookies?** This could be a hot spot in your oven. Try rotating your baking sheet halfway through the baking time. Also, ensure your cookie dough balls are uniform in size to promote even cooking.
- **Lack of Vibrant Color?** While red velvet cake mixes typically provide a good color, some brands may be paler. If you desire a deeper red, you can add an extra teaspoon or two of red gel food coloring to the dough mixture. Gel coloring provides concentrated color without adding excess liquid.
Recipe FAQs
Red velvet is a classic Southern cake known for its delicate balance of mild cocoa and vanilla flavors, often enhanced by the tang of buttermilk and sometimes a hint of vinegar. The vibrant red color, traditionally achieved through the reaction of cocoa with acidic ingredients and enhanced with food coloring, makes it visually stunning. It’s a unique taste that sits deliciously between chocolate and vanilla, creating a distinct and beloved profile.
For optimal results with red velvet cookies, chilling the dough for at least 20 minutes in the freezer or 30 minutes in the refrigerator is recommended. This helps solidify the fats in the dough, preventing the cookies from spreading too thinly during baking and resulting in a chewier, more substantial cookie. The dough should be firm enough to handle without being overly sticky, but not completely solid or rock-hard.
These easy red velvet cookies are primarily made from a red velvet cake mix, vegetable oil, eggs, and white chocolate chips. The cake mix itself contains the essential dry ingredients such as flour, sugar, baking powder, cocoa powder, and red food coloring, making the preparation incredibly simple and quick. The oil and eggs provide moisture and bind the dough, while white chocolate chips add a delightful creamy sweetness.
While vegetable oil is specified for its ability to create a very moist and tender cookie, you can experiment with melted butter. However, using melted butter may slightly alter the texture, potentially making the cookies a bit richer but possibly less chewy. If you opt for butter, ensure it’s melted and cooled slightly before mixing.
The intensity of the red color can vary based on the cake mix brand. If your cookies aren’t as vibrant as you’d like, you can enhance the color by adding 1-2 teaspoons of red gel food coloring to the dough along with the wet ingredients. Gel food coloring is highly concentrated and won’t thin out the dough.
FOLLOW ME
Flavor Variations
While these red velvet cookies with white chocolate chips are absolutely divine as they are, one of the joys of baking is customization! Don’t hesitate to get creative and tailor them to your personal taste or specific occasions.
- **Explore Other Cake Mix Flavors:** The cake mix cookie method is incredibly versatile. You can easily swap the red velvet mix for other types like chocolate, vanilla, strawberry, or yellow cake mix. While the cookies won’t be “red velvet” anymore, they will still be deliciously moist and easy to make, offering a whole new range of quick cookie options.
- **Switch Up the Chocolate:** If white chocolate isn’t your preference, these treats are equally fantastic with other chocolate varieties. Try semisweet chocolate chips, milk chocolate chips, dark chocolate chunks, or even a mix of different chocolates for a complex flavor profile.
- **Fun Toppings and Mix-Ins:**
- **Sprinkles:** For an extra festive touch, roll each ball of cookie dough in holiday sprinkles (like red and green for Christmas, or pink and red for Valentine’s Day) before baking.
- **Nuts:** Add a nutty crunch by folding in half a cup of chopped pecans or walnuts along with the chocolate chips.
- **Dipped Cookies:** Instead of mixing chips into the batter, you can bake plain red velvet cookies and then dip half of each cooled cookie into melted white chocolate (or dark chocolate) for an elegant finish. Garnish with sprinkles before the chocolate sets.
- **Luscious Cream Cheese Frosting:** To truly elevate these cookies to a red velvet cake experience, whip up a simple homemade cream cheese frosting. Using a stand mixer or hand mixer, blend 1/2 cup (1 stick) unsalted butter (at room temperature), 8 ounces cream cheese (also at room temperature), 4 1/2 cups powdered sugar, and 1 teaspoon vanilla extract until smooth and fluffy. Pipe or spread this tangy, sweet frosting onto cooled cookies for an indulgent treat.
- **Mini Marshmallows or Toffee Bits:** Fold in 1/2 cup of mini marshmallows for a softer bite, or toffee bits for a caramelized crunch.
Serving and Pairing Suggestions
These beautiful red velvet cake mix cookies, with their vibrant red color and delicate flavor, make them the perfect choice for holidays and Valentine’s Day. However, their deliciousness knows no season – you can serve them all year round! They are fantastic on their own, but here are some ideas to make them even more special:
- **Classic Milk Pairing:** A tall, cold glass of milk is the quintessential accompaniment for any cookie, and red velvet is no exception.
- **Coffee or Tea:** Serve them with a hot cup of coffee, a creamy latte, or a soothing cup of tea for a delightful afternoon pick-me-up.
- **Ice Cream Sandwiches:** For an extra decadent dessert, sandwich a scoop of vanilla bean ice cream (or even cream cheese ice cream!) between two cooled red velvet cookies.
- **Dessert Platter:** Arrange them on a festive platter with other cookies and treats for parties and gatherings. Their striking color will stand out.
- **Edible Gifts:** Package these cookies in decorative boxes or bags with a ribbon for a thoughtful homemade gift. They’re perfect for teachers, neighbors, or friends.
- **Whipped Cream or Berries:** A dollop of fresh whipped cream and a few fresh raspberries or strawberries can add a light, fresh contrast to the cookies.
Storing and Freezing for Freshness
Proper storage is key to maintaining the deliciousness and chewy texture of your red velvet cookies. These cookies are fantastic for making ahead, and they store beautifully both at room temperature and in the freezer, ensuring you always have a delightful treat on hand.
- **Room Temperature Storage:** Once completely cooled, store your red velvet cookies in an airtight container at room temperature. They will remain wonderfully fresh and soft for up to 5 days. Layer them between sheets of parchment paper if stacking to prevent sticking, especially if they have any frosting or glaze.
- **Freezing Baked Cookies:** If you’ve baked a large batch or want to save some for later, these cookies freeze exceptionally well. Place cooled cookies in a single layer on a baking sheet and freeze until solid (about 1-2 hours). Once frozen, transfer them to a freezer-safe airtight container or heavy-duty freezer bag, separated by parchment paper. They will stay fresh in the freezer for up to 2 months. Thaw them at room temperature before serving.
- **Freezing Cookie Dough:** You can also prepare the cookie dough in advance and freeze it. Form the dough into balls as directed, then place them on a parchment-lined baking sheet and freeze until solid. Once frozen, transfer the dough balls to a freezer-safe bag. When you’re ready to bake, you can bake them directly from frozen, adding a few extra minutes to the baking time (typically 2-4 minutes longer). This is perfect for fresh-baked cookies on demand!
More Cookie Recipes
Stained Glass Cookies
1 hr 52 mins
Cream Cheese Spritz Cookies
30 mins
18 No Bake Cookie Recipes
Almond Roca Cookies
30 mins
Peppermint Bark Cookies
35 mins
Love This Recipe?
Please leave a 5-star 🌟🌟🌟🌟🌟 rating in the recipe card below & a review in the comments section further down the page.
Red Velvet Cookies
Pin
Save

Time
Ingredients
- 1 15.25 ounce box red velvet cake mix look for the type with pudding in the batter
- 1/2 cup vegetable oil
- 2 eggs
- 1 1/2 cups white chocolate chips
Instructions
-
Preheat your oven to 350°F (175°C). Prepare your baking sheet by lining it with parchment paper or a nonstick silicone baking mat to prevent sticking.
-
In a large bowl, combine the red velvet cake mix, vegetable oil, and eggs. Stir until a soft, uniform dough forms. Gently fold in the white chocolate chips until they are evenly distributed throughout the dough.
-
Cover the bowl tightly with plastic wrap and chill the cookie dough in the freezer for at least 20 minutes. This step is crucial for preventing excessive spreading and ensuring a chewy texture.
-
Using a cookie scoop or tablespoon, scoop out approximately 2 tablespoons of dough per cookie and roll it into a neat ball. Place these dough balls onto the prepared baking sheet, ensuring about 2 inches of space between each. You will likely need to bake the cookies in batches.
-
Bake for 11-13 minutes, or until the edges of the cookies are lightly set and the centers still look slightly soft. Avoid overbaking to maintain a wonderfully chewy texture. Let the cookies rest on the baking sheet for 5 minutes after removing them from the oven, then carefully transfer them to a wire rack to cool completely. Repeat this process with any remaining cookie dough.
-
Allow the cookies to cool completely before serving. Store any leftover cookies in an airtight container at room temperature for up to 3 days to maintain their freshness.
Notes
- These cookies will stay fresh in an airtight container at room temperature for up to 5 days. For longer storage, they can be frozen for up to 2 months.
- For the best flavor and texture, use white chocolate chips that list cocoa butter as an ingredient, rather than palm oil.
- For a deeper red color, you can add 1-2 teaspoons of red gel food coloring to the dough when mixing.