
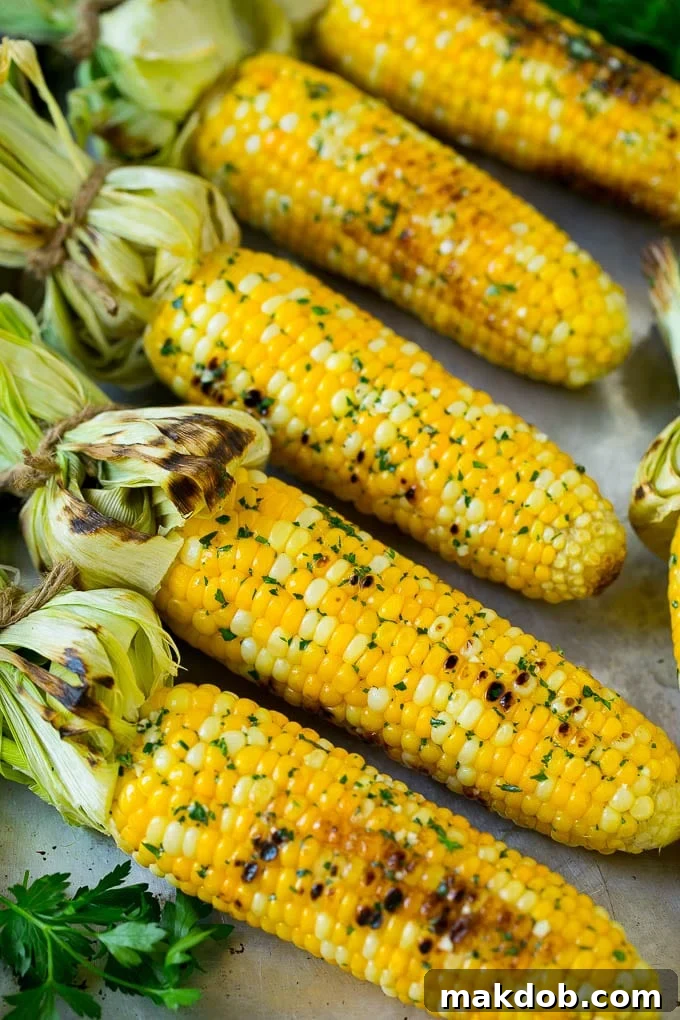
Welcome to the ultimate guide for creating the most flavorful and perfectly charred grilled corn on the cob! This classic summer side dish transforms humble ears of fresh corn into a caramelized, smoky delight, elevated by a luscious brush of homemade garlic and herb butter. It’s an effortless recipe that promises to be a showstopper at any backyard barbecue, picnic, or weeknight dinner, embodying the essence of summer entertaining with its vibrant flavors and irresistible aroma.
There’s an undeniable magic to corn during the peak of summer. Its natural sweetness is amplified by the heat of the grill, creating a tender yet crisp texture that is simply unmatched. While I adore versatile corn preparations like Mexican corn salad and black bean corn salad, this straightforward grilled version often steals the spotlight. Pair this exquisite grilled corn with other quintessential summer favorites such as dill potato salad, succulent BBQ pork chops, savory grilled shrimp skewers, or tender grilled chicken tenders for a truly memorable culinary experience that your family and guests will rave about.
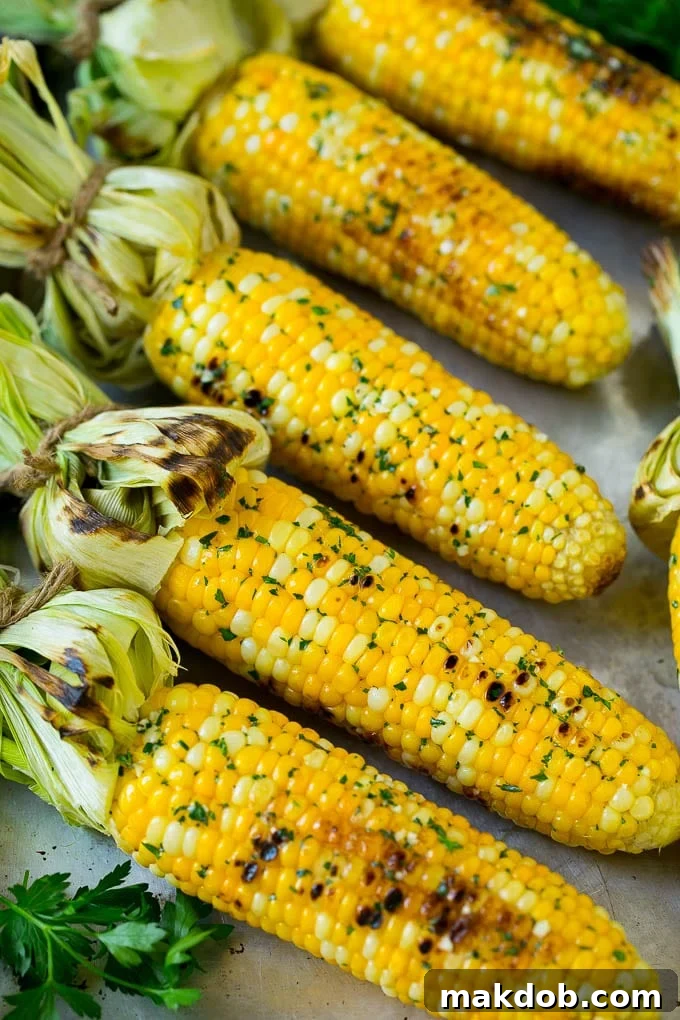
As the days lengthen and the inviting scent of charcoal fills the air, my thoughts invariably turn to grilling fresh ears of corn. There’s a distinct charm to summer corn on the cob; it possesses an unparalleled sweetness and depth of flavor that’s simply irresistible. This isn’t just a personal preference; even my children find immense joy and fun in eating grilled corn directly off the cob, making it a beloved tradition in our home during the warmer months.
This grilled corn recipe stands out as one of my absolute favorite grilling creations. If you’re eager to explore more delicious possibilities for your grill, be sure to check out my recipes for grilled mushrooms, crisp grilled zucchini, and delectable grilled scallops. For those who crave a bolder, spicier kick, my recipe for Mexican street corn (elote) offers a fantastic alternative, bursting with vibrant, authentic flavors.
Why Grilled Corn on the Cob is a Summer Staple
Grilled corn on the cob isn’t just a side dish; it’s an experience, a quintessential symbol of summer. What makes it so special? It’s the unique blend of smoky char, tender kernels, and a hint of sweetness that only comes from grilling. The high heat caramelizes the natural sugars in the corn, creating a depth of flavor that cannot be achieved through boiling or steaming. Plus, it’s incredibly easy to prepare, requires minimal cleanup (especially if you’re grilling husk-free), and appeals to almost everyone at the table. It’s the perfect accompaniment to virtually any grilled meat or seafood, and versatile enough to be incorporated into salads, salsas, or enjoyed simply on its own.
Grilled Corn On The Cob Ingredients
Creating this irresistible grilled corn on the cob requires just a few simple, fresh ingredients that come together to produce maximum flavor. You will need:
- Fresh Ears of Corn: The star of the show. Choose plump, vibrant ears for the best results.
- Olive Oil: A light coating helps prevent sticking to the grill and promotes even charring.
- Butter: The foundation for our flavorful herb butter. Unsalted is preferred so you can control the seasoning.
- Minced Garlic: Adds a pungent, aromatic kick to the butter mixture. Freshly minced is always best.
- Fresh Parsley: Provides a bright, herbaceous note and beautiful green color.
- Fresh Thyme: Contributes an earthy, slightly floral aroma that complements the corn beautifully.
- Salt and Black Pepper: Essential seasonings to enhance all the flavors. Adjust to your personal preference.
These ingredients are readily available and when combined, create a harmonious flavor profile that makes this grilled corn truly exceptional.
How Do You Make Grilled Corn on The Cob?
Making grilled corn on the cob is a straightforward process that yields incredibly delicious results. Here’s a detailed breakdown of the steps:
- Prepare the Corn: Begin with fresh shucked corn on the cob. Ensure all silk strands are removed. Gently brush each ear of corn with a thin layer of olive oil. This helps achieve those coveted grill marks and prevents the corn from drying out.
- Grill the Corn: Preheat your outdoor grill or a stovetop grill pan to a medium-high heat. Once hot, carefully place the oiled corn cobs directly on the grates. Cook for approximately 8-10 minutes in total. The key here is to turn your corn frequently—every 2-3 minutes—to ensure even cooking and to develop beautiful grill marks and a slight char on all sides. This charring is crucial for the caramelized flavor.
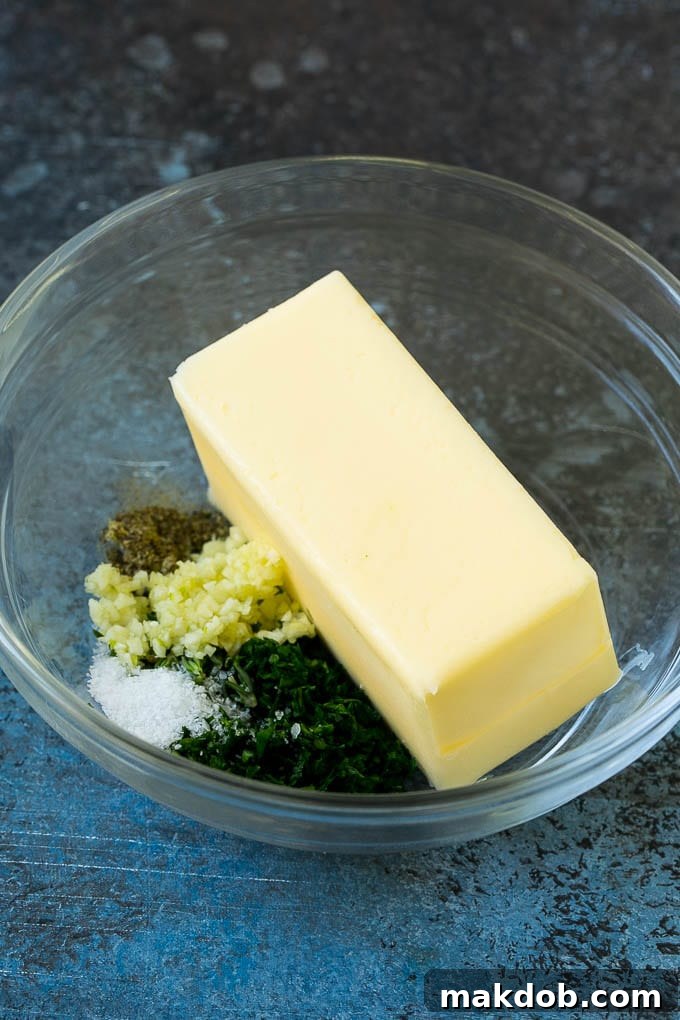
- Prepare the Garlic Herb Butter: While the corn is grilling, prepare your flavorful butter mixture. In a small bowl, combine the softened butter, finely minced garlic, freshly chopped parsley, chopped thyme, salt, and black pepper. Mix everything thoroughly until well combined.
- Melt the Butter: Gently melt the butter mixture. You can do this in the microwave in short 15-second intervals, stirring in between, or in a small saucepan over low heat. The goal is to have a smooth, brushable consistency.
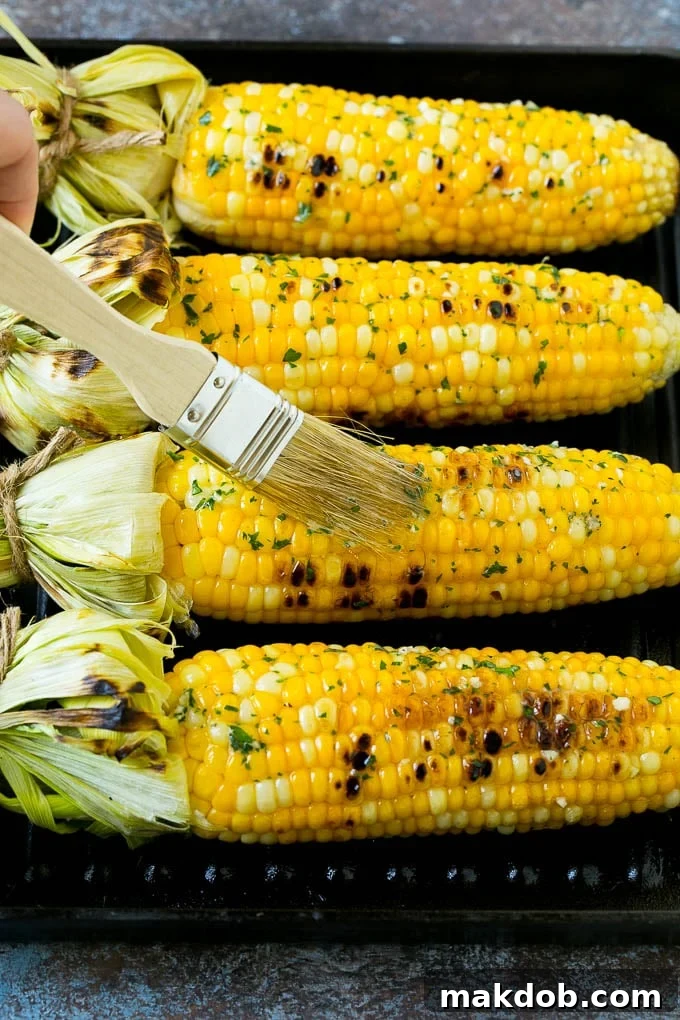
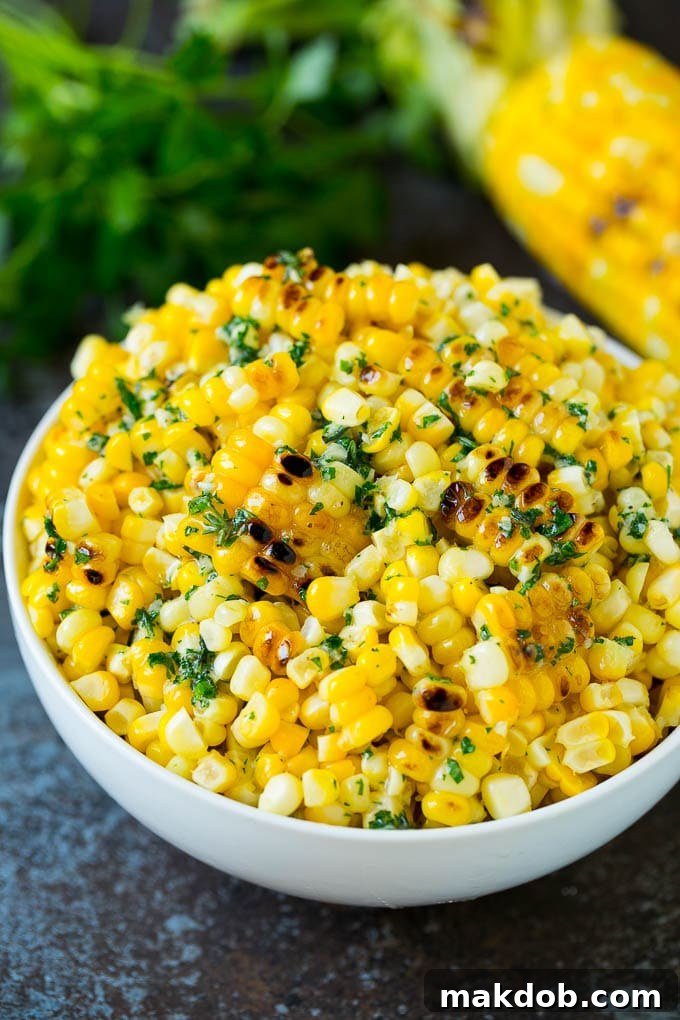
- Brush and Serve: Once the corn is cooked through, with visible grill marks and a slightly vibrant color, remove it from the grill. Immediately brush the melted garlic herb butter generously over each ear of corn. The warm corn will absorb the butter, infusing every kernel with incredible flavor. You can serve the corn on the cob for a classic presentation or, for a more versatile option, slice the kernels off the cob and serve them in a bowl, perfect for sharing or adding to other dishes.
This simple method ensures a perfectly cooked, flavorful grilled corn that will be a highlight of your meal.
Tips For The Perfect Grilled Corn On The Cob
- Indoor Grilling Option: Don’t have an outdoor grill or the weather isn’t cooperating? No problem! You can achieve excellent results by cooking your corn on a stove top grill pan. Ensure the pan is well-heated to mimic the high heat of an outdoor grill and follow the same turning instructions.
- Frequent Turning for Even Cooking: This is a crucial step for truly perfect grilled corn. You want to cook the corn until it starts to develop distinctive grill marks and a desirable slight char from the hot grill grates. Then, rotate it to get grill marks evenly around the entire cob. This not only ensures even cooking but also creates those delicious pockets of caramelized flavor.
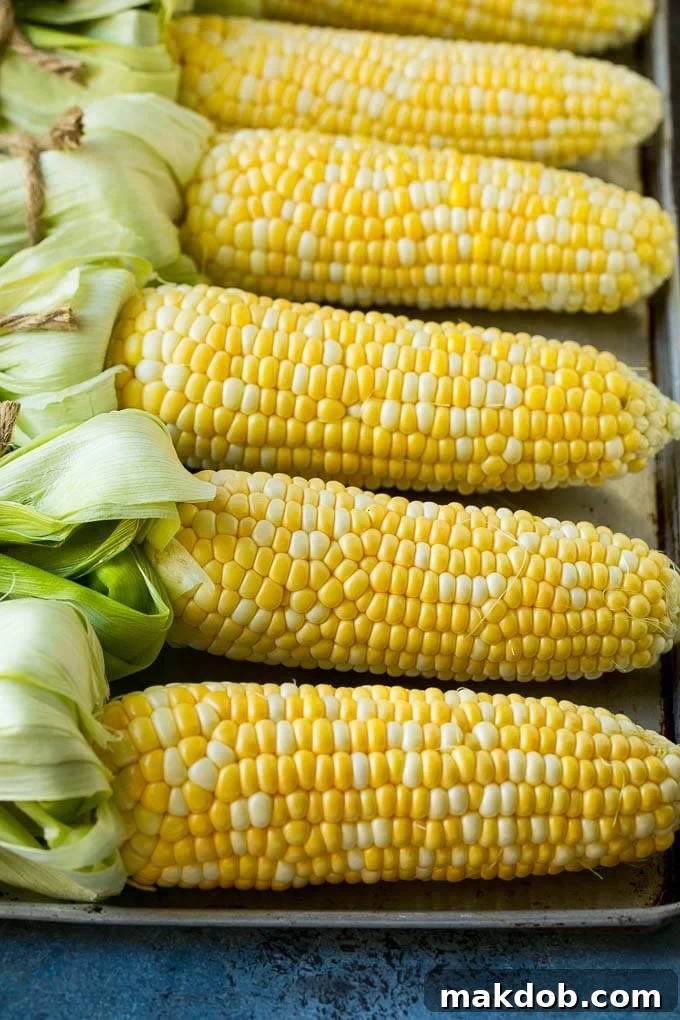
- Visual Cues for Doneness: As the corn cooks, you will notice a distinct color change. Raw corn kernels are typically pale yellow or white, but once cooked, they become much more vibrant and opaque. Use this color change as a reliable indicator to ensure all sides of your corn are thoroughly cooked and beautifully charred.
- No Foil Needed: Contrary to some beliefs, there is no need to wrap the corn in aluminum foil if you are diligent about turning it frequently. Grilling directly on the grates allows for better charring and a smokier flavor that foil can sometimes inhibit.
- Versatile Kernels: Grilled corn kernels sliced off the cob are incredibly versatile. They can be used to elevate a variety of dishes, adding a burst of sweet, smoky flavor and pleasant texture. Incorporate them into fresh salads, savory vegetable dishes, or vibrant concoctions like cheesy corn dip, refreshing corn salsa, and creamy avocado corn salad.
- Don’t Overcrowd the Grill: When placing corn on the grill, make sure not to overcrowd it. Give each cob enough space for even heat distribution and easier turning. Overcrowding can lower the grill temperature and lead to steaming rather than grilling.
- Rest the Corn Briefly: Just like grilled meats, allowing the corn to rest for a minute or two after removing it from the grill and before brushing with butter can help the natural juices redistribute, ensuring a more succulent bite.
Quick Tip: Choose Your Corn Wisely
For this grilled corn on the cob recipe, you have the flexibility to use any variety of fresh corn you prefer. Yellow, white, or bi-color corn will all yield delicious results, each offering a slightly different nuance in sweetness and appearance. Choose what looks freshest at your local market!
Recipe FAQs
The moment corn is picked, its natural sugars begin to convert into starch. For optimal sweetness and flavor, it’s always best to consume your corn as soon as possible after purchasing it. If you need to store it, fresh corn on the cob can be kept in the fridge for a maximum of 3 days. I highly recommend leaving the corn in its protective husk until you are ready to prepare and cook it, as this helps retain its moisture and freshness.
Absolutely, yes! Grilling corn on the cob without its husks is not only possible but often preferred for achieving those beautiful char marks and smoky flavor more directly. I find that grilling shucked corn directly on the grill grates is both quicker and easier, as it allows for more efficient cooking and better caramelization. The only requirement is to turn the cobs frequently as they cook to ensure even grilling on all sides.
Yes, you can definitely prepare the garlic herb butter in advance! Simply mix all the butter ingredients together, cover the bowl, and store it in the refrigerator for up to a week. When you’re ready to use it, let it soften at room temperature or gently melt it in the microwave or a small saucepan for a few seconds until it’s brushable. This makes grilling even quicker!
To reheat leftover grilled corn, you can quickly warm it on the grill for a few minutes, turning frequently, until heated through. Alternatively, a preheated oven (around 350°F / 175°C) for about 5-7 minutes, wrapped loosely in foil to prevent drying, also works well. For a faster option, you can microwave it for 30-60 seconds, but be careful not to overcook, as it can become tough.
Follow Me
How To Choose And Shuck The Freshest Corn
The success of this simple recipe heavily relies on the quality of your ingredients, especially the corn itself. Fresh corn is naturally sweeter and more flavorful, making your grilled dish truly shine. Here’s a comprehensive guide on how to select the best corn and properly shuck it:
Choosing the Best Corn at the Store:
When you’re at the grocery store or farmer’s market, look for these indicators of freshness:
- Silk: Observe the silk peeking out from the top of the husk. It should be brown, slightly sticky, and feel moist. Avoid corn with black or very dry silk, as this is a sign of older, less fresh corn.
- Husk: The outer husk should be bright green, tightly wrapped around the cob, and appear fresh and vibrant. Any yellowing, dryness, or wilting on the husk indicates that the corn is past its prime.
- Feel the Kernels: Gently feel the corn through the husk. You should be able to detect plump, firm kernels filling out the entire cob. Avoid any ears that feel soft, mushy, or have noticeable gaps where kernels might be missing. This “feel test” is a great way to ensure you’re getting a full, juicy cob.
- Smell: Fresh corn will have a subtle, sweet, earthy scent. If it smells sour or off, choose another ear.
How To Shuck Corn Effortlessly:
Shucking corn is the process of removing the husk and silk to expose the kernels. Here’s a simple method:
- Grip and Pull: Start by firmly gripping the silk and the top layer of leaves (the tassel) at the top of the cob. With a strong, downward motion, pull them all the way down towards the base of the corn.
- Expose the Corn: Repeat this process, pulling down all remaining leaves and silk until the entire cob of kernels is exposed.
- Remove Stubborn Silk: Sometimes, tiny strands of silk can cling to the kernels. You can easily remove these by gently rubbing the cob with a clean, damp cloth or a soft brush. For a quick trick, some people use a piece of paper towel to grab and rub off the remaining silk.
- Optional Presentation: For an appealing presentation, after removing all the silk, you can bend the husks back and tie them into place with a piece of kitchen twine. This creates a neat “handle” and a rustic look. Alternatively, you can simply remove all the leaves and silk completely by cutting them off with a knife or breaking them off by hand.
By following these tips, you’ll ensure your grilled corn on the cob starts with the best possible foundation for an incredibly flavorful dish.
Grilled Corn On The Cob Variations
While the classic garlic and herb butter is always a winner, grilled corn is incredibly adaptable. Here are some exciting variations to spice things up and explore new flavor profiles:
- Cilantro Lime: For a bright and zesty twist, swap out the parsley for finely chopped fresh cilantro. Add 1/4 teaspoon of vibrant lime zest and a pinch (1/4 teaspoon) of chili powder to your butter mixture. This combination brings a refreshing, slightly spicy, and aromatic flavor that’s perfect for Mexican-inspired meals.
- Italian Herb: Infuse your corn with Mediterranean flavors by adding 1/4 teaspoon of dried Italian seasoning to the butter. Enhance it further with 2 tablespoons of grated Parmesan cheese, which melts into a savory crust on the hot corn. This variation pairs wonderfully with grilled chicken or pasta salads.
- Bacon Bliss: Elevate the savory factor by sprinkling finely diced, crispy crumbled bacon over the warm corn cobs. The salty, smoky crunch of bacon is an irresistible complement to the sweet grilled corn. You can even mix a little bacon fat into the butter for an extra layer of flavor.
- Spicy Kick: If you love a bit of heat, transform your grilled corn with some spice. Mix a dash of your favorite hot sauce into the melted butter mixture, or simply sprinkle a generous amount of chili powder, smoked paprika, or cayenne pepper over the cobs after grilling. Adjust the spice level to your preference for a truly fiery side.
- Parmesan Garlic: Beyond Italian herb, you can create a purely cheesy, garlicky version. Omit the thyme and parsley from the original recipe and instead, melt 1/4 cup of grated Parmesan cheese directly into the garlic butter. Brush this rich, savory mixture generously over the hot corn.
- Honey Sriracha: For a sweet and spicy fusion, whisk together a tablespoon of honey and a teaspoon of sriracha sauce into your melted butter. This creates a glaze that caramelizes beautifully on the grill and delivers a delightful sweet-heat balance.
I find myself making grilled corn all summer long, experimenting with these variations and more. It truly is my favorite way to enjoy this delicious seasonal treat, bringing joy and amazing flavor to every meal!
More Great Summer Side Dishes
If you’re planning a summer feast, these delightful side dishes complement grilled corn perfectly and are sure to complete your spread.
Grilled Asparagus in Foil
20 mins
Grilled Vegetables
25 mins
Zucchini Gratin
40 mins
Cucumber Tomato Salad
11 mins
Cherry Tomato Salad
16 mins
Love This Recipe?
Please leave a 5-star 🌟🌟🌟🌟🌟 rating in the recipe card below & a review in the comments section further down the page. Your feedback is greatly appreciated!
Grilled Corn on the Cob
Pin
Time
Ingredients
- ▢ 8 ears corn shucked
- ▢ 1 tablespoon olive oil
- ▢ 6 tablespoons butter
- ▢ 1/2 teaspoon minced garlic
- ▢ 1 1/2 teaspoons fresh parsley chopped
- ▢ 1 teaspoon fresh thyme chopped
- ▢ salt and pepper to taste
Instructions
-
Preheat an outdoor grill or a heavy-bottomed grill pan to medium-high heat. Allow it to get sufficiently hot for even cooking.
-
Evenly brush the olive oil all over the shucked corn cobs. This helps with charring and prevents sticking.
-
Carefully place the oiled corn on the preheated grill grates. Cook for 2-3 minutes per side, rotating the cobs frequently, until the kernels begin to brown, char, and become tender-crisp. The total cook time will typically be about 8-10 minutes, depending on your grill and corn size.
-
While the corn is grilling, combine the butter, minced garlic, chopped parsley, chopped thyme, salt, and pepper in a small microwave-safe bowl.
-
Microwave the butter mixture in 30-second increments, stirring after each, until the butter is fully melted and all ingredients are well combined.
-
Once the corn is perfectly grilled and removed from the heat, generously brush the melted garlic herb butter over each cob. Serve immediately while hot and fresh!
Notes
- If you don’t have an outdoor grill or prefer to cook inside, you can achieve delicious results by cooking your corn on a stove top grill pan over medium-high heat.
- Ensure you turn your corn frequently as it cooks. You want to cook the corn until it starts to get beautiful grill marks and a little char from the grill grates, then rotate it to achieve this on all sides.