
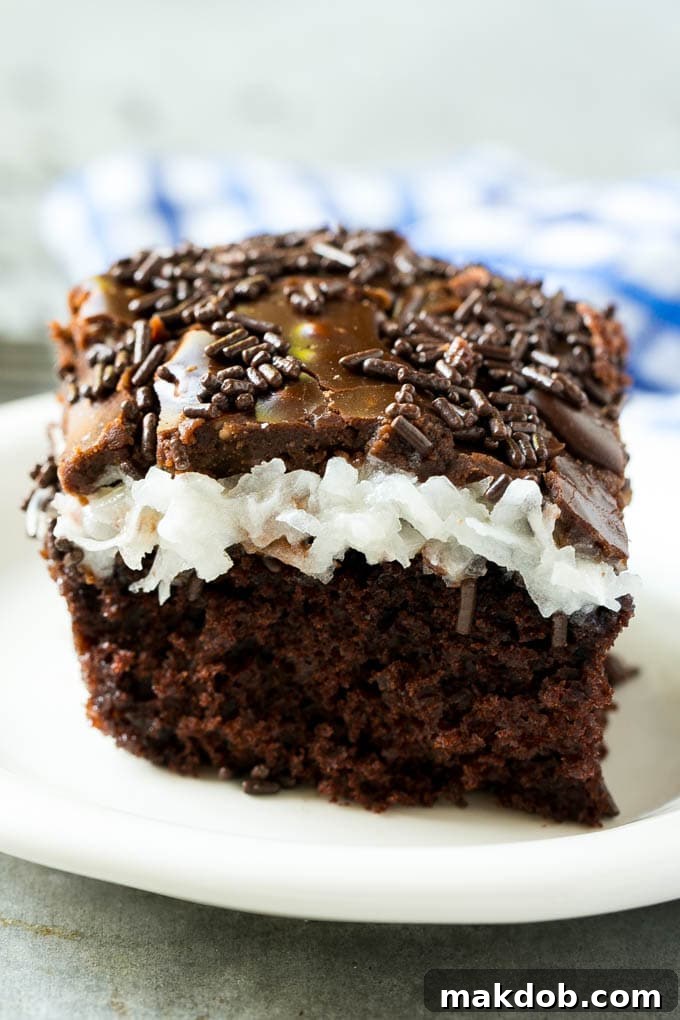
There are some desserts that transcend mere sweetness, offering an experience that is truly unforgettable. This **Irresistible Chocolate Coconut Cake** is precisely one of those creations. Imagine layers of rich, moist chocolate cake, generously topped with a creamy, dreamy coconut marshmallow sauce, and then finished with a glossy, decadent chocolate frosting. It’s a symphony of textures and flavors that captivates from the very first bite. This isn’t just *any* chocolate cake; it’s a celebration in itself, a showstopper that consistently earns rave reviews and holds a special place in our hearts. In fact, my husband declares it his absolute favorite cake, requesting it every year for his birthday!
If you’re a true chocolate enthusiast, prepare to be amazed. This cake delivers a unique blend of intense cocoa and tropical coconut, elevated by the unique sweetness of marshmallow. It’s a perfect addition to any special occasion or simply a delightful indulgence for a quiet evening. For those who can’t get enough chocolate, be sure to explore more of our delightful recipes like the Brownie Pizza and the comforting Chocolate Pudding Cake.
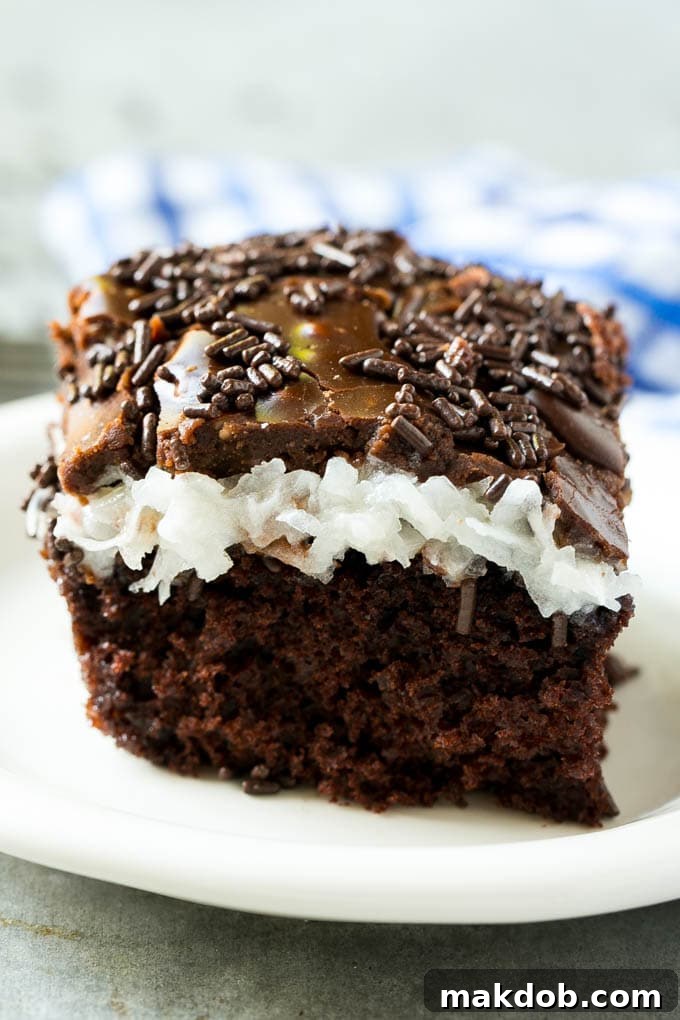
Why This Chocolate Coconut Cake Stands Out
I first started crafting this chocolate coconut cake many years ago, and over time, I’ve refined the recipe to perfection. It has become a beloved staple, especially for coconut fans. What truly sets this cake apart is the harmonious interplay of its three distinct layers, each contributing to a complex yet utterly satisfying flavor profile. It’s a testament to how simple ingredients, combined thoughtfully, can create something extraordinary.
The magic begins with the foundational chocolate cake. While delicious on its own, it serves as the perfect canvas for the stars of the show: the unparalleled coconut marshmallow sauce and the smooth chocolate frosting. This isn’t a plain cake; it’s an adventure for your taste buds, offering contrasts in richness, sweetness, and texture that make every forkful exciting.
The Rich Chocolate Cake Base
Every great cake starts with a solid foundation, and this recipe uses a devil’s food cake mix to deliver a consistently moist and flavorful chocolate base. While you could certainly use a scratch-made recipe, a high-quality mix simplifies the process without compromising on taste. This ensures a deep, cocoa-rich flavor and a wonderfully tender crumb, creating the perfect balance against the sweet, creamy layers to come. Preparing the cake is straightforward, making it accessible for bakers of all skill levels.
The Magical Coconut Marshmallow Sauce
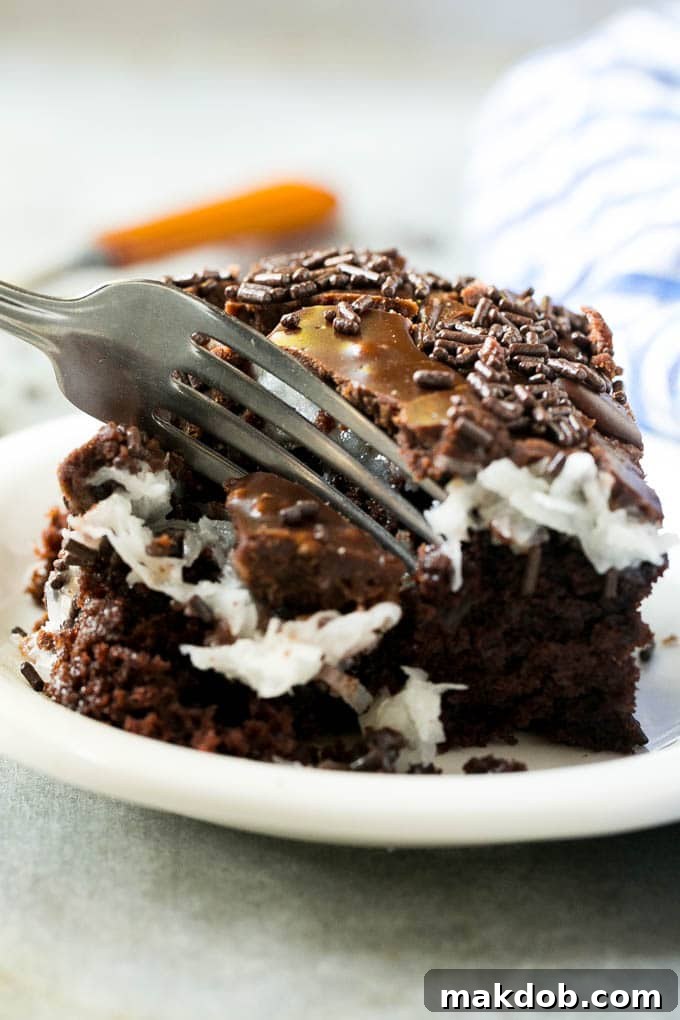
This is where the chocolate coconut cake truly differentiates itself. The coconut sauce isn’t your average topping; it’s a luscious, creamy concoction that comes to life when marshmallows are gently melted with milk and sugar, then blended with generous flakes of sweetened coconut. The transformation is nothing short of magical. As this warm, thick sauce is spread over the cooled chocolate cake, it begins to set, creating a unique, slightly chewy, and intensely coconut-flavored layer. This delightful texture ensures the sauce stays put when you slice the cake, making for neat, beautiful servings every time. The subtle sweetness of the marshmallow perfectly complements the coconut, adding an irresistible dimension that will have everyone asking for the recipe.
The Luxurious Chocolate Frosting Glaze
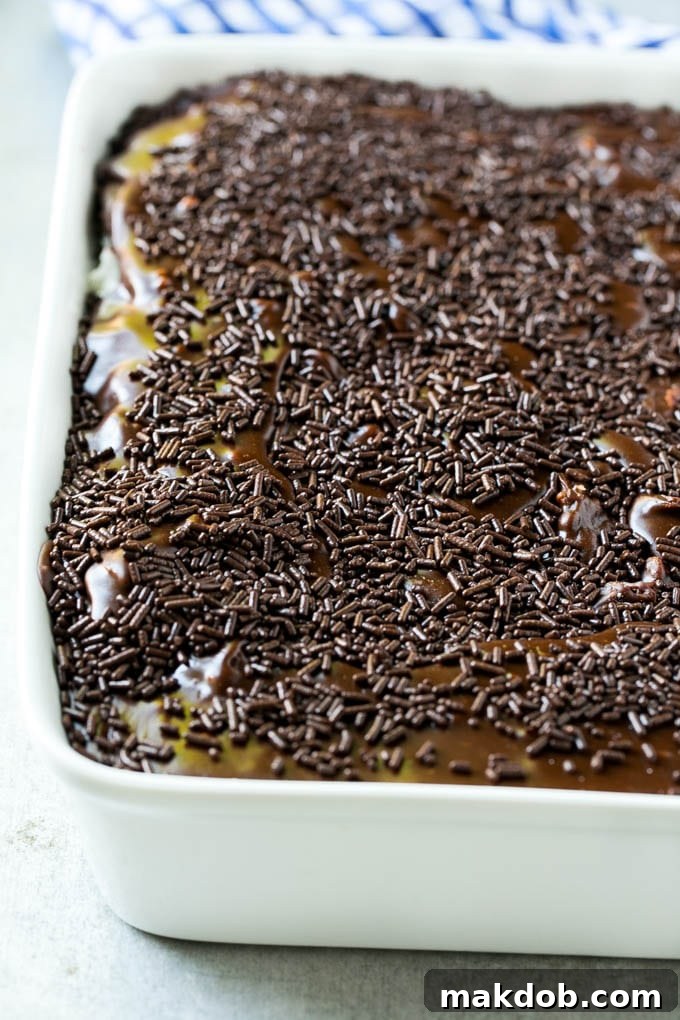
The grand finale for this decadent dessert is a glistening layer of homemade chocolate frosting. This isn’t a thick, fluffy buttercream, but rather a rich, almost glaze-like frosting that cascades over the coconut marshmallow layer. Its smooth, pourable consistency is key to achieving that beautiful, shiny finish you see in professional bakeries. The trick is to pour it evenly and resist the urge to spread it with a knife. As it cools, it will set into a smooth, glossy coating, locking in the flavors and adding another layer of intense chocolate goodness. A sprinkle of chocolate shavings or additional coconut flakes can be added for extra visual appeal and texture while the glaze is still warm.
Mastering the Chocolate Coconut Cake Recipe: Step-by-Step Guide
Creating this magnificent cake is surprisingly simple, thanks to clear instructions and a thoughtful layering process. By following these steps, you’ll achieve a dessert that looks and tastes like it came from a gourmet patisserie.
Ingredients You’ll Need
For the chocolate cake:
- 1 box devil’s food cake mix
- Oil, eggs, and water as directed on cake mix package
- Cooking spray
For the coconut sauce:
- 3/4 cup milk
- 3/4 cup granulated sugar
- 15 large marshmallows
- 3 cups flaked sweetened coconut
- 3/4 teaspoon cornstarch
For the chocolate frosting:
- 3 tablespoons butter
- 6 tablespoons granulated sugar
- 4 1/2 tablespoons cocoa powder, sifted
- 4 1/2 tablespoons milk
- 2 1/2 cups powdered sugar
- 1 teaspoon vanilla extract
- 1/2 cup chocolate sprinkles (optional, for garnish)
Easy-to-Follow Instructions
- **For the cake:** Preheat your oven according to the cake mix package directions. Lightly coat a 9″x13″ baking pan with cooking spray. In a large bowl, prepare the devil’s food cake mix by combining it with the specified amounts of oil, eggs, and water as instructed on the package. Mix until well combined and smooth. Pour the batter evenly into the prepared pan and bake according to package directions until a toothpick inserted into the center comes out clean. Once baked, remove from the oven and allow the cake to cool completely in the pan on a wire rack. This is crucial before adding the warm coconut sauce.
- **For the coconut sauce:** In a medium saucepan, combine the milk, granulated sugar, and large marshmallows. Place the saucepan over medium heat, stirring constantly, for about 5 minutes, or until all the marshmallows have completely melted and the mixture is smooth.
- Once the marshmallows are melted, stir in the flaked sweetened coconut and cornstarch. Bring the mixture to a boil, continuing to stir constantly for one minute. Immediately remove the saucepan from the heat. Pour the warm coconut sauce evenly over the cooled chocolate cake. Spread gently if needed, but try not to overwork it. Allow the cake with the coconut sauce to cool completely and set before proceeding to the frosting stage. This will ensure distinct layers.
- **For the frosting:** In a small, heavy saucepan, melt the butter over low heat. Once melted, add the granulated sugar, milk, and sifted cocoa powder. Whisk continuously for 2-3 minutes, or until all the ingredients are thoroughly combined and the mixture is smooth and slightly thickened.
- Remove the saucepan from the heat and allow the mixture to cool slightly for a few minutes. Gradually stir in the powdered sugar and vanilla extract until the frosting is smooth and free of lumps. The consistency should be pourable, like a thick glaze.
- Immediately pour the warm chocolate frosting over the cooled cake, allowing it to spread naturally over the coconut layer. For that beautiful glossy finish, resist the urge to spread the frosting with a knife, as it will not set smoothly. If desired, generously sprinkle with chocolate sprinkles or additional coconut flakes while the frosting is still warm and wet. Allow the frosting to set completely at room temperature or in the refrigerator before slicing and serving.
Pro Tips for Baking Your Best Chocolate Coconut Cake
Even though this recipe is straightforward, a few expert tips can elevate your chocolate coconut cake from great to absolutely phenomenal:
- **The Perfect Bake:** Overbaking can lead to a dry cake. Always check for doneness using a toothpick – if it comes out with moist crumbs but no wet batter, your cake is ready. Allow it to cool completely before adding any toppings to prevent the layers from melting into each other.
- **Achieving the Ideal Coconut Sauce:** Ensure your marshmallows are fully melted and the sauce comes to a gentle boil after adding cornstarch. Constant stirring prevents scorching and ensures a smooth consistency. The cornstarch helps the sauce set beautifully, providing that distinct, firm layer.
- **The Secret to a Smooth Chocolate Glaze:** The key to a shiny, uncracked frosting is to pour it, not spread it. Work quickly once it’s made, as it sets relatively fast. If you try to spread it once it starts to cool, it will lose its smooth, glossy finish. Pouring allows gravity to create that perfect, even layer.
- **Ingredient Quality Matters:** While a cake mix makes things easy, ensure your other ingredients like fresh milk, good quality marshmallows, and high-fat cocoa powder for the frosting are fresh. Sifting cocoa powder is also crucial for a lump-free frosting.
- **Embrace the Chill:** Allowing each layer to cool and set properly is vital for distinct, beautiful layers. Don’t rush the cooling process; patience is a baker’s best friend.
Serving Suggestions & Pairing Ideas
Whether you’re celebrating a birthday, an anniversary, or simply craving a sweet treat after dinner, this chocolate coconut cake is the perfect all-occasion dessert. Its rich flavor profile pairs wonderfully with a variety of accompaniments. Serve it alongside a scoop of vanilla bean ice cream for a delightful hot-and-cold contrast, or with a dollop of freshly whipped cream to enhance its creamy texture. A sprinkle of toasted coconut flakes or a few fresh raspberries can add an extra touch of elegance and a hint of tartness to balance the sweetness. It also makes for an exquisite centerpiece at any dessert table, guaranteed to impress your guests.
Storage and Make-Ahead Options
One of the many benefits of this chocolate coconut cake is its versatility with preparation. The entire cake can be made a day in advance, making it an excellent choice for parties or gatherings where you want to minimize last-minute stress. Simply cover the cooled and frosted cake loosely with plastic wrap or an airtight cake dome and store it at room temperature. If your kitchen is particularly warm, or for longer storage, refrigerating the cake can extend its freshness. Bring it back to room temperature for about 30 minutes before serving to ensure the cake and frosting are at their optimal texture and flavor. Stored properly, the cake will remain fresh and delicious for 3-4 days.
Frequently Asked Questions (FAQ)
Can I use a homemade chocolate cake recipe instead of a mix?
Absolutely! If you have a favorite scratch-made chocolate cake recipe, feel free to use it as the base. Just ensure it’s baked in a 9×13 inch pan and cooled completely before adding the coconut sauce.
What kind of coconut should I use for the sauce?
We recommend using sweetened flaked coconut for this recipe. It adds a lovely sweetness and texture that complements the marshmallow beautifully. Unsweetened coconut can be used, but you might want to slightly increase the sugar in the coconut sauce for taste.
How do I prevent the chocolate frosting from cracking?
The key is to pour the frosting when it’s still warm but not hot, and to not disturb it once poured. Avoid spreading it with a knife. Allow it to set completely at room temperature. Extreme temperature changes (like moving a warm cake directly into a very cold fridge) can sometimes cause frosting to crack.
Can I make this cake gluten-free or dairy-free?
Yes, with a few substitutions! For gluten-free, use a certified gluten-free devil’s food cake mix. For dairy-free, substitute the milk with a non-dairy alternative like almond or soy milk, and use a dairy-free butter substitute for the frosting. Always check your marshmallow and cake mix labels for hidden dairy or gluten ingredients.
More Decadent Dessert Recipes to Explore
If you’ve enjoyed this indulgent chocolate coconut cake, you’ll love these other fabulous dessert recipes from Dinner at the Zoo:
- Cherry Pie Bars
- Nutella Cookies
- Oreo Balls
- Chocolate Covered Cherries
- No-Bake Oreo Cheesecake
This post was originally published on July 9, 2015, and has been recently updated with new photos and enhanced recipe instructions to provide you with the most accurate and delightful baking experience.
Did you make this recipe? We’d love to see your creations! Tag @dinneratthezoo on Instagram and use the hashtag #dinneratthezoo to share your delicious results with our community.
Share this amazing recipe with your friends and family!
Facebook |
Twitter |
Pinterest