
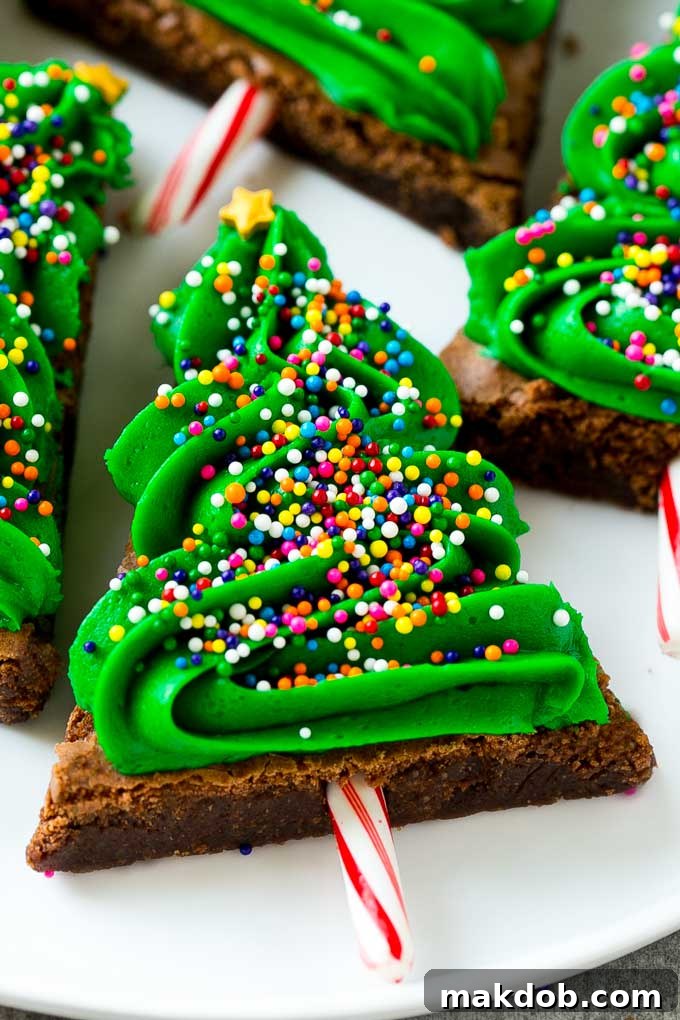
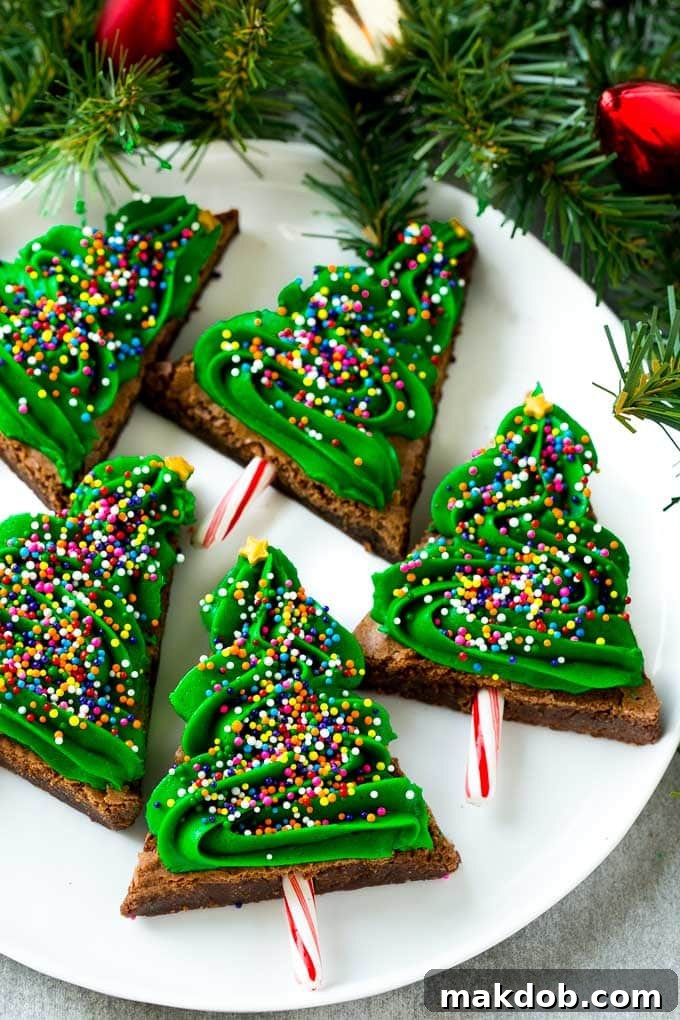
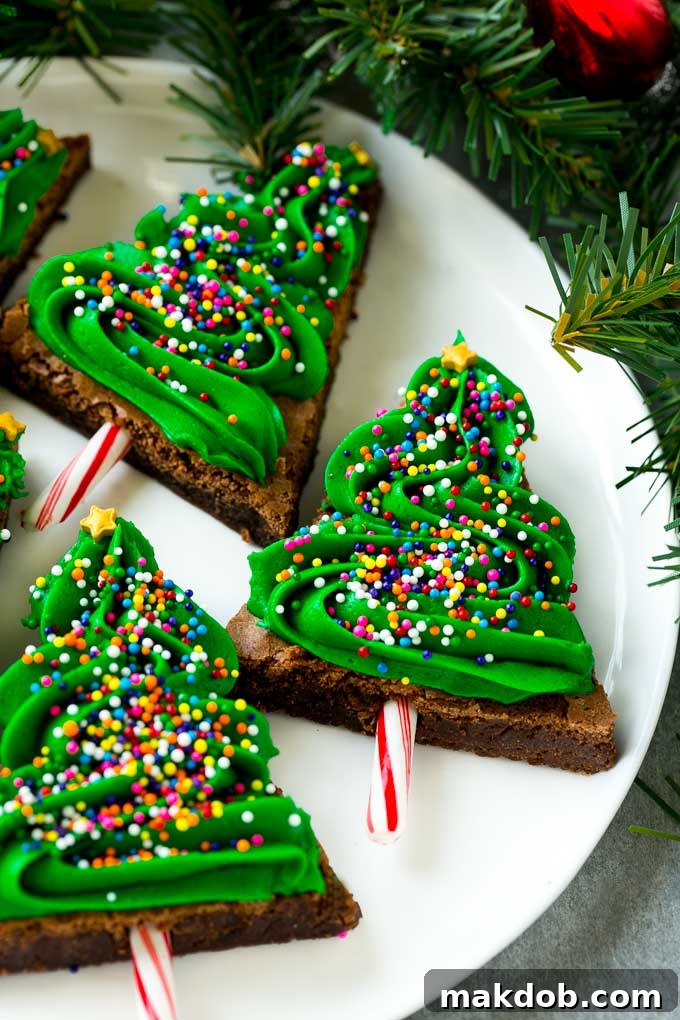
Delight your family and friends this holiday season with these utterly charming and incredibly easy Christmas Tree Brownies! More than just a dessert, these festive fudge brownies transform into miniature edible Christmas trees, adorned with vibrant green frosting, crunchy candy cane “trunks,” and a scattering of cheerful sprinkles. They are the quintessential holiday treat, perfect for potlucks, parties, or a cozy evening by the fire. Imagine the smiles when these whimsical creations grace your dessert table – they’re not just delicious, they’re a celebration in every bite!
The magic of Christmas baking truly comes alive with recipes that are both impressive and simple to execute. While I adore whipping up an array of holiday sweets like Reindeer Chow, intricate Candy Cane Hearts, or a rich Eggnog Cake, sometimes you need a showstopper that doesn’t demand hours in the kitchen. That’s where these delightful Christmas Tree Brownies shine. They offer all the festive cheer with minimal fuss, making them an ideal choice for busy holiday entertainers or a fun baking project with the kids.
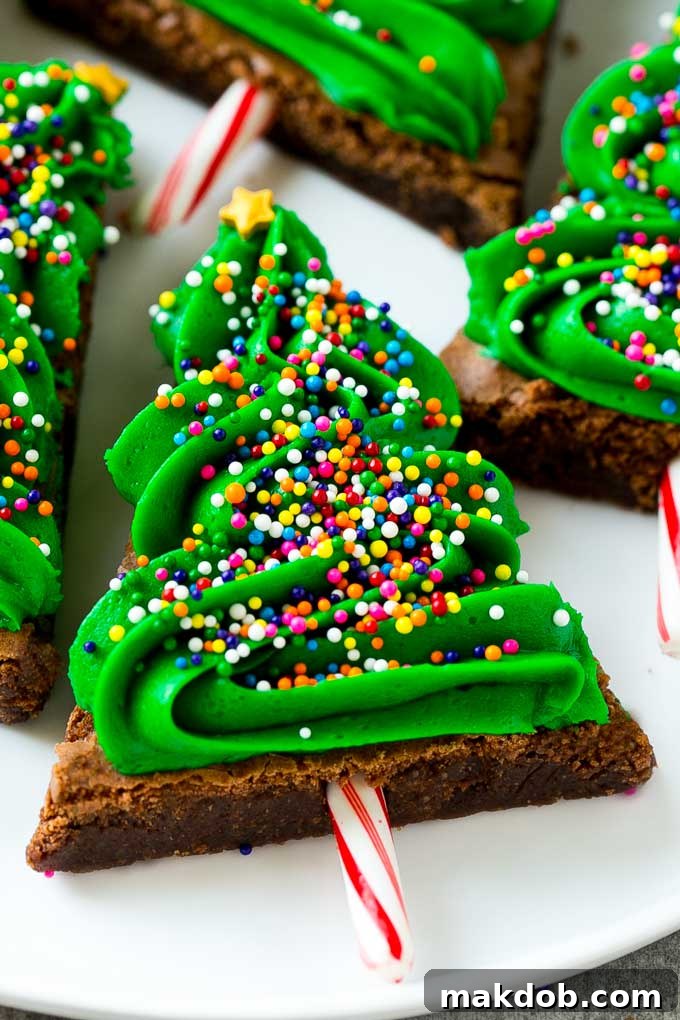
The holiday season is synonymous with warmth, joy, and, of course, delicious treats! As the air fills with the scent of pine and gingerbread, these vibrant Christmas Tree Brownies offer a playful yet sophisticated touch to any festive spread. Their colorful appearance is instantly captivating, promising a taste experience that lives up to their visual charm. We’re talking about rich, homemade fudge brownies, generously topped with creamy green-tinted frosting, crisp candy cane stems, and a shower of rainbow sprinkles – all the classic elements that make a holiday dessert truly unforgettable. What makes this recipe even better? It’s surprisingly simple to prepare, requiring just one bowl for the brownie batter, minimizing cleanup and maximizing holiday cheer.
Table of Contents
- The Essence of Christmas Tree Brownies: Key Ingredients
- Crafting Your Festive Brownies: A Step-by-Step Guide
- Mastering the Art of Holiday Brownies: Essential Tips
- Quick Tip: Prepare Ahead for Stress-Free Holidays
- Frequently Asked Questions About Christmas Tree Brownies
- Elevate Your Brownies: Creative Flavor Variations
- More Irresistible Dessert Recipes to Explore
- Christmas Tree Brownies Video Guide
- Loved This Recipe?
- Christmas Tree Brownies: The Full Recipe
The Essence of Christmas Tree Brownies: Key Ingredients
To embark on your festive brownie adventure, you’ll need a selection of simple yet high-quality ingredients. For the rich, fudgy brownie base, gather unsalted butter, premium semisweet chocolate chips (which melt into a luscious foundation), granulated sugar for sweetness, fresh eggs for structure and moisture, pure vanilla extract to enhance the chocolate flavor, and a touch of salt to balance everything out, along with all-purpose flour. The decorations, which truly bring these treats to life, consist of vibrant green frosting (store-bought for convenience or homemade for an extra personal touch), a medley of rainbow sprinkles, charming star sprinkles for the tree toppers, and, of course, small candy canes to serve as whimsical tree trunks. Each ingredient plays a crucial role in creating a dessert that is as delightful to look at as it is to eat.
Crafting Your Festive Brownies: A Step-by-Step Guide
Creating these charming Christmas Tree Brownies is an enjoyable process, broken down into a few straightforward steps:
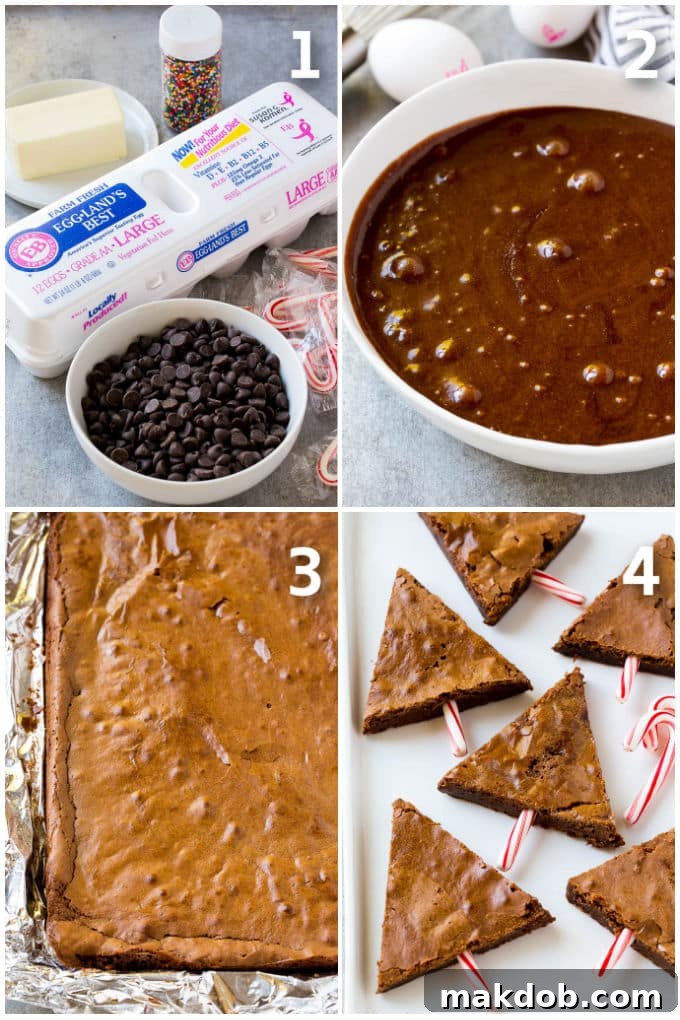
- **Prepare Your Baking Pan:** Begin by preheating your oven to 350°F (175°C). Line a 9″x13″ baking dish with aluminum foil, ensuring that the foil extends over the edges to create “handles.” This will make removing the baked brownies much easier. Lightly coat the foil with cooking spray to prevent sticking and ensure a clean release.
- **Melt Chocolate and Butter:** In a large microwave-safe bowl, combine the unsalted butter and semisweet chocolate chips. Heat them in 30-second intervals, stirring thoroughly after each one, until the mixture is completely melted and smooth. This careful process creates the rich, fudgy base for your brownies, ensuring a perfectly integrated chocolate flavor.
- **Combine Wet Ingredients:** Stir the granulated sugar into the melted chocolate mixture until well incorporated. Next, add the eggs, one at a time, whisking vigorously after each addition until the batter is smooth and glossy. This aeration contributes to the brownies’ delightful, chewy texture and prevents them from becoming too dense.
- **Add Flavor and Dry Ingredients:** Incorporate the vanilla extract, stirring it in until fragrant. Vanilla adds a wonderful depth that complements the chocolate beautifully. Finally, gently fold in the salt and all-purpose flour until just combined. Be careful not to overmix, as this can develop the gluten too much, leading to tough brownies. Stop mixing as soon as no dry streaks of flour remain.
- **Bake the Brownies:** Pour the prepared batter evenly into your foil-lined baking pan, spreading it to the corners with a spatula. Bake for 25-30 minutes, or until a toothpick inserted into the center comes out with moist crumbs, but no wet batter. A few moist crumbs are ideal for fudgy brownies; a completely clean toothpick indicates they might be slightly overbaked.
- **Cool and Chill:** Allow the brownies to cool completely to room temperature in the pan on a wire rack. This is a crucial step! For easier and cleaner cutting, transfer the pan to the refrigerator and chill the brownies for at least 30 minutes, or until firm. Chilling prevents crumbling and ensures sharp, clean edges.
- **Cut into Triangles:** Once thoroughly chilled, use the foil edges to lift the entire slab of brownie out of the pan. Place it on a clean cutting board. With a very sharp knife (wiping it clean between each cut), carefully slice the brownies into triangles, mimicking the shape of Christmas trees. You’ll typically yield 16 festive triangles from a 9″x13″ pan, with a few delicious scraps left over for the baker!
- **Add Candy Cane Trunks:** Take your small candy canes and carefully snap off the curved tops, leaving only the straight sections. Gently insert these straight candy cane pieces into the bottom of each brownie triangle to form the whimsical tree trunks. The peppermint flavor adds a classic holiday touch.
- **Decorate with Frosting:** If using a piping bag, fit it with a star tip (a closed star tip works best for a textured tree effect) or a plain round tip for a different design. Alternatively, for an easy hack, spoon your green frosting into a gallon-sized resealable plastic bag and snip a small corner off the bottom. Pipe approximately 1½ tablespoons of green frosting onto each brownie, working your way from the base to the tip to create a realistic, tree-like texture.
- **Finish with Sprinkles:** Place a single gold star sprinkle or candy at the very top of each frosted brownie, symbolizing the shining star on a Christmas tree. Then, generously shower each brownie with rainbow sprinkles, creating the delightful illusion of colorful Christmas lights and sparkling ornaments. Be creative with your sprinkle choices!
- **Serve and Enjoy:** Your stunning and delicious Christmas Tree Brownies are now ready to be served! They are best enjoyed fresh, but can also be stored, covered, in the refrigerator for up to one day. These festive treats are sure to be a delightful highlight of any holiday gathering, bringing joy to all who taste them.
Mastering the Art of Holiday Brownies: Essential Tips
Achieving perfectly decorated Christmas Tree Brownies is simple with a few expert tips that will elevate your baking experience:
- **Choosing Your Pan for Perfect Trees:** For this specific recipe, baking your brownies in a standard 9″x13″ pan is highly recommended. This size yields a perfectly proportioned slab of brownie that is ideal for cutting into consistent, festive triangle shapes. The thickness and density achieved in this pan size contribute to sturdy “trees” that hold their form beautifully after decoration, preventing them from falling apart when handled.
- **The Importance of Chilling for Clean Cuts:** While it might be tempting to cut into warm brownies, patience is key for these decorative treats! **Thoroughly chilling your brownies** (for at least 30 minutes in the refrigerator, or even longer) before cutting them will make a significant difference. Cold brownies have a much firmer texture, which prevents them from crumbling, tearing, or sticking to your knife. This ensures crisp, defined edges for your tree shapes, making them look professionally made. Don’t worry about the leftover brownie scraps – they’re a delicious baker’s perk, often eagerly claimed by impatient little helpers!
- **Customizing Tree Size to Your Preference:** The beauty of homemade treats lies in their adaptability. You have complete control over the size of your brownie trees. I generally aim for trees that are approximately 3 inches long from base to tip, which makes for a perfect two-to-three-bite treat, ideal for a dessert platter. However, feel free to adjust based on your preference – whether you prefer petite individual servings or more substantial dessert portions. Just ensure your candy cane “trunks” are appropriately sized to fit your chosen tree dimensions.
- **Frosting Flexibility: Homemade vs. Store-Bought:** When it comes to the vibrant green frosting, you have a couple of convenient options. You can easily prepare your own luscious buttercream frosting from scratch – I’ve included a simple recipe in the notes section for this purpose, which allows for customization of sweetness and consistency. Alternatively, save precious time during the busy holiday season by opting for a can of store-bought frosting. Many supermarkets offer pre-dyed green frosting during Christmas, or you can simply add a few drops of green food coloring gel to white vanilla frosting to achieve your desired shade.
- **Piping Perfection for a Festive Look:** To create that classic, textured Christmas tree look that mimics pine needles, I highly recommend using a piping bag fitted with a closed star tip. This tip produces beautiful, ridged swirls that add visual interest and dimension. If you don’t own a piping bag, don’t fret! A simple DIY solution is to spoon your frosting into a gallon-sized resealable plastic bag, snip a small corner off the bottom, and use it as a makeshift piping bag. While the star tip provides a more intricate design, even frosting straight from a snipped bag will look wonderfully festive and appealing, capturing the spirit of the season.
- **Elevating Presentation:** While these brownies are inherently charming, thoughtful presentation can make them even more special. Arrange them artfully on a festive platter, perhaps dusted with a little powdered sugar to mimic a snowy landscape, or surrounded by extra sprinkles and miniature holiday candies. Their visual appeal is a huge part of their charm, so make it count!
Quick Tip: Prepare Ahead for Stress-Free Holidays
Planning is key during the busy holiday season, and these Christmas brownies are wonderfully accommodating to make-ahead preparations. You can confidently bake the brownies, allow them to cool completely, and cut them into their charming tree shapes well in advance of your gathering. Once cut, simply arrange the brownie triangles in a single layer in an airtight container, separated by parchment paper, and freeze them for up to one month. When you’re ready to serve, simply thaw the brownies at room temperature for an hour or two, then proceed with the fun part: adding the festive frosting, star toppers, and colorful sprinkles. This approach allows you to spread out your holiday baking tasks, saving you precious time on the day of your event, and ensures you’ll have a delightful, homemade treat ready to go when you need it most, fresh and fabulous!
Frequently Asked Questions About Christmas Tree Brownies
For the cleanest and most precise cuts, it is always recommended to cut brownies when they are thoroughly chilled, ideally cold from the refrigerator. Cold brownies have a much firmer texture, which prevents them from crumbling or tearing. This also significantly reduces their stickiness, making for an easier and less messy cutting process, especially when creating intricate shapes like these Christmas trees. Cutting warm brownies often results in uneven, messy edges and a gooey interior that’s hard to manage.
Cutting brownies into perfect triangles for your Christmas trees is simpler than it sounds. First, ensure your baked brownie slab is completely chilled and removed from the pan using the foil liner, then place it on a clean cutting board. For a 9″x13″ pan, start by cutting the brownie slab into four equal strips lengthwise. Then, take each strip and make diagonal cuts, alternating the direction of the cut for each triangle. For example, cut from the top left corner to the bottom right for the first triangle, then from the top right corner to the bottom left for the next. This method allows you to maximize your yield, creating beautiful, symmetrical triangles from each strip. Using a sharp knife that you wipe clean between each cut will also help achieve crisp edges and prevent smudging. You’ll get minimal waste this way!
Absolutely! While this recipe provides instructions for homemade fudge brownies from scratch, a high-quality box brownie mix works wonderfully as a shortcut, especially during a busy holiday season. Simply prepare the brownie mix according to the package directions, bake in a 9″x13″ pan, and then follow the cooling, chilling, cutting, and decorating steps as outlined in this recipe. Using a mix is a fantastic way to save time without compromising on the festive fun and delicious results!
To keep your Christmas Tree Brownies fresh and their delightful decorations intact, it’s best to store them in an airtight container in the refrigerator. They will remain delicious and visually appealing for up to 3-4 days. If you’ve used a softer buttercream frosting, keeping them chilled until just before serving is particularly important to maintain their festive shape and prevent the frosting from becoming too soft or melting.
For these fudgy brownies, semisweet chocolate chips are recommended as they provide a balanced chocolate flavor that is neither too sweet nor too bitter. However, you can experiment with dark chocolate chips for a more intense chocolate experience, or even milk chocolate chips if you prefer a sweeter, creamier brownie. High-quality chocolate makes a noticeable difference in the final taste and texture.
FOLLOW US FOR MORE DELICIOUS RECIPES
Elevate Your Brownies: Creative Flavor Variations
While these Christmas Tree Brownies are absolutely delightful in their original form, part of the joy of holiday baking is customizing recipes to suit your unique taste preferences or to surprise your guests with new twists. Here are some fantastic ways to introduce exciting flavor variations:
- **Brownie Batter Boosters:** The rich fudge brownie base is a perfect canvas for additional mix-ins. Feel free to fold up to ½ cup of extra ingredients into the batter just before pouring it into the pan. Consider additions like crunchy toffee bits for a buttery crunch, sweet butterscotch chips, classic white chocolate chips for a milder chocolate flavor, or even toasted coconut flakes for a tropical-holiday fusion. For a nutty twist, chopped pecans or walnuts can also be delightful. A word of caution: while these additions enhance flavor, larger pieces might make the brownies slightly more challenging to cut cleanly, so ensure they are thoroughly chilled.
- **Innovative Frosting Alternatives:** If you’re looking for an alternative to traditional buttercream, consider a creative switch. Instead of piping frosting, you could dip the top of each brownie triangle into melted green candy melts. This provides a smooth, glossy finish and a distinct candy flavor that hardens quickly. For a simpler yet equally appealing look, you could just drizzle melted white or green candy melts artfully over the plain brownie triangles, letting them harden. This candy coating option is also excellent for transporting your brownies, as the hardened candy melts are less prone to smearing than soft frosting, making them travel-friendly for holiday gatherings.
- **Sprinkle Spectacle:** The rainbow nonpareil sprinkles I typically use evoke the joyful sparkle of holiday lights, creating a classic festive aesthetic. However, the world of sprinkles is vast and full of possibilities! Don’t hesitate to experiment with different types and colors. Try classic red and green Christmas sprinkles, elegant snowflake shapes, edible glitter for extra shimmer, or even silver and gold accents for a more sophisticated look. Mini chocolate chips or crushed peppermints can also be used as “ornaments.” Let your creativity run wild to match your holiday theme or personal style.
- **Candy Cane Creativity (and Beyond):** Standard peppermint candy canes are a delightful and traditional choice for the tree trunks, offering a cool, minty counterpoint to the rich chocolate. But modern candy canes come in an impressive array of flavors – from cherry to fruit punch to sugar cookie! Choose your favorite to add an unexpected flavor dimension to your brownies. For those who prefer a non-minty option or wish to avoid candy canes altogether, consider using long, straight pieces of Tootsie Rolls, pretzel sticks for a salty-sweet contrast, or even segments of KitKat candy bars to form the sturdy tree trunks. These alternatives offer different textures and flavors while maintaining the charming aesthetic.
- **A Touch of Spice:** For a truly unique holiday flavor profile, consider adding a pinch of cinnamon or a tiny dash of gingerbread spice to your brownie batter. These warm spices pair beautifully with chocolate and will infuse your Christmas Tree Brownies with an extra layer of festive aroma and taste.
The truly remarkable aspect of these Christmas Tree Brownies is that their exquisite taste perfectly matches their enchanting appearance. They are a consistent highlight on my Christmas table year after year, never failing to bring smiles and satisfy sweet cravings. Their delightful combination of fudgy brownie, creamy frosting, and festive decorations makes them a standout holiday treat that everyone will adore.
More Irresistible Dessert Recipes to Explore
Brownie Pizza
50 mins
Peanut Butter Brownies
50 mins
Peppermint Brownies
1 hr 10 mins
Haystack Cookies
10 mins
Funfetti Cookies
15 mins
Christmas Tree Brownies Video Guide
For a visual walkthrough of how to create these enchanting Christmas Tree Brownies, watch our step-by-step video guide below. See firsthand how easily these delightful holiday treats come together, from preparing the fudgy brownie batter to the artistic final touches of frosting and sprinkles. This video is perfect for visual learners and anyone looking for extra guidance to ensure their brownies are both beautiful and delicious, making your holiday baking a joyous and successful endeavor!
Loved This Recipe?
If you enjoyed making and sharing these festive Christmas Tree Brownies, we’d be absolutely delighted if you could leave a 5-star 🌟🌟🌟🌟🌟 rating in the recipe card below. Your feedback helps us grow and inspires other home bakers to create their own delicious holiday memories! Feel free to share your thoughts, tips, and experiences in the comments section further down the page – we love hearing from you and seeing your amazing creations!
Christmas Tree Brownies
Pin
Time
Ingredients
For the brownies:
- cooking spray
- 1/2 cup unsalted butter
- 8 ounces semisweet chocolate chips
- 1 1/2 cups granulated sugar
- 4 large eggs
- 1 teaspoon vanilla extract
- 1/2 teaspoon salt
- 3/4 cup all-purpose flour
For the decorations:
- 16 small candy canes
- 16 gold star sprinkles or candies
- 1/3 cup rainbow sprinkles
- 2 cups green frosting homemade or store-bought; a basic homemade buttercream recipe is provided in the notes section
Instructions
For the brownies
-
Preheat your oven to 350 degrees Fahrenheit (175°C). Prepare a 9″x13″ baking pan by lining it with aluminum foil, leaving an overhang on the sides for easy removal. Lightly coat the foil with cooking spray to ensure the brownies don’t stick.
-
In a large microwave-safe bowl, combine the butter and semisweet chocolate chips. Microwave in 30-second intervals, stirring well after each, until the butter and chocolate are fully melted and smoothly combined.
-
Stir in the granulated sugar until completely blended. Then, add the eggs one at a time, whisking vigorously after each addition until the mixture is smooth and glossy.
-
Stir in the vanilla extract until fragrant. Gently fold in the salt and all-purpose flour using a spatula until just combined. Be careful not to overmix the batter.
-
Pour the brownie batter evenly into your prepared pan and bake for 25-30 minutes. The brownies are done when a toothpick inserted into the center comes out with moist crumbs, not wet batter.
-
Allow the brownies to cool completely to room temperature in the pan. For easier and cleaner cutting, chill them in the refrigerator for at least 30 minutes, or until firm.
-
Once chilled, use the foil edges to lift the entire slab of brownie from the pan onto a cutting board. With a sharp knife, cut the brownie slab into 16 individual triangles, creating your Christmas tree shapes.
For the decorations
-
Carefully snap off the curved tops of the candy canes, keeping only the straight sections. Insert these straight candy cane pieces into the bottom of each brownie triangle to form the tree trunks.
-
Place your green frosting into a piping bag fitted with a star or plain tip. If you don’t have a piping bag, a resealable plastic bag with a small corner snipped off will work. Pipe approximately 1½ tablespoons of frosting onto each brownie, creating a textured tree effect.
-
Position a star sprinkle at the peak of each frosted brownie to act as the tree topper. Then, generously scatter rainbow sprinkles all over each brownie, simulating colorful Christmas lights.
-
Serve your festive Christmas Tree Brownies immediately, or store them, covered, in the refrigerator for up to one day to maintain freshness and decoration integrity.
Notes
You will need: 1 cup unsalted butter (softened), 3 1/2 cups powdered sugar, 2 teaspoons vanilla extract, 2-3 tablespoons milk or cream, and green food coloring gel.
Instructions: In a large bowl, beat the softened butter with an electric mixer on medium speed until it is light and fluffy, about 2-3 minutes. Reduce the mixer speed to low and gradually add the powdered sugar, one cup at a time, mixing until fully incorporated after each addition. Stir in the vanilla extract and 2 tablespoons of milk or cream. Continue beating on medium speed until the frosting is smooth and creamy. You can add more powdered sugar if you desire a thicker consistency, or add more milk or cream by the teaspoon for a thinner consistency. Finally, add green food coloring gel a few drops at a time, mixing until your desired shade of green is achieved.
Nutrition
Tweet
Pin