
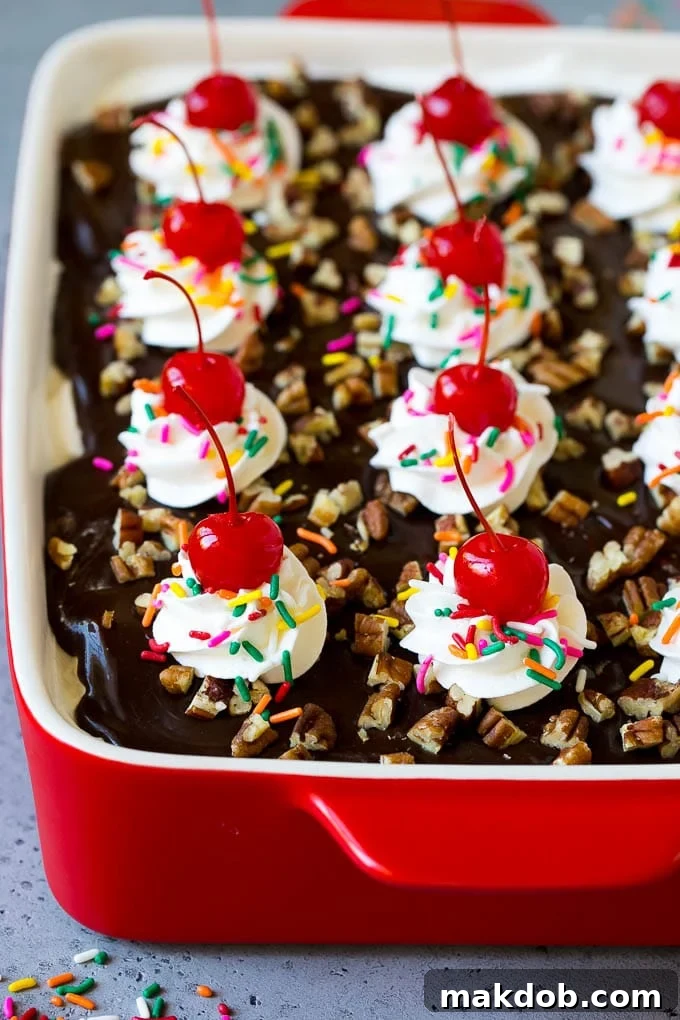
Irresistible No-Bake Banana Split Cake: Your Ultimate Crowd-Pleasing Dessert
Prepare to be enchanted by the ultimate dessert sensation: the No-Bake Banana Split Cake. This delightful treat takes all the beloved flavors of a classic banana split and transforms them into a towering, easy-to-make cake that requires no oven at all. Featuring a buttery graham cracker crust as its foundation, this dessert is generously layered with creamy cheesecake, sweet pineapple, fresh banana slices, fluffy whipped topping, and rich chocolate fudge. It’s the quintessential make-ahead dessert, perfect for feeding a crowd and guaranteed to disappear quickly at any gathering.
As an enthusiast of stress-free entertaining, I often turn to no-bake desserts for their incredible ease and universal appeal. They consistently earn rave reviews from family and friends, making them a staple in my kitchen. While chocolate lasagna and no-bake peanut butter pie are always hits, this vibrant banana split cake truly stands out with its colorful layers and refreshing taste.
Why Choose a No-Bake Banana Split Cake?
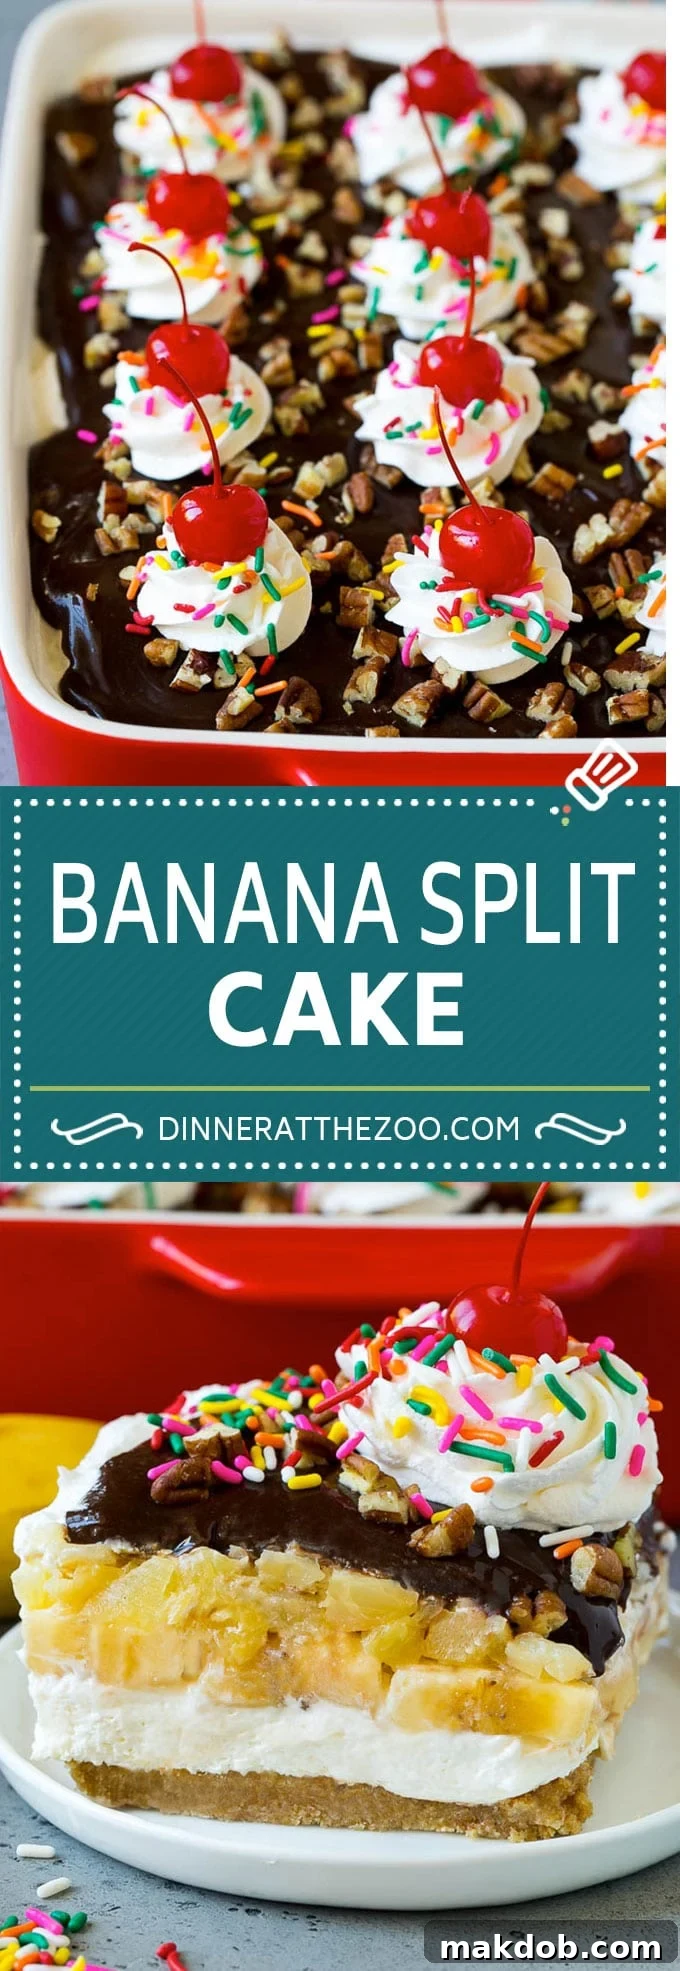
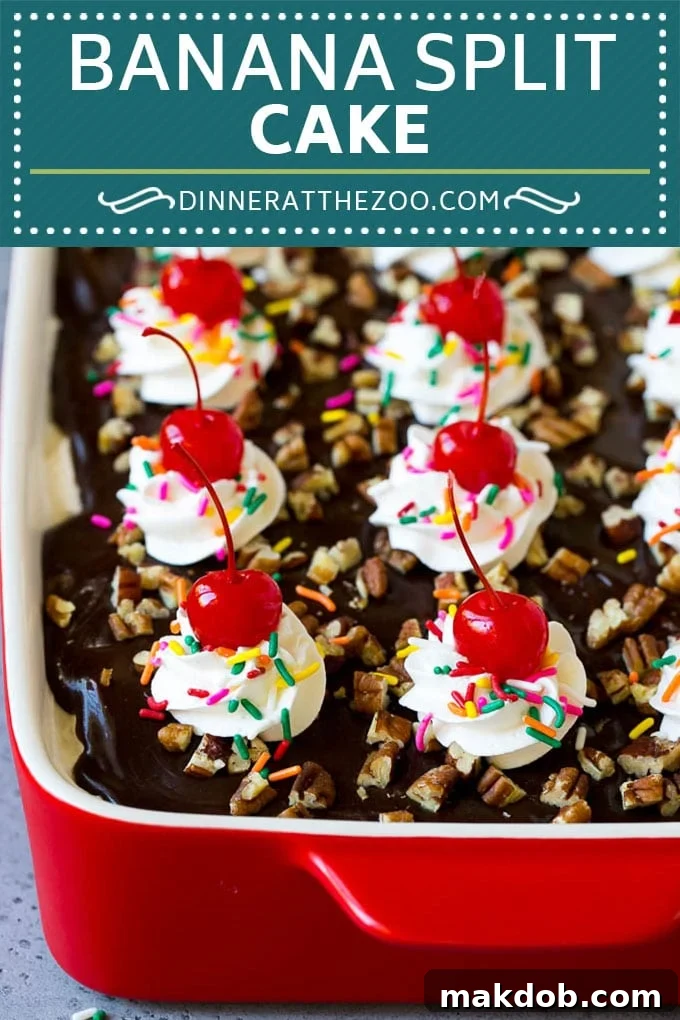
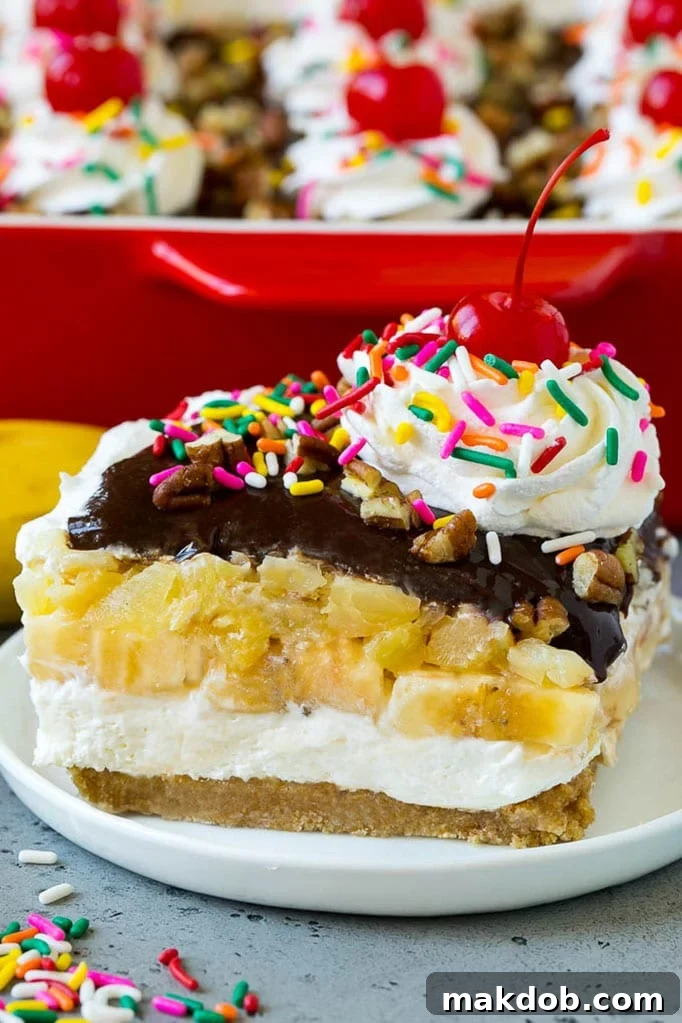
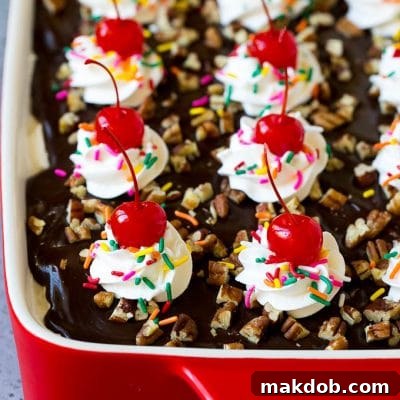
For sundae aficionados, this no-bake banana split cake is nothing short of a dream come true. It’s a true showstopper, presenting a majestic tower of delightful layers: a sturdy crust, luscious cheesecake, vibrant fruit, rich chocolate, crunchy nuts, playful sprinkles, and, of course, a crowning cherry. This dessert is the quintessential indulgence for any summer party or potluck, offering all the fantastic flavor of a classic banana split without the worry of melting ice cream. Imagine serving a dessert that evokes nostalgic joy, tastes incredibly fresh, and requires minimal effort – that’s the magic of this no-bake creation.
The “no-bake” aspect is a significant advantage, especially during warmer months. You won’t need to turn on your oven, keeping your kitchen cool and your energy bills down. This makes it a perfect choice for outdoor gatherings, picnics, and any occasion where you want to spend less time cooking and more time enjoying. Its simple assembly also means it’s a fantastic recipe for beginner bakers or those looking for a stress-free dessert solution. The vibrant colors and distinct layers make it visually appealing, ensuring it catches everyone’s eye on the dessert table.
The Anatomy of a Perfect Banana Split Cake: Layers of Delight
Every bite of this banana split cake is a journey through textures and flavors, thanks to its thoughtfully constructed layers. Starting from the bottom up, each component plays a crucial role in creating this irresistible dessert.
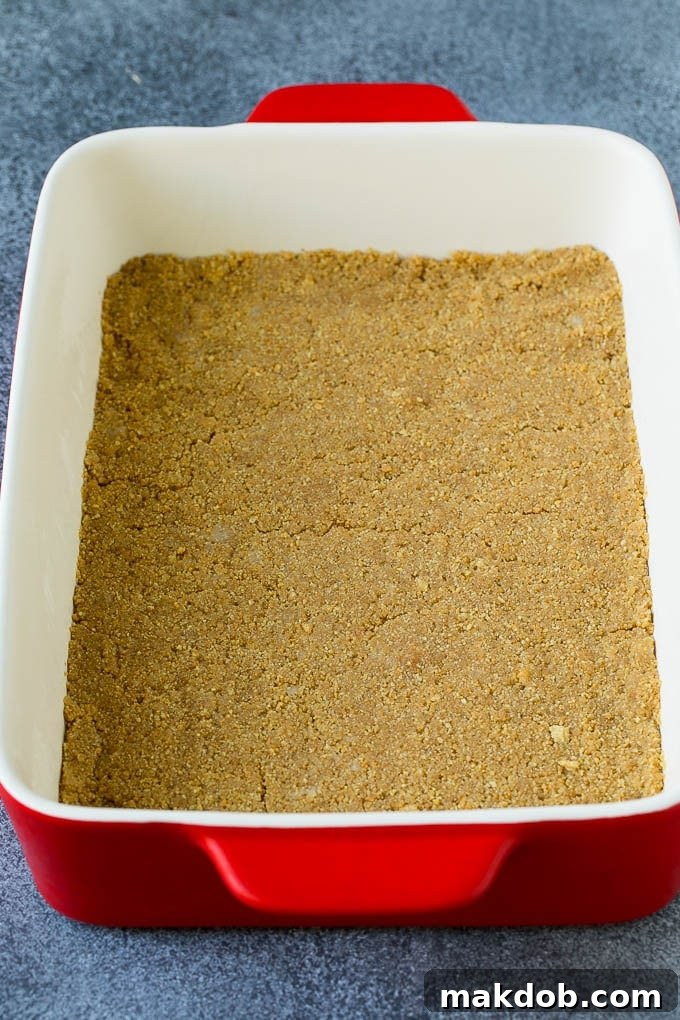
- The Graham Cracker Crust: This forms the delicious base of our cake. A simple blend of crushed graham crackers, melted butter, and a touch of sugar creates a firm yet tender foundation that offers a satisfying crunch with every spoonful. Chilling this layer properly is vital for structural integrity.
- The Creamy Cheesecake Layer: Smooth, rich, and utterly luxurious, the no-bake cheesecake layer is made from softened cream cheese, whipped topping, granulated sugar, and a hint of vanilla extract. This layer provides a tangy sweetness that perfectly balances the other components, elevating the cake beyond a simple fruit dessert.
- Fresh Banana Slices & Crushed Pineapple: These two fruits are the heart of the banana split experience. Generous slices of ripe bananas deliver natural sweetness and a soft texture, while well-drained crushed pineapple adds a bright, zesty counterpoint. The acidity in the pineapple also naturally helps to slow down the browning of the bananas, keeping them looking and tasting fresh.
- Light Whipped Topping & Decadent Chocolate Fudge: A generous blanket of whipped topping provides a light, airy contrast to the rich layers below. Drizzled over this is warm (but not hot!) fudge sauce, creating those iconic chocolate swirls that are essential to any banana split.
- Customizable Sundae Toppings: The grand finale involves a vibrant array of sundae fixings. Chopped pecans add a delightful nutty crunch, while colorful rainbow sprinkles provide a festive touch. And, of course, no banana split is complete without bright red maraschino cherries, artfully placed to complete the classic look.
This harmonious blend of ingredients ensures that each slice of the no-bake banana split cake is a symphony of flavors and textures, making it a truly unforgettable dessert experience.
Crafting Your No-Bake Banana Split Cake: A Step-by-Step Guide
Making this impressive no-bake banana split cake is surprisingly straightforward, mostly involving assembly and chilling. Follow these steps for a dessert that looks and tastes like it came from a professional bakery.
- Prepare Your Pan: Start by lightly coating a 9×13-inch baking dish with cooking spray. This helps prevent sticking and makes serving easier.
- Craft the Graham Cracker Crust: In a medium bowl, combine the graham cracker crumbs, melted butter, and granulated sugar. Mix until well combined and the crumbs are moistened. Press this mixture evenly into the bottom of your prepared pan. Place the crust in the freezer for about 10 minutes to set it quickly while you prepare the filling.
- Whip Up the Cheesecake Layer: In the bowl of a stand mixer (or using a hand mixer), beat the softened cream cheese until it is smooth and creamy. Gradually add the whipped topping, granulated sugar, and vanilla extract, continuing to beat until the mixture is light and fluffy.
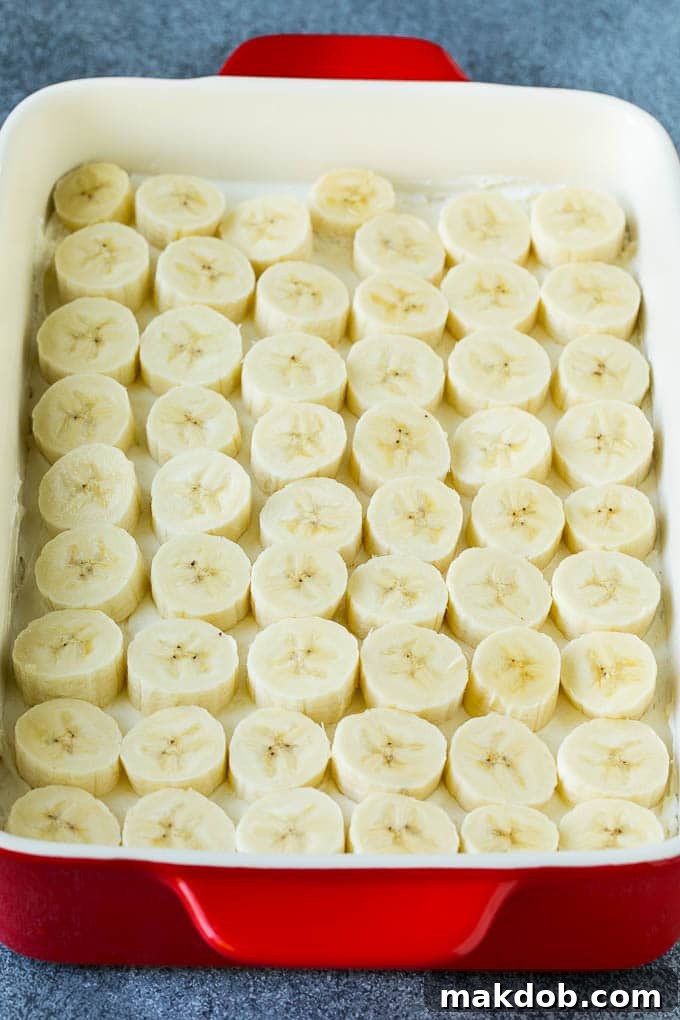
- Assemble the Fruit Layers: Carefully spread the creamy cheesecake mixture evenly over the chilled graham cracker crust. Next, arrange a single layer of fresh, sliced bananas over the cheesecake. Ensure the crushed pineapple is very well-drained to avoid making the cake soggy, then spread it evenly over the bananas.
- Add the Initial Whipped Topping: Spread half of the remaining whipped topping over the pineapple layer. Place the cake in the refrigerator and chill for at least 30 minutes. This allows the layers to firm up slightly before adding the fudge.
- Prepare the Hot Fudge: Warm the hot fudge sauce gently in the microwave for 15-20 seconds, or just until it’s pourable. It should be lukewarm, not hot, as hot fudge will melt your whipped topping. If it gets too warm, let it cool at room temperature.
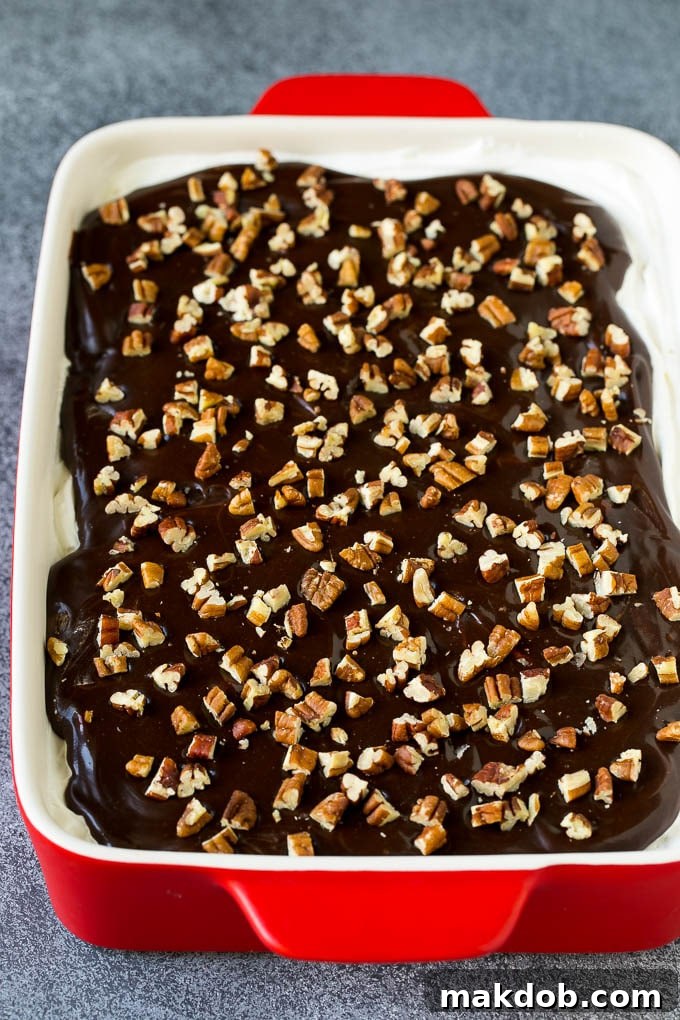
- Drizzle and Chill: Drizzle the lukewarm fudge sauce over the whipped topping layer. Gently and quickly spread it into place, being careful not to mix it too much with the white topping. Immediately sprinkle the chopped pecans over the fudge layer. Return the cake to the refrigerator and chill for a minimum of 2 hours, or ideally up to 8 hours, to allow all the layers to fully set.
- The Grand Finale: Garnish and Serve: Once chilled and firm, pipe rosettes with the remaining whipped topping onto the top of the cake. Finish with a generous sprinkle of rainbow sprinkles and strategically place maraschino cherries. Slice, serve, and enjoy!
Expert Tips for Banana Split Cake Success
To ensure your no-bake banana split cake turns out perfectly every time, keep these essential tips in mind:
- Chilling is Crucial: The most important step in creating a perfectly set no-bake cake is sufficient chilling. While the preparation is quick, the majority of the “making” time is spent waiting for the layers to firm up in the refrigerator. Follow the chilling instructions diligently to achieve distinct, stable layers that hold their shape when sliced.
- Optimize Freshness: This cake is at its absolute best when served within 12 hours of assembly. While the natural acidity in the pineapple helps prevent the bananas from browning too quickly, over time, bananas can soften and discolor. For optimal visual appeal and taste, plan to serve it the same day you finish chilling. If preparing further in advance, you can brush a thin layer of lemon juice over the banana slices before adding the pineapple, but be mindful it might slightly alter the flavor profile.
- Choose Your Whipped Topping Wisely: You have options for the whipped layer. Pre-made whipped topping (like Cool Whip) offers ultimate convenience and stability, making it my go-to choice. However, if you prefer the taste of fresh cream, you can whip your own heavy cream with a little granulated sugar and vanilla extract until stiff peaks form. Crucially, avoid aerosol whipped cream, as it will quickly deflate and leave your cake looking sad.
- Get Creative with Toppings: The beauty of a banana split cake lies in its customizability. Beyond the classic pecans, sprinkles, and cherries, feel free to experiment! Consider mini chocolate chips, toffee bits, a drizzle of caramel sauce, chopped walnuts, or even shredded coconut for added flavor and texture.
- Select Ripe Bananas: Use bananas that are ripe but still firm. Overly ripe bananas can become mushy and might brown more quickly. They should be yellow with just a few brown spots.
- Thoroughly Drain Pineapple: This cannot be stressed enough. Excess liquid from canned crushed pineapple will make your cake soggy. Press the pineapple in a fine-mesh sieve or cheesecloth until as much liquid as possible is removed.
Slicing Your Masterpiece: Achieving Picture-Perfect Servings
The hardest part about making banana split cake isn’t the assembly, it’s often cutting those neat, picture-perfect slices. But with a few simple techniques, you can ensure every piece looks as good as it tastes:
- Pre-Freeze for Firmness: About 30 minutes before you plan to slice, place your entire cake in the freezer. This brief chill will further firm up all the layers, making them more stable and less likely to squish or merge as you cut through the dessert.
- Clean Knife Between Cuts: For impeccably clean lines between each slice, wipe your knife with a damp paper towel (or rinse under hot water and wipe dry) after every single cut. This prevents remnants from previous slices from smudging the next one.
- Use a Hot Knife: For an even smoother cut, especially through the fudge and whipped topping, dip your knife in hot water and then wipe it dry before each slice. The warmth helps the knife glide through the layers without dragging.
- Refine Edges with an Offset Spatula: If you’re aiming for presentation perfection, gently run a thin offset spatula around the freshly cut sides of each slice. This can help to gently push any slightly displaced layers back into alignment, creating those crisp, defined lines you see in food photography.
Serving Suggestions and Occasions
This No-Bake Banana Split Cake is incredibly versatile and shines on many occasions. It’s an obvious choice for summer barbecues, potlucks, and poolside parties, offering a refreshing alternative to traditional ice cream sundaes without the melting mess. My kids frequently request it for their birthdays, and their friends always go wild for it – there’s just something inherently joyful about all those different layers of color and flavor! It also makes a wonderful dessert for family gatherings, holiday picnics, or simply as a special weeknight treat. Pair it with a tall glass of iced tea or a sparkling lemonade for a complete and delightful experience.
Frequently Asked Questions (FAQs)
- Can I make this banana split cake ahead of time? Yes, absolutely! This cake is an excellent make-ahead dessert. You can assemble it up to 8-12 hours in advance. Just be sure to keep it well-chilled in the refrigerator until serving. Add the final whipped topping rosettes, sprinkles, and cherries just before serving for the freshest look.
- How do I prevent the bananas from browning? The crushed pineapple’s acidity naturally helps prevent the bananas from browning quickly. For extra protection, you can very lightly brush the sliced bananas with a tiny amount of lemon juice or a fruit protector spray before layering them.
- Can I use a different type of crust? Yes, you can! While graham cracker is classic, an Oreo cookie crust or a vanilla wafer crust would also be delicious alternatives and maintain the no-bake characteristic.
- Can I freeze leftovers of the banana split cake? While it’s best enjoyed fresh, you can freeze individual slices of the cake for up to 1-2 weeks. Wrap them tightly in plastic wrap and then aluminum foil. Thaw slices in the refrigerator for a few hours before serving. The texture might be slightly different, but it will still be tasty.
- What size pan is best for this recipe? This recipe is designed for a standard 9×13-inch rectangular baking dish, which yields generous servings perfect for a crowd.
This no-bake banana split cake truly offers a delightful blend of simplicity and spectacular flavor. It’s a testament to how easy it can be to create a show-stopping dessert that everyone will love, without the stress of an oven. Give it a try, and watch it become your new favorite!
More Sweet Treats You’ll Love
- Ice Cream Sandwich Cake
- Blueberry Shortcake
- Tiramisu Ice Cream Cake
- Shamrock Shake
- Homemade Magic Shell
Banana Split Cake
Pin
Sara Welch
20
1
3
21
Ingredients
For the crust
- 1 1/2 cupa graham cracker crumbs
- 8 tablespoons butter melted
- 1/4 cup granulated sugar
- cooking spray
For the fillings
- 12 ounces cream cheese softened
- 8 ounces whipped topping thawed
- 1/2 cup granulated sugar
- 1/2 teaspoon vanilla extract
- 3 bananas sliced
- 20 ounce can crushed pineapple well drained
For the toppings
- 8 ounces whipped topping thawed, divided use
- 1 1/4 cups hot fudge sauce
- 1/3 cup pecans chopped
- 1/4 cup rainbow sprinkles
- 16 maraschino cherries
Instructions
-
Coat a 9″x13″ pan with cooking spray.
-
For the crust: Mix together the graham cracker crumbs, butter and sugar in a bowl. Press into the bottom of the prepared pan. Chill the crust in the freezer for 10 minutes.
-
Place the cream cheese in the bowl of a mixer. Beat until smooth and creamy. Add the whipped topping, sugar and vanilla extract.
-
Spread the cream cheese mixture over the crust. Add a layer of bananas, then a layer of crushed pineapple.
-
For the toppings Spread half the whipped topping over the pineapple layer. Chill for 30 minutes in the refrigerator.
-
Warm the fudge sauce in the microwave for 15-20 seconds or pourable. The sauce should not be hot or it will melt the whipped topping. If your chocolate is too hot, let it sit at room temperature until lukewarm.
-
Drizzle the fudge over the whipped topping and quickly gently spread into place.
-
Sprinkle pecans over fudge layer. Chill for at least 2 hours, or up to 8 hours.
-
Place the remaining whipped topping in a piping bag fitted with a star tip. Pipe rosettes of whipped topping onto the top of the cake. Top with sprinkles and cherries. Cut into slices, then serve.
Nutrition
Did you make this recipe?
Tag @dinneratthezoo on Instagram and hashtag it #dinneratthezoo
Tweet
Pin
This post was originally published on June 2, 2015 and was updated on May 28, 2019 with new content.