
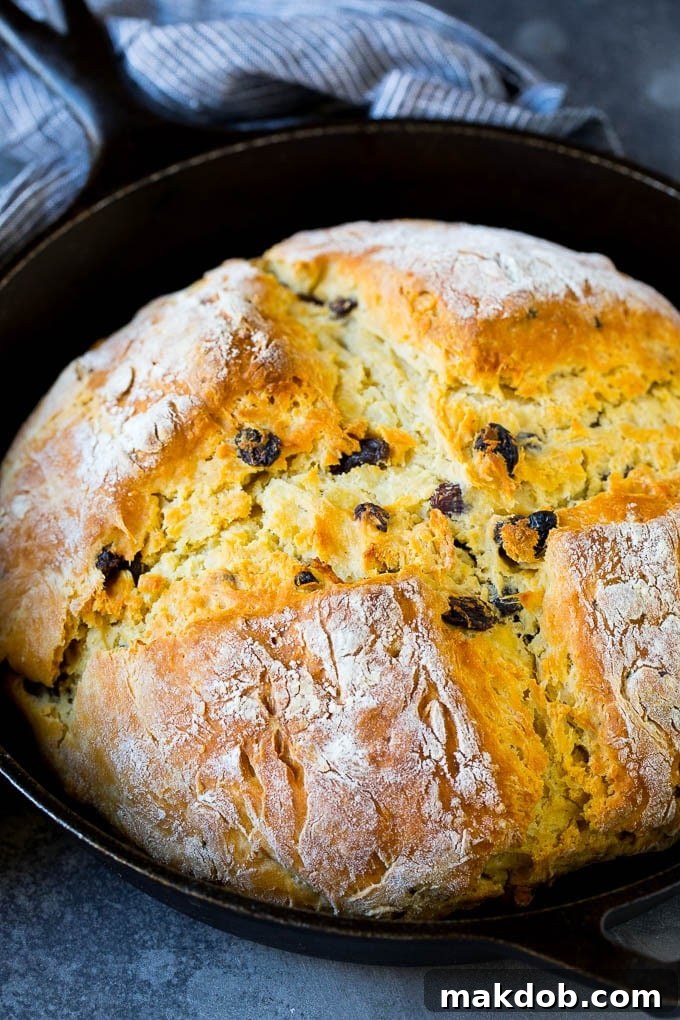
Easy Irish Soda Bread Recipe: A Quick, No-Yeast Loaf
Discover the joy of baking with this incredibly easy Irish Soda Bread recipe, featuring a light, tender crumb generously studded with sweet raisins. This traditional quick bread bakes to a beautiful golden brown perfection, offering a rustic charm and a delightful balance of sweet and savory notes that pairs wonderfully with a myriad of dishes. Forget complicated yeast breads; this no-knead recipe brings fresh, homemade bread to your table in under an hour!
Whether you’re celebrating St. Patrick’s Day, seeking a comforting addition to a cold-weather meal, or simply craving a satisfying slice of homemade bread, this Irish Soda Bread is a true kitchen hero. Its simplicity and speed make it an ideal choice for busy weeknights, offering all the warmth and flavor of a classic loaf without the fuss of kneading or waiting for dough to rise. The result is a wonderfully textured bread that practically begs for a generous slather of butter and a dollop of your favorite jam.
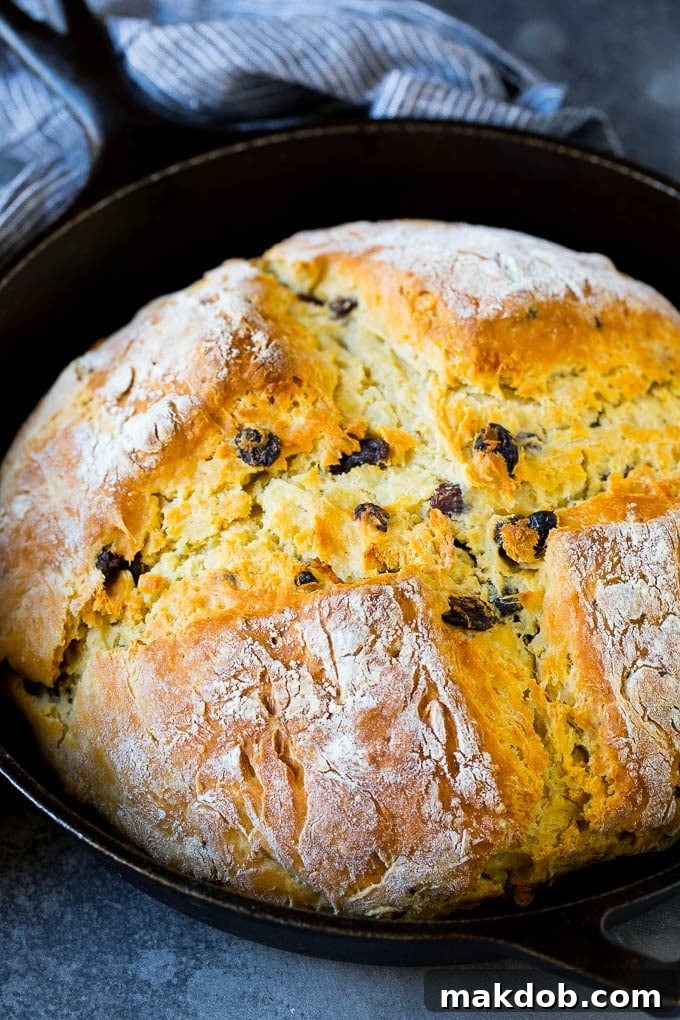
This versatile bread is more than just a side; it’s an experience. Its unique flavor profile, combining the subtle sweetness of raisins with the tangy undertones of buttermilk, makes it a fantastic accompaniment to a wide range of meals. Imagine tearing off a warm piece to soak up the rich broth of a hearty chicken stew, or serving it alongside a succulent slow-roasted prime rib. It’s equally delightful with classic Irish fare like braised cabbage or corned beef hash, and even complements festive beverages such as an Irish mule or a playful shamrock shake.
Table of Contents
- Why You’ll Love This Irish Soda Bread
- The Simple Ingredients You’ll Need
- How to Make Traditional Irish Soda Bread
- Essential Tips for a Perfect Loaf
- Storing and Reheating Irish Soda Bread
- The Rich History of Irish Soda Bread
- Delightful Flavor Variations
- Frequently Asked Questions (FAQs)
- More St. Patrick’s Day Recipes You’ll Enjoy
- Irish Soda Bread Recipe Card
Why You’ll Love This Irish Soda Bread
There are countless reasons to fall in love with this easy Irish Soda Bread, but its sheer simplicity and speed are definitely at the top of the list. Unlike traditional yeasted breads that require multiple rises and careful kneading, this recipe is a true “quick bread.” This means:
- No Yeast Required: The leavening power comes from baking soda reacting with acidic buttermilk, creating a tender crumb without the need for finicky yeast.
- No Kneading: A gentle mix is all it takes! Over-kneading will develop gluten, leading to a tough loaf, so a light touch is actually preferred.
- No Waiting for Rising: From mixing bowl to oven in minutes, you won’t spend hours waiting for your dough to proof. This is perfect for when a bread craving strikes or you need a last-minute side for dinner.
- Rustic Charm: The simple, round shape and signature “X” cut on top give this bread an authentic, homemade look that’s incredibly appealing.
- Incredible Versatility: Enjoy it plain, with butter and jam, or as a side to savory stews, soups, and roasts. Its slightly sweet, tangy flavor profile makes it a fantastic canvas for various meals.
In short, if you’re looking for a foolproof bread recipe that delivers maximum flavor with minimal effort, this Irish Soda Bread is about to become your new favorite!
The Simple Ingredients You’ll Need
Crafting this delicious Irish Soda Bread requires just a handful of common pantry staples, making it accessible to any home baker. Here’s a breakdown of the key ingredients and their roles:
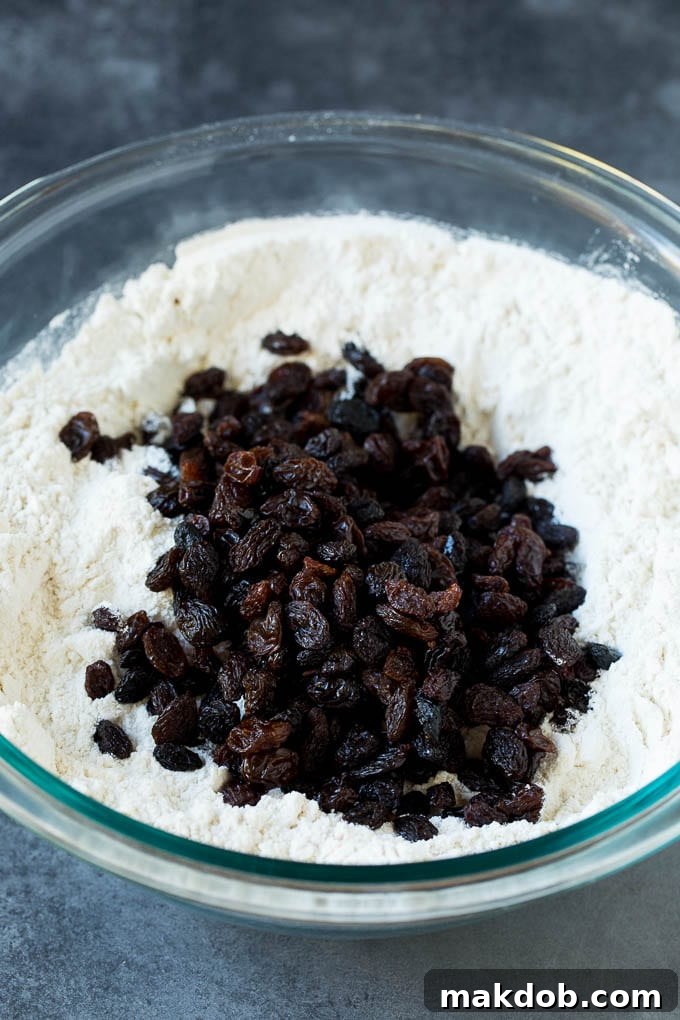
- All-Purpose Flour: The base of our bread. While some recipes use whole wheat, all-purpose flour provides the classic light and tender texture.
- Granulated Sugar: Adds a subtle sweetness that balances the tang of the buttermilk and complements the raisins.
- Baking Soda: The star leavening agent. When combined with buttermilk, it creates carbon dioxide bubbles, giving the bread its rise.
- Salt: Enhances all the flavors in the bread and is crucial for proper leavening.
- Raisins: These are a signature addition, providing bursts of natural sweetness and chewiness throughout the loaf. You can adjust the quantity based on your preference or even omit them for a savory bread.
- Cold Butter (cut into small pieces): Incorporating cold butter into the flour mixture creates a tender, flaky texture similar to scones or biscuits. The small pieces melt slowly during baking, releasing steam and creating pockets of air.
- Buttermilk: Essential for Irish Soda Bread! Its acidity reacts with the baking soda to leaven the bread, while also contributing a unique tang and tenderness.
- Egg: Adds richness, helps bind the dough, and contributes to a beautifully golden crust.
- Cooking Spray: For preparing your baking pan, ensuring the bread doesn’t stick.
Always ensure your ingredients are fresh, especially the baking soda, as its effectiveness diminishes over time.
How to Make Traditional Irish Soda Bread
Baking this delightful Irish Soda Bread is a straightforward process, perfect for bakers of all skill levels. Follow these simple steps for a truly rewarding experience:
- Prepare Your Oven and Pan: Preheat your oven to 375 degrees F (190 degrees C). Lightly coat a 9-inch round baking pan or a cast iron skillet with cooking spray. This prevents sticking and helps achieve a lovely crust.
- Combine Dry Ingredients: In a large mixing bowl, whisk together the all-purpose flour, granulated sugar, baking soda, and salt. Ensure they are well combined to distribute the leavening evenly.
- Cut in the Butter: Add the cold butter, cut into small cubes, to the dry ingredients. Using a pastry blender or two forks, cut the butter into the flour mixture until it resembles coarse crumbs. This step is crucial for a tender, flaky texture.
- Stir in Raisins: Fold in the raisins, ensuring they are evenly distributed throughout the flour and butter mixture.
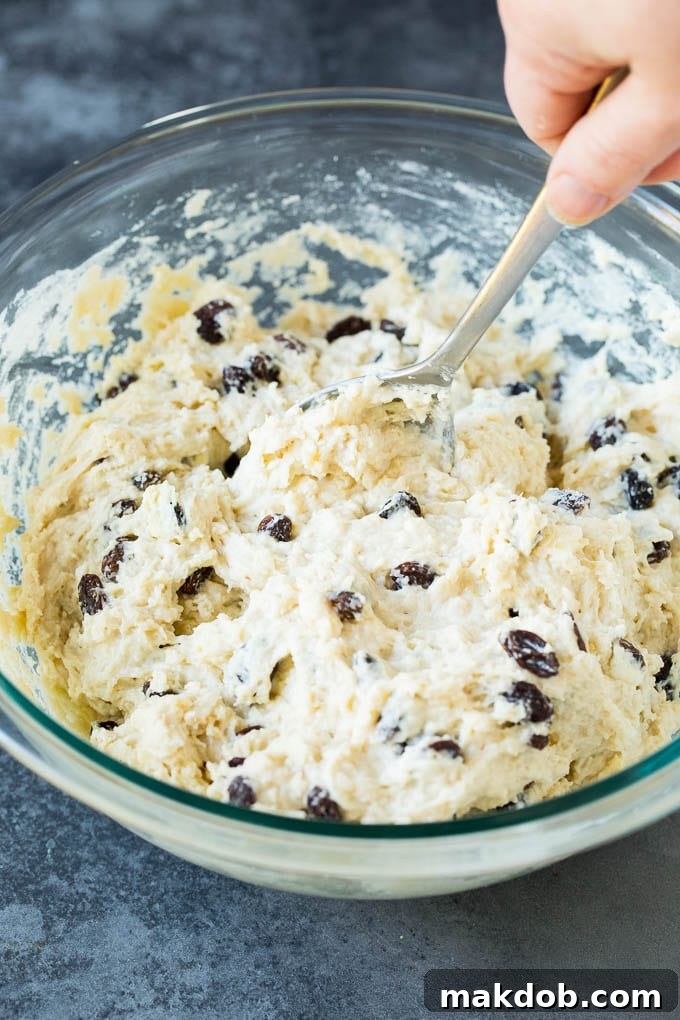
- Add Wet Ingredients: In a separate bowl, lightly whisk the buttermilk and egg together. Pour the wet mixture into the dry ingredients and stir with a wooden spoon or spatula until a stiff, shaggy dough forms. Be careful not to overmix; a few streaks of flour are perfectly fine.
- Shape the Loaf: Turn the dough out onto a lightly floured work surface. Dust your hands with flour, as the dough will be quite sticky. Gently pat and shape the dough into a round, cohesive ball, about 7-8 inches in diameter. Avoid excessive handling or kneading.
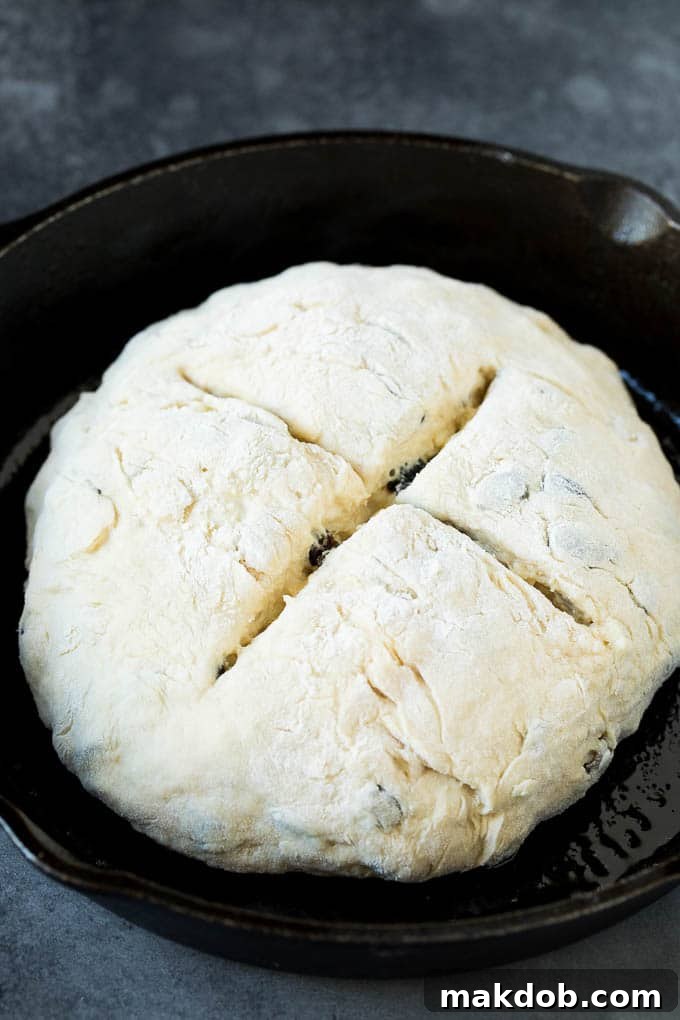
- Score and Bake: Transfer the shaped dough to your prepared baking pan. Using a sharp knife, cut a deep “X” into the top of the loaf, extending almost to the edges. This traditional scoring helps the bread rise evenly and allows the heat to penetrate the center.
- Bake to Perfection: Bake for 45-50 minutes, or until the crust is a beautiful golden brown and a wooden skewer or toothpick inserted into the center comes out clean.
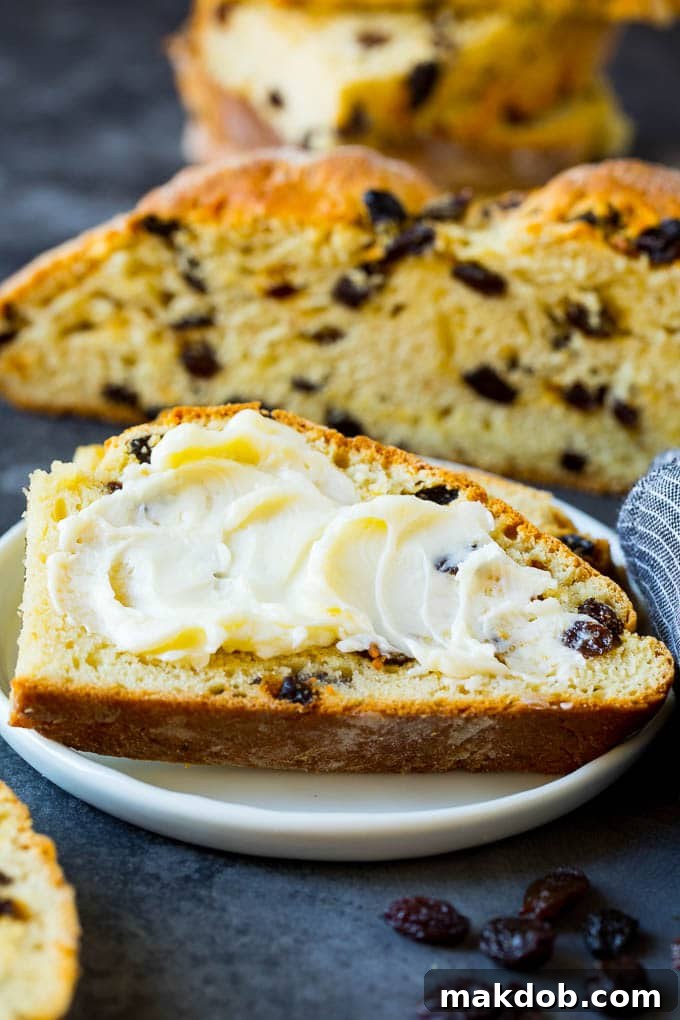
- Cool and Serve: Let the bread cool on a wire rack for at least 10-15 minutes before slicing and serving. This allows the internal structure to set. Enjoy warm with butter, jam, or alongside your favorite meal!
Essential Tips for a Perfect Loaf
While Irish Soda Bread is remarkably forgiving, a few expert tips can elevate your baking and ensure a consistently delicious loaf every time:
- Buttermilk is Key (and How to Substitute): True Irish Soda Bread relies on the acidity of buttermilk to react with baking soda for its signature rise and tangy flavor. If you don’t have buttermilk on hand, don’t fret! You can easily make your own substitute. Combine 2 cups of milk (dairy or non-dairy works) with 2 tablespoons of lemon juice or white vinegar. Let it sit for about 10 minutes, or until the mixture looks slightly curdled. This “homemade buttermilk” will work perfectly.
- Handle Sticky Dough with Care: The dough for Irish Soda Bread is naturally soft and sticky. This is normal and desired for a tender crumb. To prevent it from sticking excessively to your hands and work surface, liberally dust both with extra flour as needed when shaping the loaf. Resist the urge to add more flour to the dough itself, as this can make the bread dry and dense.
- The Magic of No Yeast: Remember, this is a quick bread. It uses baking soda as its leavening agent, which reacts immediately with the buttermilk. This means there’s no need for yeast, no waiting for the dough to rise, and no complex kneading techniques. This simplicity is part of its charm and why it bakes so quickly.
- Don’t Overmix: Once you add the wet ingredients to the dry, stir just until everything is combined and a stiff dough forms. Overmixing will develop the gluten in the flour, resulting in a tough, chewy bread rather than the tender texture we’re aiming for. A few lumps or streaks of flour are better than an overmixed dough.
- Scoring the “X”: The traditional “X” cut on top of the loaf isn’t just for aesthetics. It allows the bread to expand evenly during baking and helps the heat penetrate to the center, ensuring it cooks through properly. Make the cuts fairly deep, almost to the edges of the loaf.
- Cast Iron Skillet for Best Crust: While a round baking pan works well, baking Irish Soda Bread in a preheated cast iron skillet can give you an even crisper, more golden crust.
Quick Tip
I use a pastry blender to cut the butter into the dough, which makes quick work of it. If you don’t have a pastry blender, two forks will do the job just as effectively, though it might take a minute or two longer.
Storing and Reheating Irish Soda Bread
Irish Soda Bread is truly at its best when enjoyed fresh from the oven, still warm and fragrant. However, you can certainly enjoy it for a few days after baking, or even freeze it for longer enjoyment. Here’s how to ensure its freshness:
- Room Temperature: Store leftover soda bread in an airtight container or tightly wrapped in plastic wrap at room temperature for up to 2-3 days. While it won’t be as soft as when it’s fresh, it will still be delicious.
- Freezing: For longer storage, Irish Soda Bread freezes beautifully. Wrap the whole loaf or individual slices tightly in plastic wrap, then place them in a freezer-safe bag or aluminum foil. It can be frozen for up to 2 months.
- Thawing and Reheating: To thaw, simply let the bread come to room temperature. For that “freshly baked” taste, you can reheat slices in a toaster, a preheated oven (at 300°F/150°C for about 10 minutes), or briefly in the microwave. Reheating brings back some of its initial softness and warmth.
The Rich History of Irish Soda Bread
Irish Soda Bread isn’t just a recipe; it’s a culinary emblem deeply rooted in Irish history and culture. Its origins trace back to the mid-19th century when baking soda (sodium bicarbonate) became widely available for home kitchens. Before this, most bread was leavened with yeast, a more complex and time-consuming process.
The brilliance of soda bread lies in its simplicity and accessibility. It required only four basic ingredients: flour, salt, baking soda, and buttermilk. These were staples in most Irish households. Buttermilk, a byproduct of butter making, was particularly abundant and readily available. The acidic buttermilk reacted perfectly with the baking soda, creating a quick rise without the need for an oven. Many traditional Irish homes had cast-iron griddles or bastible pots over open fires, making this method ideal.
This “quick bread” became a lifesaver during times of hardship, providing a nourishing and easy-to-prepare food source for families. Its popularity soared because it was inexpensive to make, used readily available ingredients, and could be baked quickly, often multiple times a day. While modern versions often include additions like sugar and raisins, the core tradition of a simple, wholesome loaf remains, connecting every bite to a rich and resilient culinary heritage.
Delightful Flavor Variations
While the classic raisin-studded Irish Soda Bread is a favorite, this versatile recipe lends itself beautifully to various adjustments. Feel free to experiment with these flavor variations to suit your taste:
- Whole Wheat: For a heartier, nuttier loaf, substitute half of the all-purpose flour with whole wheat flour. This adds more fiber and a deeper flavor profile.
- Citrus Zest: Brighten your bread with a fresh, aromatic twist. Add a tablespoon of grated lemon zest or orange zest to the dry ingredients for a subtle citrusy aroma and flavor that pairs wonderfully with the raisins.
- Savory Herb & Cheese: Transform your soda bread into a savory delight! Omit the raisins entirely and reduce the sugar to 1-2 tablespoons (or omit). Consider adding 1/2 cup of shredded cheddar cheese, a tablespoon of fresh chopped rosemary leaves, or a teaspoon of caraway seeds for an earthy, aromatic touch. This version is fantastic with soups or savory spreads.
- Honey Sweetness: For a slightly sweeter and more complex flavor, replace half of the granulated sugar with honey. This adds a lovely moistness and a distinct floral note to the bread.
- Dried Currants or Cranberries: If you’re not a fan of raisins, or simply want to try something different, swap them out for dried currants or even dried cranberries. Currants offer a smaller, tangier bite, while cranberries provide a tart contrast.
- Mixed Spice: For a warmer, more aromatic bread, add 1/2 teaspoon of ground cinnamon or a pinch of nutmeg to the dry ingredients.
Whether you’re celebrating St. Patrick’s Day or simply looking for an easy homemade bread recipe, this soda bread, in any of its delicious variations, is sure to be a hit!
More St. Patrick’s Day Recipes You’ll Enjoy
Slow Cooker Corned Beef and Cabbage
8 hrs 10 mins
Cabbage and Sausage Skillet
30 mins
Colcannon Recipe
50 mins
Fried Cabbage with Bacon
25 mins
Irish Nachos
10 mins
Frequently Asked Questions (FAQs)
Irish Soda Bread is a traditional quick bread that relies on baking soda as its primary leavening agent, rather than yeast. It typically consists of four basic ingredients: flour, baking soda, salt, and buttermilk. The acidity of the buttermilk reacts with the baking soda to create a rapid rise. Often, ingredients like sugar, butter, eggs, raisins, or citrus zest are added to enhance its flavor and texture. The dough is shaped into a round loaf, traditionally scored with an “X” on top, and baked until golden brown.
While delicious at any temperature, most people, including myself, prefer Irish Soda Bread served warm. It’s truly fantastic hot out of the oven, with a soft interior and slightly crisp crust. If you have leftovers, you can easily reheat individual slices in a toaster, a preheated oven, or even a few seconds in the microwave to recapture that fresh-baked warmth and flavor.
Irish Soda Bread Recipe Card
★
★
★
★
Irish Soda Bread
Pin
Author
Sara Welch
Time
15 minutes
45 minutes
1 hour
Course
Side Dish
Cuisine
Irish
Serves
12
Ingredients
- 4 cups all-purpose flour plus more for dusting the work surface
- 1/4 cup granulated sugar
- 1 teaspoon baking soda
- 1 teaspoon salt
- 1 1/4 cups raisins
- 1/4 cup butter cold, cut into small pieces
- 1 3/4 cups buttermilk
- 1 egg
- cooking spray
Instructions
-
Preheat the oven to 375 degrees F (190°C). Coat a 9-inch round pan or cast iron skillet with cooking spray.
-
In a large bowl, combine the flour, sugar, baking soda, and salt. Stir well to combine.
-
Add the cold butter, cut into small pieces, to the flour mixture. Use a pastry blender or two forks to cut the butter into the flour until coarse crumbs form.
-
Stir the raisins into the flour mixture, ensuring they are evenly distributed.
-
In a separate small bowl, whisk the buttermilk and egg together. Pour this wet mixture into the flour mixture and stir until a stiff dough forms. Do not overmix.
-
Transfer the dough to a lightly floured flat surface. Dust your hands with flour and gently shape the dough into a round ball. The dough will be sticky.
-
Place the ball of dough into the prepared pan. Use a sharp knife to cut a deep “X” into the top of the loaf.
-
Bake for 45-50 minutes, or until the bread is golden brown and a toothpick inserted into the center comes out clean.
-
Cool on a wire rack for at least 10 minutes before slicing and serving. Enjoy!
Notes
- A pastry blender makes cutting in the butter easy. If you don’t have one, two forks can be used to achieve the same coarse crumb texture.
- No buttermilk? No problem! Make your own by combining 2 cups of milk with 2 tablespoons of lemon juice or white vinegar. Let it sit for about 10 minutes until it slightly curdles, then use as directed.
- The dough will be soft and sticky. Use plenty of flour on your hands and work surface when shaping to prevent sticking and form a neat loaf. Avoid adding extra flour directly into the dough itself.
Nutrition
Carbohydrates: 50g |
Protein: 6g |
Fat: 6g |
Saturated Fat: 3g |
Cholesterol: 28mg |
Sodium: 366mg |
Potassium: 222mg |
Fiber: 2g |
Sugar: 6g |
Vitamin A: 196IU |
Vitamin C: 1mg |
Calcium: 54mg |
Iron: 2mg
Did you make this recipe?
Tag @dinneratthezoo on Instagram and hashtag it #dinneratthezoo
Tweet
Pin
Love This Recipe?
Please leave a 5-star 🌟🌟🌟🌟🌟 rating in the recipe card above & a review in the comments section further down the page. Your feedback helps other bakers!
Follow Me for More Delicious Recipes!